Today, we are going to learn how to draw a mouse together with this fun drawing tutorial for beginners! Like all of our drawings at emilydrawing.com, you’ll follow along with ten simple steps to create your art.
As we draw, we will learn interesting facts about mice. Mice can be found pretty much anywhere—they are in almost every country and continent, much like their woodland cousins in our chipmunk drawing tutorial. They are most active at night, making them nocturnal, which allows them to avoid predators—especially ones like cats, which you can also learn to draw in our how to draw a cat tutorial. There are over 30 species of mice!
Although you may think mice mostly eat cheese from cartoons, they actually eat grains, nuts, and fruits—but if you’re feeling playful, try our tutorial on how to draw a piece of cheese to pair with your mouse! in fact, they will eat almost anything, whether it’s plant- or animal-based! In fact, they have very large appetites.
Let’s move on to making art! Grab some drawing materials and get ready to follow this mouse sketch step by step!

Materials:
- a piece of paper
- a pencil for the guiding lines and sketching
- an eraser
- a black sharpie or a pen for the outlines
- markers or colored pencils for coloring
- our printable drawing guide (Join my Email List below to get this Tutorial)
Here are my RECOMMENDED Art Supplies!
- Crayola Coloring Set (140 Pieces – Mega Value!)
- 24 Colored Crayon Set
- A4 Printer Paper
- Crayola Coloring Pencils
- HP Home Printer with Instant Ink!
Time needed:
14 minutes.
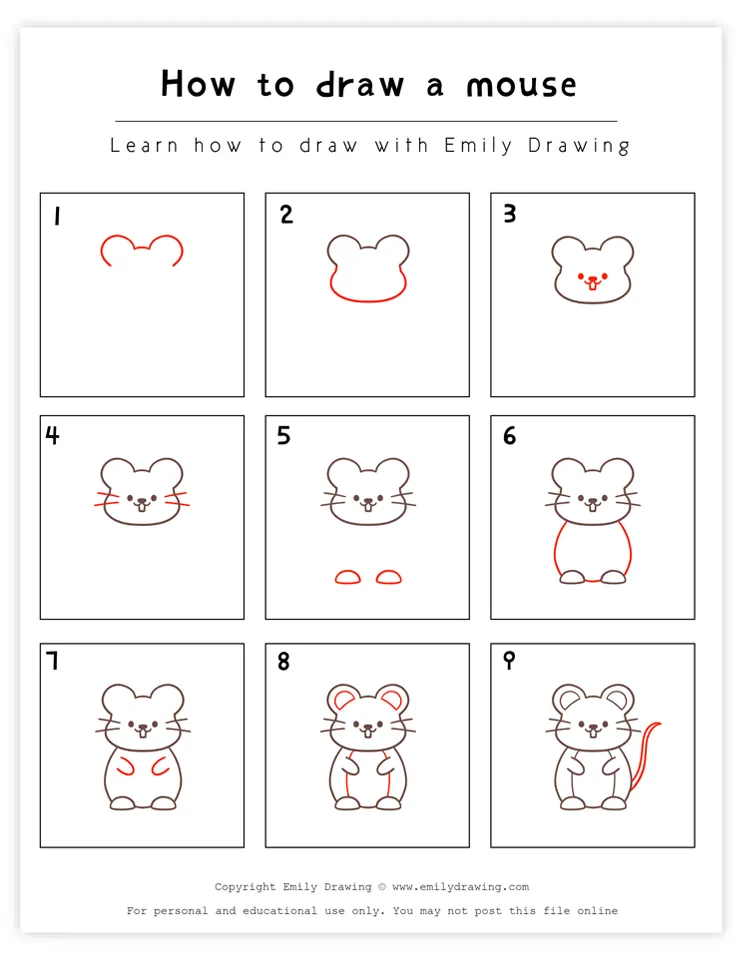
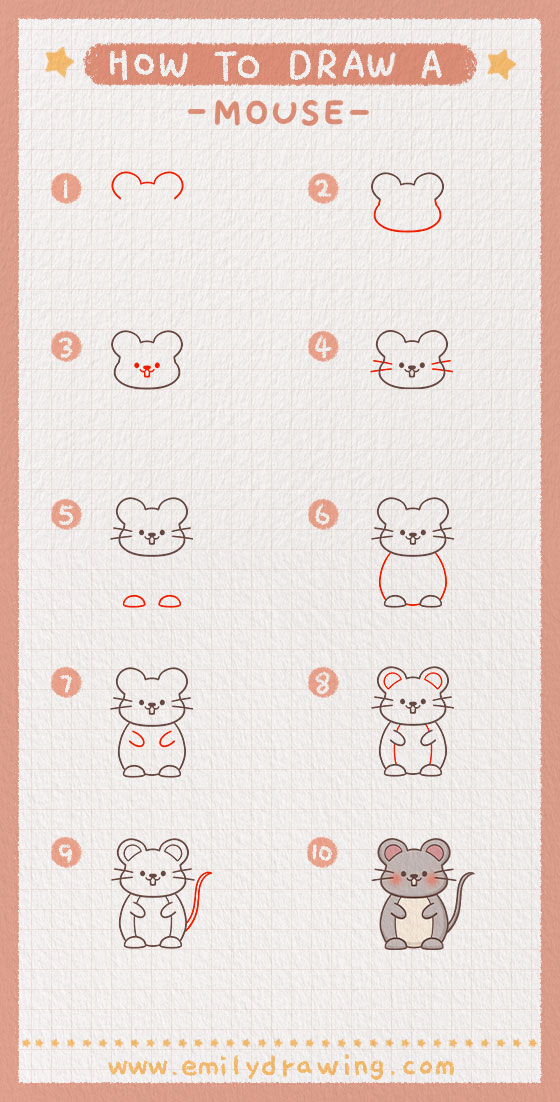
How to Draw a Mouse — Let’s get started!
Step 1 – Draw the top of the head and the ears.
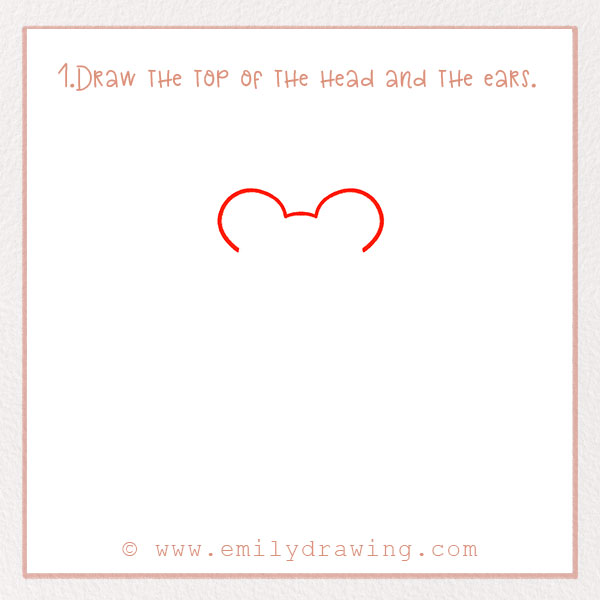
Let’s start with the head. First, draw two semicircles for ears about two-thirds of the way up the page. Connect them in the middle with a small line. Right now, this kind of looks like Mickey Mouse, perhaps the most famous mouse!
Step 2 – Draw the rest of the head.

Let’s draw the rest of the head’s outline. Connect the bottom of each ear with a large curved line. It should look like it has super puffy cheeks as if they are full of food—just like a cute cartoon mouse drawing! Check out the photo.
Although we are just drawing one mouse, they are actually highly social and enjoy being in groups—just like chipmunks, which you can learn to draw in this step-by-step guide. They are good communicators, using noise, body language, and scent to send messages.
Step 3 – Draw the mouse’s face.
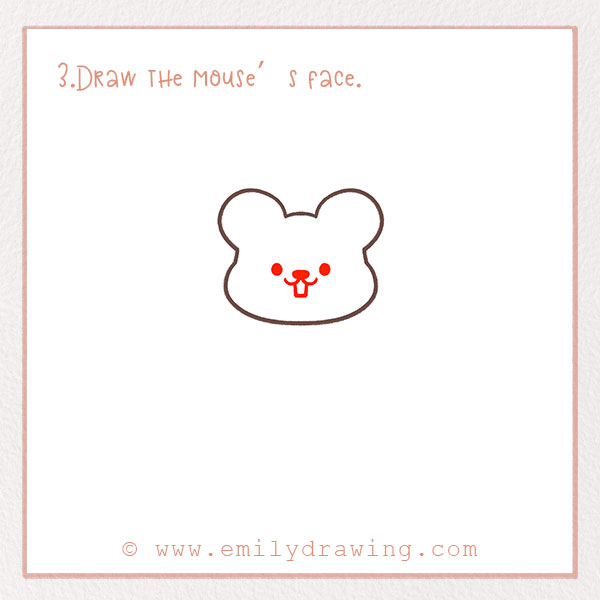
So, Let’s draw the mouse’s mouth and eyes. If you’re interested in drawing other cute animals with expressive faces, check out our cat drawing tutorial. Draw two filled dots for the eyes. However, mice don’t actually have great eyesight; they rely on other senses instead.
Next, centered below the eyes, draw an upside-down triangle for the nose. Draw two curves for the mouth, making it appear like it is smiling. Finally, draw a rectangle for the teeth! They famously have very strong teeth that allow them to chew on pretty hard substances. Their teeth also continually grow!
Great job!
Step 4 – Add the whiskers!
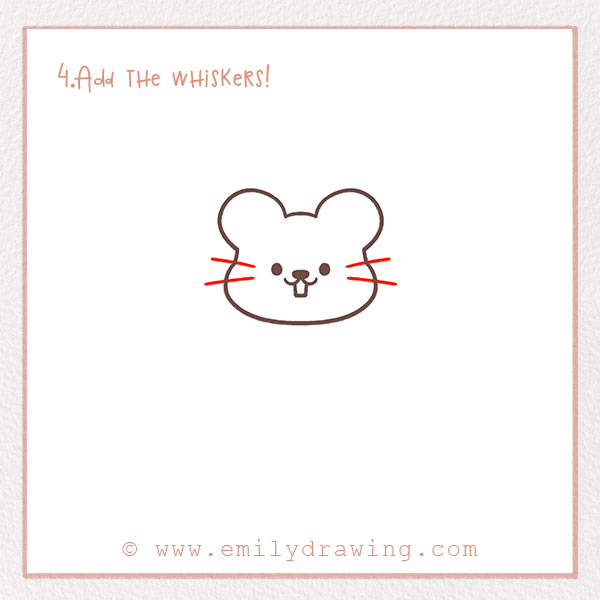
Let’s keep going and draw whiskers! Like many animals, mice have whiskers, which help them navigate the world around them. For example, their whiskers help them more easily sense objects, food, and other mice.
For the whiskers, simply draw two diagonal lines from the middle of cheeks that extend beyond the face’s outline. There should be four whiskers in total.
Step 5 – Add the mouse’s feet.

Mice are excellent climbers. Their back paws have five toes, and their front paws have four toes. Their extra toes on the back feet help them have more stability and power when jumping. Our mouse needs to have feet!
Draw two ovals for feet a few inches from the bottom of the page. They should be slightly more flat on the bottom. Check out the photo!
Step 6 – Draw the mouse’s body!
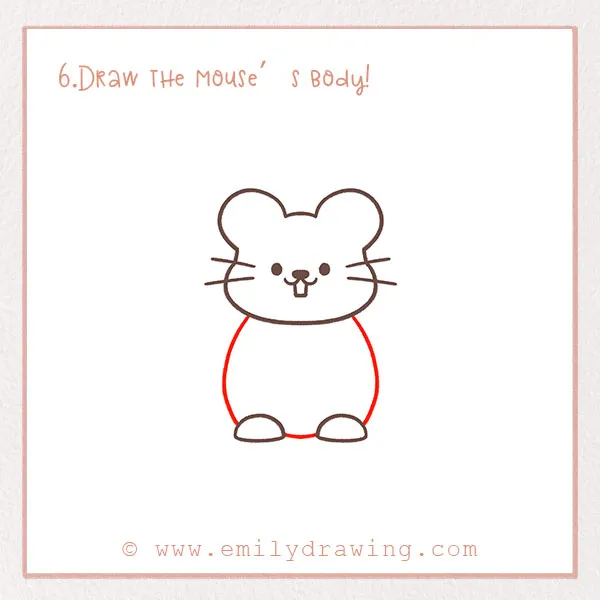
Let’s finish the body’s shape—and for an extra fun touch, you can place a little treat nearby using our guide on drawing a piece of cheese. Draw a large curve from either side of the chin to the outer edges of each foot. It should look like the mouse has a big belly! After all, they do have huge appetites. Lastly, draw a small curve between the feet to show the bottom of the belly.
Great job!
Step 7 – Draw the arms!
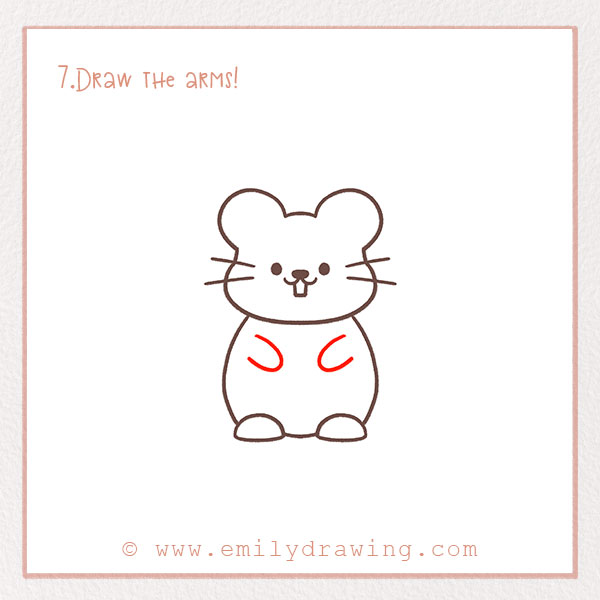
We are going to add the mouse’s arms now! Draw two narrow curves that extend inward towards the middle of the belly. They should be a few inches apart.
Step 8 – Add detail to the ears and belly.

Let’s add more detail to the ears and belly. Draw two semicircles inside each ear. Mice have decent hearing, but it is not their most powerful sense (smell).
Step 9 – Add the mouse’s tail.

Finally, let’s finish off our mouse by drawing its tail! Like many animals, a mouse’s tail helps with stability.
On the right side of the body, draw a long curve extending up and out. Draw another line parallel to the first. They should come together to form a point at the end of the tail.
Step 10 – Color in your new creation!
We are almost done! In our opinion, this last step is the most fun. Find some colors and fill in your drawing however you like. Have fun with it, and don’t forget about the background!
Pin it now, Draw later!
Awesome job! Thanks for following along with us! We hope you absolutely loved this tutorial and learned some new things about mice along the way. Browse the rest of the site for easy and fun ten-step tutorials! You can draw plants, foods, animals, and people using the same format. Until next time!
Get the FREE Printable Drawing Guide