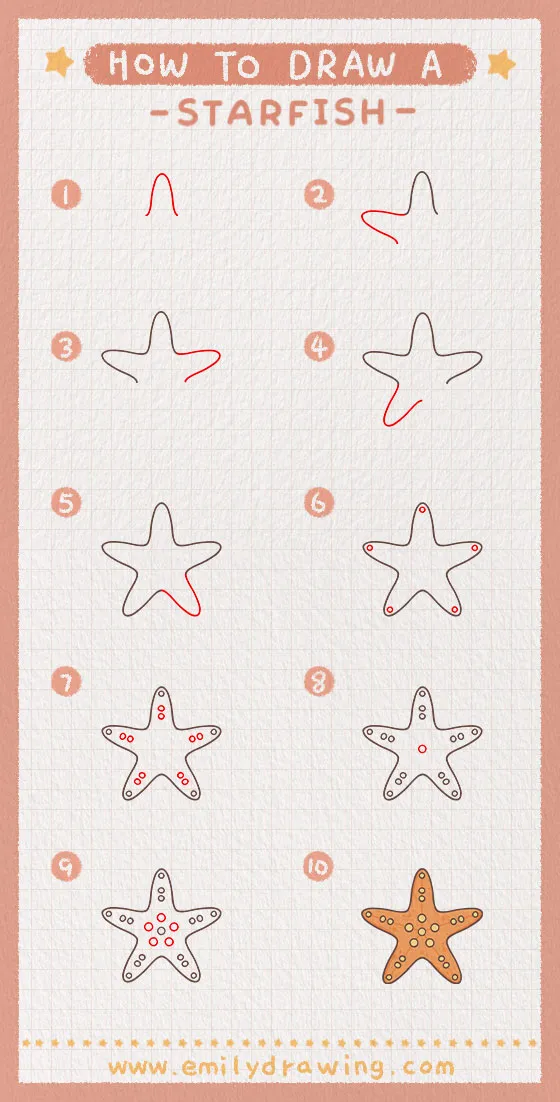
Welcome to our fun drawing tutorial for today: How to Draw a Starfish!
Starfish, also called sea stars, are related to sea urchins and sand dollars. Starfish are marine invertebrates and typically have five arms—however, they can have many more. In fact, there are about 2,000 of starfish, so there is quite a bit of variety! There are so many fascinating things about starfish due to their unique anatomy and classification. Starfish have been around for millions of years. Did you know that one starfish can live for up to 35 years?
Like all of our tutorials, we will give written descriptions and photo references for each step. Get some drawing supplies and keep reading to get started! We will learn some more interesting things about starfish along the way.
If you enjoy drawing marine life, you might also like How to Draw a Dolphin or How to Draw a Whale.
Materials:
- a piece of paper
- a pencil for the guiding lines and sketching
- an eraser
- a black sharpie or a pen for the outlines
- markers or colored pencils for coloring
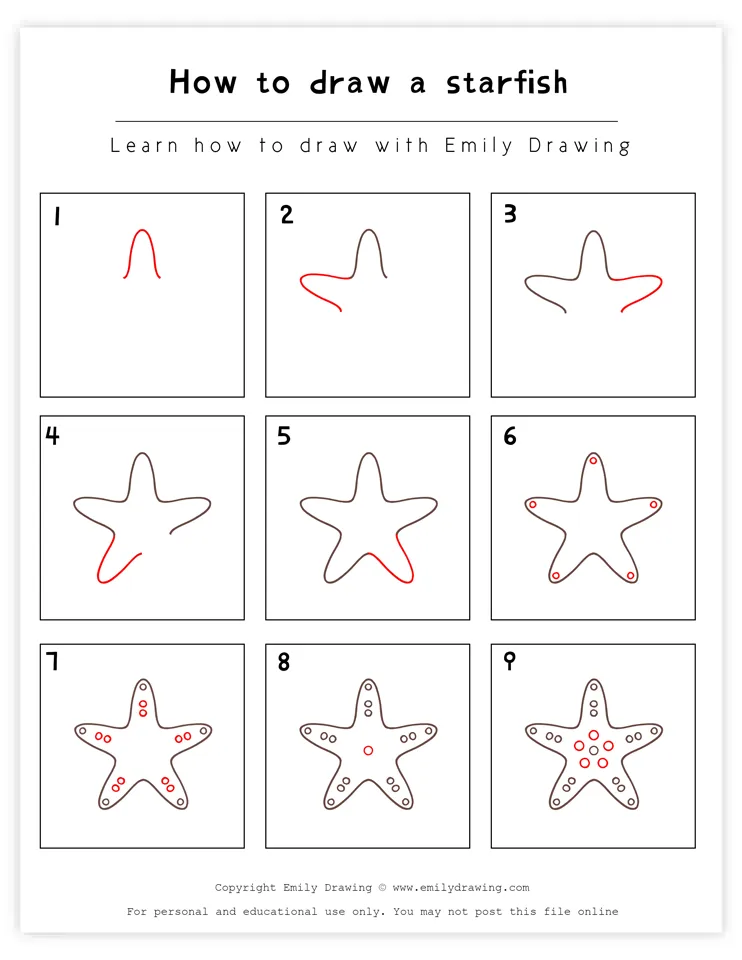
- our printable drawing guide (Join my Email List below to get this Tutorial)
Here are my RECOMMENDED Art Supplies!
- Crayola Coloring Set (140 Pieces – Mega Value!)
- 24 Colored Crayon Set
- A4 Printer Paper
- Crayola Coloring Pencils
- HP Home Printer with Instant Ink!
Time needed:
10 minutes.
How to Draw a Starfish— Let’s get started!
Step 1 – Draw the top of the starfish.
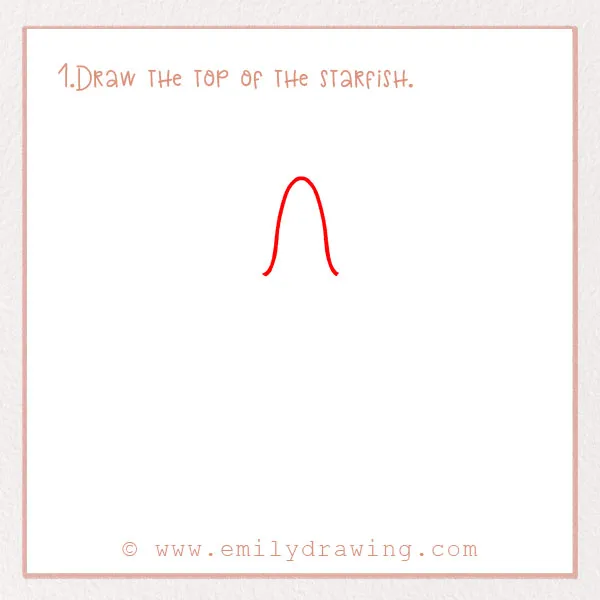
We are going to start with one of the points of the starfish, specifically the top one. Near the top of the page, draw a large upside-down V shape. It should be slightly more rounded so the point isn’t too sharp. Each arm of the starfish will be a few inches long. Leave plenty of room below for the rest of the drawing.
Step 2 – Add another arm.
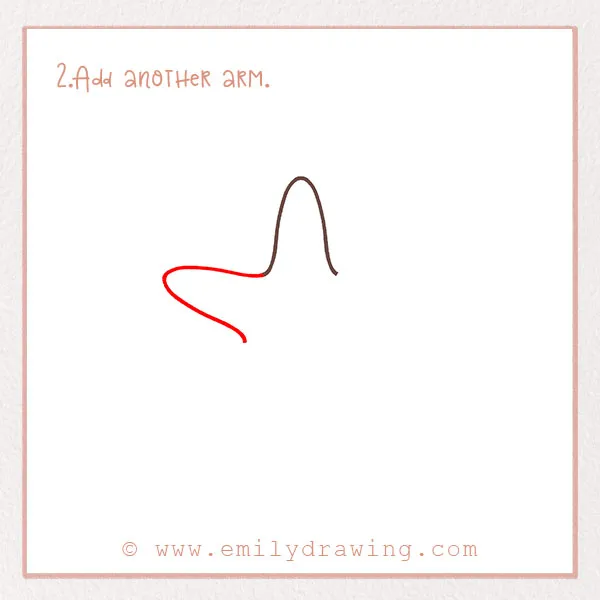
Similar to Step 1, draw another rounded V shape. This time, draw it on the left side. Great job!
Step 3 – Draw another arm!
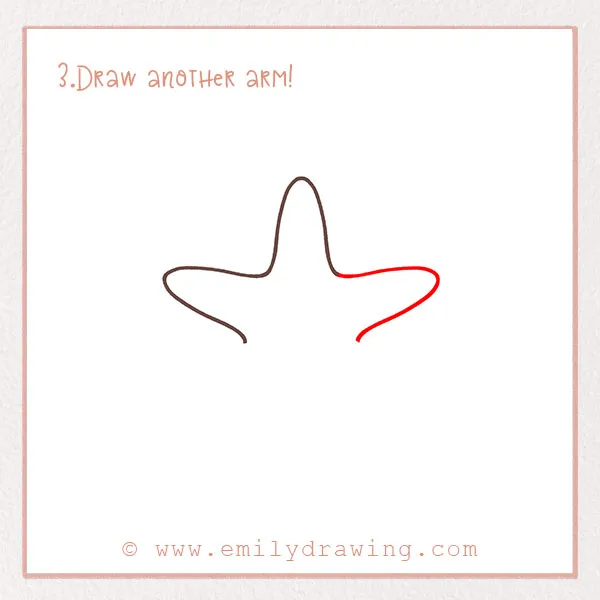
Draw another arm, but this time towards the right side of the page. You should start to see the overall shape of the starfish now. We are going to keep adding arms around the central point, also called the central disc.
For more tutorials involving symmetry, check out How to Draw a Snowflake or How to Draw a Star.
Step 4 – Add another arm.
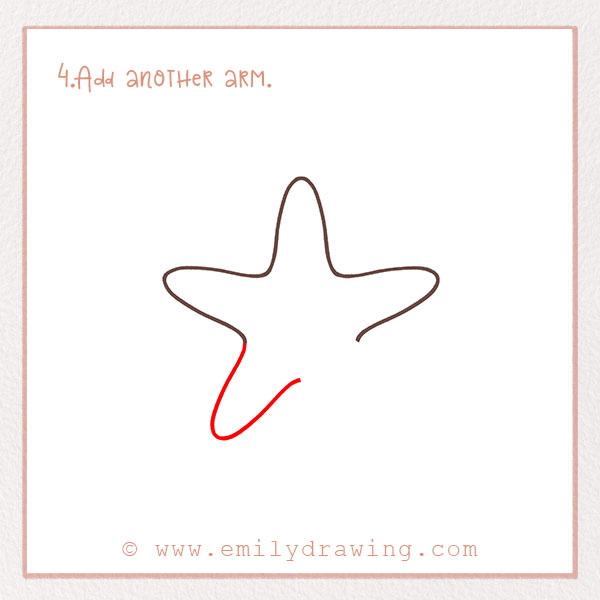
You guessed it—add another arm! Below the arm from Step 2, add another one of the same shape.
Step 5 – Add the last arm!
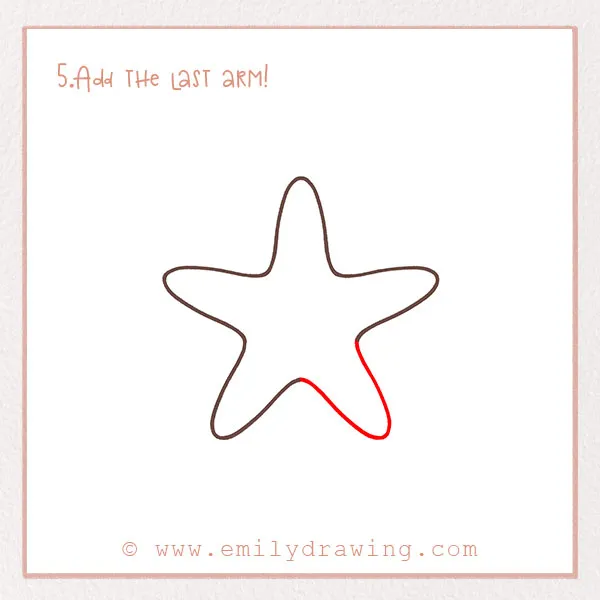
Complete the shape of the starfish by drawing the last arm. Place it in the remaining space on the bottom right side. Our starfish has just five legs, but did you know that some starfish can have over 50?
If you enjoy adding intricate details, try How to Draw a Snake or How to Draw a Sunflower.
Step 6 – Begin drawing the pattern.
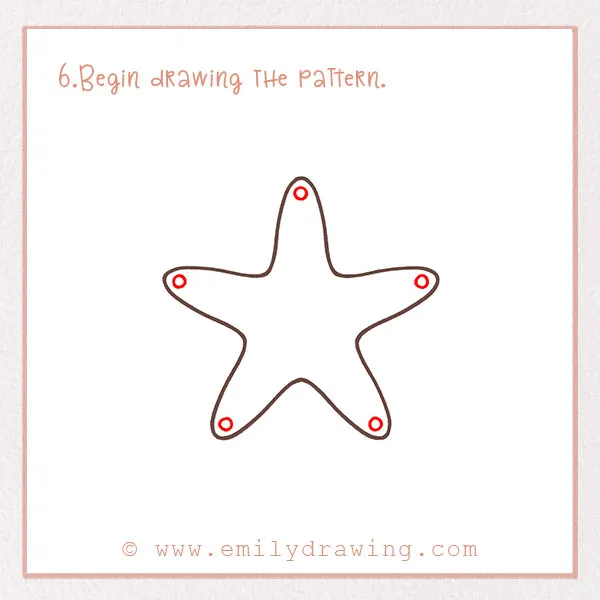
Starfish have something called ampullae, which are sense organs. Let’s draw them now. Start with the ones at the end of the arms. To do this, draw five circles at the very end of each arm.
Step 7 – Add more circles.
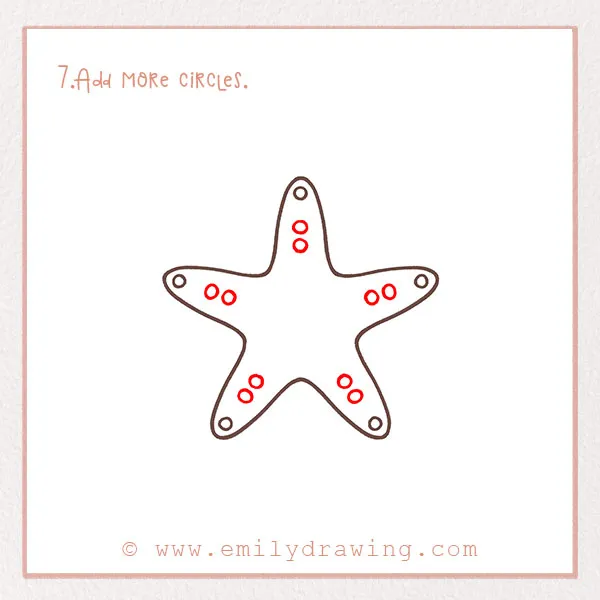
We are going to add more circles now. In each arm, add two circles right next to each other. They should be the same size as the first five, but they don’t have to be perfect!
Step 8 – Add another circle.
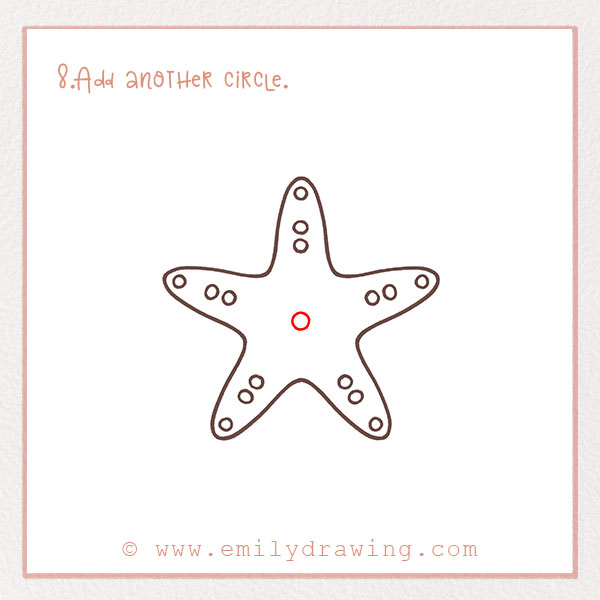
Draw one right in the middle of the starfish! Again, it should be the same size as the rest. Have you ever looked at a starfish and seen this pattern? It’s quite fascinating. If you haven’t, maybe look up a picture after this tutorial to see what real starfish look like.
Step 9 – Add more circles.
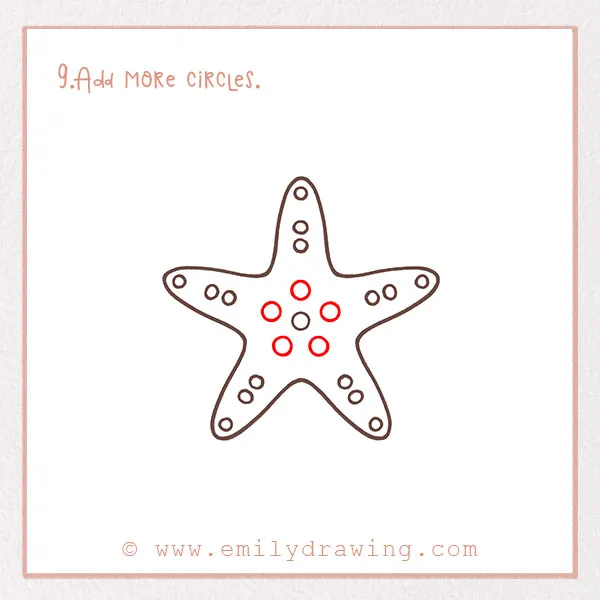
Let’s add the last few circles. Around the center circle that you just drew, add five more. They should be just a tad bigger than the rest. Draw them evenly spaced apart. Refer to the photo.
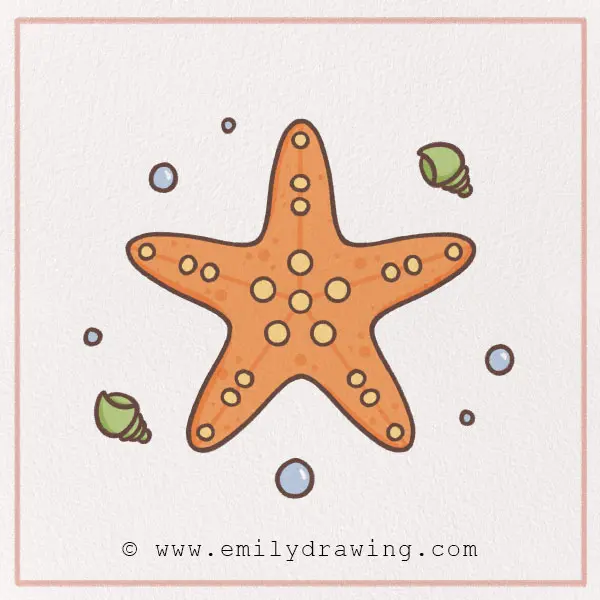
Step 10 – Color in your starfish!

Last but not least, let’s add some color to the drawing. Starfish can be in many different colors, such as red, orange, purple, yellow, and more. So find some bright pencils or markers and add some color!
Voila, you’ve drawn a starfish! Good job. We hope you loved this tutorial. Let us know your thoughts below!
Complete your aquatic collection with How to Draw an Octopus or How to Draw a Seahorse.
Starfish are truly fascinating marine creatures; there’s so much to learn about them. If you want to learn how to draw other marine life, see the animal section on the site! You’ll find sharks, turtles, seahorses, and more. There are many to discover there. There are also food and holiday-themed projects.
Pin it now, Draw later!
