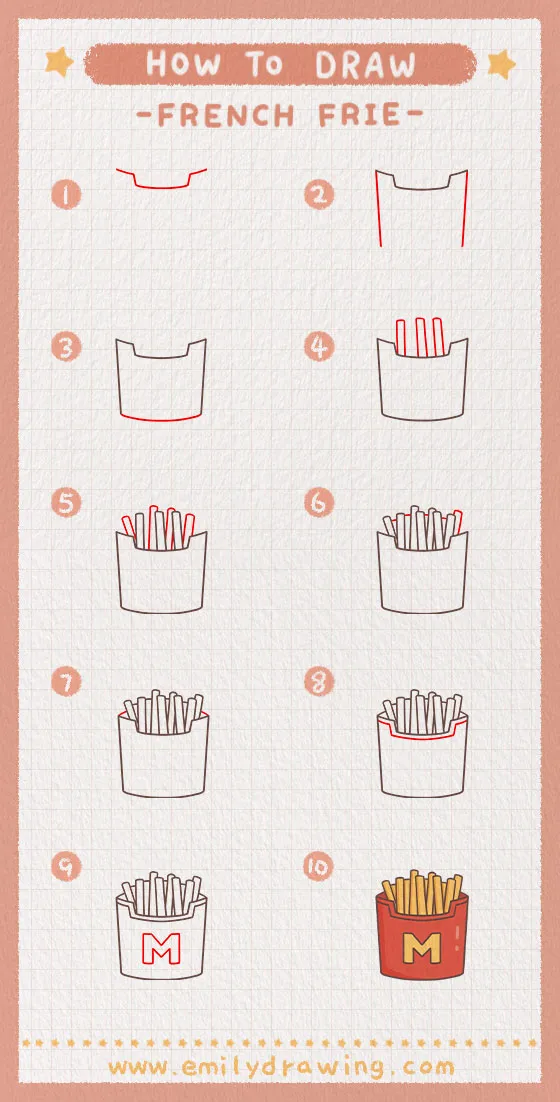
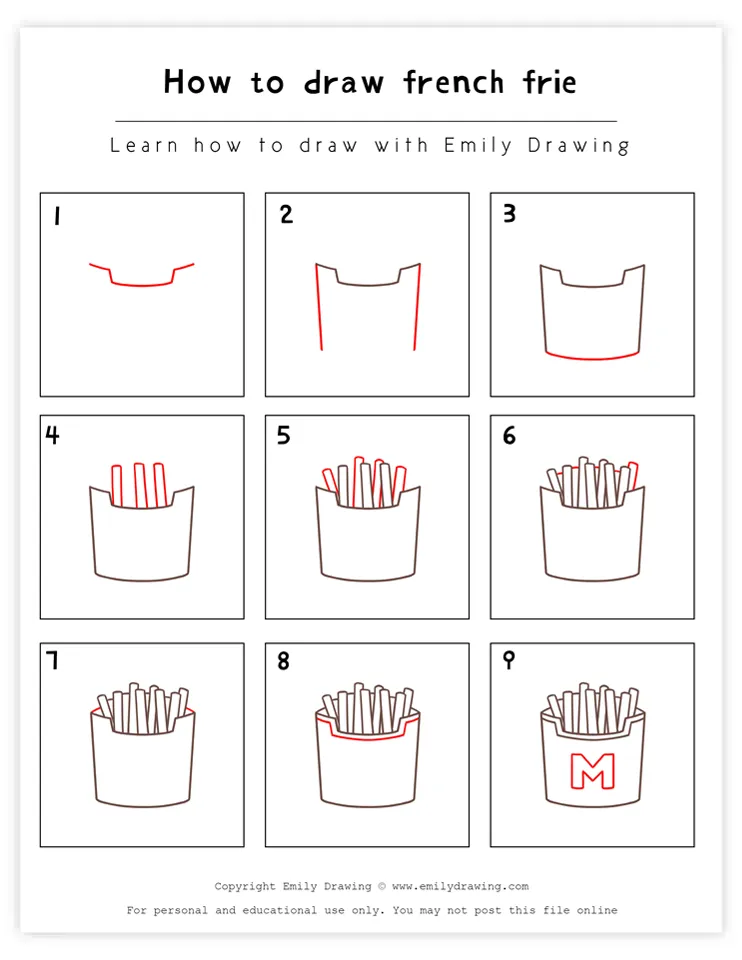
Today, we are going to learn how to draw French fries together in ten easy steps!
Before we get started, let’s learn a little bit about french fries. French fries are made by slicing potatoes into thin strips and then frying them. Oftentimes, people add salt or some other seasoning to them.
Did you know they most likely originated in Belgium, not France as often thought? However, nowadays, they are popular around the world. They are especially associated with American fast-food restaurants such as McDonald’s, which sells red cartons of these yummy treats alongside their famous hamburgers. Have you ever tried them?
Let’s get started on this tutorial. Have fun!
If you enjoy drawing food-related objects, you might also like How to Draw a Hamburger or How to Draw a Cupcake.

Materials:
- a piece of paper
- a pencil for the guiding lines and sketching
- an eraser
- a black sharpie or a pen for the outlines
- markers or colored pencils for coloring
- our printable drawing guide (Join my Email List below to get this Tutorial)
Here are my RECOMMENDED Art Supplies!
- Crayola Coloring Set (140 Pieces – Mega Value!)
- 24 Colored Crayon Set
- A4 Printer Paper
- Crayola Coloring Pencils
- HP Home Printer with Instant Ink!
Time needed:
10 minutes.
How to Draw French Frie — Let’s get started!
Step 1 – Draw the top of the carton.
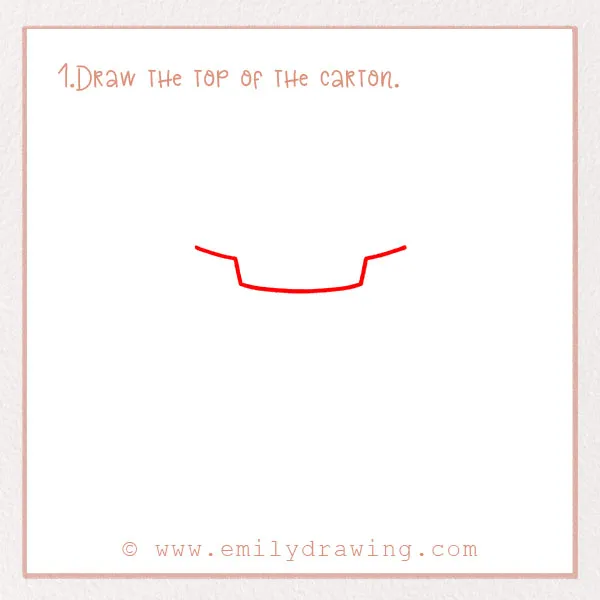
French fries famously come in paper cartons. This started around the 1980s, so people could eat them easily on the go. That’s how we are going to draw ours, too! About two-thirds up the page, draw a horizontal line a few inches long. On either end of the line, draw a short vertical line. Bring them both back out again with two more lines to finish this step. This is the top rim of the carton. Check out the photo!
Step 2 – Continue drawing the carton.
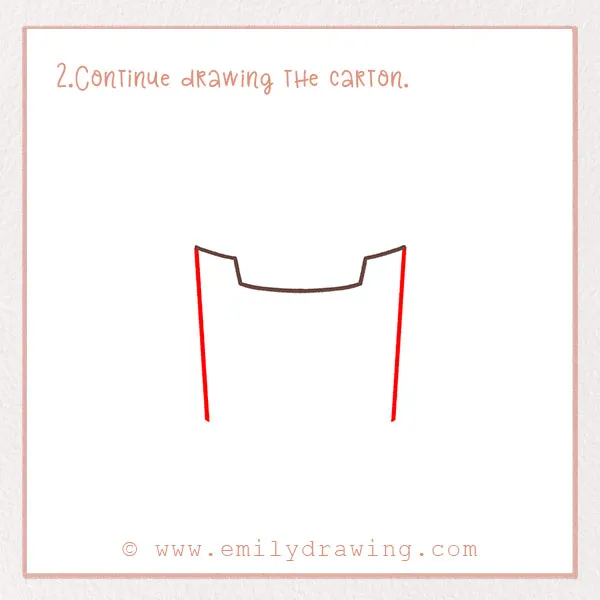
For this step, draw two vertical lines to form the edges of the carton. They should be several inches long and of the same size.
For more practice with drawing containers, try How to Draw a Popcorn or How to Draw an Ice Cream Cone.
Step 3 – Draw the bottom of the carton.
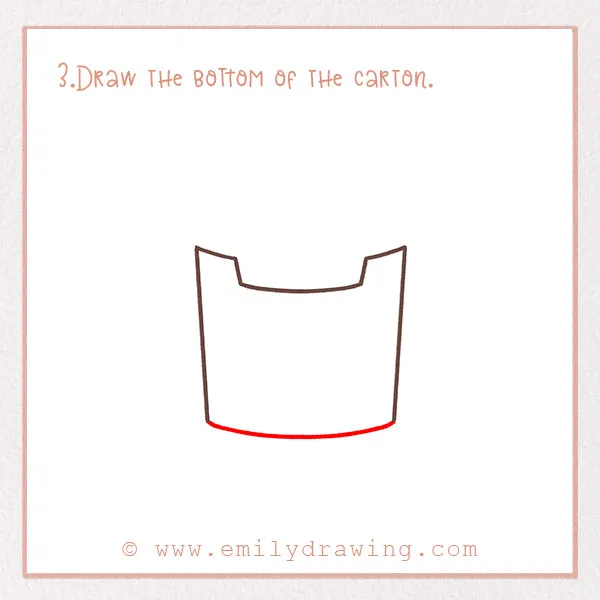
Let’s finish the shape of the carton. Draw a slightly curved line that connects the lines you drew in Step 2. Great job!
Step 4 – Start drawing the french fries.
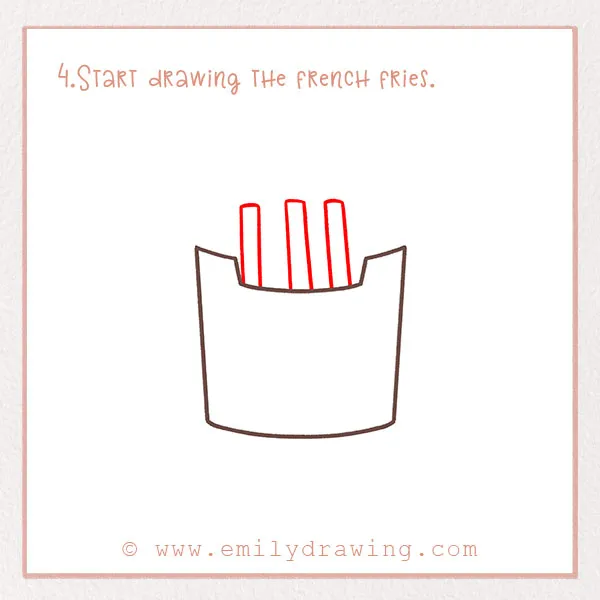
Of course, we need to add the fries! Fries are typically made of normal potatoes, but sometimes they can be sweet potatoes. You probably know that ketchup is the most common dipping sauce for french fries, but some people prefer mayo or honey mustard. What’s your favorite way to eat french fries?
Coming out from the indented part of the carton, draw three long skinny rectangles. Make them slant a little bit. American fries, in particular, are often quite thin, especially when sold by fast food places.
If you enjoy working with repetitive shapes, check out How to Draw a Watermelon or How to Draw Mushrooms.
Step 5 – Add more fries.
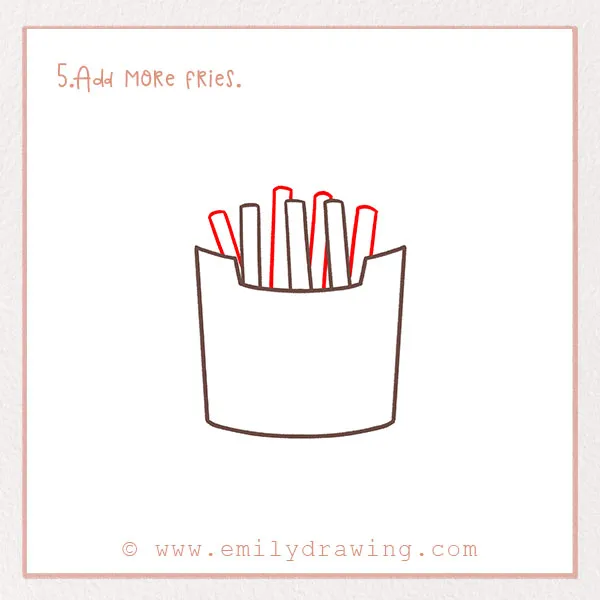
Let’s keep adding fries. They should be the same long skinny shape. However, make them lean different ways to make them look realistic. They should all overlap each other, so some of the rectangles are going to be cut off. Check out the photo to see what we mean.
Step 6 – Add more fries!
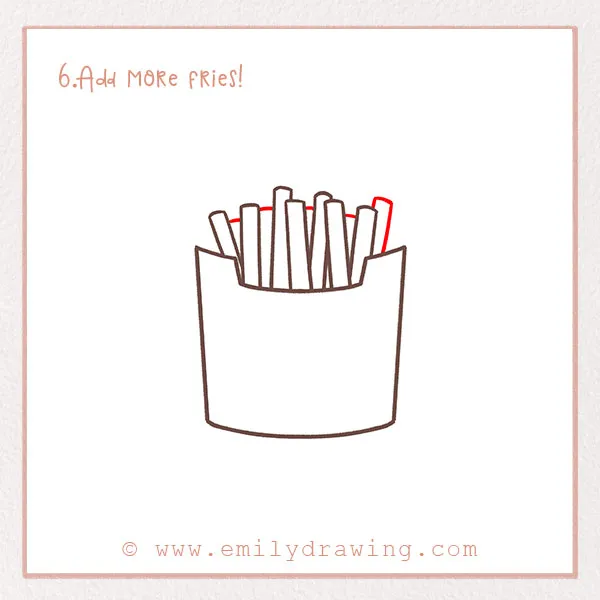
We need to add even more fries. Add a few short horizontal lines in between the fries already there. This gives the illusion of there being more fries in the back. See the photo.
Step 7 – Draw the back of the carton.
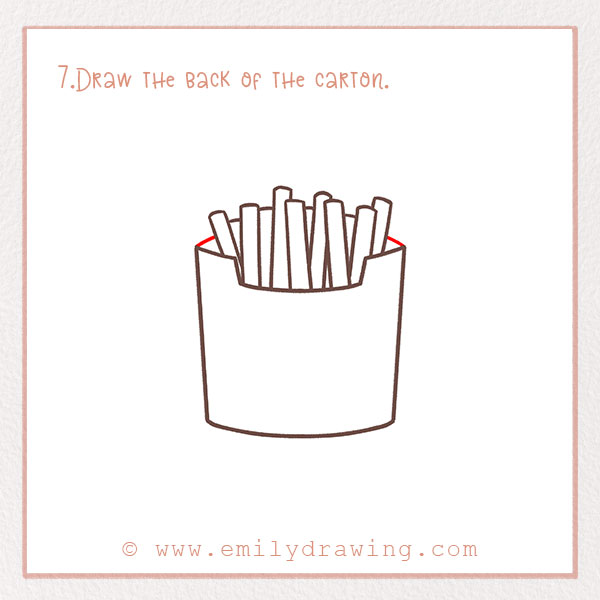
This is a super quick step. We need to make the carton look three-dimensional. To do this, just draw two short curved lines at the top of the carton.
Step 8 – Create detail on the carton.
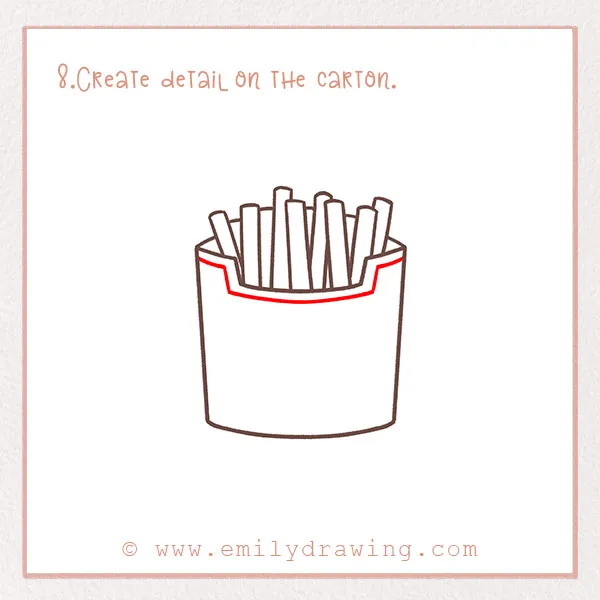
Let’s add some pattern to the container. Draw another line that mimics the outline of the carton from Step 1. It should look like a stripe at the top of the container. Great job!
Step 9 – Add a bit more detail.
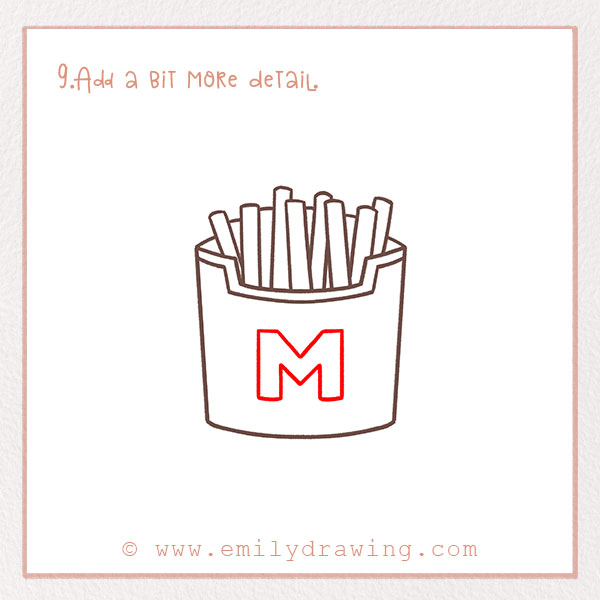
As we mentioned in the introduction, McDonald’s is one of the most famous fast-food places selling french fries. It started in the USA but is all around the world now. We are going to draw an M on our container to resemble how they are served at fast-food places!
Centered in the container, draw a big block letter M. You’re almost done with this drawing!
Step 10 – Color in your creation!

Last but not least, color in your drawing. Have fun, and take your time!
You’re all done—awesome job! Thanks for following along. If you enjoyed this format, we have a lot more tutorials just like this one. If you want more food-themed ones, there are tutorials on cupcakes, strawberries, pineapples, and more. Stay creative!
Once you’ve drawn your fries, complete the meal with How to Draw a Hamburger or How to Draw a Popsicle.
Pin it now, Draw later!
