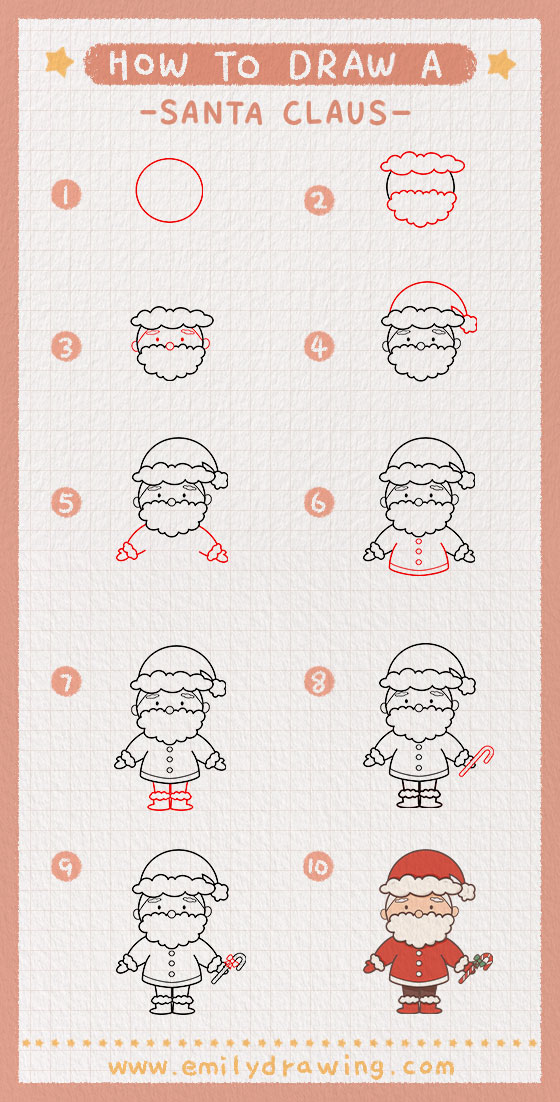
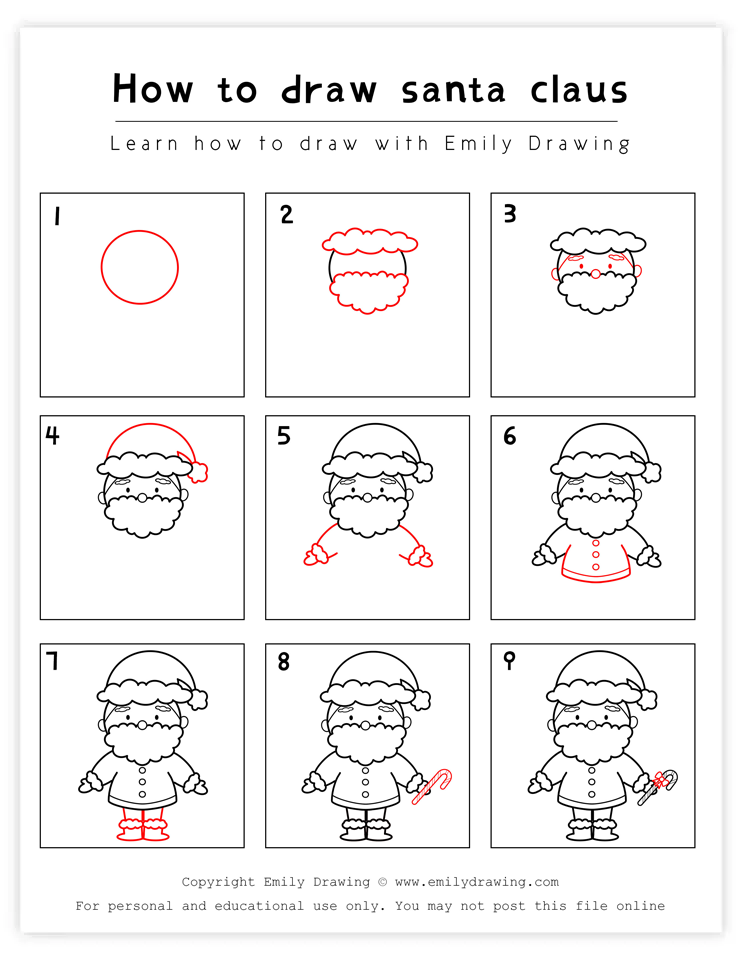
Hello! You’ve found one of our step-by-step drawing tutorials! Today, we are going to learn How to Draw Santa Claus, a well-known figure across the globe!
Santa Claus is a prominent part of Christian culture who acts as a symbol of Christmas. He is said to have a workshop at the North Pole, where he lives with Mrs. Claus. This is where he makes toys and other presents for well-behaved kids. Then, he delivers them on the night before Christmas so kids can wake up to some surprises under the Christmas tree!
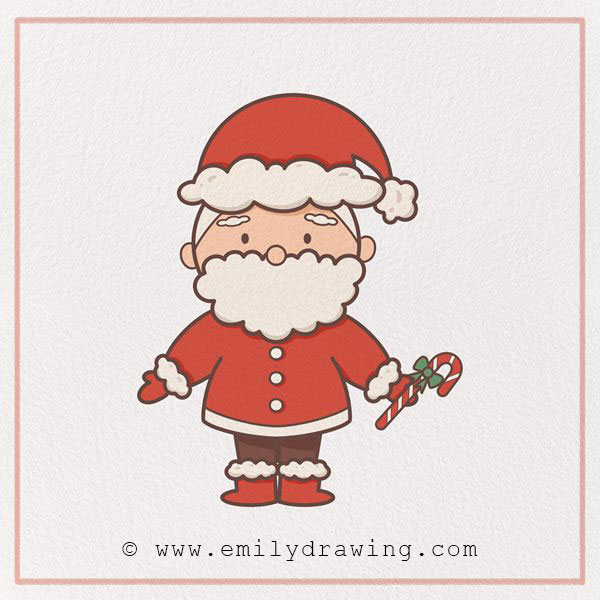
He’s known as a jolly, white-beared, older man who wears a red coat decorated with white fur and a big belt buckle. Other names for Santa Claus are Saint Nicholas, Old Saint Nick, or just Santa.
Ho ho ho! Let’s get started—happy drawing!
Materials:
- a piece of paper
- a pencil for the guiding lines and sketching
- an eraser
- a black sharpie or a pen for the outlines
- markers or colored pencils for coloring
- our printable drawing guide (Join my Email List below to get this Tutorial)
Here are my RECOMMENDED Art Supplies!
- Crayola Coloring Set (140 Pieces – Mega Value!)
- 24 Colored Crayon Set
- A4 Printer Paper
- Crayola Coloring Pencils
- HP Home Printer with Instant Ink!
Time needed:
15 minutes.
How to Draw a Santa Claus — Let’s get started!
Step 1 – Draw a circle.
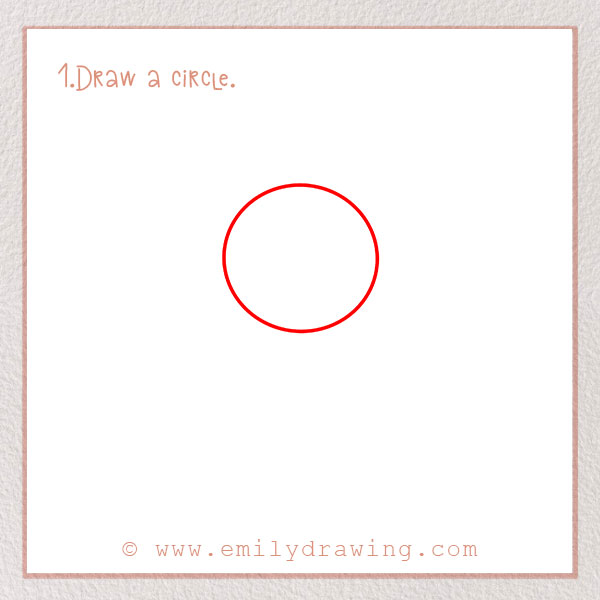
About three-quarters of the way up the page, draw a circle a few inches wide. This will be Santa Claus’ head. There should be plenty of space around the circle to add to the drawing.
Step 2 – Draw detail around his face.
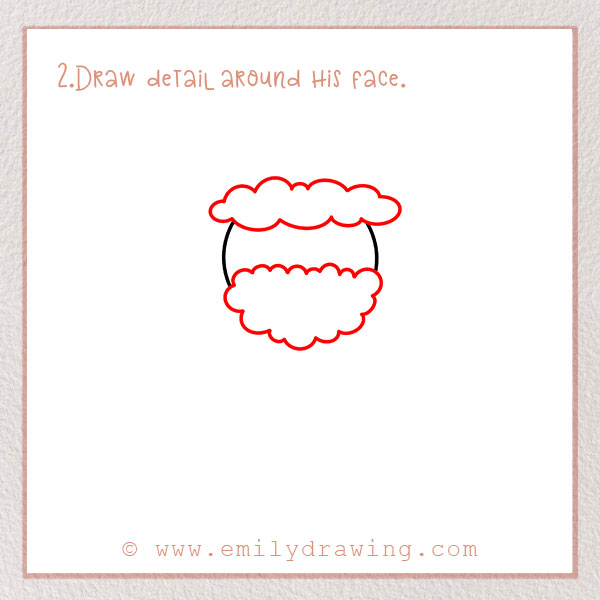
Let’s add Santa’s beard and the bottom of Santa’s hat. Both of them will be made of puffy, cloud-like shapes to show soft white material.
First, make a shape made of semicircles on his chin to form the beard. It should be a few inches long.
Then, on the top of his head, draw a similar shape. It should be a tiny bit narrower. Refer to the image!
Step 3 – Draw Santa’s facial features.
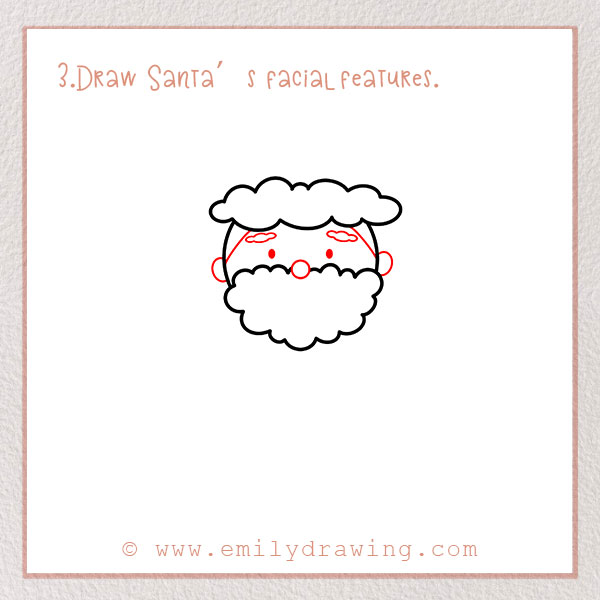
First, add a small circle at the top center of his beard. This is his nose.
Above his nose, draw two small dots for his eyes. Then, above the eyes, draw two eyebrows made of semicircles, similar to the beard, but much smaller.
Draw his ears by drawing semicircles right above the beard on either side of his head. Lastly, draw two diagonal lines above each ear, going up to the hat. This shoes his hairline.
Now, our Santa has a face!
Step 4 – Finish Santa’s hat.
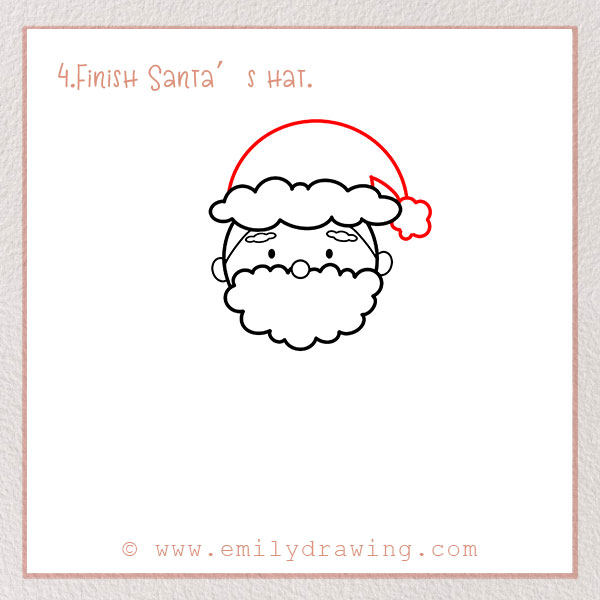
From the left side of the hat, draw a large curved line to the right. Draw a small puff made of semicircles to form the shape at the end of the hat. Then, draw two short lines to connect the hat outline to the other side. Refer to the image.
Step 5 – Draw his arms!
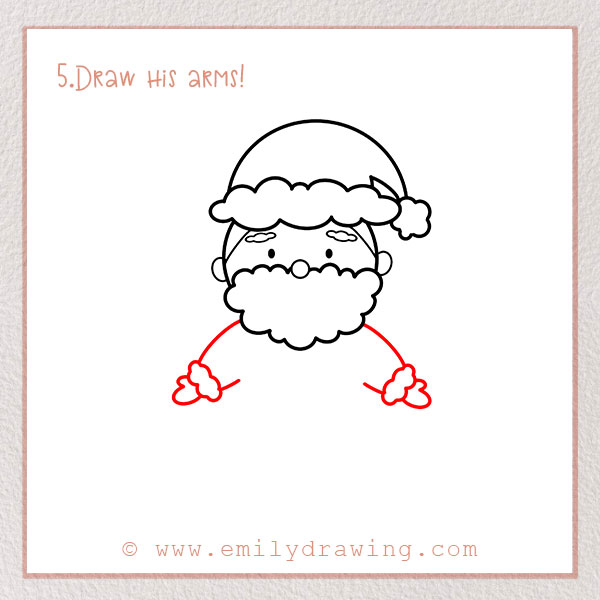
Let’s add Santa’s arms. Start with the right arm. Draw a diagonal line going outwards. Then, draw a similar puffy shape for the sleeve cuff. Draw two curved lines for the hand. Add a small line back towards the body, but don’t connect it all the way.
Then, do the same exact thing for his other arm!
Step 6 – Add Santa’s shirt.
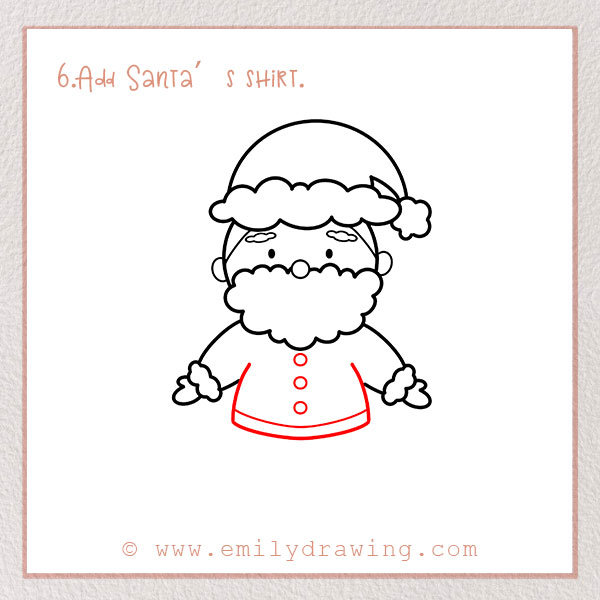
Santa is known for wearing a big red coat with buttons. Let’s add this now!
Draw two lines coming down from the arms (where we left off in the last step). Connect them to form the bottom of his coat. Then, add another line right above to show detail.
Draw three small circles on top of each other to resemble the buttons.
Step 7 – Add Santa’s boots!
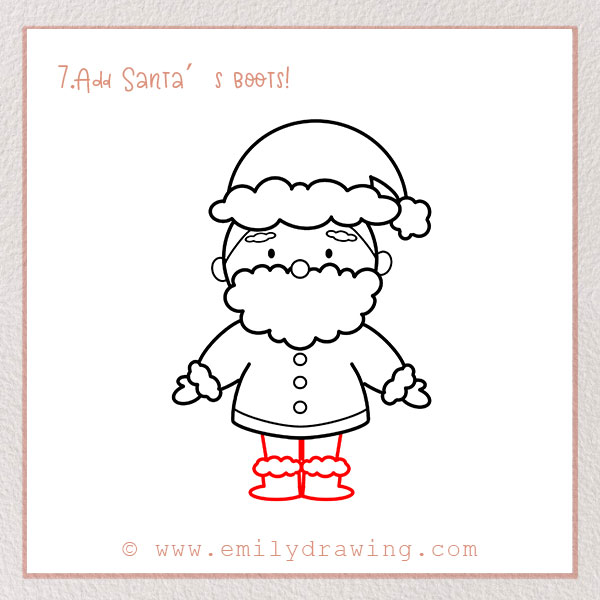
Santa lives in the North Pole—he needs to have boots to walk through the snow! Let’s add his boots now.
Start with the right leg by adding a short line going down. Draw a puffy cloud shape, like the one we’ve been drawing. Add a point for the boot, and close the shape.
Do the same thing for the left leg and boot!
Step 8 – Draw a candy cane!
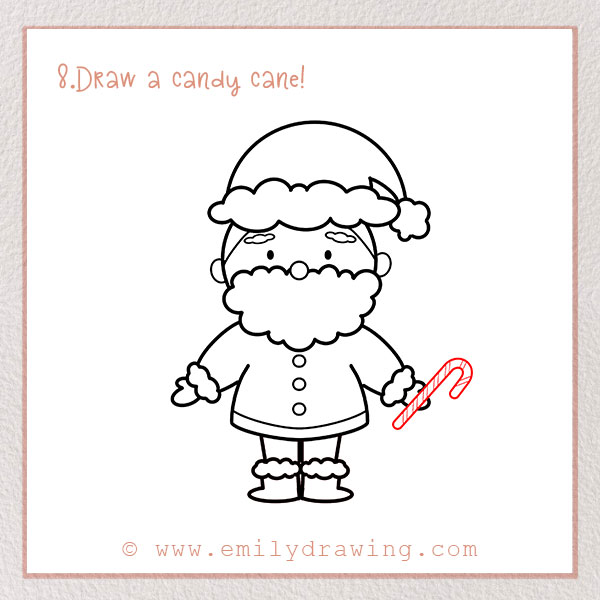
Candy canes are popular sweets around Christmas, so our Santa is going to be holding one.
Draw two parallel diagonal lines in his right hand. Make both curves go to the right. Lastly, add lines to show the stripes of the candy cane.
To add more festive elements to your drawing, consider learning How to Draw a Christmas Stocking to complement your Santa Claus.
Step 9 – Add a bow to the candy cane.
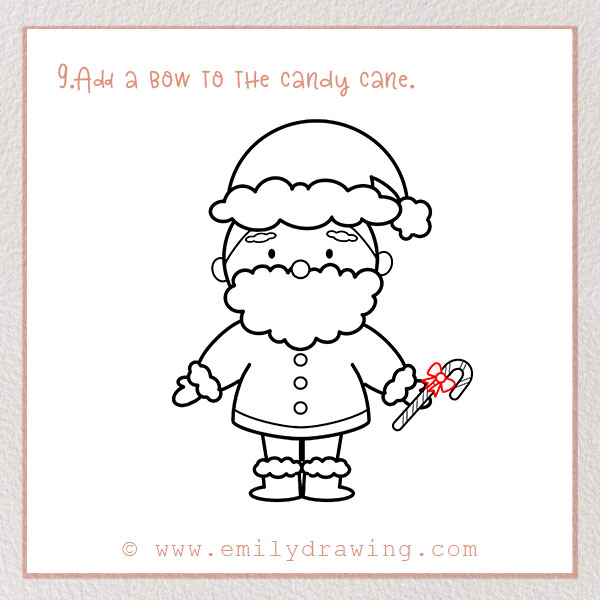
Draw three shapes next to each other on the candy cane, right above his hand. Add the rest of the bow. Refer to the image for this step!
Step 10 – Color!

Last but not least, we have to color! Santa is usually depicted in a big, red coat. Add some color to the background, too! Have fun with it!
Now that you’ve drawn your Santa Claus, you might enjoy our Santa Claus Coloring Page to add more holiday cheer to your art collection.
Great job! Thanks for following along with our drawing project! We hope you had a jolly time learning how to draw Santa Claus and learned some new drawing techniques in the process! If you are in the holiday spirit, check out the snowman and Christmas stocking tutorials!
Enjoy your creation, share it with others, and comment about your experience below! If you had fun, browse our site for more ten-step drawing tutorials!
If you enjoyed this tutorial, you might also like our guides on How to Draw a Christmas Tree and How to Draw a Snowman.
Pin it now, Draw later!
