Do you have a kid interested in beetle drawing? Are you an art teacher who has to instruct students how to draw a cute beetle? If yes, this drawing guide is for you.
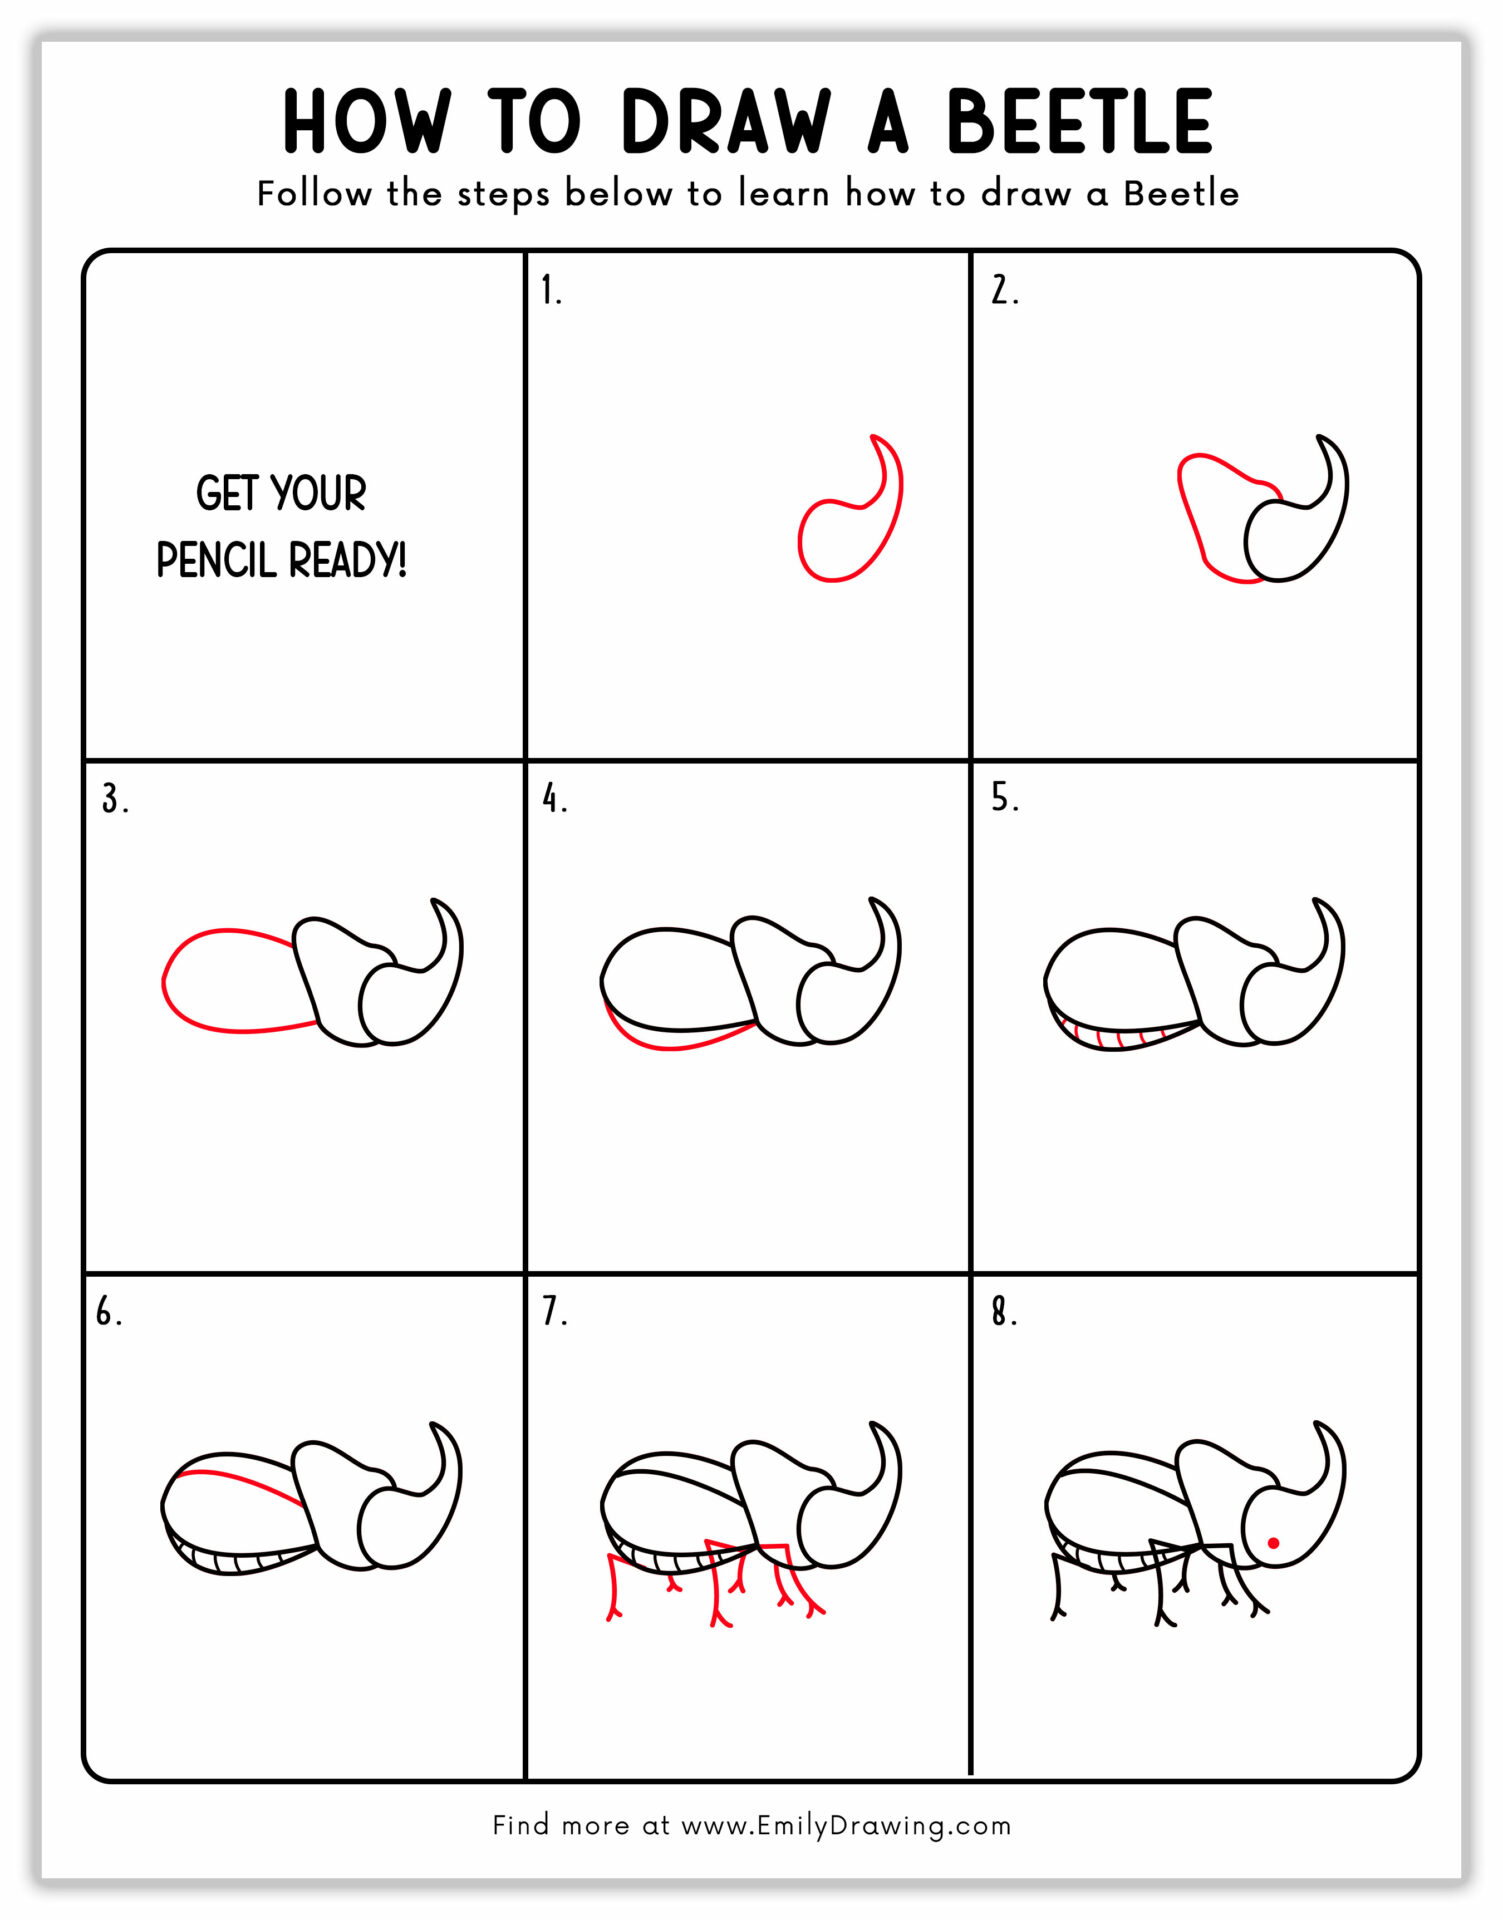
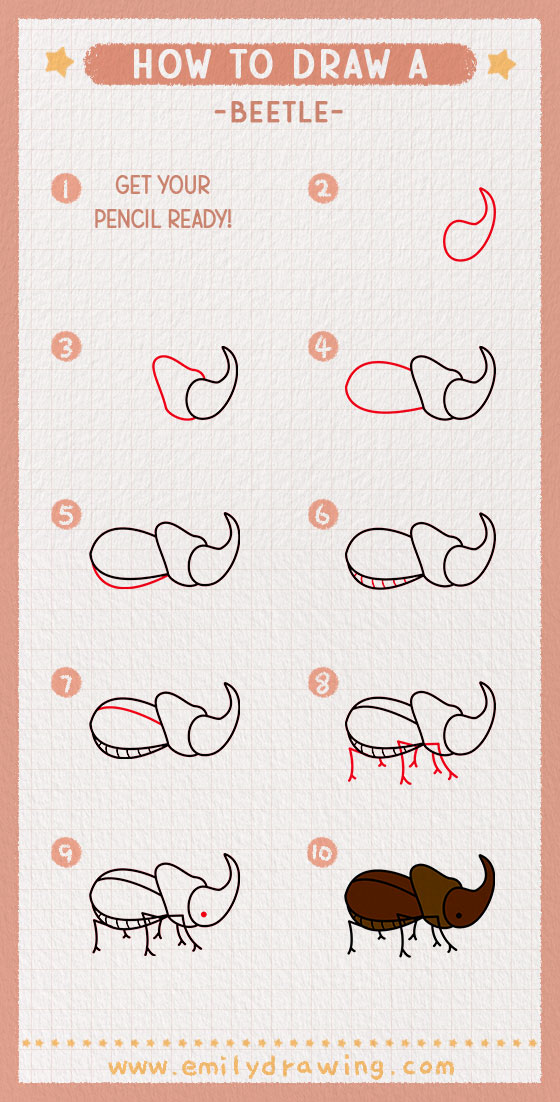
In it, we are going to discuss eight steps to create a realistic beetle drawing for your art collection. Here, we will help you in achieving the full drawing of the beetle by taking you through one step at a time.
It’s a really easy guide that will take only 20 to 30 minutes. However, the time limit can fluctuate if you start sketching the background.
Now, without wasting any moment, let’s dive into this beetle sketch tutorial.
How to Draw a Pencil Sketch of Beetle?
Grab all the important art supplies along with the colors to sketch a pencil drawing of a beetle. Moreover, collect the maximum reference pictures for background and coloring ideas.
Once you have them, begin your drawing with this first step.
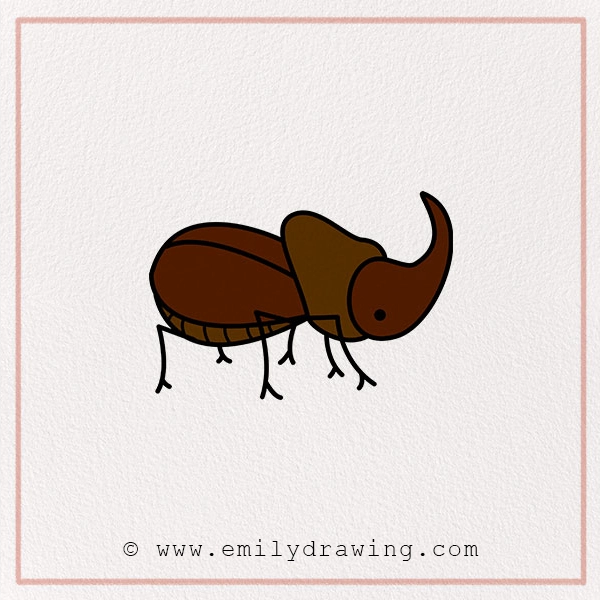
Materials:
- a piece of paper
- a pencil for the guiding lines and sketching
- an eraser
- a black sharpie or a pen for the outlines
- markers or colored pencils for coloring
- our printable drawing guide (Join my Email List below to get this Tutorial)
Here are my RECOMMENDED Art Supplies!
- Crayola Coloring Set (140 Pieces – Mega Value!)
- 24 Colored Crayon Set
- A4 Printer Paper
- Crayola Coloring Pencils
- HP Home Printer with Instant Ink!
Time needed:
15 minutes.
How to Draw a Beetle — Let’s get started!
Step 1 – Sketch the Horn
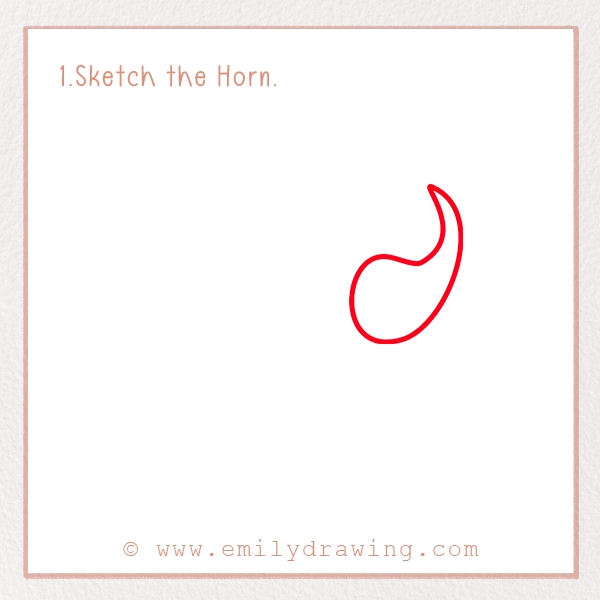
Beetles have a horn at the top of their head. In this step, we are going to sketch it along with the head of the beetle.
To draw it, you have to draw a smooth and perfect oval-like base with a curve extending upward and slightly to the right. Refer to our picture for creating a perfect horn.
Step 2 – Draw the Thorax
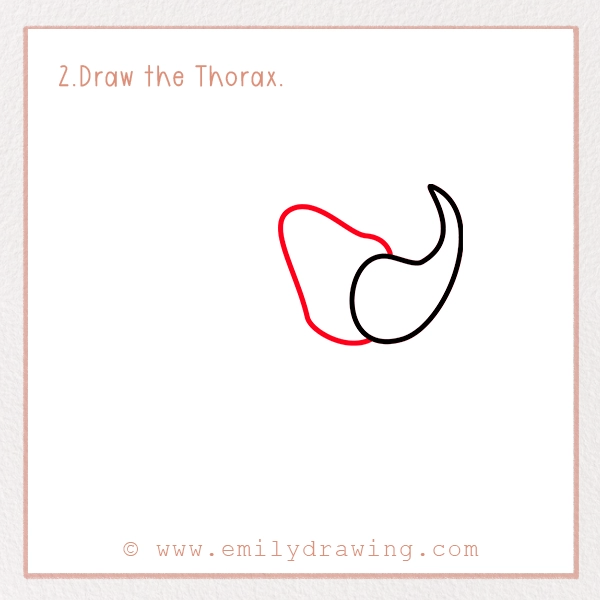
A beetle has three body parts: the head, the thorax, and the abdomen. We have drawn the head so it is time to sketch the thorax.
For drawing it, you should sketch a horizontal, uneven, oval-like shape to the left side of the head. Make sure this oval has an edge at the top, and the top should be wider than the bottom.
Step 3 – Sketch the Abdomen
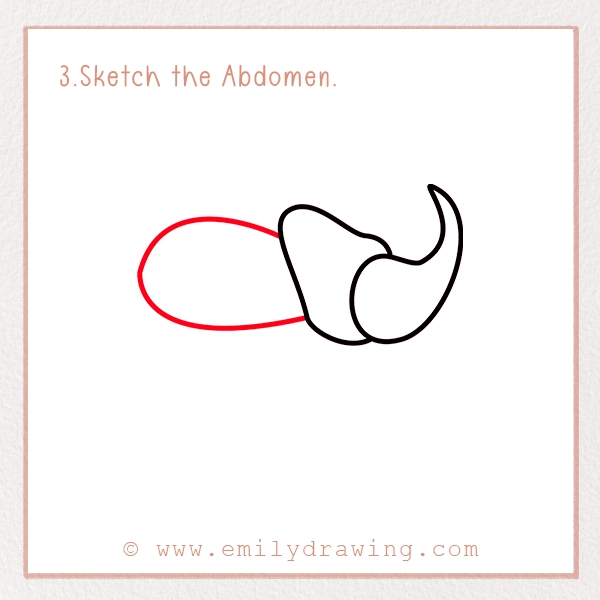
Now, it is time to draw the third part of the beetle’s body. The abdomen is the largest part of this insect’s body, and it overlaps with the thorax.
To draw it, put your pencil to the left side of the thorax, and sketch an elongated perfect oval shape. Make sure it starts from the top of the thorax and ends at the bottom of it to sketch a perfect shape.
Step 4 – Refine the Abdomen
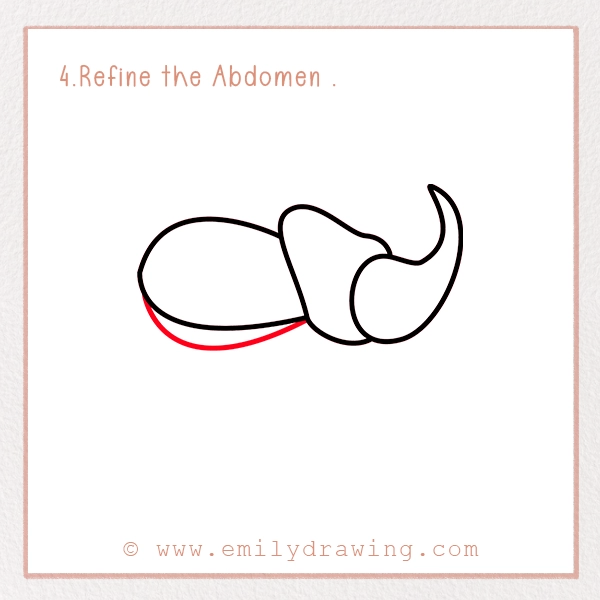
A realistic beetle drawing is incomplete without adding depth and detail. You have to refine the abdomen to give a professional look to it.
To do this, add a small oval shape at the bottom of the abdomen. It should cover the whole length of this body part.
Step 5 – Create Segments of the Body
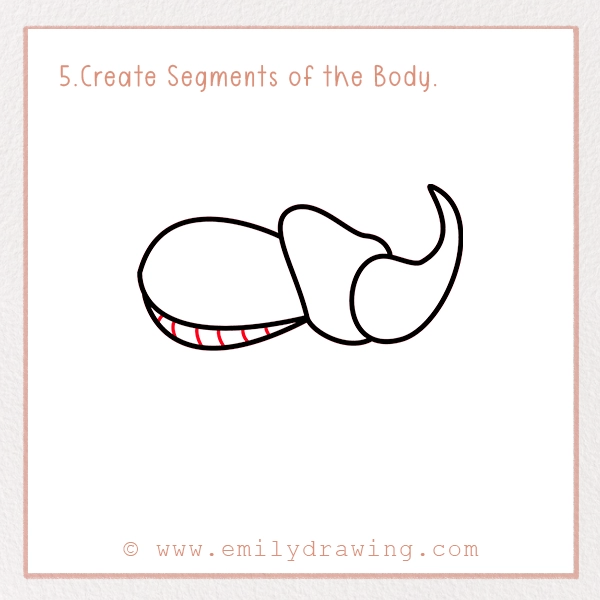
You may have noticed each insect has segments on their abdomen, a detail we also emphasized in our cockroach drawing tutorial. These segments give an aesthetic look to their bodies, so beetle drawing is incomplete without these segments.
To draw it in this step-by-step beetle drawing, focus on the small oval shape we sketched in step four. In it, sketch some curved lines, facing the same direction.
These curved lines should follow the natural flow of the body and should be evenly spaced. Take as much time as you need to perfect these lines.
Step 6 – Sketch the Wings
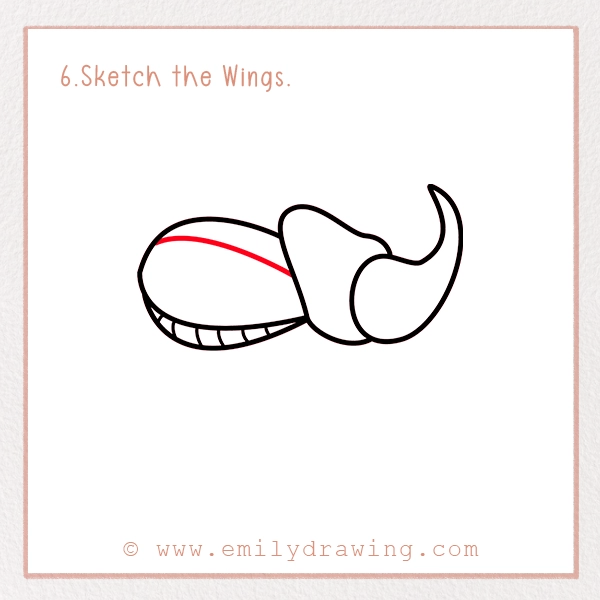
Beetles have wings on their abdomen that they use for flying, similar to how wings are featured in our fly drawing guide. Though a few beetles can’t fly, they have short wings folded on their abdomen. The flying beetles also fold their wings on their body when they are not using them.
As we are drawing a beetle in a standing position, we have to show the wings folded on the abdomen. To do this, draw a curved line in between the abdomen as shown in our picture. Make sure it follows the natural body shape of the insect—refer to our how to draw a fly for more examples of wing placement.
Step 7 – Sketch the Six Legs
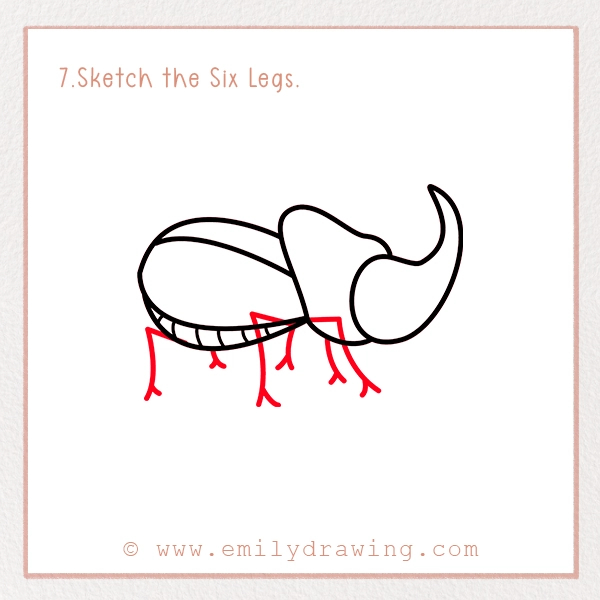
Every insect has six legs, three on each side. They are attached to the thorax or abdomen, and available in three portions. They have a knee and a paw with long thin legs.
To draw them, you have to sketch six thin lines, attached to the thorax and abdomen. Three of them are on the front, so make three long lines that are bending at the knee and have a paw shape at the bottom as shown in our picture.
For the rest of the three legs, we have to depict them on the other side of the body. So, draw small lines with a paw at the bottom to show those legs.
Make sure you evenly spaced these legs to give an aesthetic look to your drawing.
Step 8 – Draw the Eye
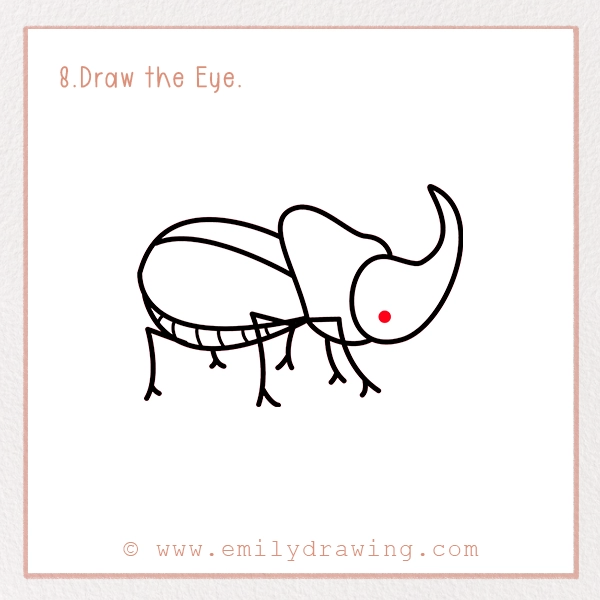
This is the final step in our how to draw a beetle guide, where we only need to sketch the eye. It is the simplest step in this guide as you just have to draw a dark circle in the head.
That circle should be near the thorax line, at the bottom side of the head. You can add a small white dot in the dark circle, too, to give a lively appearance to it.
Now, it is time to play with colors and unleash our creative skills on the pencil sketch of the beetle.
Step 9 – Beetle Drawing with Colors

We have drawn rhinoceros beetles in this guide. This beetle has different species, each having their unique colors. Some famous ones are dark brown, shiny black, gray, greenish, or metallic colors. You can choose any color from these to give life to your insect.
If you want to have some unique colors, you can go for them too. There are different species of beetles, each of vibrant colors. You will find yellow, red, white, green, blue, violet, and other colors of this insect. So, choose any of your choice and have fun with coloring your beetle pencil sketch.
Pin it now, Draw later!
Background Tips for Beetle Drawing
You can add a variety of backgrounds to your cute beetle drawing. These backgrounds will help you in enhancing your insect drawing. Some suggestions are:
- Draw greenery in the background of the beetle.
- Show beetle standing on the stem of the tree.
- Depict a brown ground beneath the beetle.
- Draw a group of beetles.
Your Beetle Drawing is Complete!
Finally, your beetle drawing is complete! Celebrate it by sharing it with your friends and family. Moreover, share it with your social media artistic community to collect praise from them. Don’t forget to check our other insect and animal drawing tutorials—like this fun guide on how to draw a cockroach—to create a full-fledged forest drawing.
