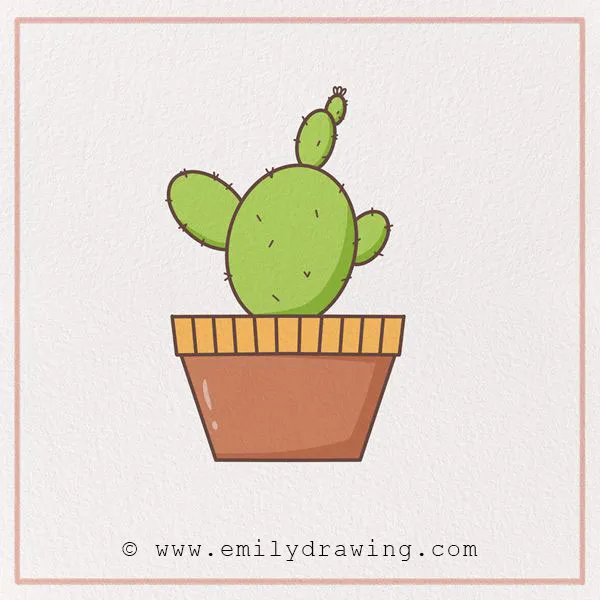
Whether you’ve seen one in person or not, a cactus is a very recognizable and one-of-a-kind succulent plant. With its unique shape, texture, and blooms, It’s an especially fun subject for cactus art! And, did you know that some of them can live to 200 years old?
Most cacti grow naturally in dry and hot climates, such as desert regions. This makes them different from many other trees and flowers. However, one of the remarkable things about art is that you can take it anywhere. So, no matter where you live, you can have your cactus with you! You could even make a garden of plants on your wall from drawings.
Are you ready to follow this easy drawing tutorial on how to draw a cactus? Collect your art materials and keep on reading to get started. Happy drawing!
Materials:
- a piece of paper
- a pencil for the guiding lines and sketching
- an eraser
- a black sharpie or a pen for the outlines
- markers or colored pencils for coloring
- our printable drawing guide (Join my Email List below to get this Tutorial)
Here are my RECOMMENDED Art Supplies!
- Crayola Coloring Set (140 Pieces – Mega Value!)
- 24 Colored Crayon Set
- A4 Printer Paper
- Crayola Coloring Pencils
- HP Home Printer with Instant Ink!
Time needed:
15 minutes.
How to Draw a Cactus — Let’s get started!
Step 1 – Begin to draw the pot.
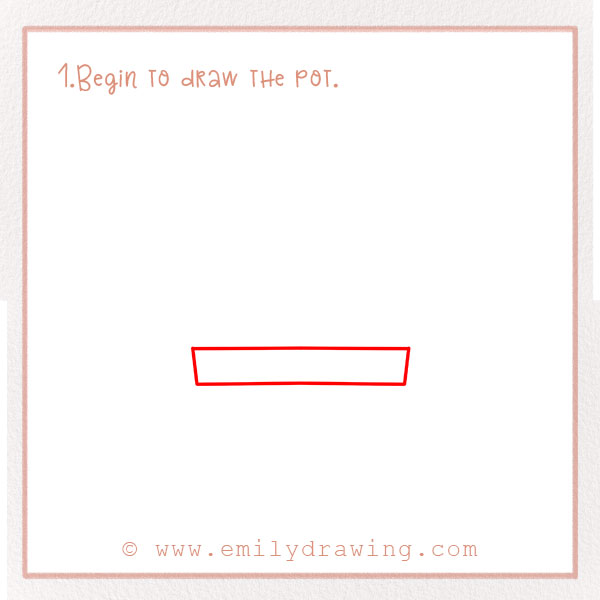
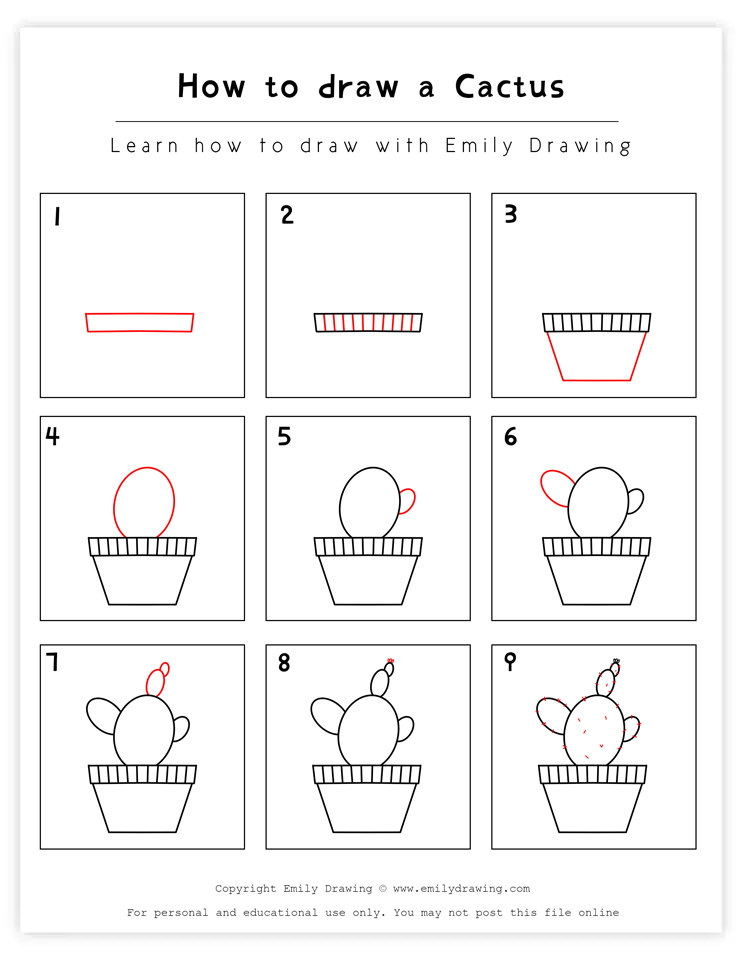
To start off our creation, let’s start to draw the pot. About two-thirds of the way down the page, draw a long, skinny, and horizontal rectangle. This will be the top part of the plant pot.
Step 2 – Add detail to the pot.
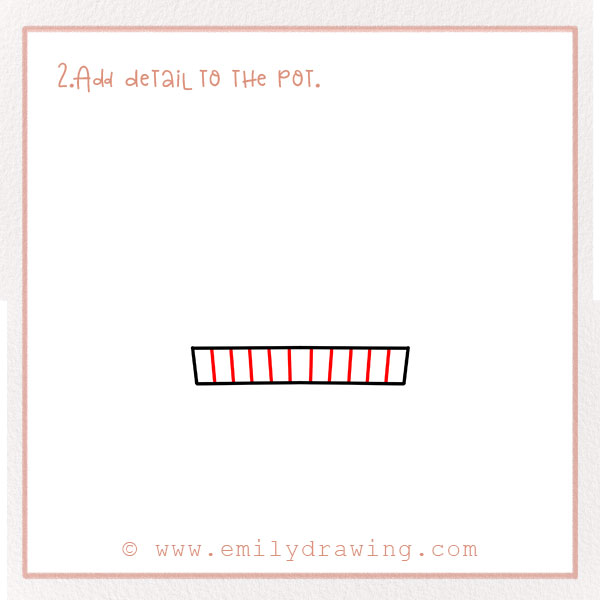
Let’s add some detail to the pot. To do this, add vertical lines in the rectangle, evenly spaced to show ridges. This will form the texture of the pot.
Step 3 – Form the shape of the pot.
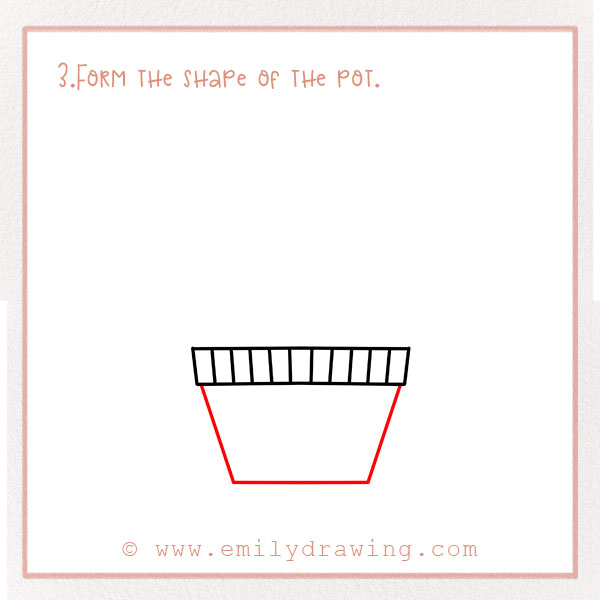
Now, we need to have a nice and big pot to hold the cactus. Let’s add the main part of the pot! Draw two slanting lines downwards from the outside edges of the first rectangle. Connect them below to form the bottom of the pot.
Step 4 – Start drawing the cactus!
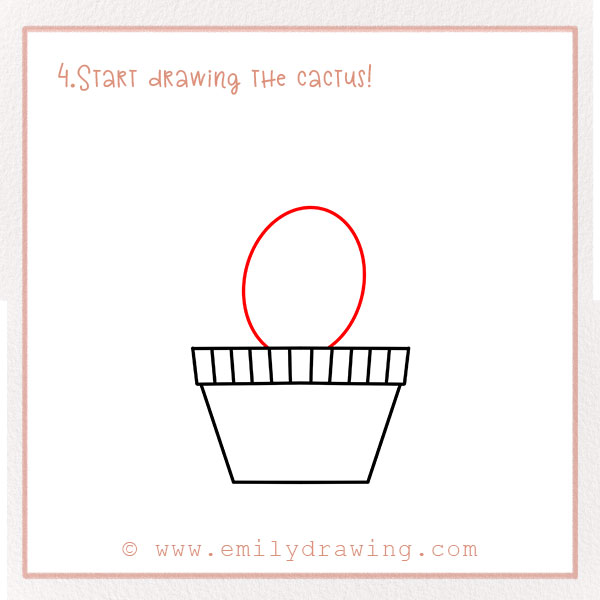
Now, let’s get to the main event: the cactus! Draw a shape coming out of the pot. Draw it in the center of the pot. It should be a large, ovular shape. It doesn’t need to be perfect—all plants have their own personality!
Let the oval get cut off by the top of the pot—refer to the photo for reference. This shows perspective so that the plant is sitting within the pot and not on top of it.
Step 5 – Add one branch of the cactus.
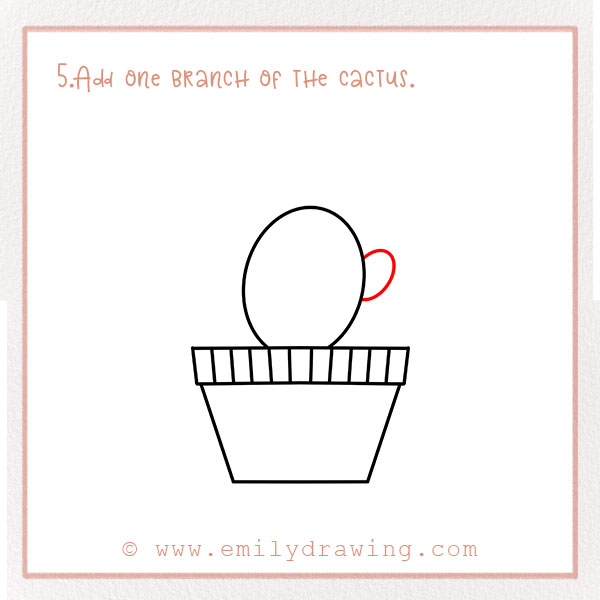
Next, we’re going to make this plant a little bit bigger.
On the right side of the cactus, draw a semi-circle-like shape emerging from the first part of the cactus that we drew in the last step.
Step 6 – Add another branch of the cactus!
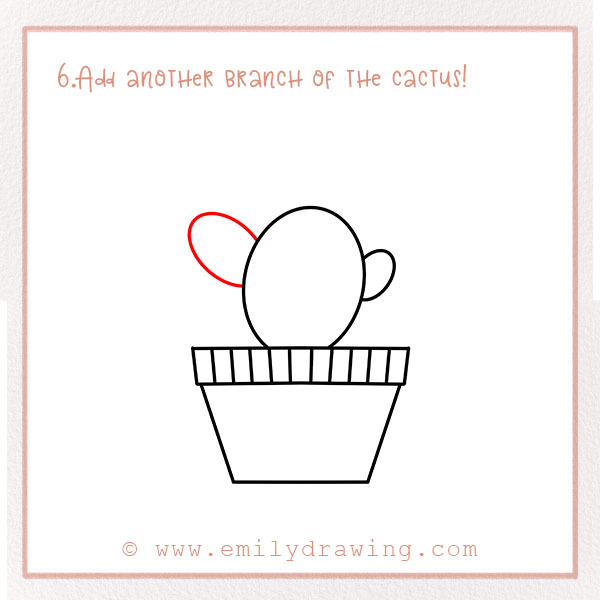
On the left side, we’re going to add another branch! To create variety, let’s make this one a bit bigger than the last one.
It should be close to the same level as the first branch. Just make it a little bit bigger!
Step 7 – Add the last branch.
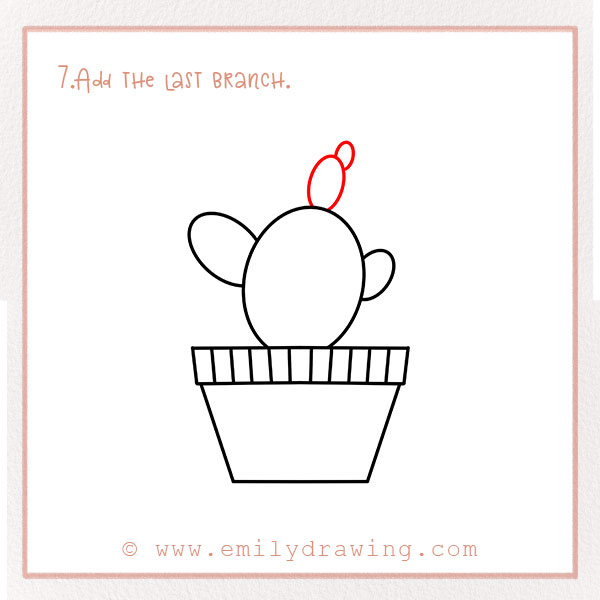
On the center-top of the first branch of the cactus, we’re going to add one more branch. It can be about the same size as the one on the right. Again, it doesn’t have to be perfect.
Lastly, add another even smaller circle on top of it!
Step 8 – Add a tiny flower bloom!
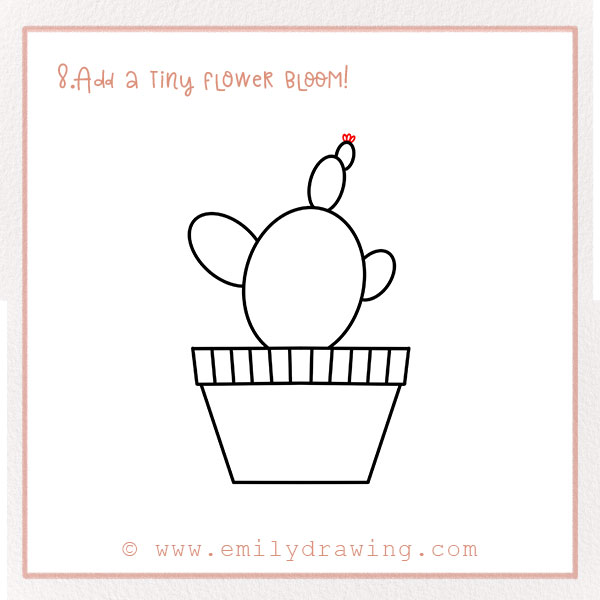
If you’ve ever seen a cactus in person or in a picture, you might have noticed that it has had bright and unique blooms! Of course, we have to add that to this creation. Let’s put that in the drawing now.
To do that, add a small flower shape on the top of the last branch. Draw tiny petals on it. This will add a beautiful pop of color to your creation!
Step 9 – Add thorns to the cactus.
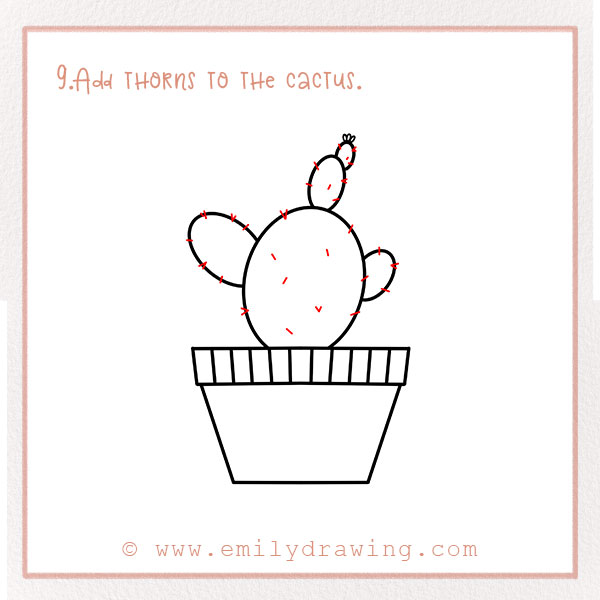
Another recognizable and important feature of a cactus is the thorns, right? We have to add them here!
Add a variety of small dots all around the cactus. Scatter them around, and make sure to draw them on all of the branches!
Step 10 – Color your new plant!

Complete your creation by coloring it in! Decorate the pot however you want. And, of course, add some color to the cactus itself! If you want your desert plant illustration to look realistic, use greens and pinks for an authentic feel.
For more flower drawing guides, check out How to Draw a Rose and How to Draw a Lily.
Pin it now, Draw later!
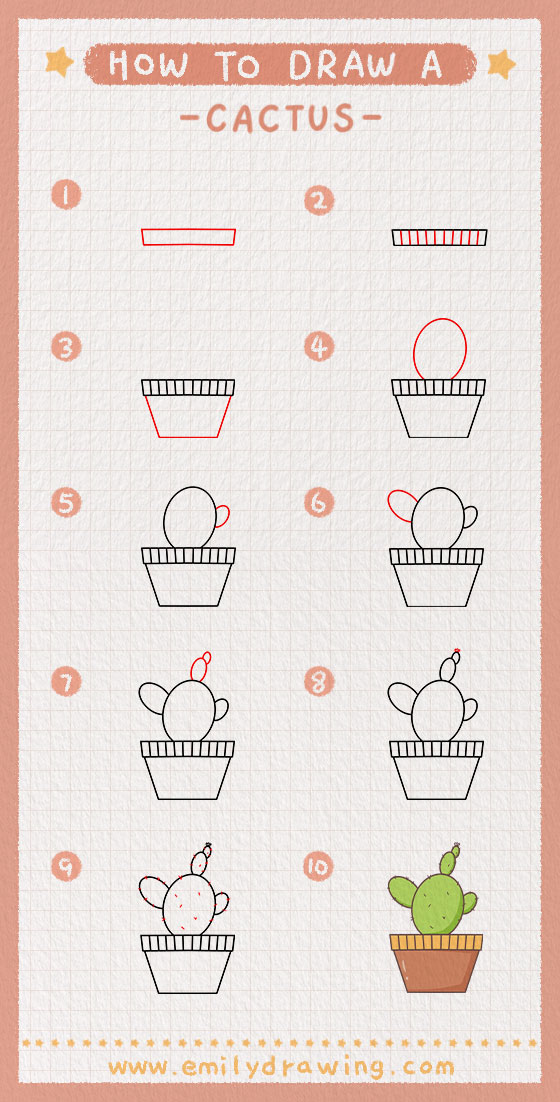
Voila! You’ve made your very own cactus. We hope you’ve enjoyed this step-by-step guide. Thanks for following along!
Share your one-of-a-kind artwork with your friends or family. Comment what you thought about this tutorial or any suggestions you have for additional ones, and make sure to check back here for more!
If you enjoy drawing plants, you might also like our tutorials on How to Draw a Sunflower and How to Draw a Tulip.
