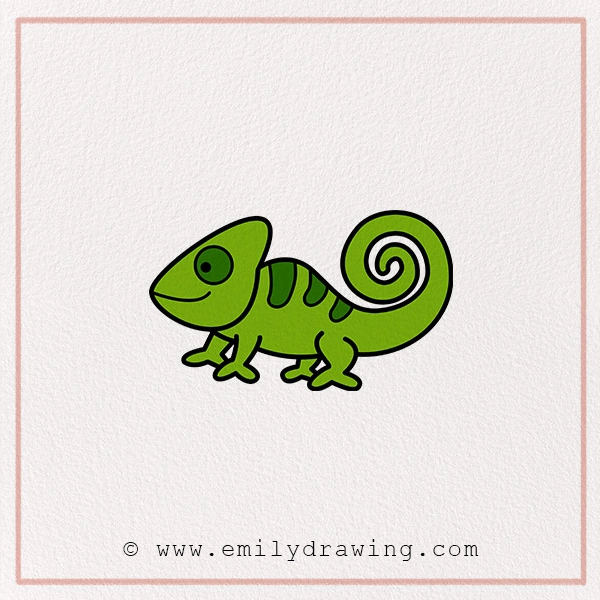
Chameleons are among the most amazing animals on the planet. One of their best features is their ability to change color. They can change their skin color if they want to camouflage themselves from predators.
Moreover, fear, anxiety, thirst, and humidity also play a role in changing their skin colors. If they get frightened, they can swell and increase in size.
Another amazing aspect is its eye structure. It can rotate its eyes independently in different directions simultaneously.
Due to these amazing facts, every novice artist must want to draw it in their sketchbook. This painting should be in their collection, just like fun sketches of other forest critters such as chipmunks.
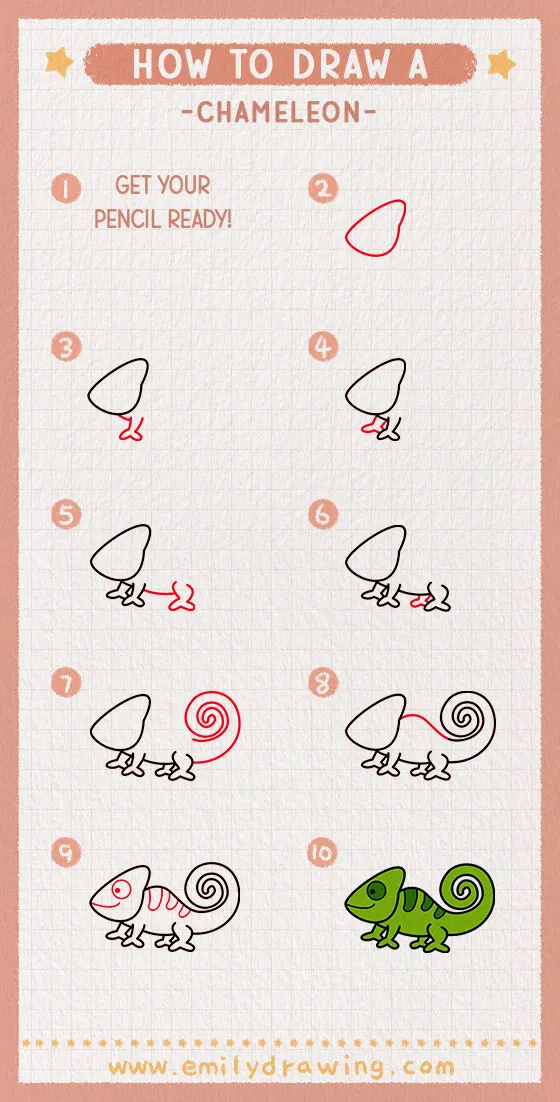
That’s why I’ve created this 8-step chameleon drawing tutorial for kids and young artists. Within 30 minutes, you can excel in drawing a chameleon on a piece of paper.
So, let’s delve into this how to draw a chameleon guide.
How to Draw a Chameleon For Kids?
This is an easy drawing guide in which we will learn how to draw a chameleon with a pencil. For this, grab all the important art supplies, and the piece of paper. You can collect some realistic reference pictures too.
Materials:
- a piece of paper
- a pencil for the guiding lines and sketching
- an eraser
- a black sharpie or a pen for the outlines
- markers or colored pencils for coloring
- our printable drawing guide (Join my Email List below to get this Tutorial)
Here are my RECOMMENDED Art Supplies!
- Crayola Coloring Set (140 Pieces – Mega Value!)
- 24 Colored Crayon Set
- A4 Printer Paper
- Crayola Coloring Pencils
- HP Home Printer with Instant Ink!
Time needed:
15 minutes.
How to Draw a Chameleon — Let’s get started!
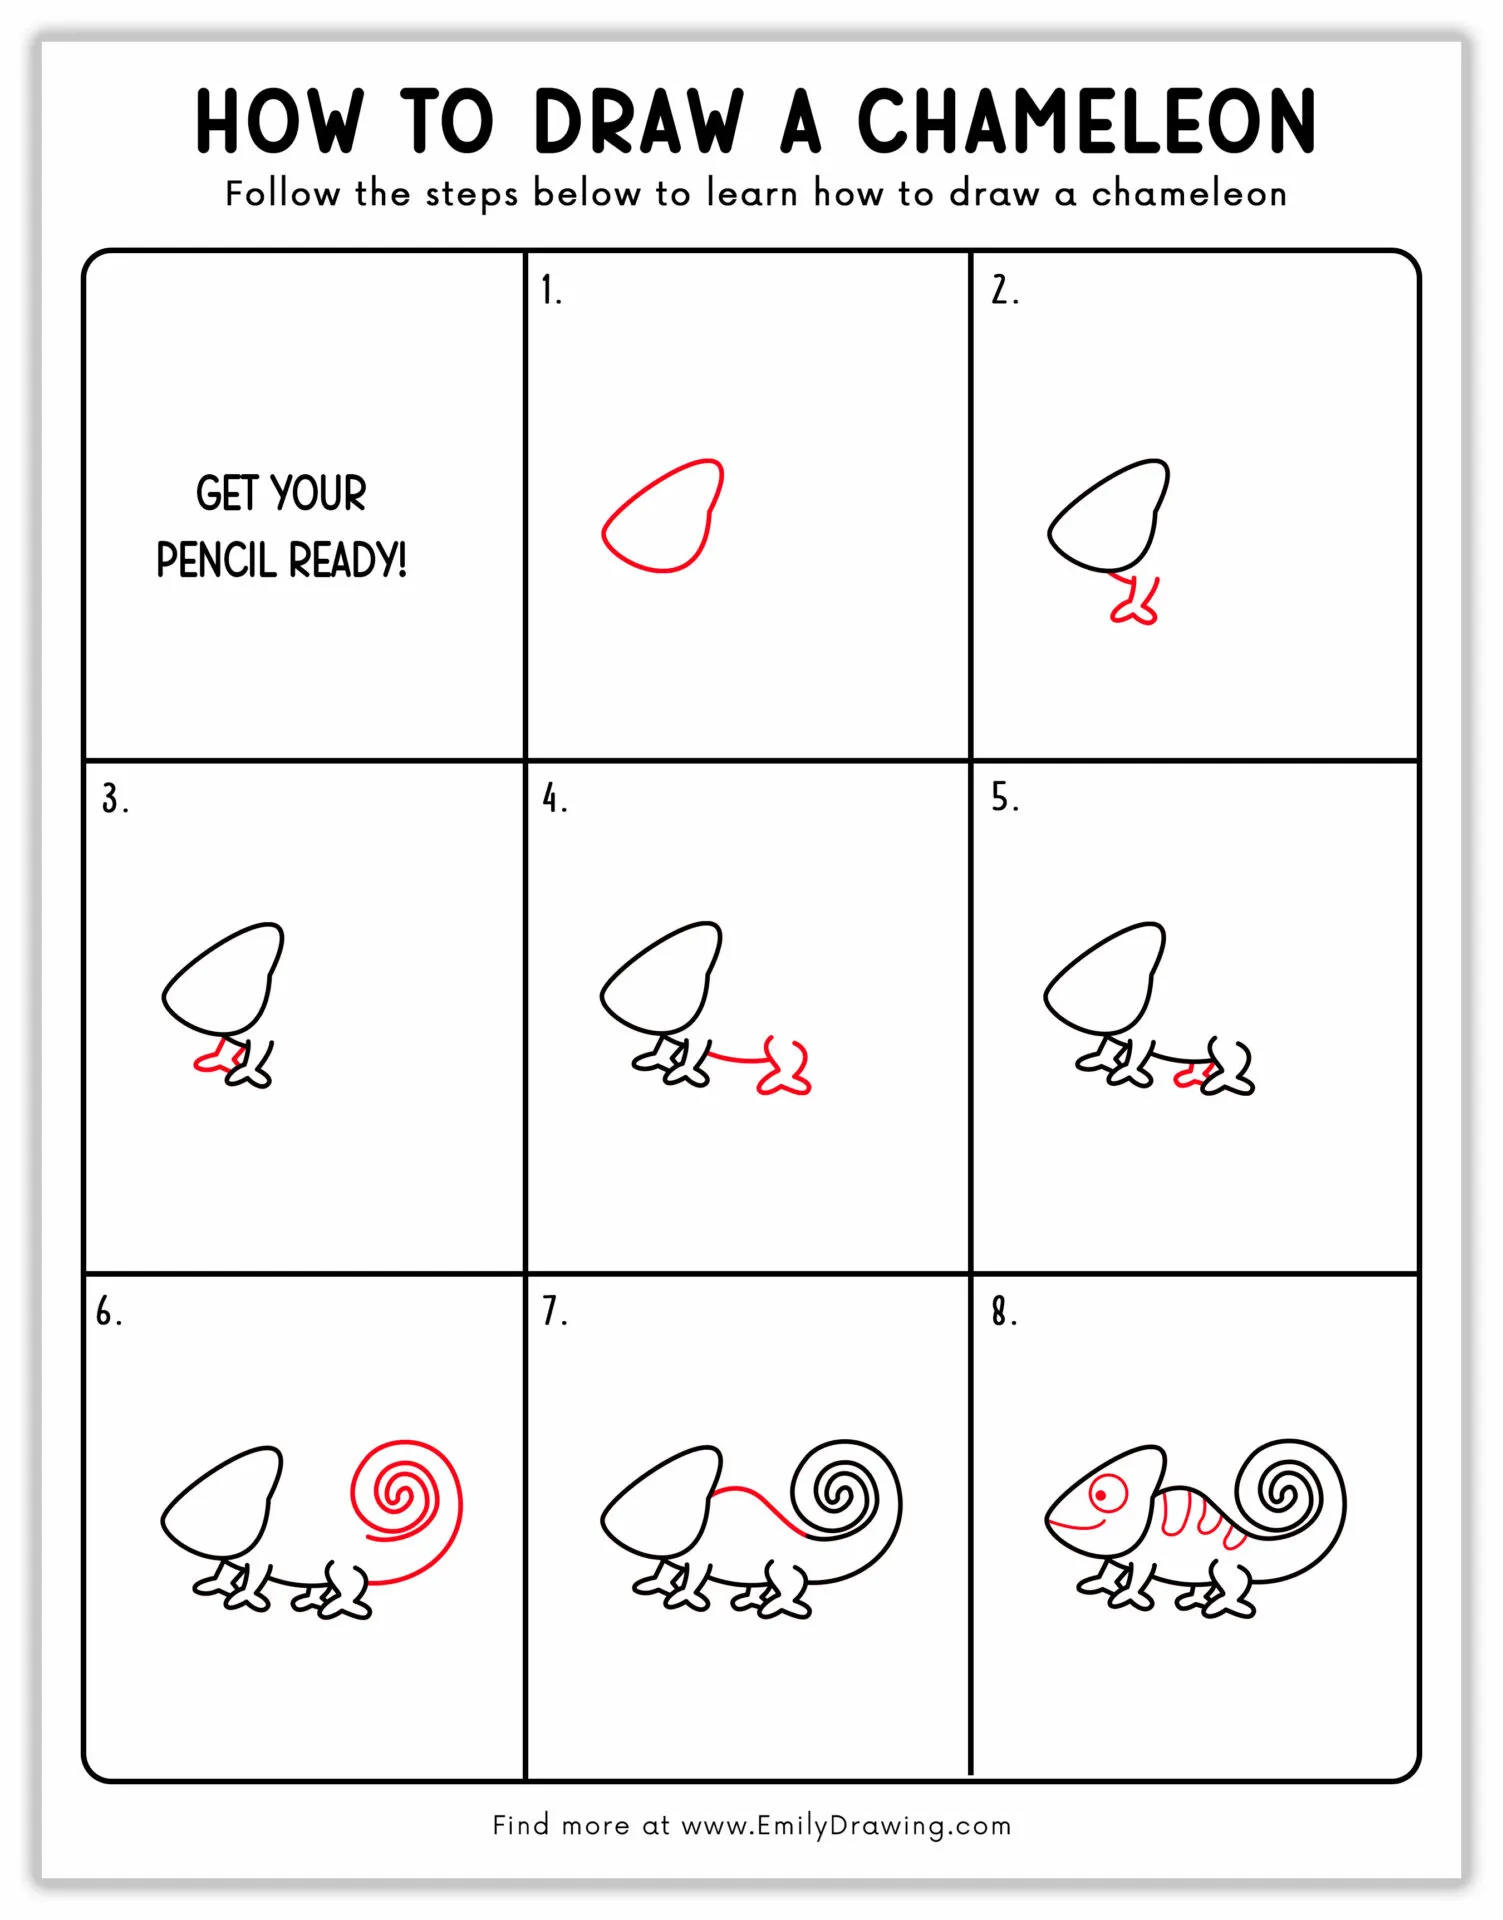
Step 1 – How to Draw a Chameleon Head
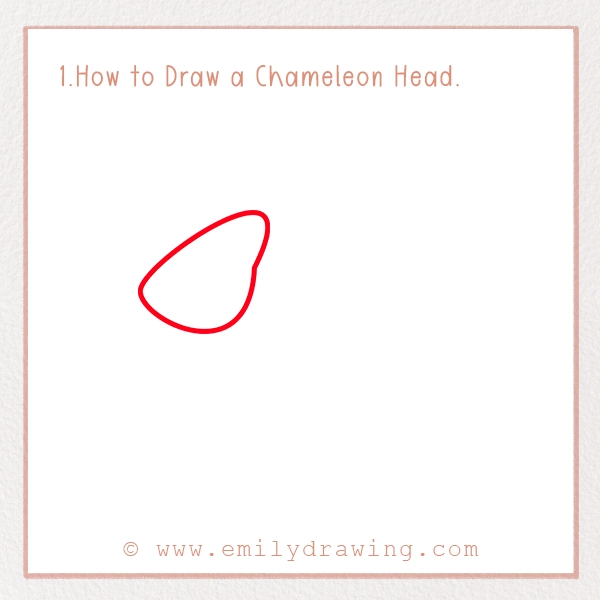
Drawing a chameleon head is a bit difficult because it is unique and different from other creatures. Our whole drawing is going to be based on it, so do this step quite carefully.
For drawing this, sketch a tear-drop shape in the middle of the page. It should have a pointed end toward the left, representing its snout.
Make sure that the base of the head is wider to lay the foundation of Chameleon’s facial features. To do this, sketch a sharp edge on the front, at the bottom of the head.
Step 2 – Sketch the Front Leg
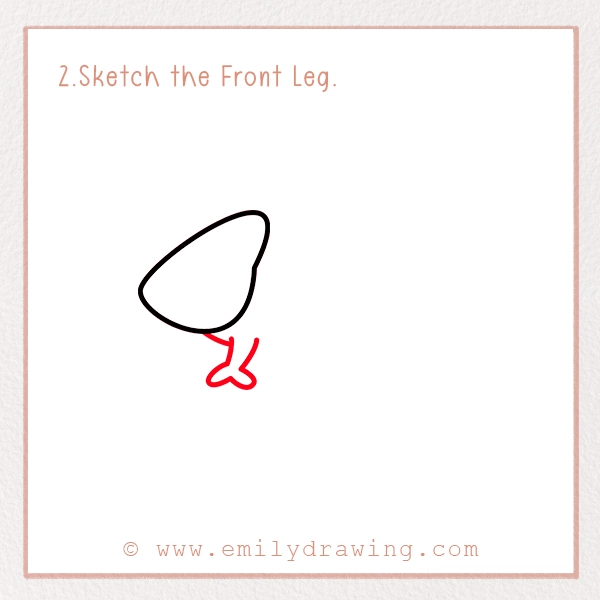
Sketch a small curved line beneath the head of the chameleon. Now, draw two curved lines extending downward and ending with a claw-like shape. You should make sure it is closer to the head.
Step 3 – Draw the Second Leg
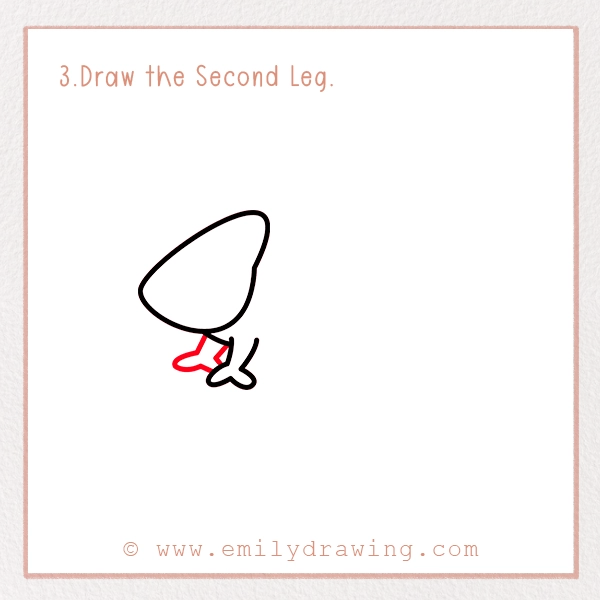
Near the front leg, sketch another one. It should be in the shape of a claw-like triangle with two distinct toes at the end.
Make sure it is extended downward and outward, positioned as if it is walking.
Step 4 – Sketch the Belly and The Back Leg
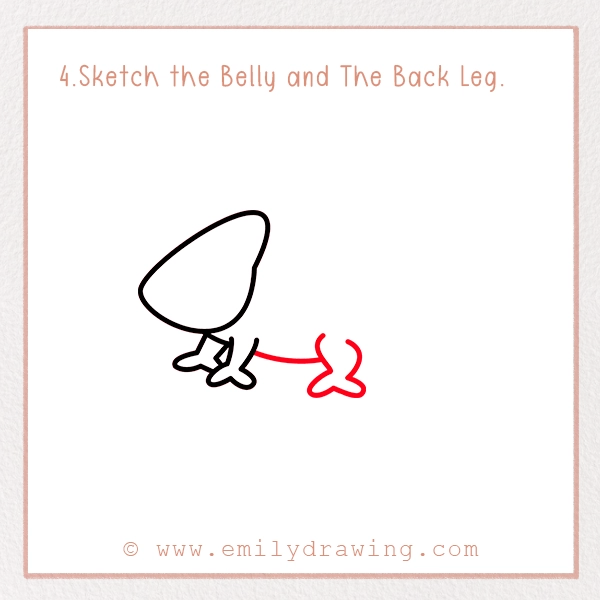
This step is going to focus on two parts of the chameleon body: the belly and the back leg.
To draw the belly, you should sketch a curved shape extending backward from the front leg. At the end, draw two highly curved shapes that have a claw at the bottom.
Step 5 – Draw the Last Leg
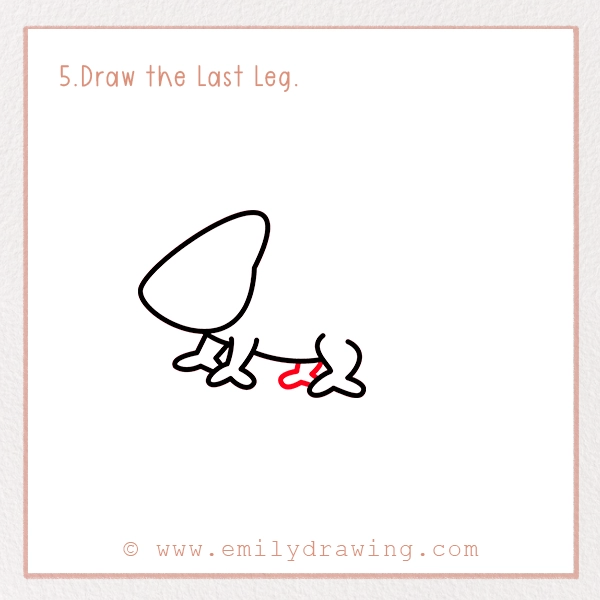
We will sketch the last leg in this step of how to draw a chameleon. This leg is on the far side of the body and helps give the drawing a 3D appearance.
To do this, you should put your pencil an inch away from the already drawn back leg. Your pencil should be on the outline of the chameleon body. Now, draw a similar triangular claw-like shape there.
It should be extending downward and pointing forward.
Step 6 – Sketch the Tail
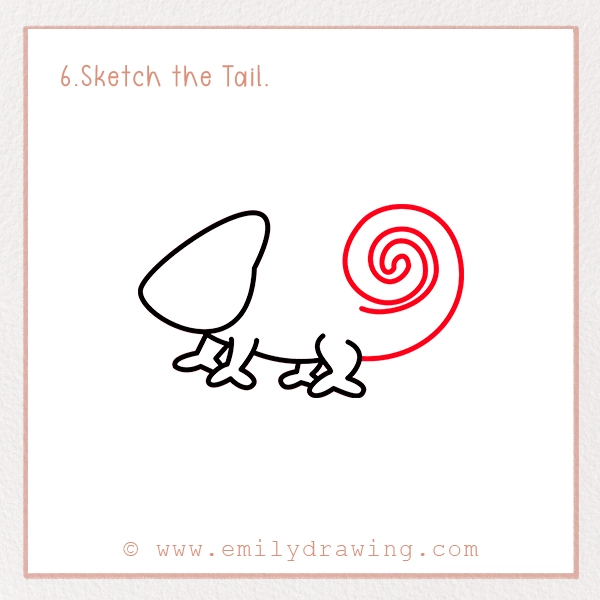
Now it’s time to sketch the tail in this realistic chameleon sketch guide. We are going to draw a spiral and neatly coiled tail in this step, so be careful while pencil sketching the tail.
Put your pencil on the back leg. From there, draw a spiral shape, extending the body line. It should be a curled tail that is tight and neatly coiled.
You can extend the spiral shape, return it toward the head of the chameleon, and add a line along with the curled tail to give it a coiled shape.
Step 7 – Complete the Chameleon Body
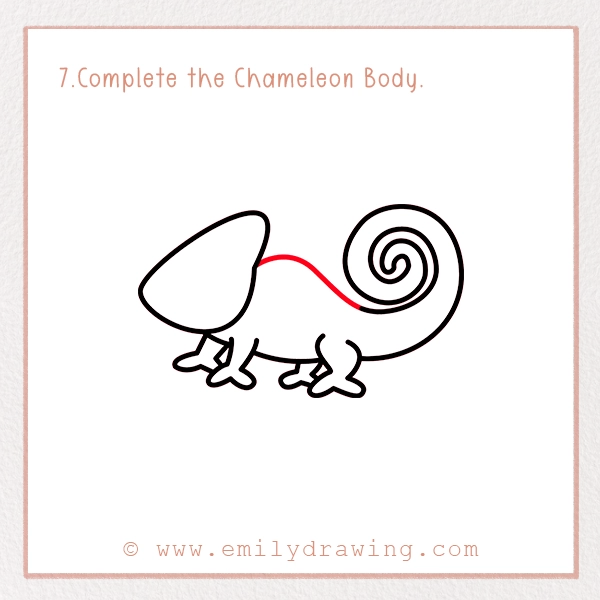
We need to add some depth to our drawing to give it a realistic and professional look. This step will ensure our body has a natural and rounded appearance.
To do this, add a curved shape, starting from the back of the chameleon’s head. This curved shape should connect with the tail naturally.
Step 8 – Sketch the Facial Features
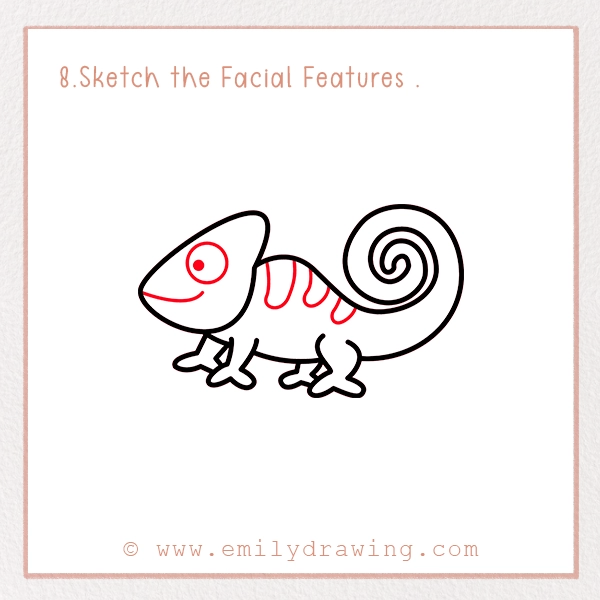
This final step completes your friendly and realistic chameleon sketch. In it, you have to draw eyes, stripes, and smile on your chameleon’s face.
First of all, let’s draw the eyes. For this, sketch an oval shape on the top of the head. Inside this oval shape, draw a small dark circle.
Beneath this eye, sketch the smile of the chameleon. To do this, draw a curved line beneath the eye.
Lastly, draw some stripes on the body of this animal. These stripes will give it a realistic and 3D look. Add three to four stripe shapes along the curve of the body, as shown in our reference picture. Make sure these stripes follow the natural curve of the body and are spaced evenly.
That’s it! Your chameleon drawing is complete. You can celebrate it now. However, your pencil sketch chameleon isn’t complete without some vibrant colors.
Step 9 – Coloring Your Chameleon Pencil Sketch Drawing!
You can find chameleons in different colors around the world. They have unique colors depending on their habitat and weather. But their most common natural colors are green, yellow, cream, or dark brown. Their stripes are either the lighter or darker version of their body’s color.
However, they keep changing their colors throughout the year. So, you can color your pencil sketch drawing in any color you want. It will give a fancy and unique look to your painting.
Pin it now, Draw later!
Background Tips for Chameleon Drawing
You should learn how to draw a chameleon on the branch to excel in your painting. It is easy as you have to sketch a branch beneath your chameleon drawing. The branch can be drawn with a few straight and curved shapes.
Moreover, you can brainstorm other types of backgrounds as well. This could include creating a group of chameleons in the picture or sketching a forest scene behind them.
If you want to learn how to draw other animals, you can check out our other drawing tutorials as well—like this step-by-step guide on how to draw a chipmunk, perfect for kids and beginners. These will help you become an expert artist.
Get the FREE Printable Drawing Guide