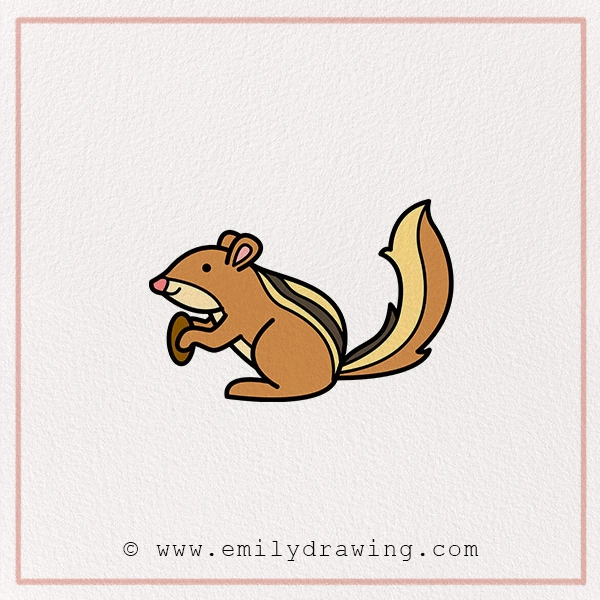
Have you ever wanted to draw a cute little chipmunk? These tiny, energetic creatures are known for their bushy tails and chubby cheeks! In this fun and easy guide, we’ll take you through the steps to draw a chipmunk from start to finish. Just grab your pencil, and let’s get started!
Chipmunks are part of the squirrel family and are found mostly in North America. They are famous for their cheek pouches, which they use to store food. These adorable little creatures are quick on their feet and love to scamper around forests and gardens. By the end of this tutorial, you’ll have your very own chipmunk drawing that you can be proud of!
Materials:
- a piece of paper
- a pencil for the guiding lines and sketching
- an eraser
- a black sharpie or a pen for the outlines
- markers or colored pencils for coloring
- our printable drawing guide (Join my Email List below to get this Tutorial)
Here are my RECOMMENDED Art Supplies!
- Crayola Coloring Set (140 Pieces – Mega Value!)
- 24 Colored Crayon Set
- A4 Printer Paper
- Crayola Coloring Pencils
- HP Home Printer with Instant Ink!
Time needed:
15 minutes.
How to Draw a Chipmunk — Let’s get started!
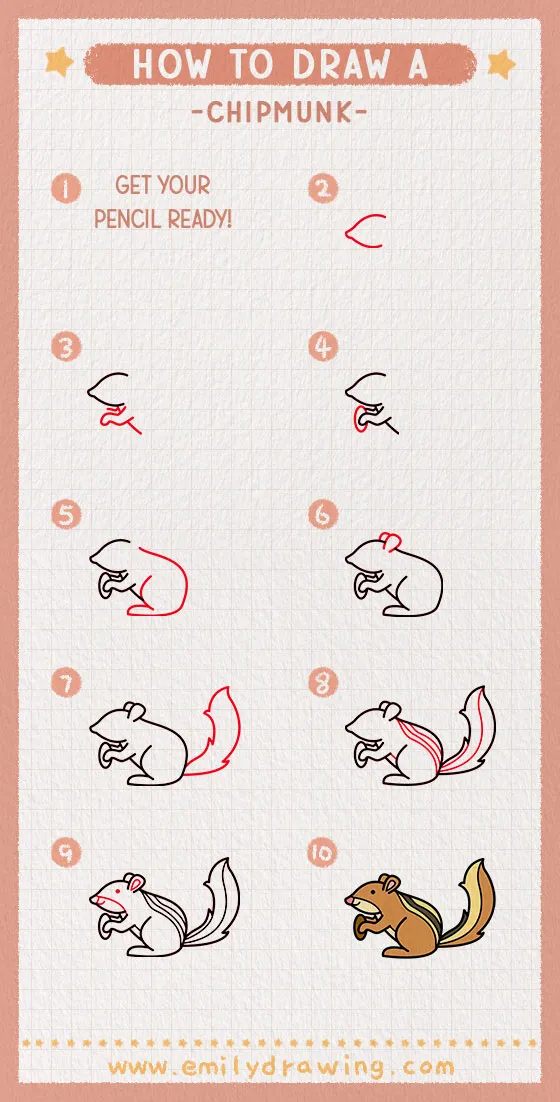
Step 1 – Start with the Head
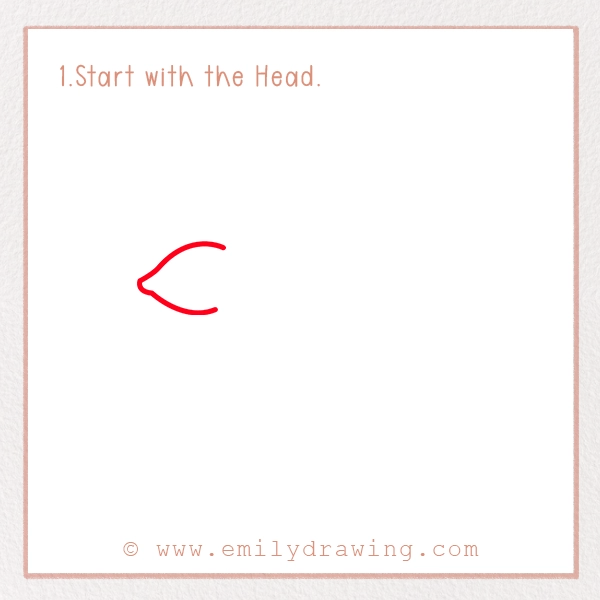
Begin by drawing a small curved shape to form the outline of the chipmunk’s head. This will look like half of an oval with a slightly pointed snout. Don’t worry about making it perfect!
A good trick is to draw lightly at first so you can make adjustments as needed. If you make a mistake, simply erase and try again. The more you practice, the better your drawing will become!
Step 2 – Draw the Front Leg and Stomach
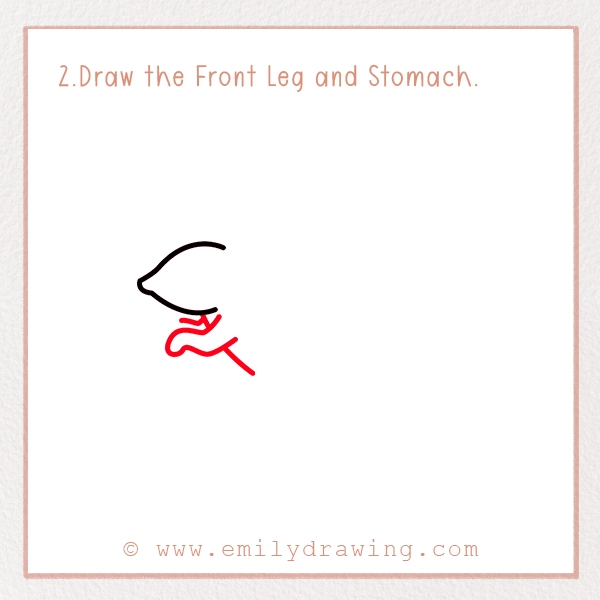
In this step, focus on giving your chipmunk its body form by drawing the front leg and stomach. Start by sketching a smooth, curved line right beneath the head to form the stomach. Allow this line to gently swoop down, creating a natural and rounded shape. From the lower end of the stomach, draw a softly curving line that extends into the front leg. Make sure the leg has a natural taper, finishing with a small, rounded shape to represent the paw. Keep your strokes light and playful, as this will help the drawing look both balanced and full of character.
Step 3 – Draw the Right Front Leg
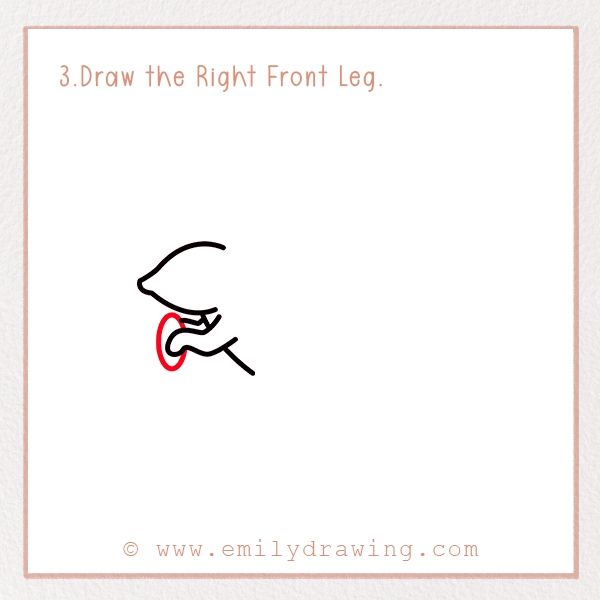
Now it’s time to add the right front leg. From the body, on the right-hand side, draw a separate curved line that follows the natural flow of the chipmunk’s form. This line should mimic the gentle curve of the leg, narrowing slightly as it approaches the paw. Remember to keep the proportions in mind, ensuring that the leg looks like it belongs to the chipmunk’s lively posture. For extra detail, you can add subtle markings to indicate the toes, giving the leg a more defined and realistic appearance.
Step 4 – Sketch the Body
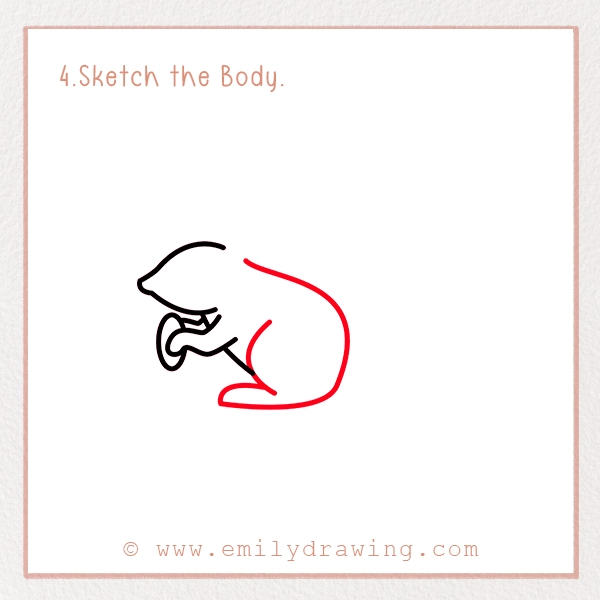
Time to draw the body! Start by sketching a slightly curved line from the head, moving down to form the back. Then, complete the lower part of the body by connecting it to the front paw.
Keep the body small and rounded—chipmunks are tiny creatures! If your lines look too stiff, try using short, light strokes to create a more natural and fluffy look.
Step 5 – Draw the Two Ears
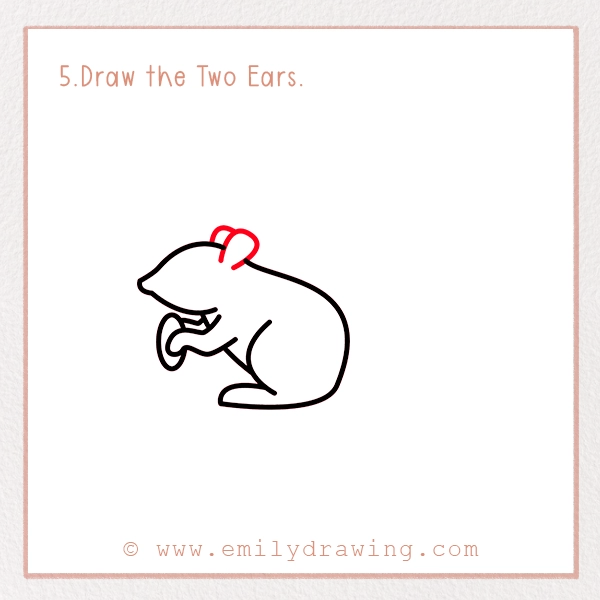
Finally, let’s complete your chipmunk’s head by drawing its ears. At the top of the head, add two small, rounded ears—one on each side. Make sure they are nearly symmetrical to maintain a balanced look. Chipmunk ears are delicate and should be drawn with soft curves, not too large, so they complement the overall cuteness of the creature. For a touch of realism, you may add a slight curve or fold inside each ear to suggest texture and depth.
Step 6 – Create the Fluffy Tail
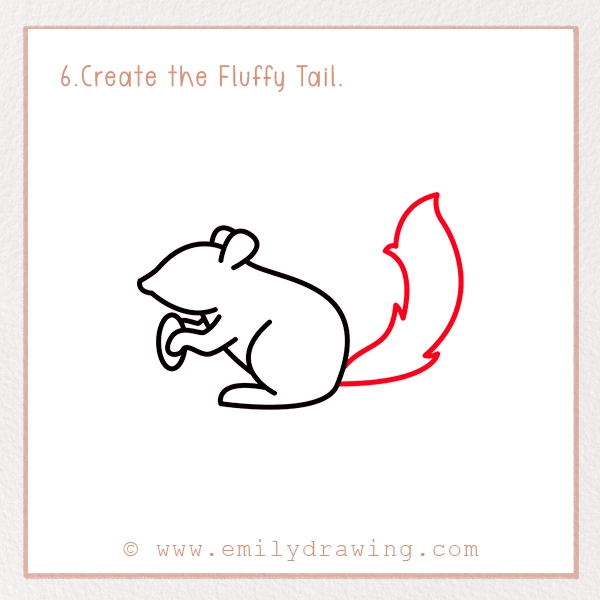
A chipmunk’s tail is one of its most adorable features! Draw a big, bushy tail curving upwards behind the body. Use wavy lines to give it a fluffy appearance.
If you want to make the tail extra fluffy, try adding more layers of curved lines to create a sense of volume. The tail should look like it has movement, as if the chipmunk is ready to scurry off at any moment!
Step 7 – Add Fur and Stripes
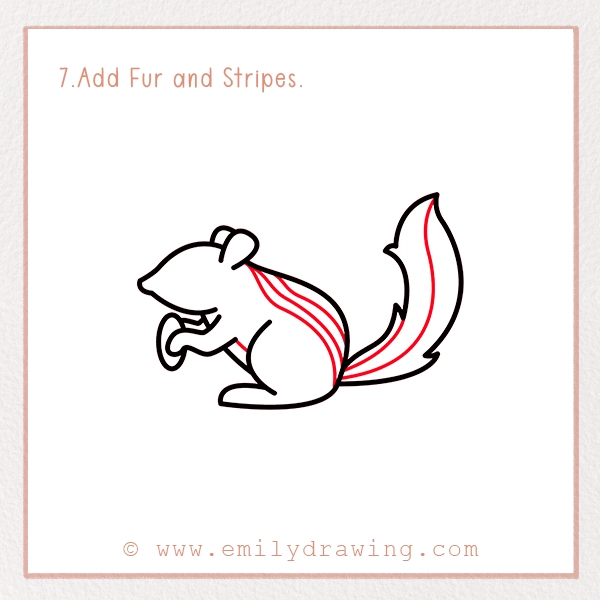
Chipmunks have stripes running along their backs. Draw a few curved lines along the body and tail to show this unique pattern. This step adds more character to your drawing!
These stripes are one of the key features that make a chipmunk stand out from other small animals. You can make them bold or soft, depending on the style you prefer.
Step 8 – Refine the Details
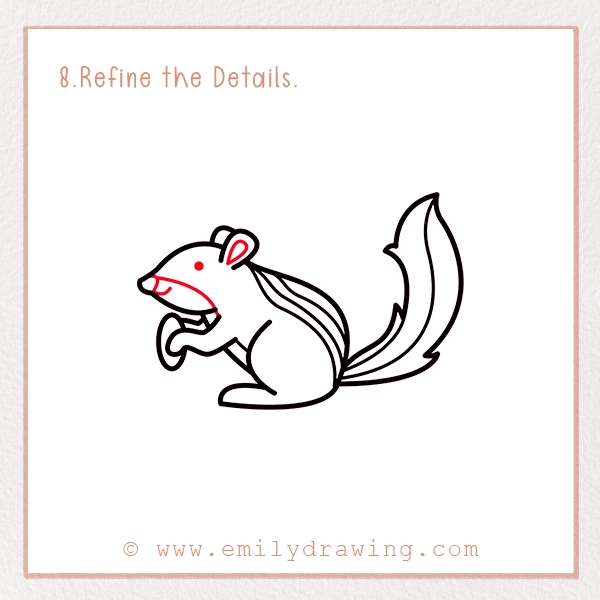
Go over your drawing, adding any final details like fur texture or extra shading. Make sure the chipmunk looks balanced and cute!
Adding small, short lines along the body can make the fur look more realistic. If you want, you can also darken the eye and outline to make them stand out more.
Step 9 – Color Your Drawing!
Now for the fun part coloring! Chipmunks are usually brown with white and black stripes. Use light and dark browns for the fur, pink for the nose and tongue, and a mix of dark and light greys for shading.
For a more natural look, try blending different shades of brown. You can also add a little shadow underneath the chipmunk to make it look like it’s sitting on a surface instead of floating in the air.
Pin it now, Draw later!
Fun Facts About Chipmunks!
- Chipmunks can store food in their cheek pouches, sometimes holding up to five times the size of their heads!
- They are excellent climbers and diggers, often creating underground burrows with multiple tunnels.
- A chipmunk’s rapid chirping sound is used to warn others of danger!
- Unlike squirrels, chipmunks prefer to stay close to the ground rather than climb trees.
- They can gather and store up to 8 pounds of food for the winter months!
Tips and Tricks for Better Drawing
- Sketch lightly first: Use soft strokes so you can erase mistakes easily.
- Observe real chipmunks: Looking at photos or videos can help you add realistic details.
- Experiment with expressions: Make your chipmunk look happy, surprised, or even mischievous!
- Use different pencils: Try using a harder pencil (H or 2H) for sketching and a softer one (B or 2B) for shading.
- Try different poses: Once you’ve mastered this drawing, challenge yourself to draw a chipmunk standing or climbing a tree!
We hope you had a blast drawing your own chipmunk! Keep practicing, and soon, you’ll be able to draw these adorable creatures with ease. Share your drawing with friends and family, or post it online using #EmilyDrawin.
Get the FREE Printable Drawing Guide