Hello, and welcome to another tutorial by Emily Drawing! Today’s tutorial is all about drawing the clam! We’ll go through nine easy steps to draw this sea creature.
The size of a clam depends on the species. They can measure from 0.1 millimeters to 4.8 feet long and weigh up to 550 pounds.
The largest clam is the Giant Clam (Tridacna gigas), and it can grow up to 4.8 feet long and over 500 pounds.
Next is the Soft Shell Clam (Mya arenaria), which is about 4 inches long and weighs less than a quarter of a pound.
Finally, the Pygmy Pea Clam (Pisidium moitessierianum) is the smallest, measuring around 1.8 to 2.8 millimeters.
It’s time to get started on the tutorial for drawing a clam. So, grab your colored pencils or markers, and learn how to draw this invertebrate.
Materials:
- a piece of paper
- a pencil for the guiding lines and sketching
- an eraser
- a black Sharpie or a pen for the outlines
- markers or colored pencils for coloring
- our printable drawing guide (Join my Email List below to get this Tutorial)
Here are my RECOMMENDED Art Supplies!
- Crayola Coloring Set (140 Pieces – Mega Value!)
- 24 Colored Crayon Set
- A4 Printer Paper
- Crayola Coloring Pencils
- HP Home Printer with Instant Ink!
Time needed:
15 minutes.
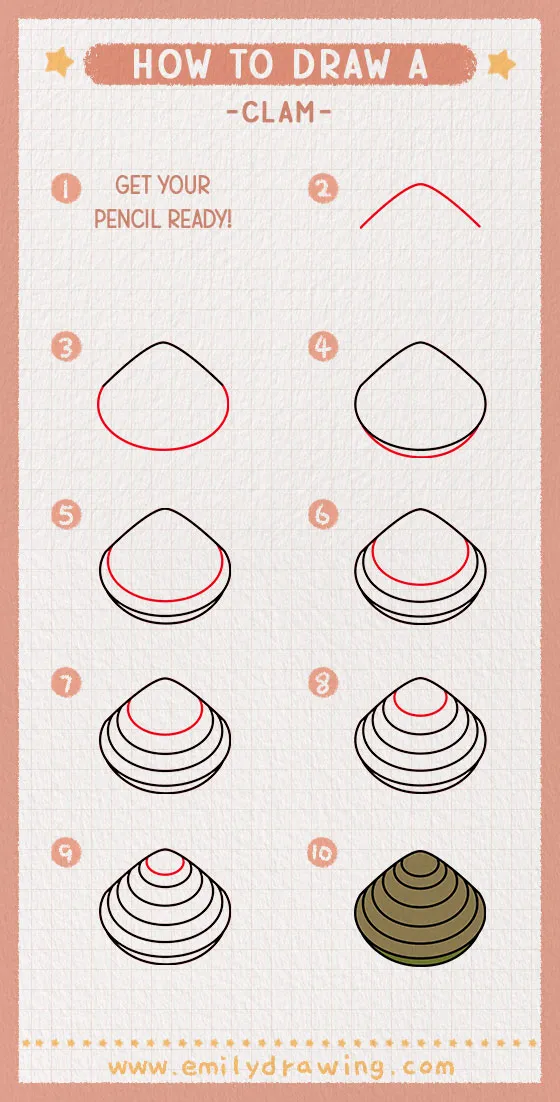
How to Draw a Clam — Let’s get started!
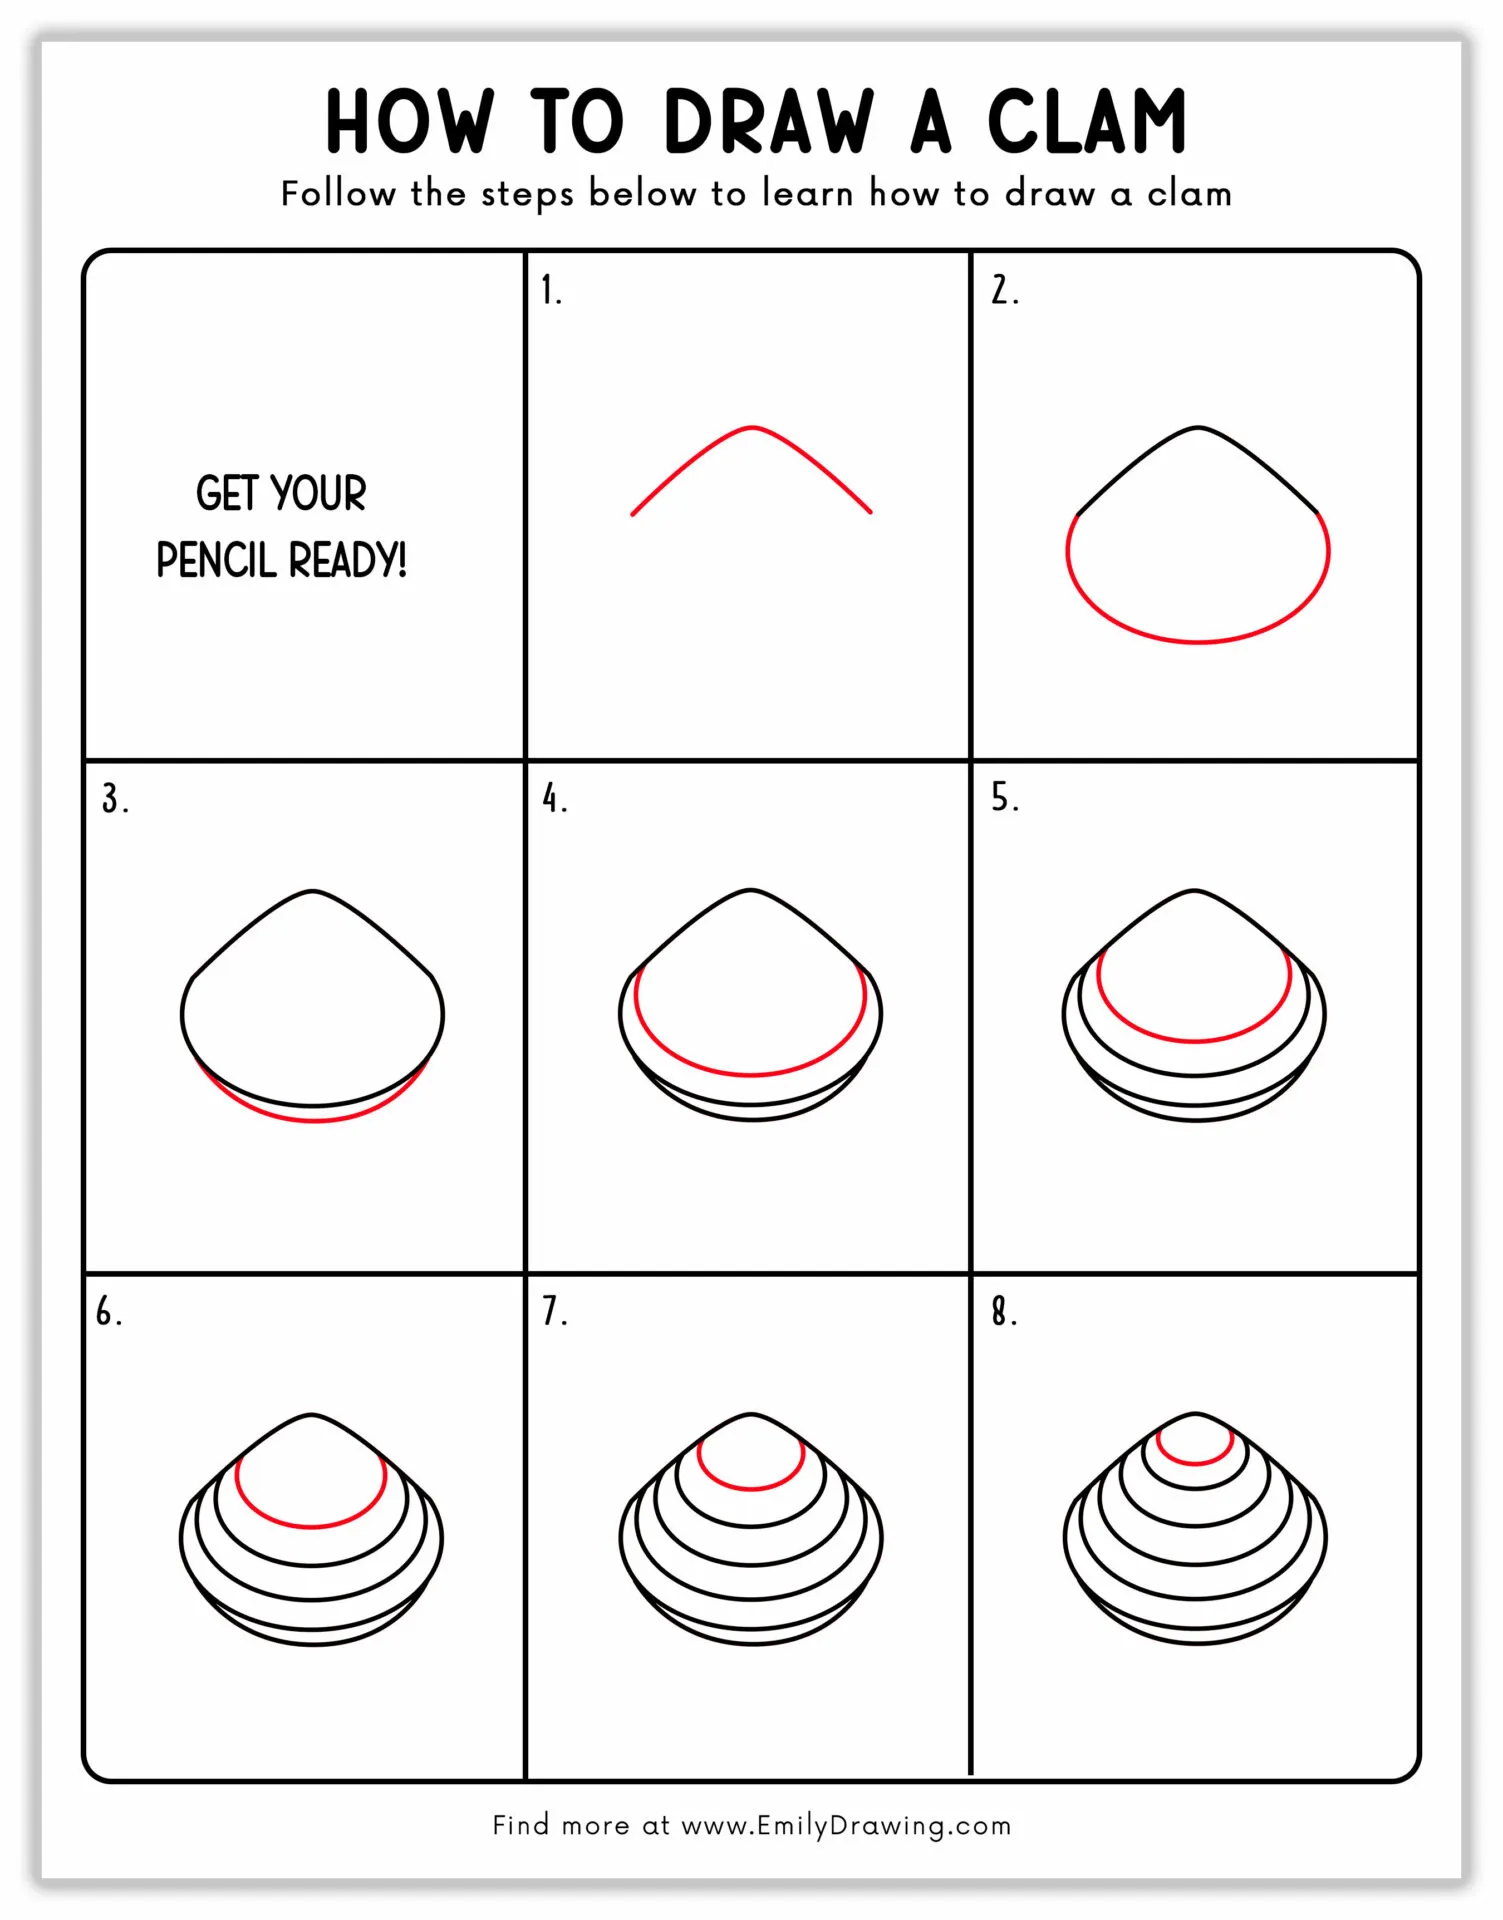
Step 1 – Draw The Clam’s Top
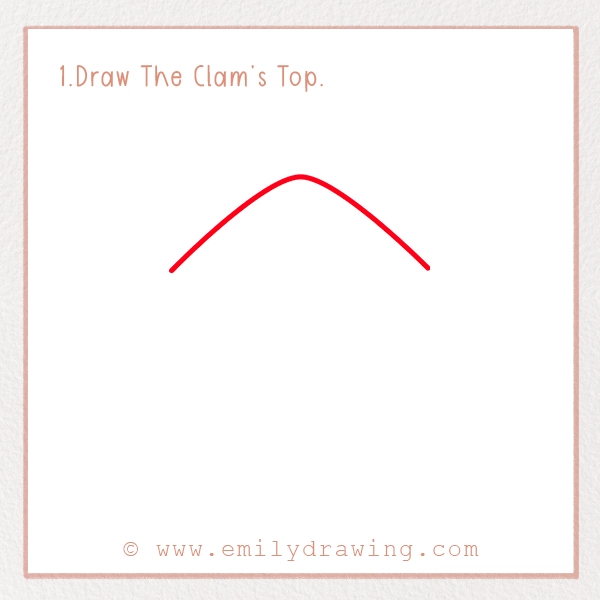
For step one, you’ll draw the top of the clam, which is a rounded triangle shape. Leave the bottom open to finish the clam, only drawing the two sides and rounded top for now. Interesting fact: the bump at the front end of the clam’s valve is the umbo, and its uses include the hinge, teeth, dorsal part, and growth.
Step 2 – Draw The Clam’s Lower Body
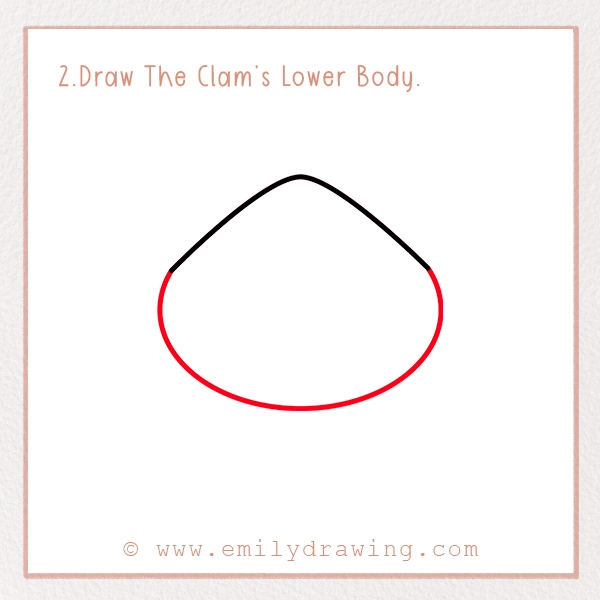
Next, you’ll draw the rounded bottom of the clam. The shape should look like a triangle with a bottom that curves outward. A clam includes two siphons, also known as tubes. In reality, they look like a neck sticking out of the shell. The incurrent siphon is located on the clam’s underside, and it draws water into the body. The excurrent siphon is located on the clam’s back, and it releases used water and waste.
Step 3 – Draw The Clam’s First Layer
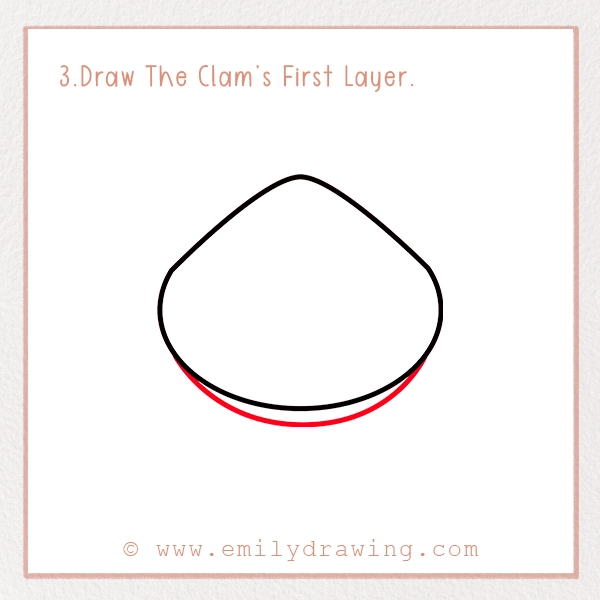
For this step, you’ll draw the clam’s first layer or section. We’ll call it a layer for this tutorial, but you can also think of them as thin stripes when drawing. This line is right in front of the bottom, and it follows the bottom’s outward curve. There should be a small space between this line and the bottom of the clam.
Step 4 – Draw The Clam’s Second Layer
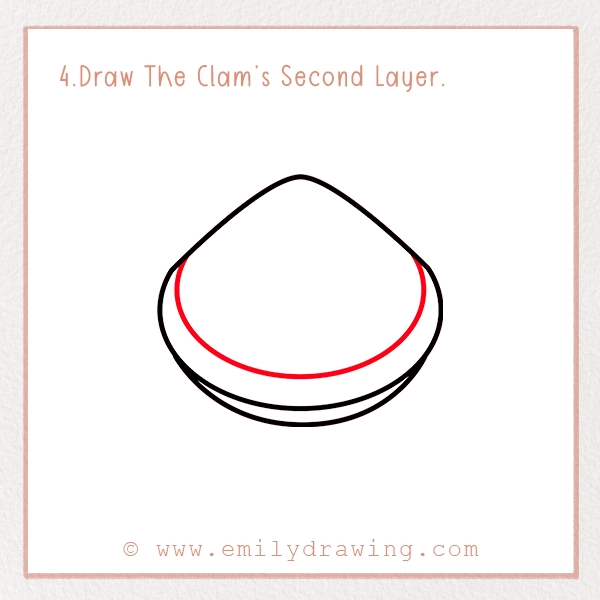
Now, you’ll draw the second layer, which is another curved line above the one you added in the previous step. The space between the two lines can be slightly bigger than the first space, just be sure you’re following the same curved line.
Step 5 – Draw The Clam’s Third Layer
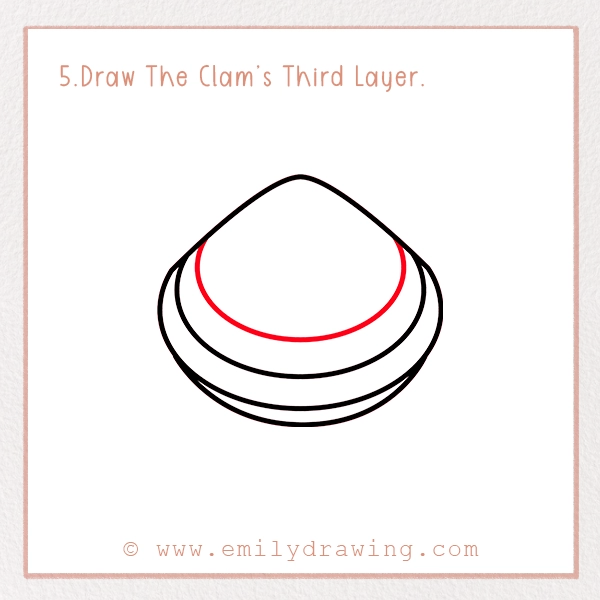
Just like the previous steps, you’ll add the clam’s third layer by drawing another curved line. It’ll be above the second line you drew. Did you know clams grow by adding layers to the outer edges of their shells? These are called growth rings, and they’re just like the rings on a tree trunk. This means you can use these rings to determine the clam’s age.
Step 6 – Draw The Clam’s Fourth Layer
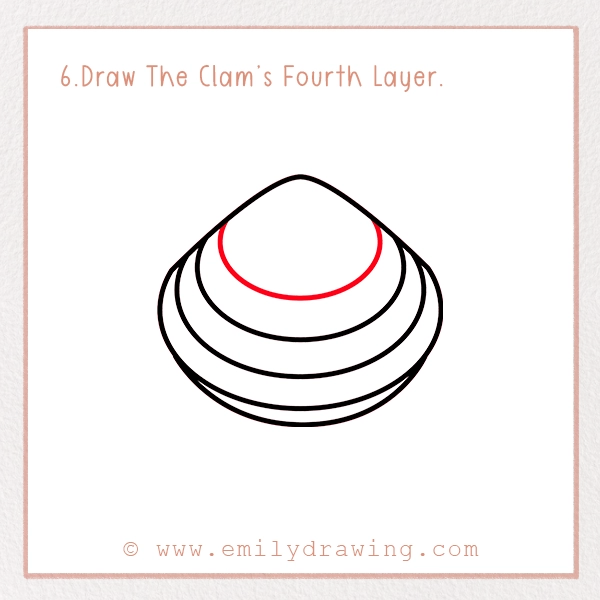
For the sixth step, you’ll add the clam’s fourth layer. Once again, you’ll add another curved line, this time above the third layer. The space can be about the same distance as the other layers, minus the smaller space of the very first layer.
Step 7 – Draw The Clam’s Fifth Layer
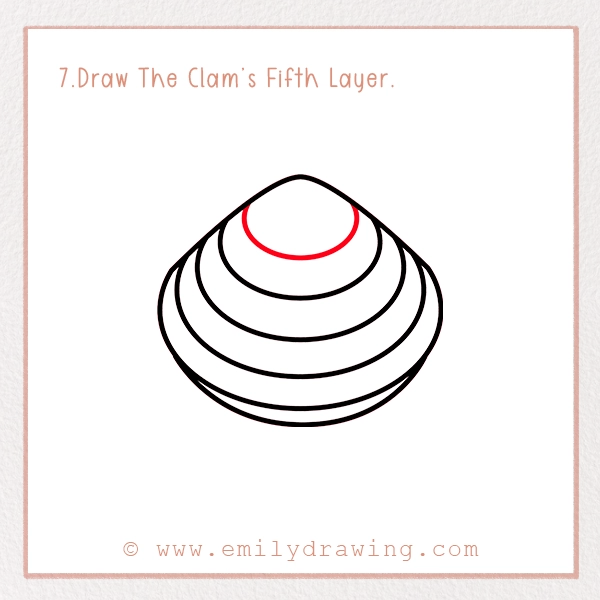
You’ll repeat the previous step to add the clam’s fifth layer. As you can see, the curved lines become shorter as you move toward the top of the clam. The space between these lines is pretty much the same.
Step 8 – Draw The Clam’s Sixth Layer
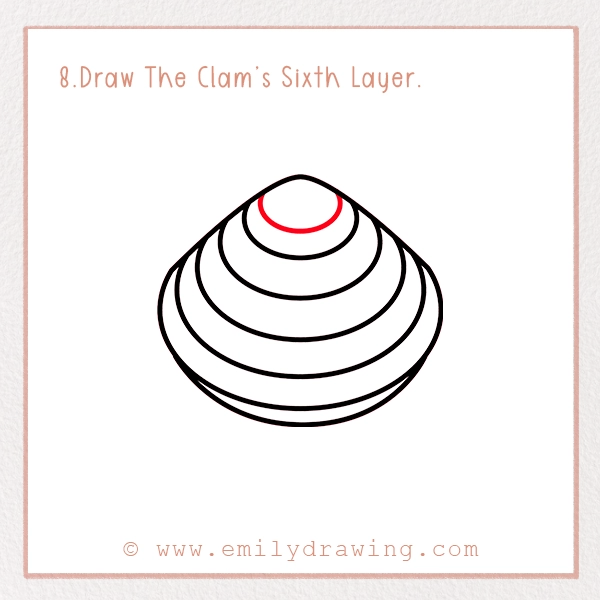
Finally, you’ll add the clam’s sixth layer, which is a shorter curved line. Additionally, the space between the fifth and sixth lines is slightly smaller than the other, with the first layer still being the smallest. The clam’s foot is located on the lower side of the body, extending from the head. It’s used for moving and burrowing.
Step 9 – Color In Your Drawing!
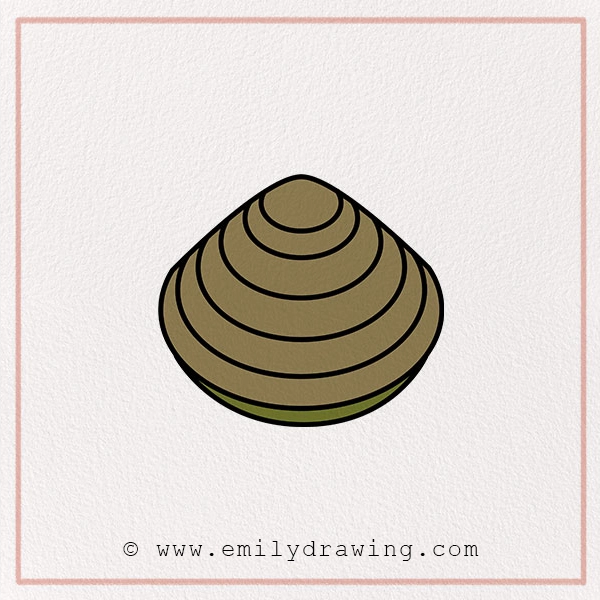
Now, it’s time to color in your clam drawing. Our clam is brown with black lines, and the very first layer is a shade of dark green. If you want to get creative, you can give your clam a different color. You don’t always have to stick to reality when coloring your drawings. Of course, you also want to color your background to match the environment. This could be a clam underwater or resting on the sand.
Pin it now, Draw later!
Interesting Facts About The Clam
Giant Clams can be found in the Pacific and Indian oceans, while Soft Shell Clams are found on the East and Pacific Coasts. On the East Coast, they’re found from Canada to North Carolina. On the Pacific Coast, they’re found in Alaska, California, and Washington.
The Pygmy Pea Clam can be found in Europe and Asia. Their specific locations include eastern and western Europe, southwestern Siberia, and northeastern Kazakhstan.
Did You Know?
- A clam’s diet consists of microscopic organisms and organic matter, such as zooplankton, phytoplankton, and detritus.
- The layers of a clam’s shell are the periostracum, prismatic, and nacreous.
- When an irritant such as a grain of sand is trapped between the shell and mantle, the clam can produce pearls. This is because the mantel creates layers of nacre around the irritant.
- The average lifespan depends on the clam’s species and environment, but it can range from as little as 1 year to over 500 years.
- Due to overharvesting, Giant Clams are protected under the Endangered Species Act.
We hope you had fun with our “How To Draw A Clam” tutorial. You’re welcome to share your drawing with us by posting on social media with #EmilyDrawing! If you’re interested in drawing other sea creatures or animals in general, check out the tutorials on our site. We offer many easy-to-follow drawing tutorials.
Get the FREE Printable Drawing Guide