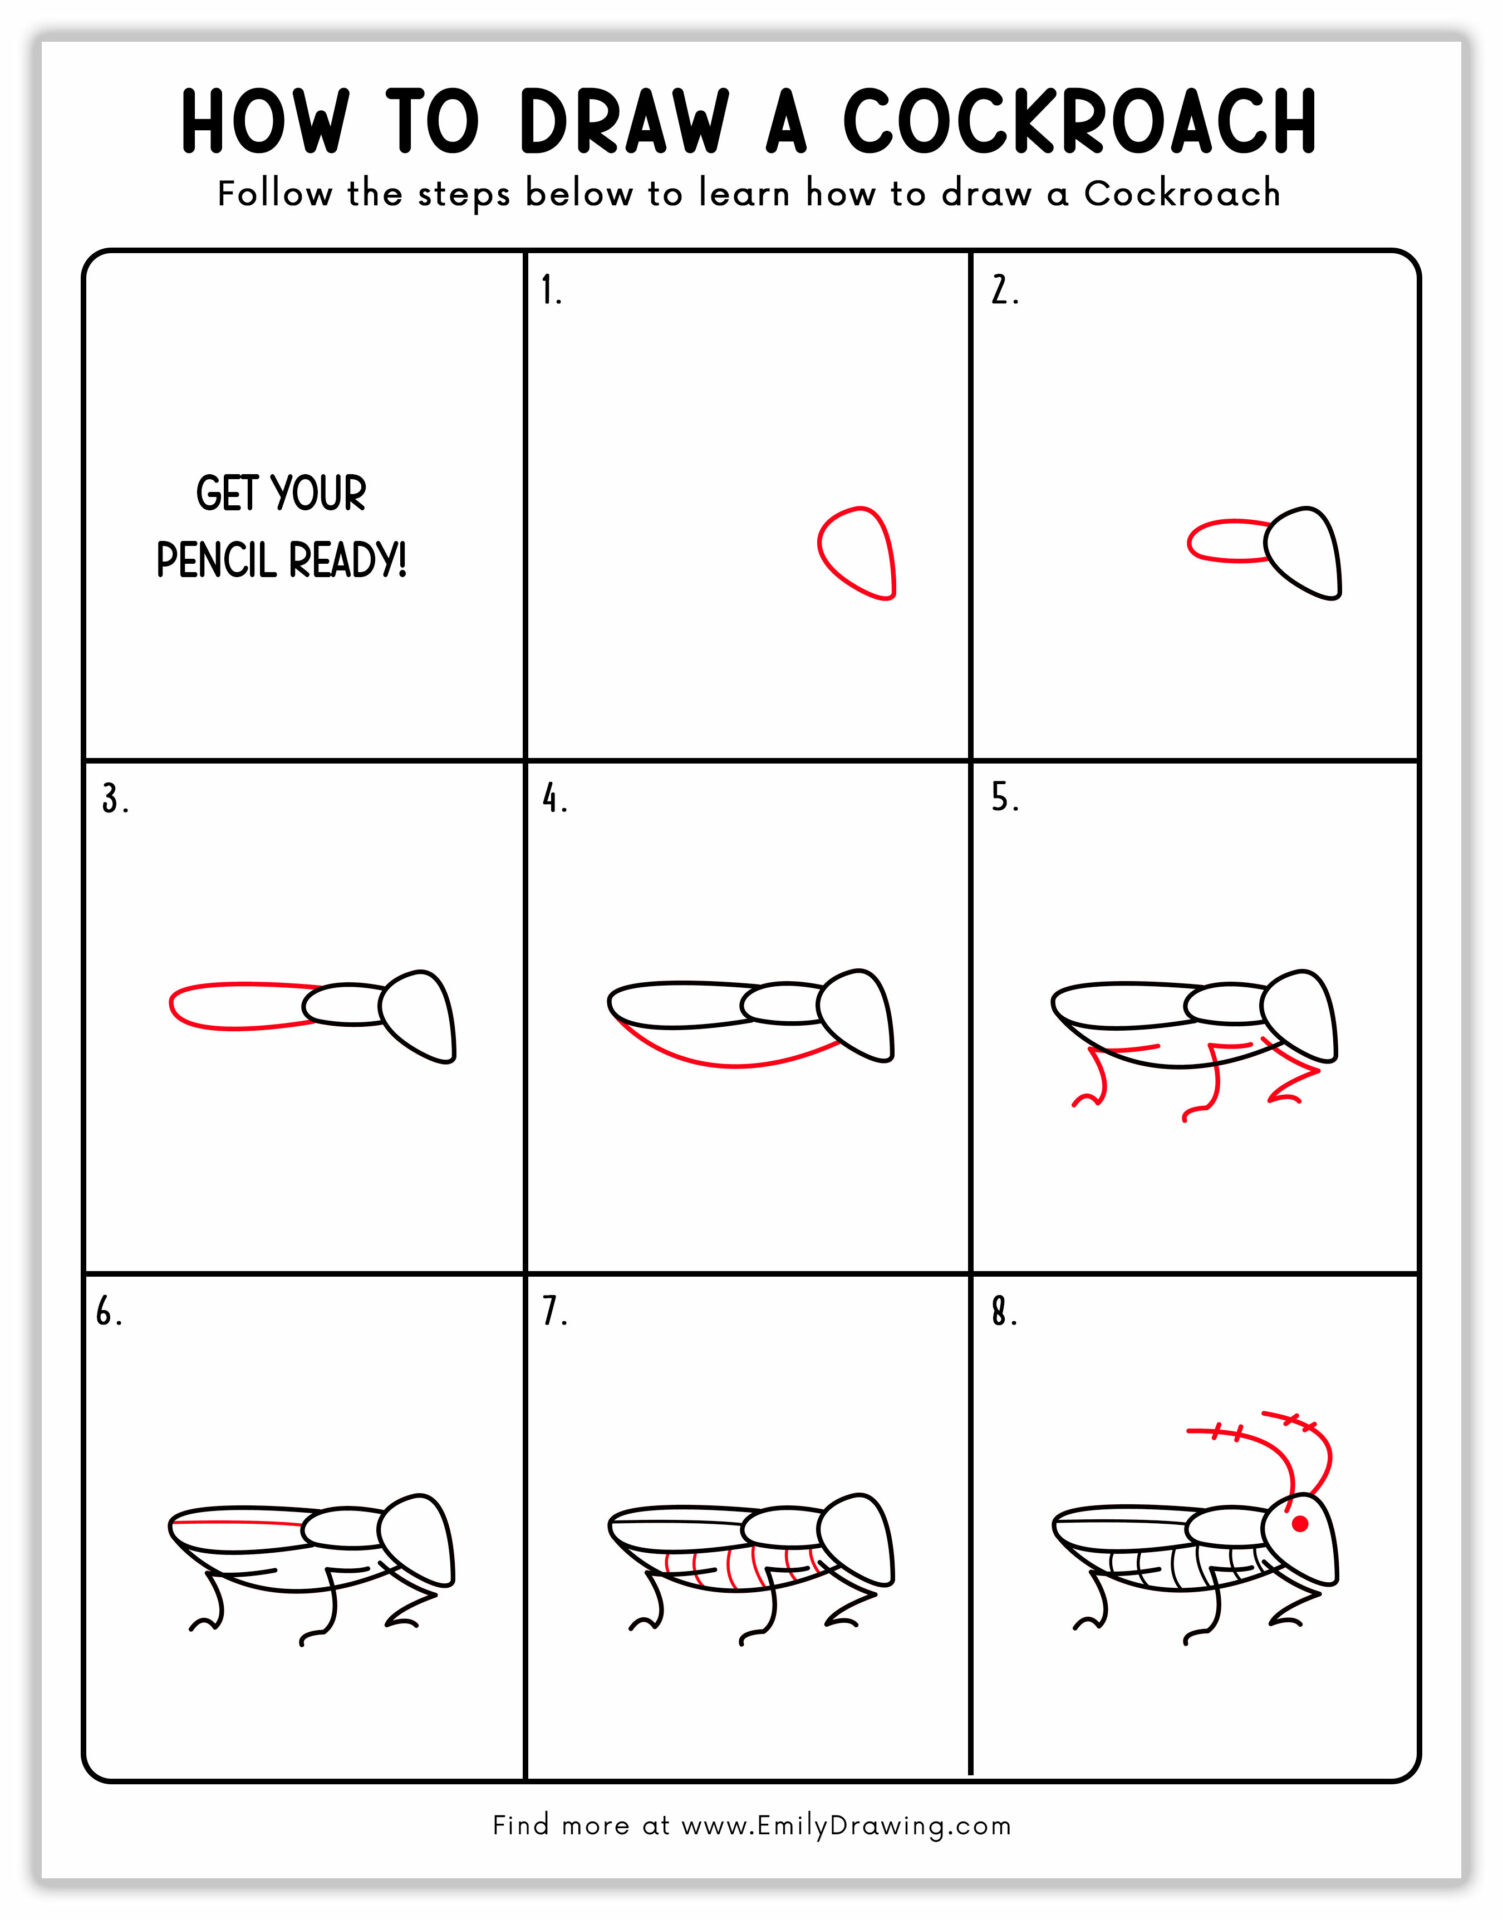
Drawing a cockroach is one of the easiest tasks for kids and novice artists. If you want to start your artistic journey, sketching a cockroach can be a good idea—especially if you’re also interested in similar bugs like in our how to draw a beetle tutorial. There are no complexities in drawing it, so you can add them in your sketchbook without any difficulty—just like when learning how to draw a beetle.
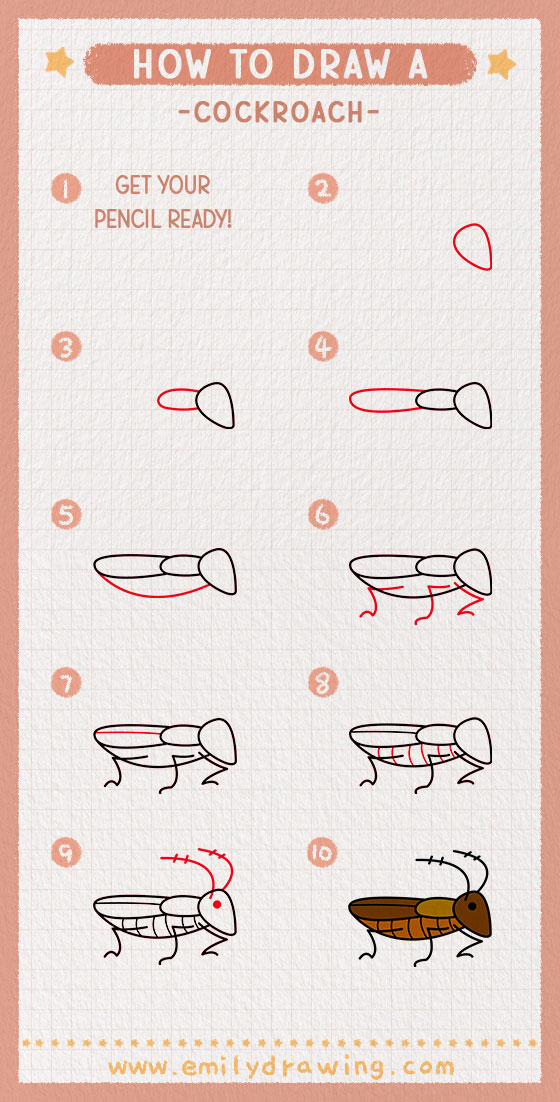
You need to complete the eight steps in this cockroach drawing tutorial to sketch a basic version of the insect.
How to Draw Cockroaches in Detail?
Before starting the tutorial, make sure you have all the important art supplies. Moreover, collect some reference pictures of cockroaches in different poses and backgrounds. These pictures will help you draw a realistic cockroach and unleash your creative powers.
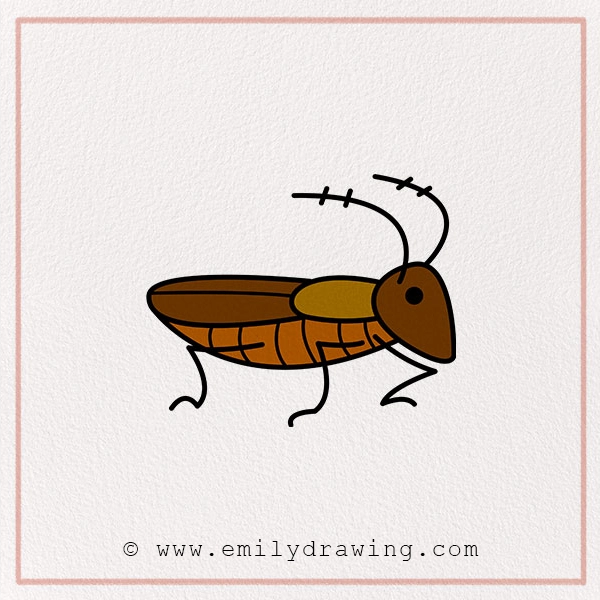
Materials:
- a piece of paper
- a pencil for the guiding lines and sketching
- an eraser
- a black sharpie or a pen for the outlines
- markers or colored pencils for coloring
- our printable drawing guide (Join my Email List below to get this Tutorial)
Here are my RECOMMENDED Art Supplies!
- Crayola Coloring Set (140 Pieces – Mega Value!)
- 24 Colored Crayon Set
- A4 Printer Paper
- Crayola Coloring Pencils
- HP Home Printer with Instant Ink!
Time needed:
15 minutes.
How to Draw a Cockroach — Let’s get started!
Step 1 – Sketch the Cockroach’s Head
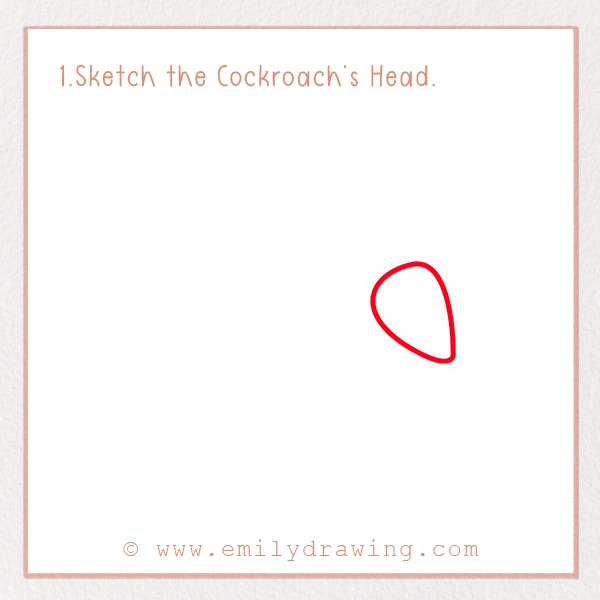
In an insect’s body, the crucial part is its head. It is the starting point of every insect drawing so you have to sketch its shape and size cautiously.
Put your pencil in the left of the page. Here, draw an oval shape that has a sharp end at the front, facing the downward direction. This depicts the mouthparts of this insect.
Tip: Make sure the oval is rounded instead of elongated to have a realistic cockroach drawing.
Step 2 – Sketch the Thorax
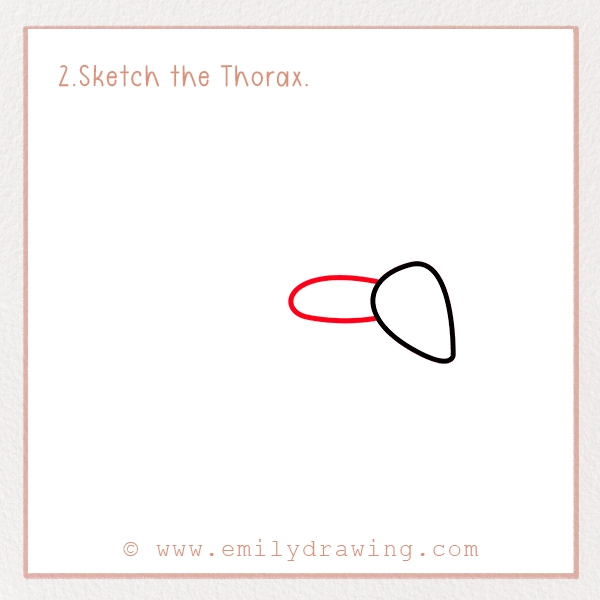
In cockroach anatomy drawing, we consider three body parts: the head, thorax, and abdomen. We have drawn the head, so let’s sketch the thorax now.
To do this, put your pencil on the back side of the head. Here, draw an elongated oval shape. Make sure this shape is wider at the bottom to give a two-dimensional look to your drawing.
The thorax should be a bit larger than the head.
Step 3 – Sketch the Abdomen
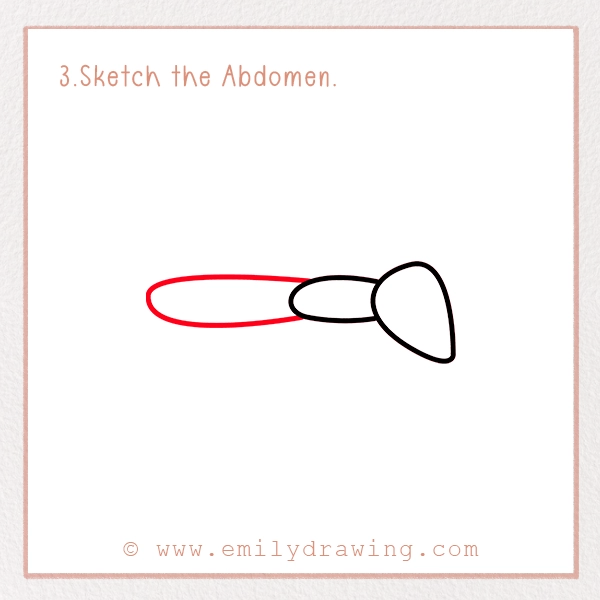
Finally, we are sketching the third part of the body. Abdomen is the largest one among the three sections so make sure it is at least double the size of the thorax.
Beneath the thorax, sketch an elongated oval shape. It should also be a bit wider at the bottom as shown in our reference picture.
For having this shape, you can sketch the top line as a curved one, and give the bottom a slightly oval shape.
Step 4 – Draw the Belly of the Cockroach
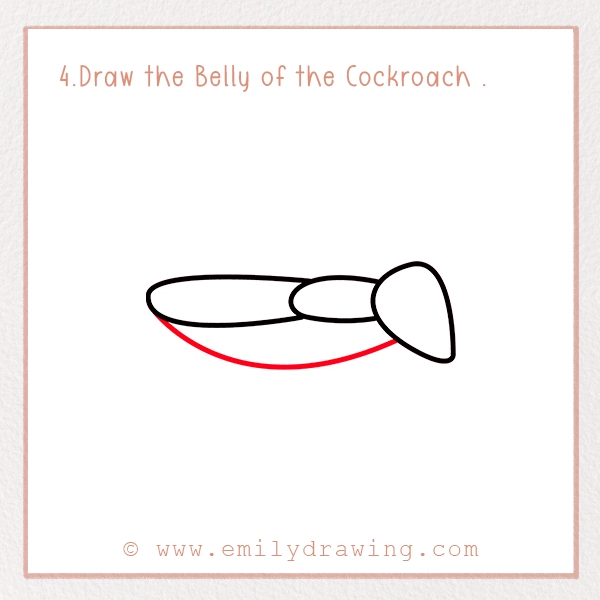
Cockroaches have a huge belly. This creature can’t die with the belly up (except for any rare case) because of its extreme belly fat.
In this step, we are going to draw the famous belly of this insect. For this, you have to draw an oval shape or a half-circle at the bottom, starting from the head and ending at the tip of the abdomen. You can refer to our picture for better understanding.
Step 5 – Sketch the Legs
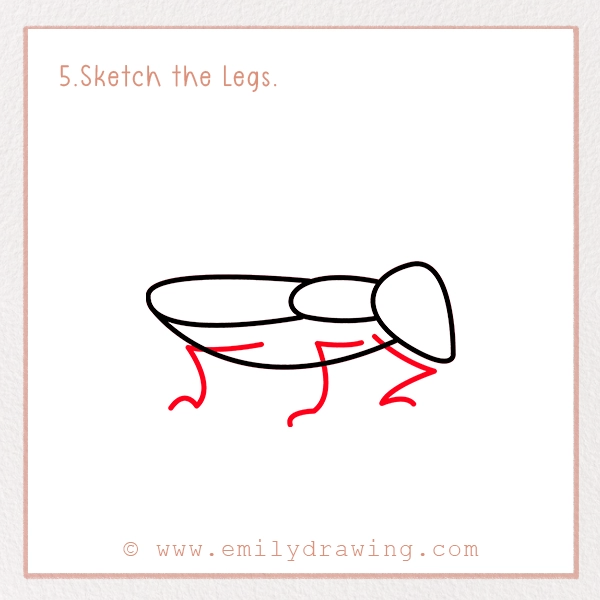
Insects have six legs; three on each side. But, in the drawing, we are sticking to the front three legs only to avoid messiness.
Cockroaches’ legs have five portions: one attached to the body, the second acting as a joint, the third is the thick thigh bone before the joint, the fourth longest thin line, and the fifth is the claw.
For drawing realistic legs, put your pencil inside the belly, draw a thick line before bending the leg, and then draw a thin line before sketching a claw shape.
Check out our reference picture to get a better idea of the location of these legs.
Step 6 – Draw the Wings on the Abdomen
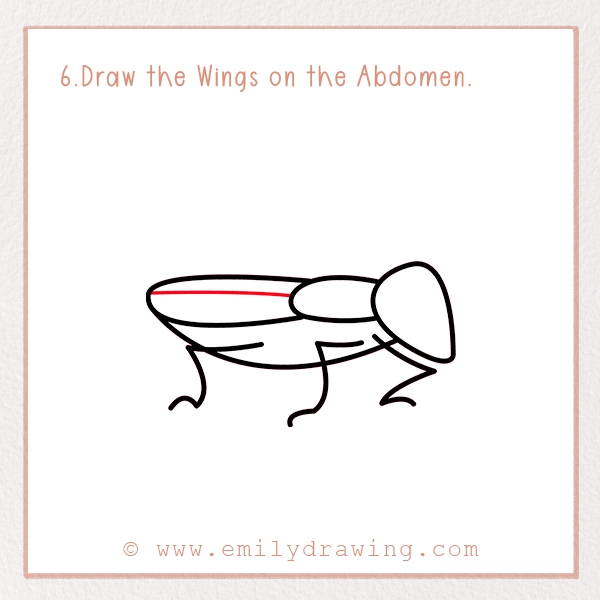
This is the simplest step in this How to Draw a Cockroach guide. We are going to learn how to draw wings on the abdomen.
Cockroaches have two wings on the abdomen, much like other insects you might sketch—see our how to draw a fly for comparison. As they don’t fly much, their wings remain attached to their abdomen most of the time. So, we only need to add a horizontal line in between the abdomen to indicate the wings, as you would in the fly drawing tutorial.
Make sure the line follows the shape of the abdomen.
Step 7 – Draw Belly Segments

Start your favorite music in the background as this step is going to take a while. You need to sketch different segments on the cockroach’s belly to give a realistic look to it.
To do this, draw slightly curved lines, following the natural shape of the body. These lines should be evenly spaced for aesthetic purposes.
Step 8 – Draw the Facial Features
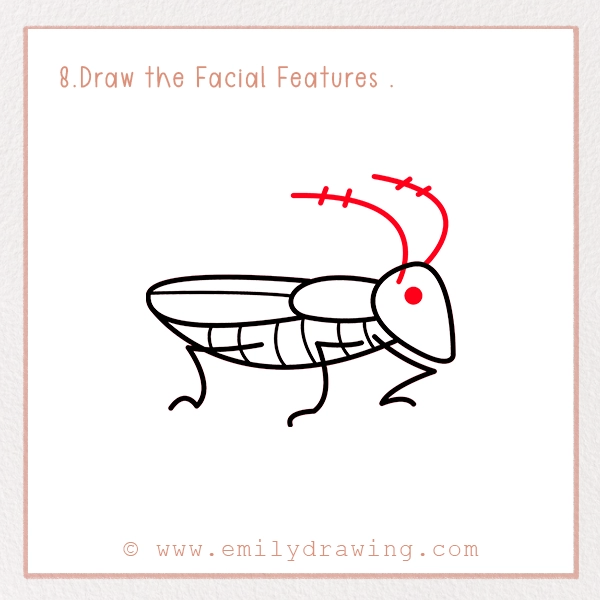
It is the last step where we need to give the final look to our cockroach’s face. Here, you should draw the eye and antennas of the insect.
First of all, draw a dark circle near the top of the head. Inside it, add a small white dot to depict the light area.
Now, sketch the antennas on the top of the head. For this, draw two curved lines that taper at the end. On these lines, add two small horizontal lines to segment them.
That’s it! Your cockroach sketch is complete. But if you want to refine it further, you can go with the next step.
Step 9 – Coloring Your Cockroach Pencil Sketch

Colors are a crucial part of giving a lively and realistic look to your drawing. Kids love adding the dash of colors in their sketches to enjoy the process of drawing.
Mostly, cockroaches are red in color. But, different species live in various habitats and have unique life preferences. So, their colors are different from each other.
Most of them have shiny black, tan, reddish-brown, dark brown, and white color. There are banded cockroaches, too, that have various color bands on their bodies.
So, you can color your cockroach drawing as you want.
Pin it now, Draw later!
Background Tips for Cockroach Drawing
Cockroaches can be seen in various places, such as houses and offices. You can draw any setting in the background to make your painting look realistic.
Alternatively, you could sketch groups of cockroaches of different species—or even mix in other insects using guides like how to draw a cricket. If you prefer a simpler background, you can use a light brown color to depict the floor on which the cockroach is moving.
Once you have finalized your cockroach sketch, you can share it with your social media family, announcing the beginning of your artistic journey.
For more animal and insect drawing guides, do check out our blog—especially our tutorial on how to draw a cricket.
