Have you heard the loud chirping sound in the summer nights? I bet it annoys a lot of you as it interferes with our sleep.
When this chirping sound is annoying for adults, it might be fascinating for kids. They might want to learn about the insect creating the noise and how to draw it in their sketchbooks, much like they would when learning how to draw an ant.
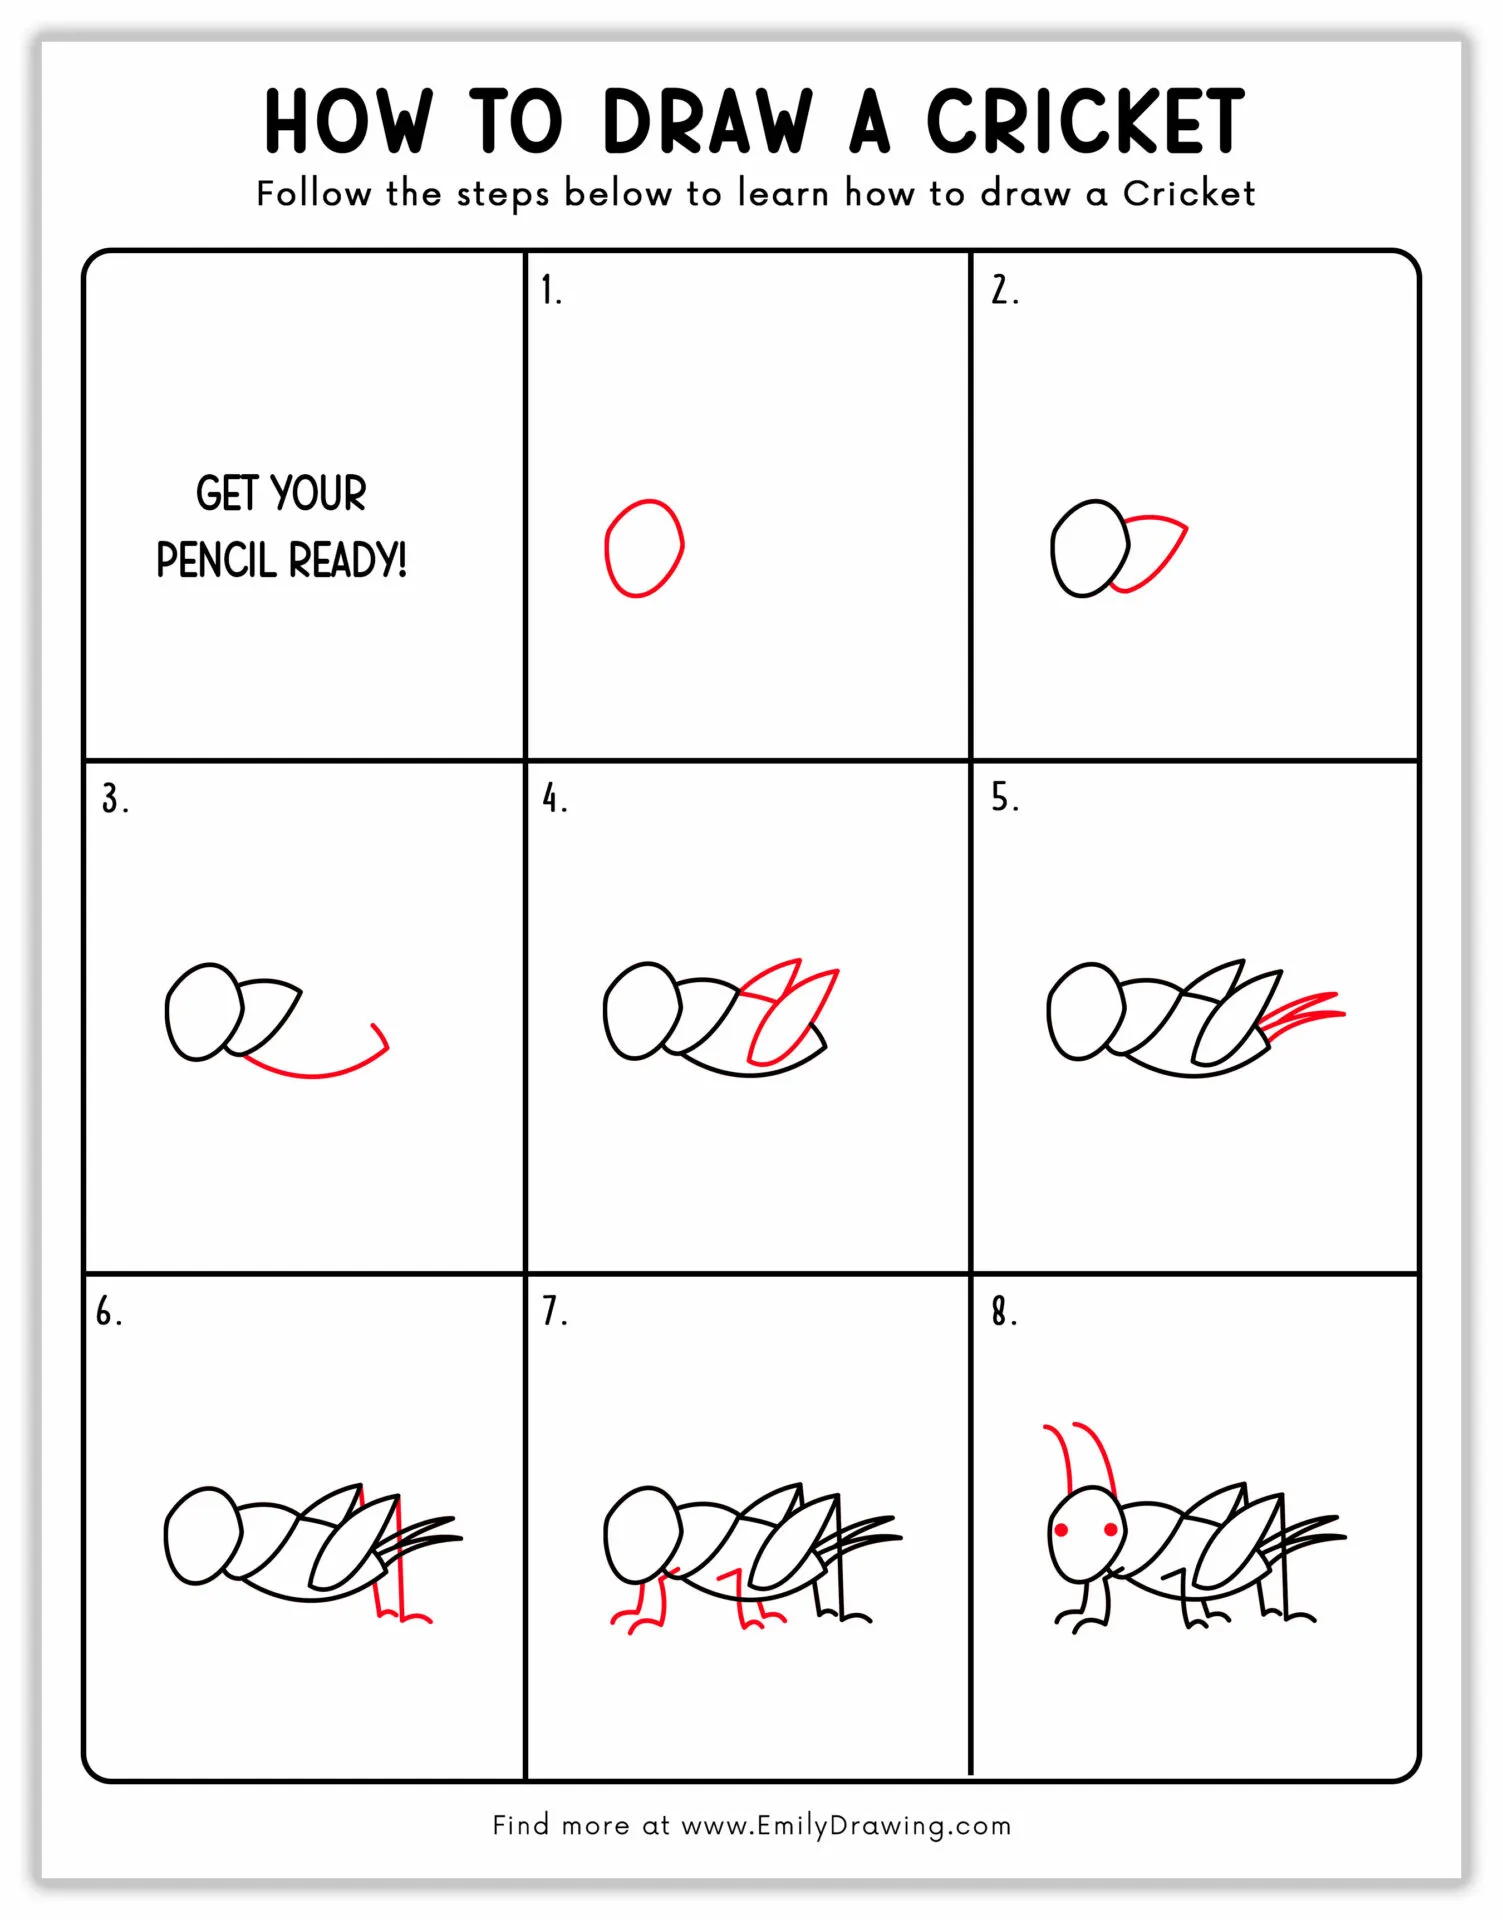
That’s why I have added this eight-step guide on how to draw a cricket insect on this blog—perfect for kids who also enjoy tutorials like how to draw an ant. This insect sketch tutorial will help you create a cricket painting in your sketchbook within 30 to 35 minutes.
Before we delve into the tutorial, you may want to learn more fascinating facts about this insect.
Fun Facts about Cricket Insect
- Crickets make the chirping noise by rubbing their wings together — a fun fact if you’re curious about how crickets chirp. They do this activity to attract females.
- They can jump up to 20 times their body length.
- They eat plants, insects, and seeds because they are omnivores.
- In many cultures, they are considered a symbol of luck and happiness.
- They have ears on their legs, which allows them to hear sounds.
- They can change their chirping speed, depending on the weather.
8-Step Easy Guide of How to Draw a Cricket Insect for Beginners
I suggest you read the whole guide before starting your painting. It will help you collect important art products and reference pictures. It will also activate your creative side, allowing you to create a unique and personalized insect painting.
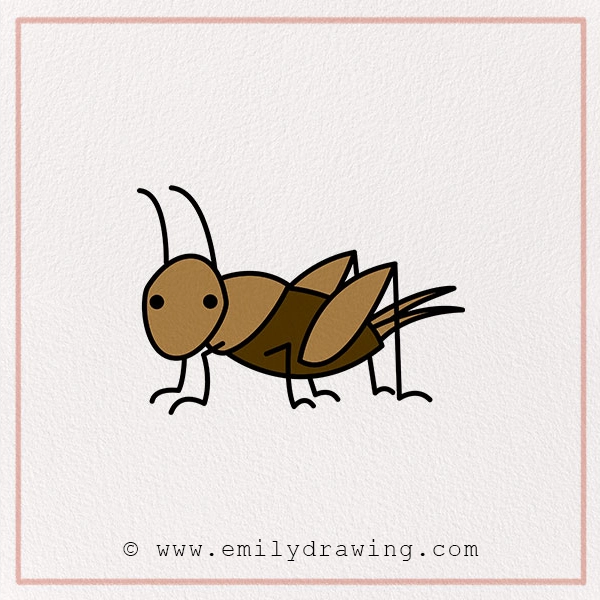
Materials:
- a piece of paper
- a pencil for the guiding lines and sketching
- an eraser
- a black sharpie or a pen for the outlines
- markers or colored pencils for coloring
- our printable drawing guide (Join my Email List below to get this Tutorial)
Here are my RECOMMENDED Art Supplies!
- Crayola Coloring Set (140 Pieces – Mega Value!)
- 24 Colored Crayon Set
- A4 Printer Paper
- Crayola Coloring Pencils
- HP Home Printer with Instant Ink!
Time needed:
15 minutes.
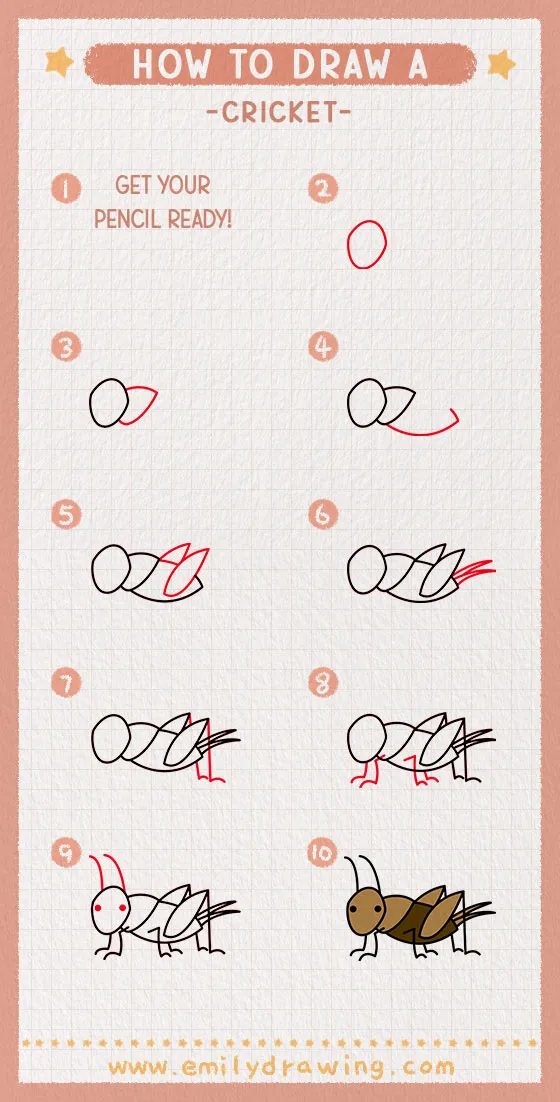
How to Draw a Cricket — Let’s get started!
Step 1 – Sketch the Head
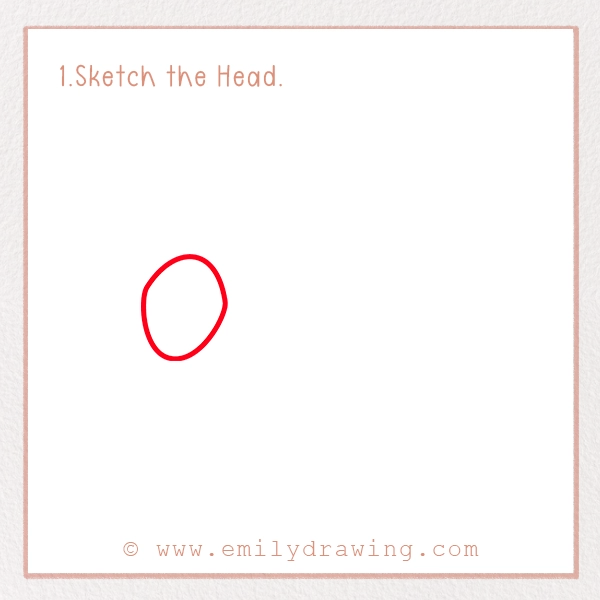
Start by drawing a small oval shape on the right side of the page. This oval shape is the head of the cricket and the base of our whole drawing.
You should make sure the oval has small edges on either side of it to represent the real shape of the head.
Step 2 – Add the Thorax
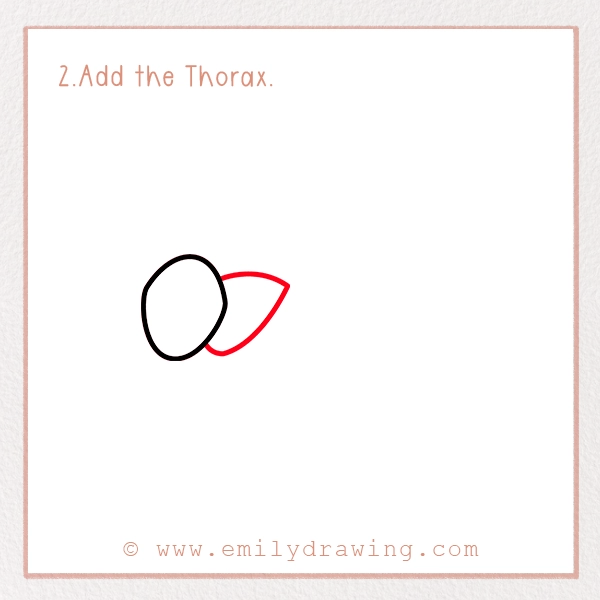
Beneath the head, there is always a thorax in an insect, which is crucial for creating a realistic cricket drawing. It is slightly larger than the head, so you should keep this fact in mind while drawing the realistic cricket painting.
To draw this, put your pencil on the right side of the head, and sketch a curved shape resembling a half-oval. It should have an edge at the top, tilting toward the right direction, as shown in our picture.
Step 3 – Create the Abdomen
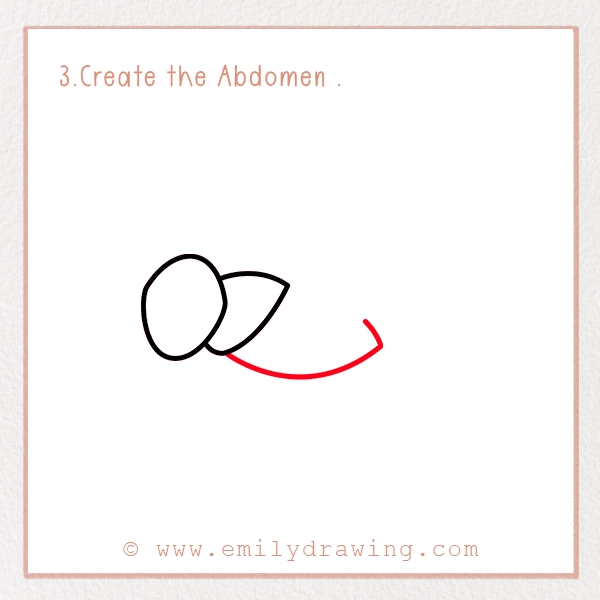
In insects, abdomens are mostly 2 to 3 times larger than the head. This body part is in elongated form.
To sketch it, you should put your pencil on the bottom of the thorax, and sketch a curved line. It could resemble an oval shape.
This line should tilt downward, and then curve back up, creating an edgy end. The upper line should be shorter, as shown in our picture.
Step 4 – Create the Wings
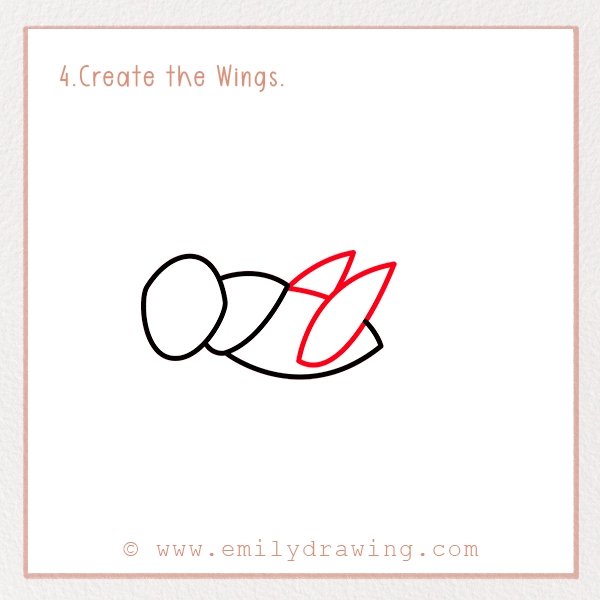
A cricket has two wings that rub together to produce noise—a unique feature also worth exploring when you draw a fly. They are on either side of the body and are attached to the abdomen, much like in this helpful guide on how to draw a fly.
To sketch them, you should draw a small line, starting from the upper thorax portion. It should be in a curved shape, and stop before connecting to the edge, leaving a space in between.
In that space, you should draw a tear-drop shape. Half of it should be inside the abdomen and the other outside of it. It should be facing the backward direction.
Just above that wing, on the outline of the abdomen, create a half tear-drop shape. It will represent the wing on the other side of the body.
Step 5 – Add the Tail
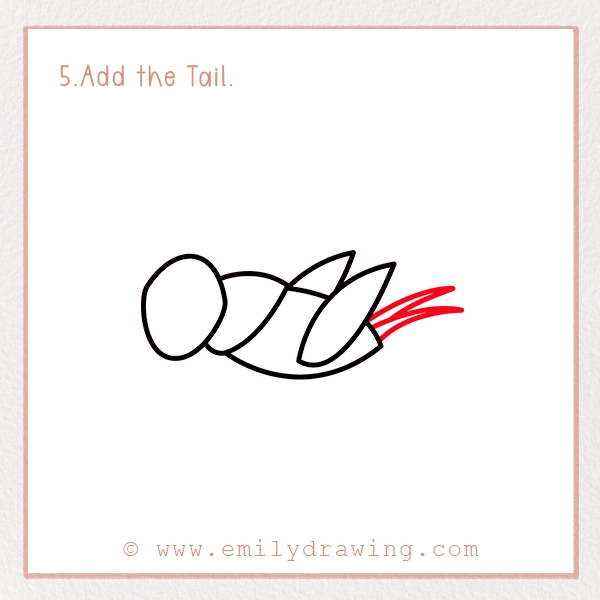
At the end of the abdomen, draw two thin spikes pointing backward. They may also resemble triangular shapes. Ensure they face upward and taper at the ends, as these shapes represent the insect’s tail.
Step 6 – Sketch the Back Legs
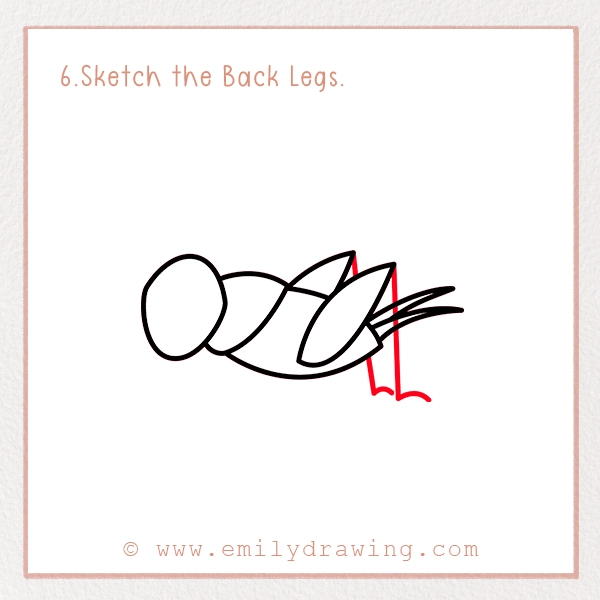
Crickets have two long and strong back legs that enable them to jump 20 times their body length, similar to what you’ll find in our how to draw a grasshopper guide. In this step, we are going to sketch these.
Starting from the edge of the wing, draw a straight long vertical line. End this line with a paw shape to give the appearance of the leg.
Now, draw a small line from the second wing, ending on the surface of the first wing. It will represent the second hind leg. At last, at the bottom of the thorax, just behind the first hind leg, draw another one. It should start from the outline of the abdomen.
Step 7 – Sketch Other Legs
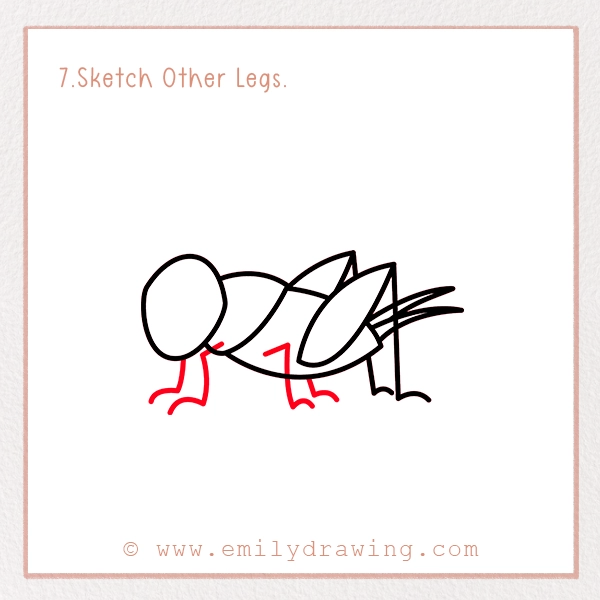
A cricket has a total of six legs, three on each side. We have already drawn two legs, so it is time for the next four. These four legs are used for walking and grabbing things, just like in our grasshopper drawing tutorial, which features similar anatomical details.
To draw them, you need to sketch four thin curved lines, bend slightly to create a knee, and end at the hook shape. You can create them at an even distance on the abdomen.
Step 8 – Sketch the Facial Features
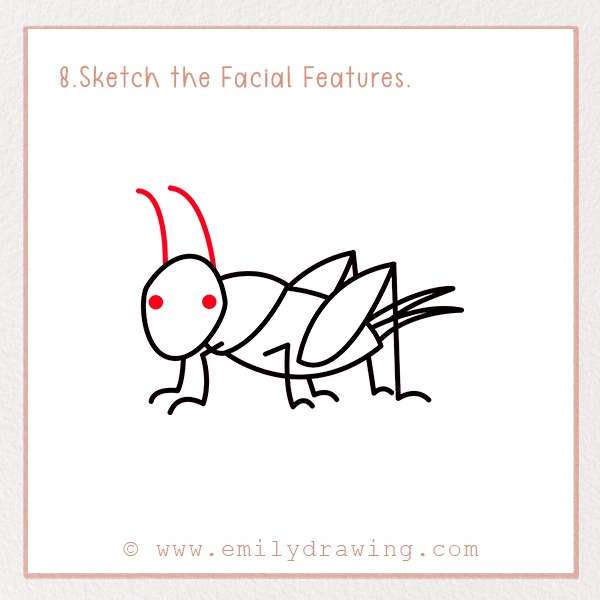
It is the last step in which we need to draw the eyes and antennas. For eyes, you have to sketch two dark circles near the small edges of the head on both sides.
The next thing is to draw two thin lines at the top of the head, representing the antennas. They should curve slightly at the top.
That’s it! Your drawing is complete. But, if you want to enhance it, the next step is going to help you immensely.
Step 9 – Drawing of Cricket with Coloring

There are different species of cricket insects, each having their unique set of colors. Most of the crickets have brown colors, with a mixture of dark and light shades in their body. You can check our picture to get an idea of this kind of cricket.
Except for it, some other famous colors of crickets are:
- Black
- Green with whitish wings
- Gray silver
- Light yellow or tan
You can choose these colors or can go with any unique one too. It is entirely your choice.
Pin it now, Draw later!
Once you complete the drawing, share it with the world through social media.
