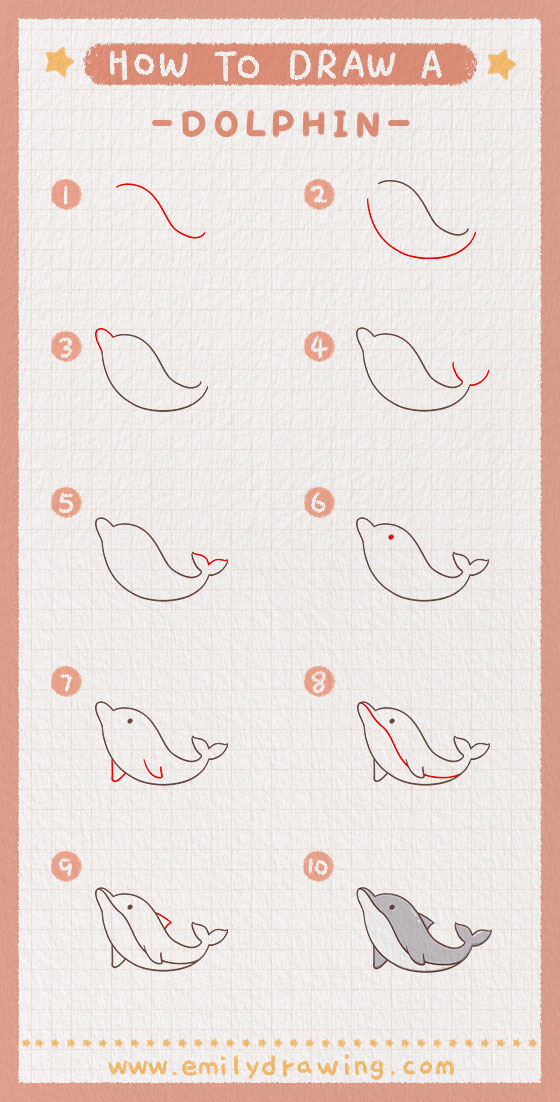
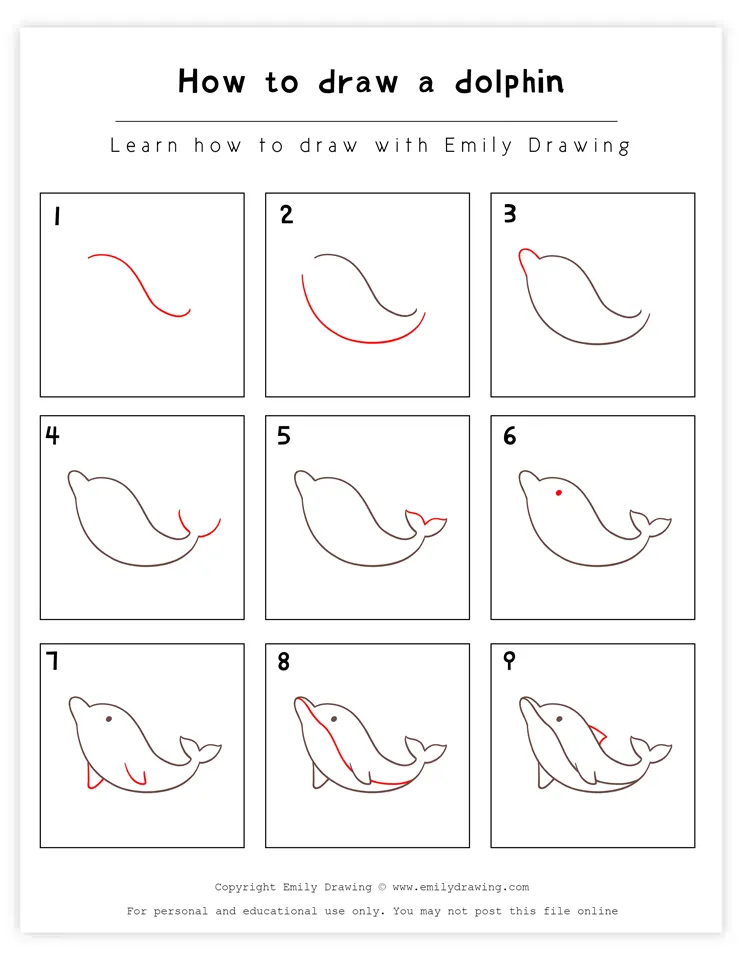
Welcome to our fun 10-step drawing tutorial: today, we’re going to learn how to draw a dolphin together with a clear step-by-step dolphin drawing guide!
Dolphins are such fascinating animals. First of all, they are extremely intelligent: one of the craziest abilities of dolphins is sonar. Sonar is echolocation, which helps a dolphin see underwater. They basically use echoes to interpret the location of objects in the water.
Dolphins are mammals, just like humans: dolphins breathe air, give birth to live young, are warm blooded, nurse their babies with milk, and can have hair.
Alright, with all that said—find some of your favorite drawing materials and let’s get moving with this tutorial. Keep reading below for Step 1!
Materials:
- a piece of paper
- a pencil for the guiding lines and sketching
- an eraser
- a black sharpie or a pen for the outlines
- markers or colored pencils for coloring
- our printable drawing guide (Join my Email List below to get this Tutorial)
Here are my RECOMMENDED Art Supplies!
- Crayola Coloring Set (140 Pieces – Mega Value!)
- 24 Colored Crayon Set
- A4 Printer Paper
- Crayola Coloring Pencils
- HP Home Printer with Instant Ink!
Time needed:
11 minutes.
How to Draw a Dolphin — Let’s get started!
Step 1 – Draw the top of the dolphin.
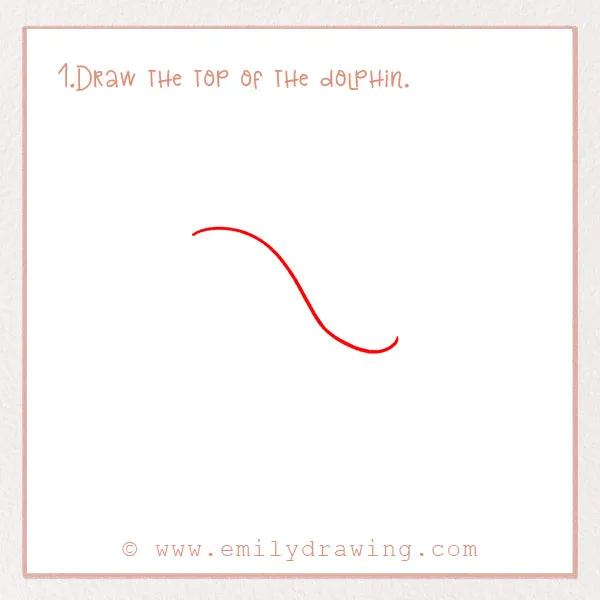
To begin your easy dolphin sketch, draw a curved line about three or four inches from the top of the page. It should be a sideways S-shape. It doesn’t have to be perfect! It should take up a lot of the page.
This forms the top contour of the dolphin’s back!
Step 2 – Continue the shape of the dolphin.
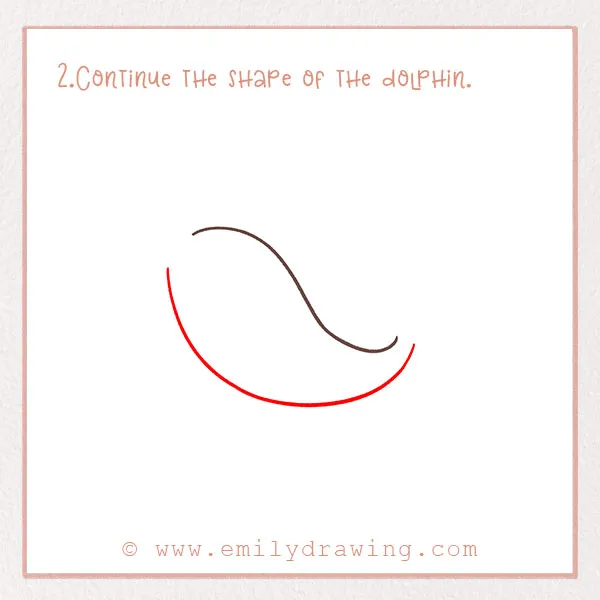
Underneath the first line, draw a second line a few inches below. It will also be curved—check out the photo! It’ll be a very wide U shape. This forms the belly of the dolphin.
Step 3 – Draw the dolphin’s nose.
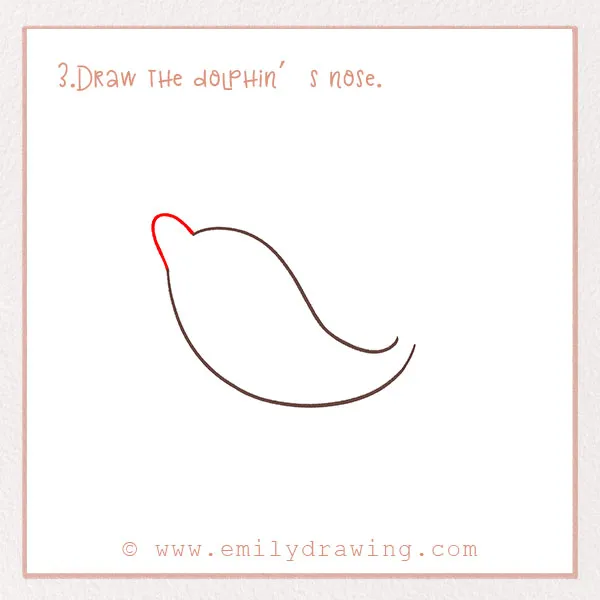
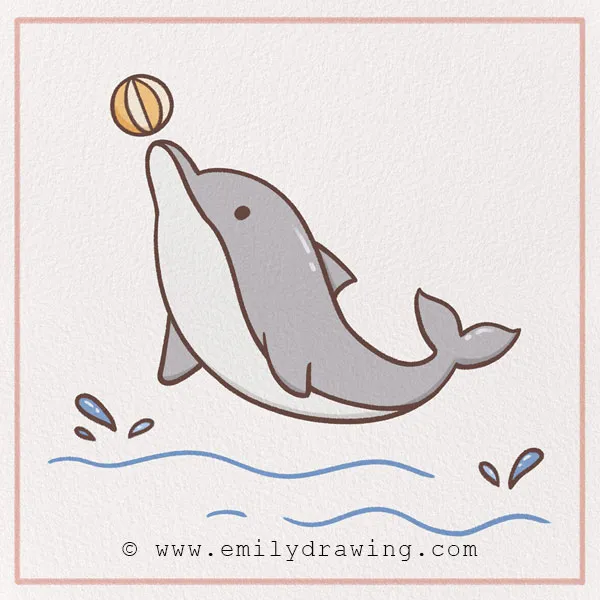
Dolphins have very distinct noses, also called snouts. Let’s draw a nose on the dolphin. Have you ever seen dolphins play with balls on their noses? It’s very impressive!!
On the left side, you should have a small gap in between the curved lines. Draw a line that connects them. It should be a small curved line. Check out the photo.
Step 4 – Start drawing the dolphin’s tail.
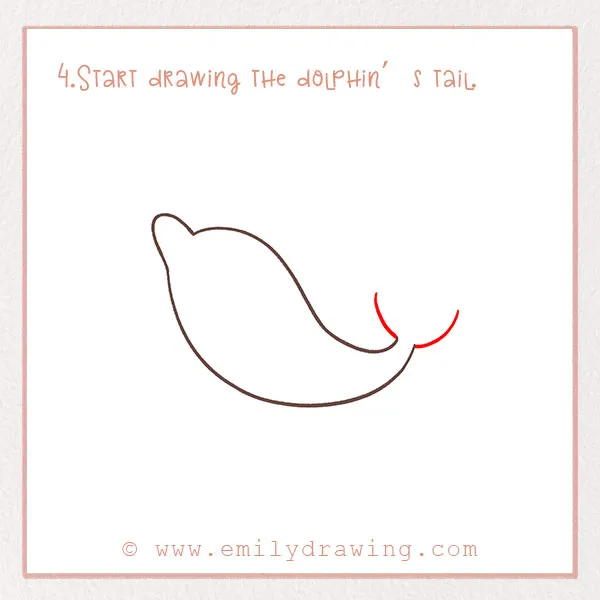
Let’s continue by drawing the dolphin’s tail! On the right side of the body, draw two curved lines extending up and out.
We’re going to finish the shape of the tail in the next step.
Good job!
Step 5 – Complete the dolphin’s tail.
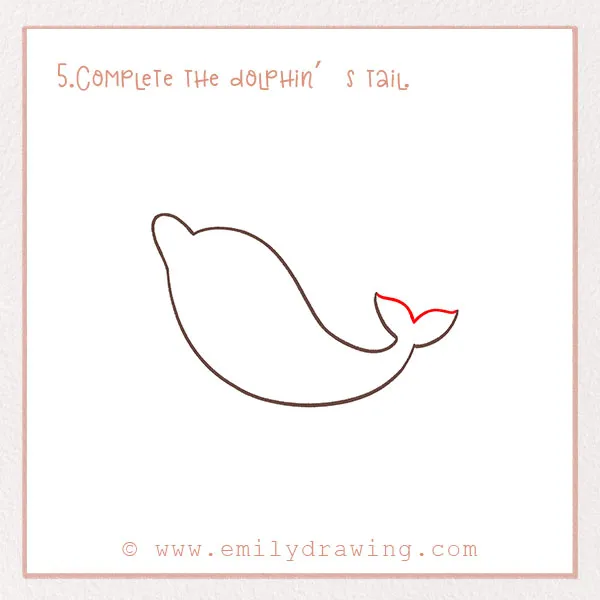
Where we left off in Step 4, let’s add two more lines. Make them go inwards so that it forms the shape of the fin. Dolphins have uniquely curved fins, unlike sharks who have more angular ones.
Step 6 – Draw the eye of the dolphin!
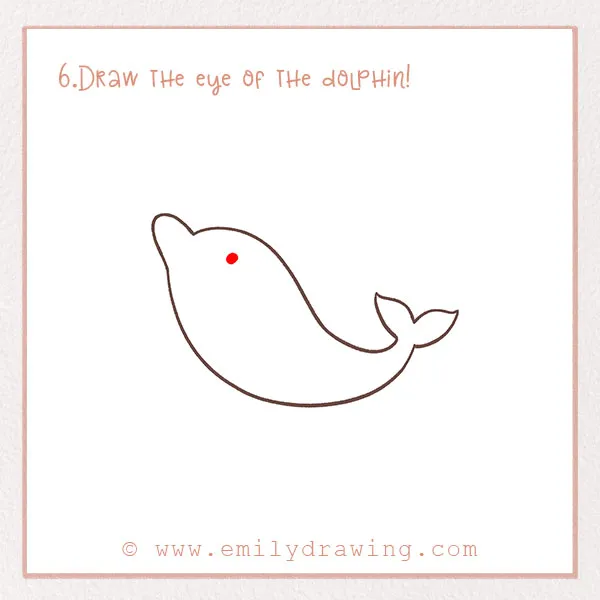
We’ve got to add the eyes. Did you know that dolphins are believed to see only in grayscale and some shades of blue and green? However, they generally do have good eyesight both in and out of water.
Since our dolphin is swimming to the side, we can only see one eye. On the upper left of the dolphin, close to the nose, draw a small dot for the eye.
Step 7 – Draw the two pectoral fins.
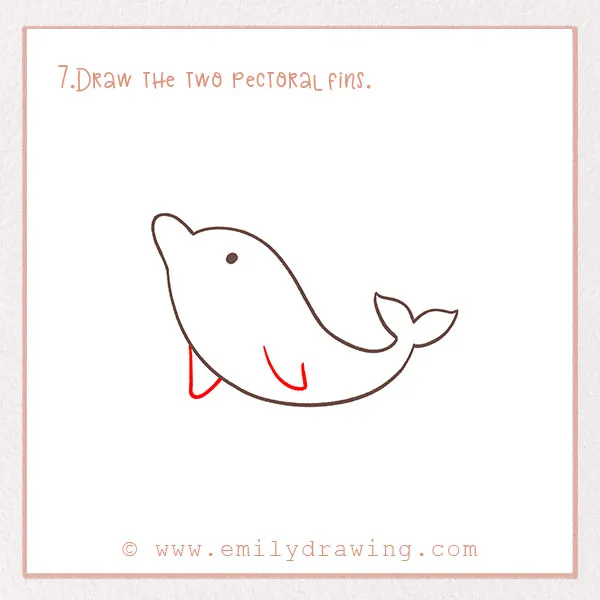
Draw two more fins! These are called the pectoral fins. These help a dolphin steer and control depth. Other sea creatures, like fish and whales, also have fins that help them steer.
In the main shape of the dolphin, draw a curved V shape. This forms the left pectoral fin. Next, underneath the belly, draw another V shape for the right pectoral fin. Check out the photo to get the perspective right!
Step 8 – Add detail to the body.
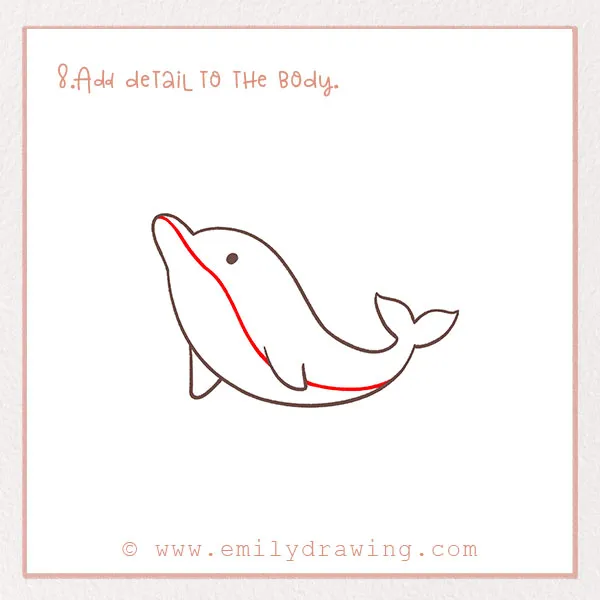
In this step, we’re going to add a bit more detail to the body to establish more perspective. Through the center of the body, draw a long curved line—it should go from the nose, through the fin, and back towards the tail. Look at the photo!
Now the belly of the dolphin is more clear.
Step 9 – Add the dorsal fin!
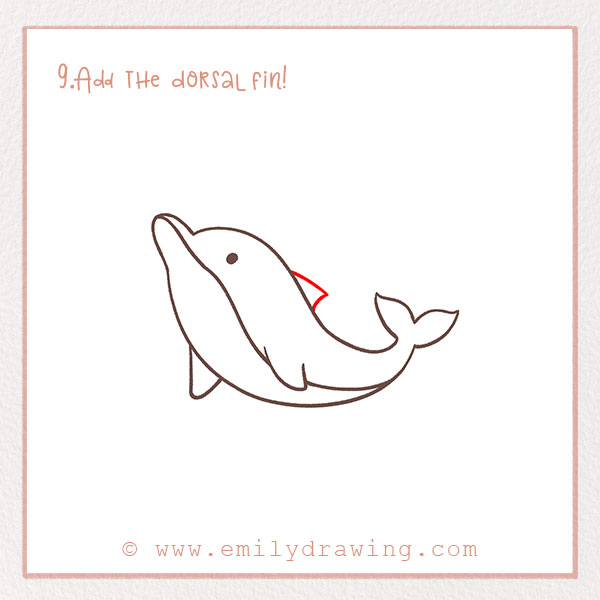
Dorsal fins help with stabilization among other things. If you’ve ever seen a dolphin swimming in the ocean, you probably first noticed it from seeing the dorsal fin poking out of the water as it swims!
On the top of the body, draw a triangle for the dorsal fin. Good job!!
You’re almost done!
Step 10 – Color in your dolphin friend!

Let’s color in the dolphin!! This is always a fun step. Find some colors and fill in your dolphin. Often, dolphins are a blue-grey. Go ahead and fill in the rest of the space, too! Make it look like your dolphin is swimming in the ocean.
Good job! You’ve finished drawing your dolphin! Give it a name!!
Complete your marine animal collection with How to Draw a Shark or How to Draw an Octopus.
We hope you had fun with this dolphin drawing for kids tutorial and learned some cool facts about dolphins. You might enjoy following along with the whale tutorial, too!
Show this to your family and friends, and share this drawing tutorial with them if you think they would enjoy it too! There are convenient social icons on this page to share it online.
If you enjoy drawing marine animals, you might also like How to Draw a Whale or How to Draw a Starfish.
Pin it now, Draw later!
