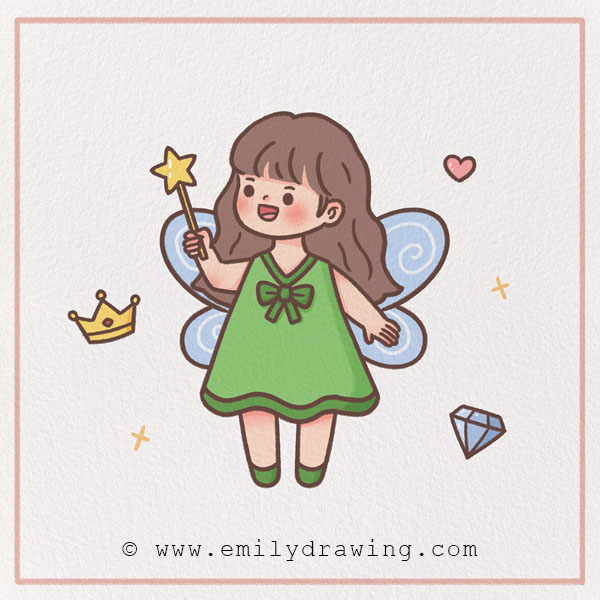
Hello and welcome to another 10-step art tutorial! Today, we are going to learn how to draw a fairy together in this fun guide to drawing fairies.
Fairies are very well-known from children’s stories, mythology, songs, and more—just like magical beings such as mermaids, as shown in our step-by-step mermaid drawing tutorial. While they are typically seen as fictional, some people may tell you fairies exist. They are known as cute little creatures that can fly. They are often depicted as able to become invisible! Additionally, they often have a bit of a mischievous side. Fairies have been depicted in folklore for hundreds and hundreds of years, so they have a very long history!
Do you know any stories with fairies? If so, you probably know a thing or two about them—and if you enjoy drawing fantasy characters, don’t miss our how to draw a mermaid tutorial too! Of course, there are lots of famous fairies, such as Tinker Bell from Disney!
Let’s get started on the fairy drawing tutorial now! Find some drawing materials and keep reading for Step 1. As always, we will have pictures to help you with this step-by-step drawing. Happy drawing!
Materials:
- a piece of paper
- a pencil for the guiding lines and sketching
- an eraser
- a black sharpie or a pen for the outlines
- markers or colored pencils for coloring
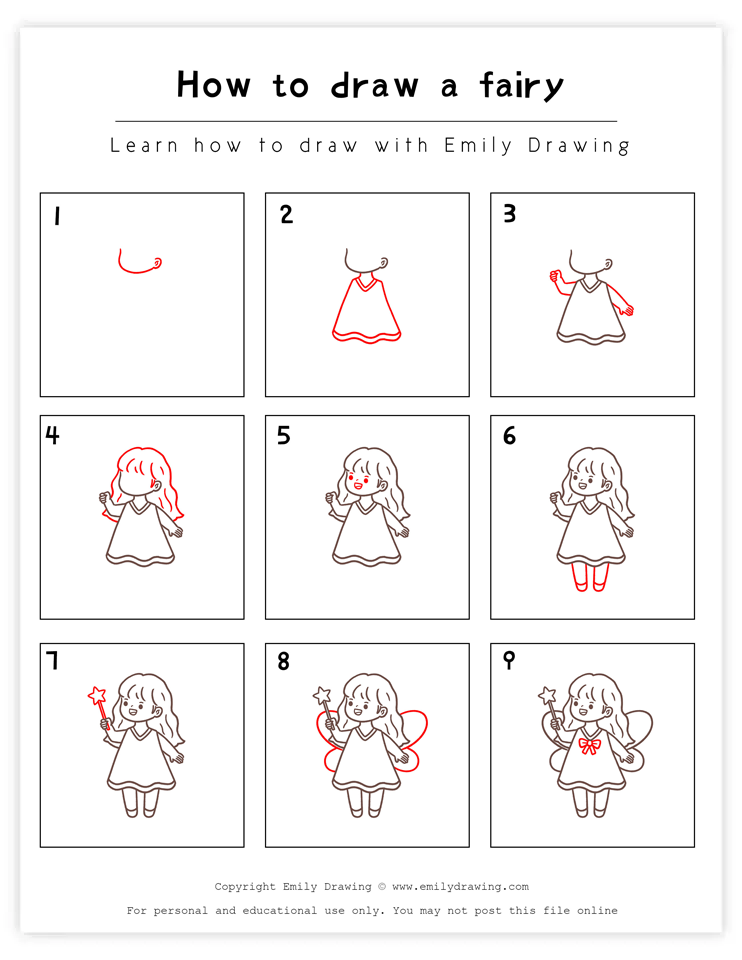
- our printable drawing guide (Join my Email List below to get this Tutorial)
Here are my RECOMMENDED Art Supplies!
- Crayola Coloring Set (140 Pieces – Mega Value!)
- 24 Colored Crayon Set
- A4 Printer Paper
- Crayola Coloring Pencils
- HP Home Printer with Instant Ink!
Time needed:
10 minutes.
How to Draw a Fairy — Let’s get started!
Step 1 – Draw the fairy’s head.
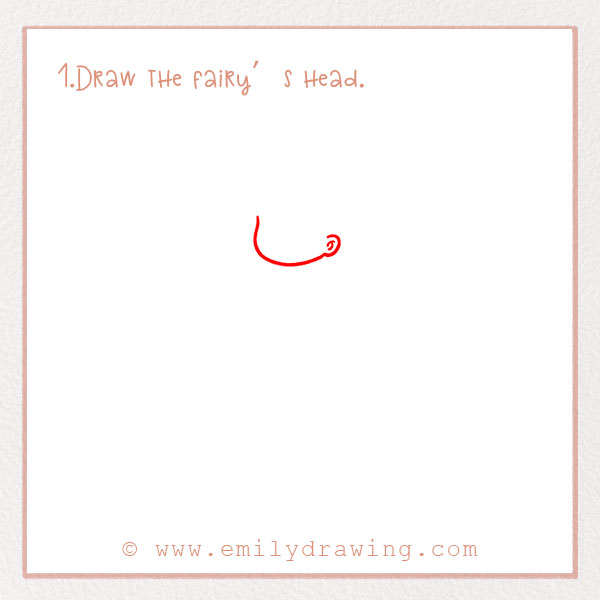
First, we are going to draw the fairy’s head. Draw a curve about three-fourths of the way up the page. On the right side, draw an ear.
We can only see one ear because she will be facing towards the left side of the page (in profile view).
Step 2 – Draw the fairy’s dress.
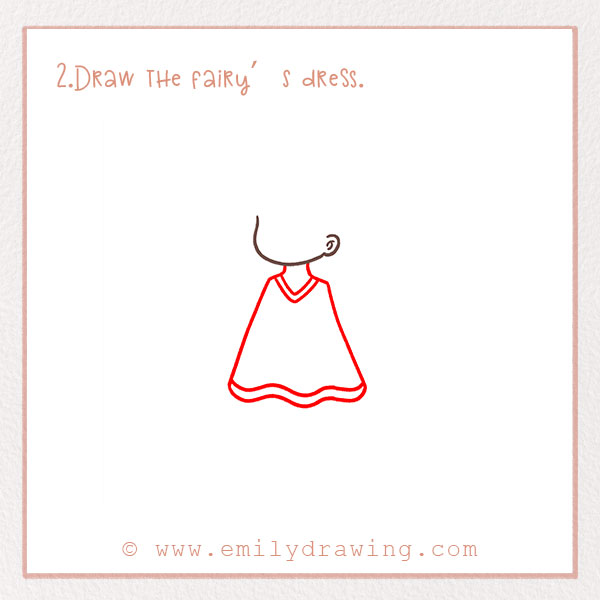
Let’s keep drawing the body. First, draw the neck by drawing two small, slightly curved lines. From there, draw two long slanted lines that go out and down. These form the sides of the dress. Next, connect them with a squiggly line at the bottom. Draw another squiggly line one just above the first one. Lastly, draw a V for the neckline of the dress.
Great job!
Step 3 – Complete the fairy’s arms.
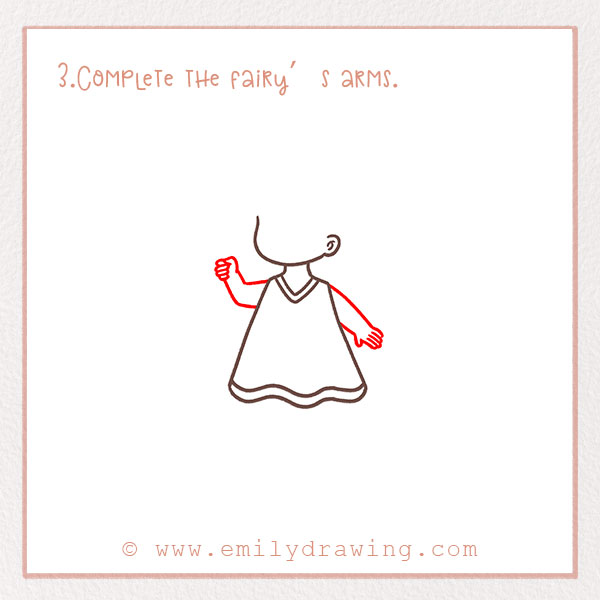
We are going to draw our fairy with one arm raised and holding a wand.
On the left side, draw a bent arm. Don’t forget to draw little fingers in a fist since she will be holding a wand. The other arm can be straight with extended fingers. Check out the photo.
Step 4 – Draw the fairy’s hair.
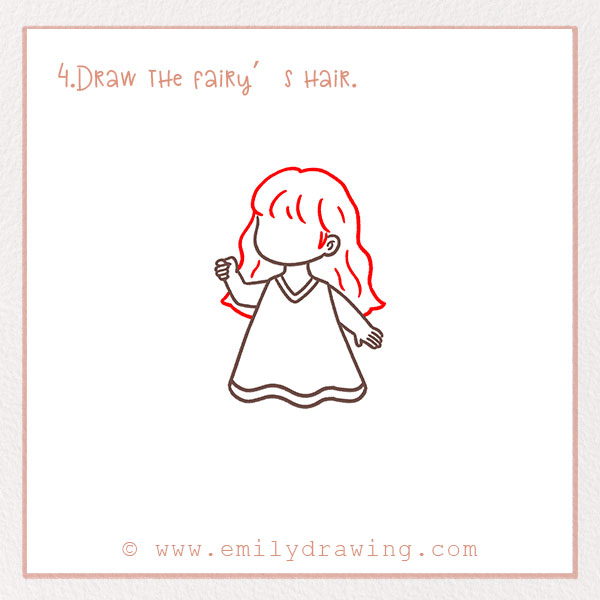
Our fairy is going to have long wavy hair. First, draw the bangs by adding several curved C shapes. Draw curve for the top of her head. Lastly, draw several squiggly lines to show dimension of her wavy hair. Her hair should go about halfway down her back.
Great job!
Step 5 – Add the fairy’s face.
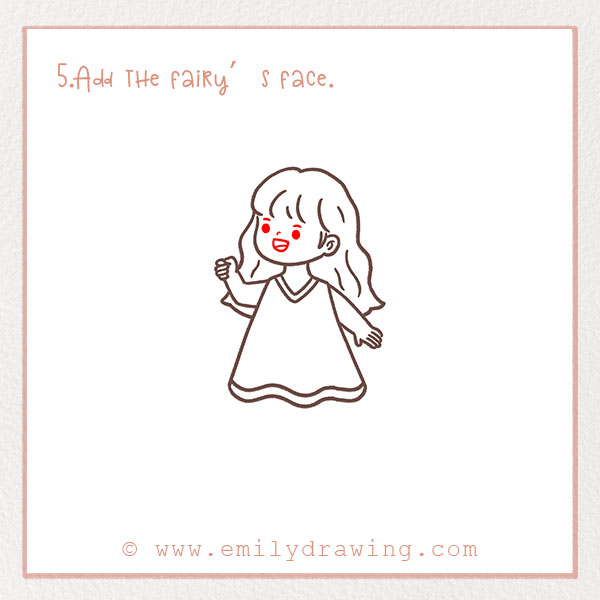
Like all of our drawings, we want our subject to look happy! Draw a big smile on her face, as well as a dot for a nose, and two dots for eyes. Lastly, add eyebrows. She should look like she’s facing the left side of the page, towards her bent arm that will be holding a wand.
Step 6 – Draw her legs.
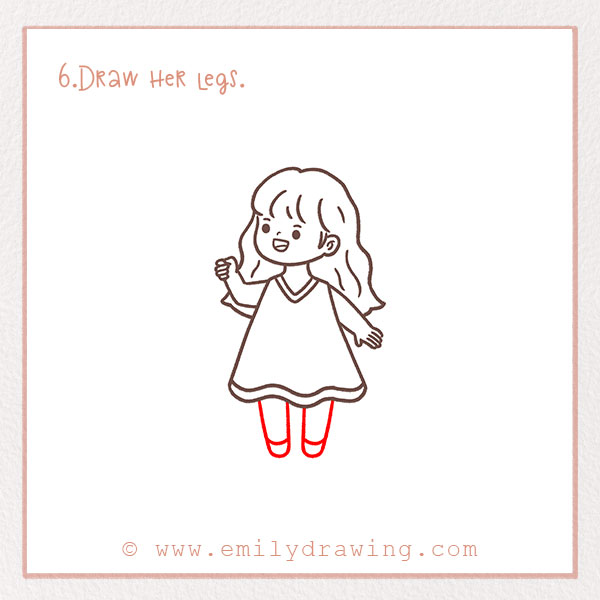
Next, draw her legs. Simply draw straight lines and connect them at the bottom for her legs. Don’t forget to add curves that show her socks.
Step 7 – Draw her wand!
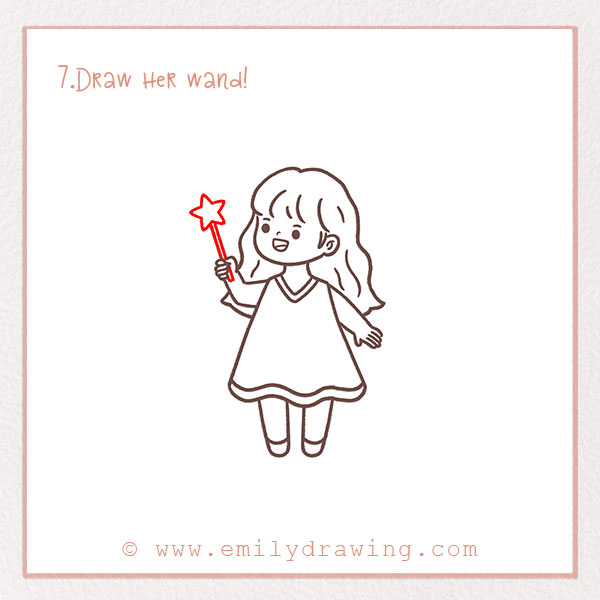
Fairies are known for waving wands! They may even be able to do magic, grant wishes, or perform healing acts with their wands.
Our fairy definitely needs a wand. In her bent arm, draw a skinny and slanted rectangle. At the top of the wand, draw a star! Great job.
Step 8 – Draw her wings!
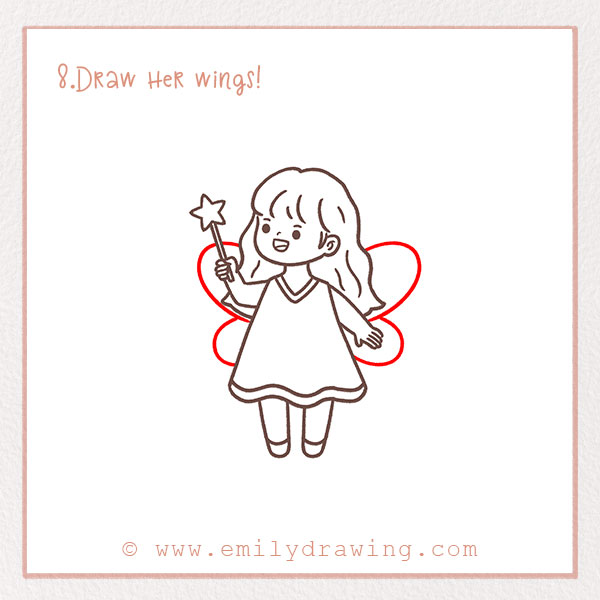
Fairies can fly, so our fairy needs to have wings! These often resemble butterfly wings, which you can learn to sketch beautifully in our butterfly drawing tutorial. They almost look like butterfly wings—so if you want to practice those shapes further, check out our how to draw a butterfly guide. On either side of her hair, draw a large curve. Draw two smaller curves below. Again, they should look like butterfly wings.
Refer to the photo.
Step 9 – Draw a bow.
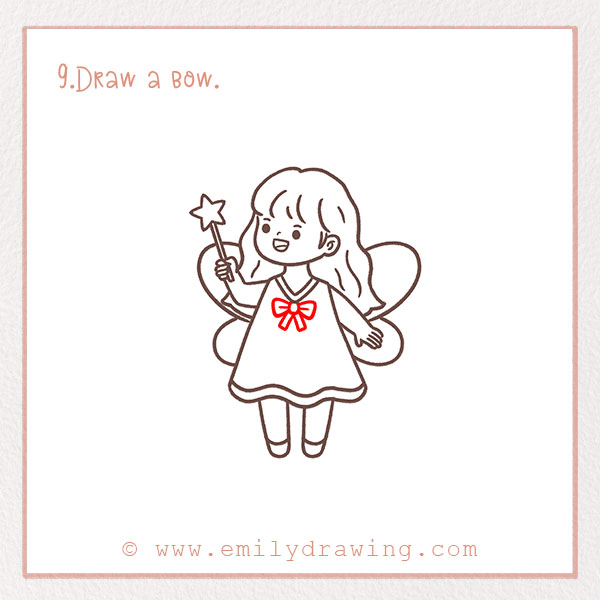
Time to put the finishing touch on our fairy. Draw a little bow on her dress, just by the neckline—or explore our how to draw a bow guide for more bow ideas! Great job!
Step 10 – Color in your drawing!

Fairies can of course look very different! Do you have a favorite story, movie, or game with a fairy? Use that as inspiration! Maybe you can even add some fairy dust around the wand!
So, decide how you want to color in your drawing and go for it! If you feel like it, you can fill in the background. Is your fairy by water or a flower? Is the sun shining? Be creative, and as always, have fun with it!
Pin it now, Draw later!
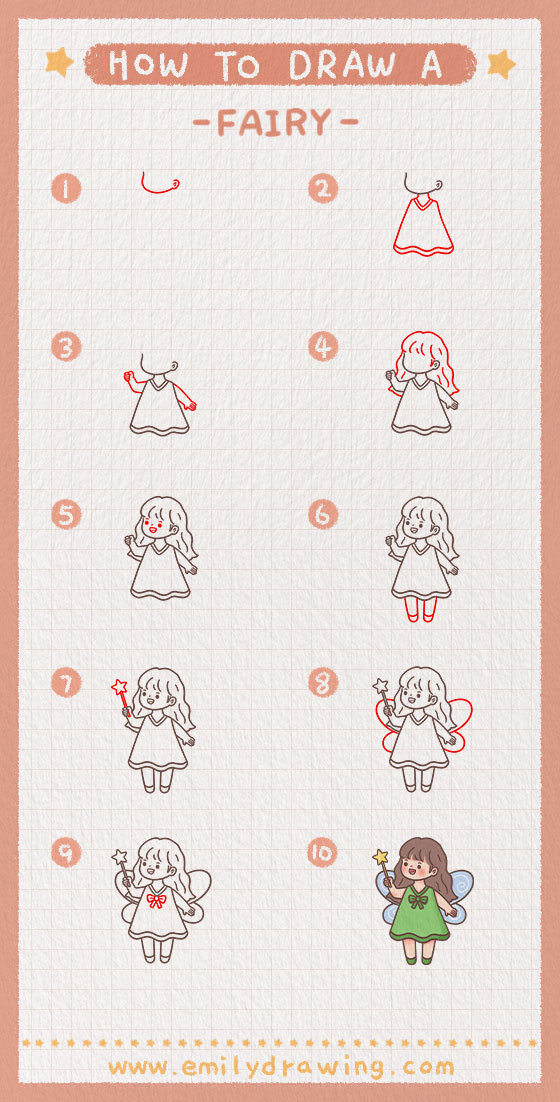
Thanks for following along on our art tutorial. Be sure to browse our site for more! We hope you enjoy our other character-themed tutorials like Peppa Pig, Spider-Man, and Hello Kitty. No matter the subject, we love throwing in facts so that you learn a bit along the way! Browse around our site to find one.



It is okay