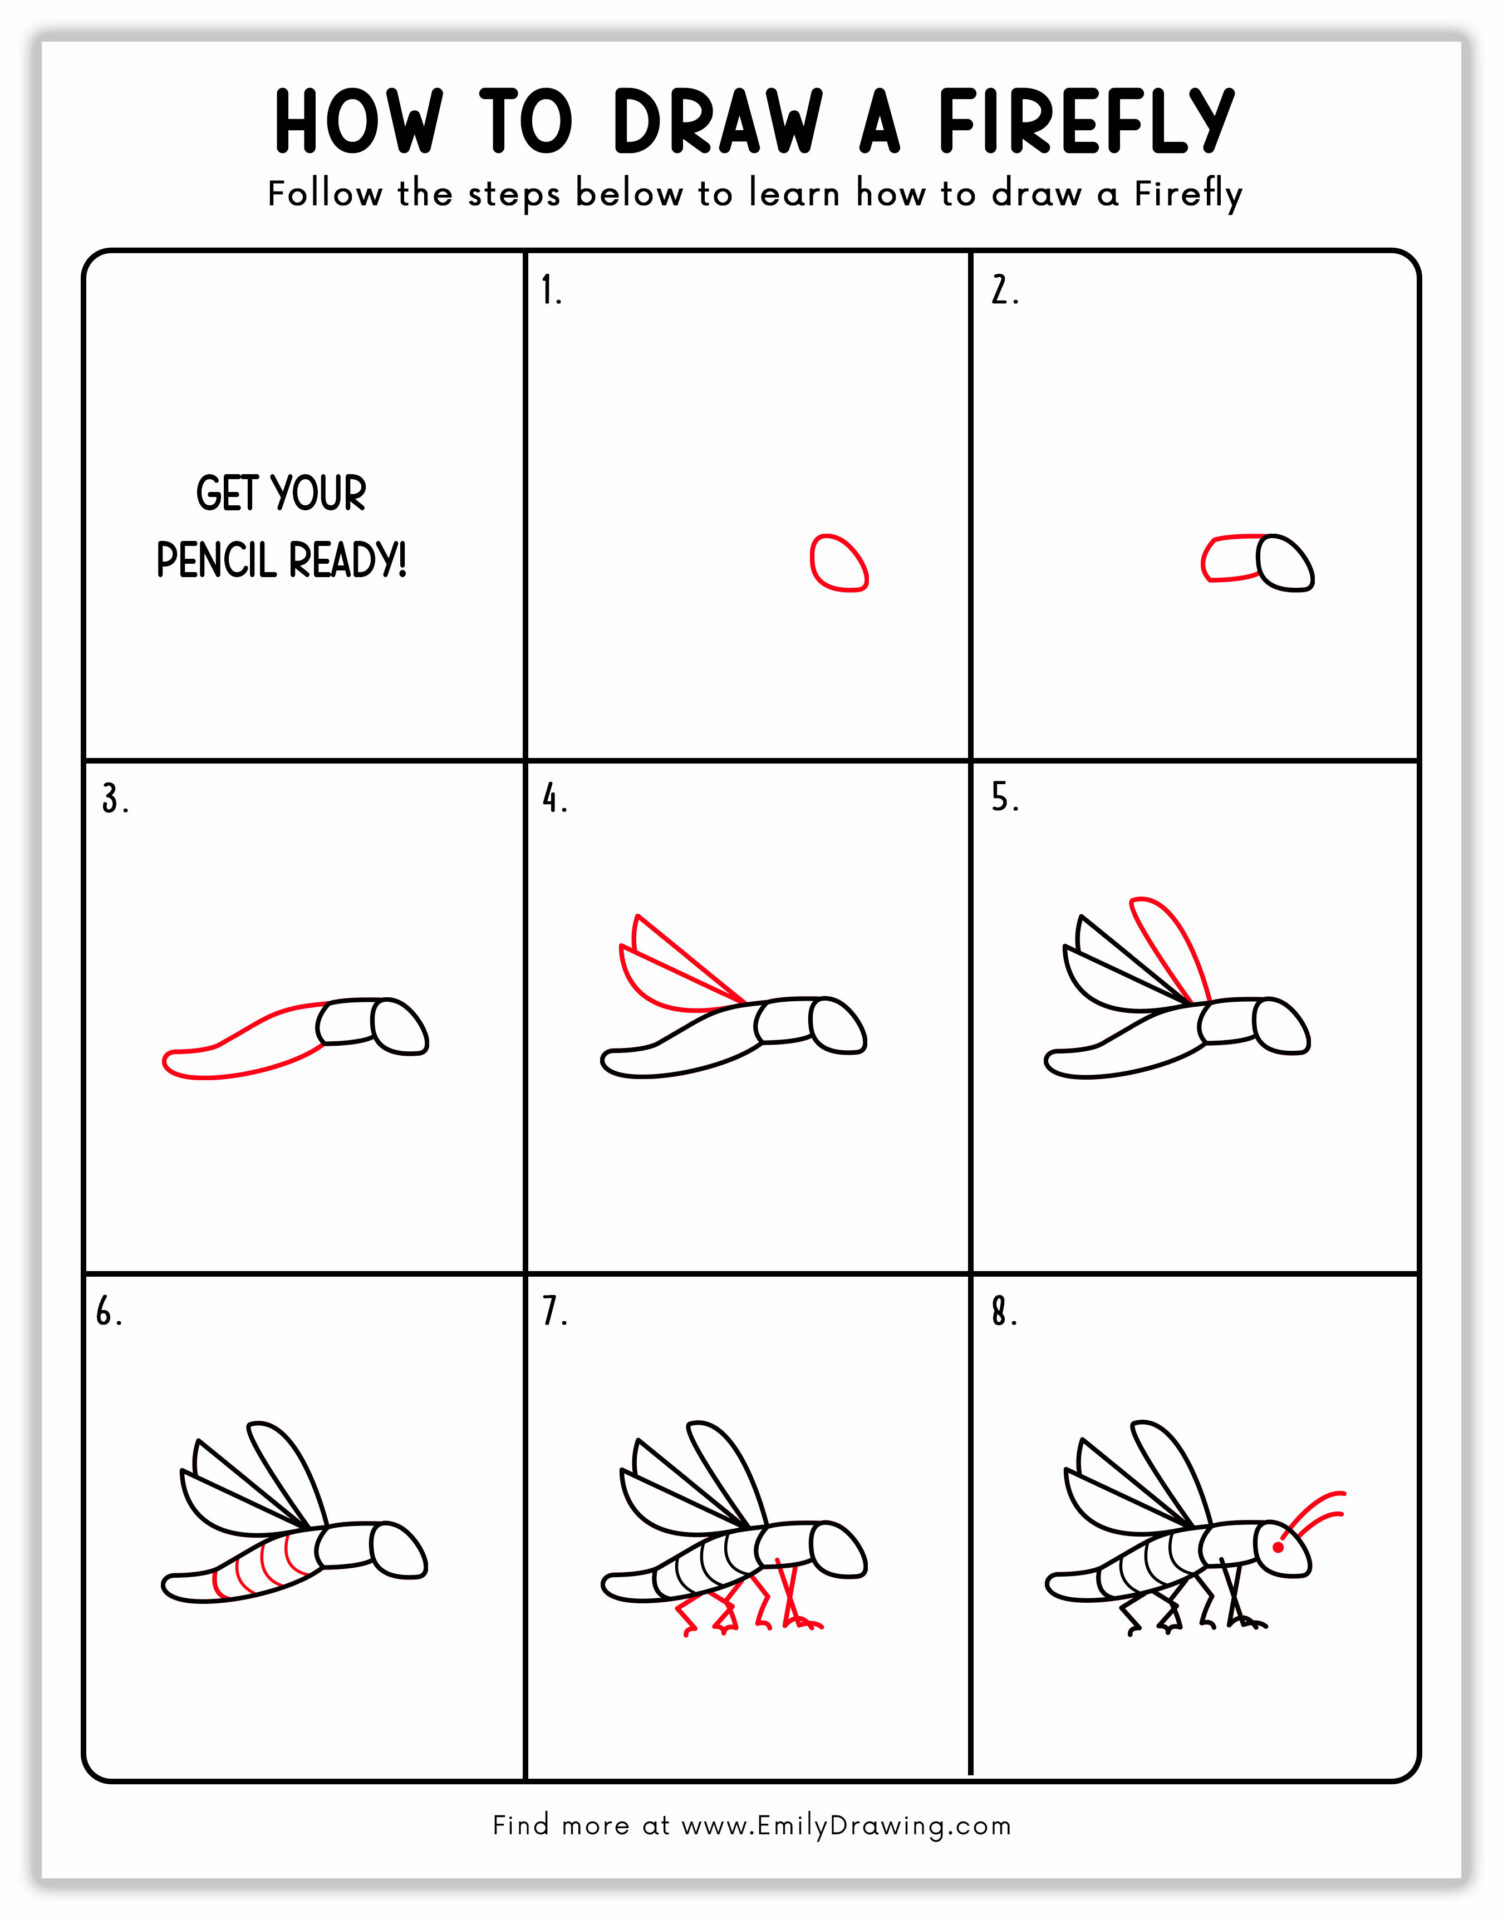
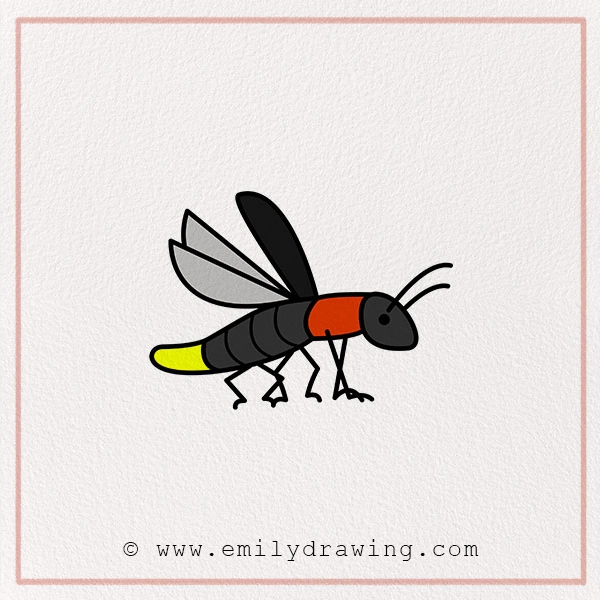
Kids around the world are fascinated with fireflies. These insects stand out from others because of their signature ability to shine like a Christmas tree, just like the glowing creature in our lightning bug drawing tutorial.
Due to its unique features, many preschoolers want to learn how to draw a firefly to include this insect in their scrapbooks. Paintings of nighttime nature scenes feel incomplete without glowing fireflies—something we explore in detail in this how to draw a lightning bug guide. So, artists are also eager to learn how to sketch this insect.
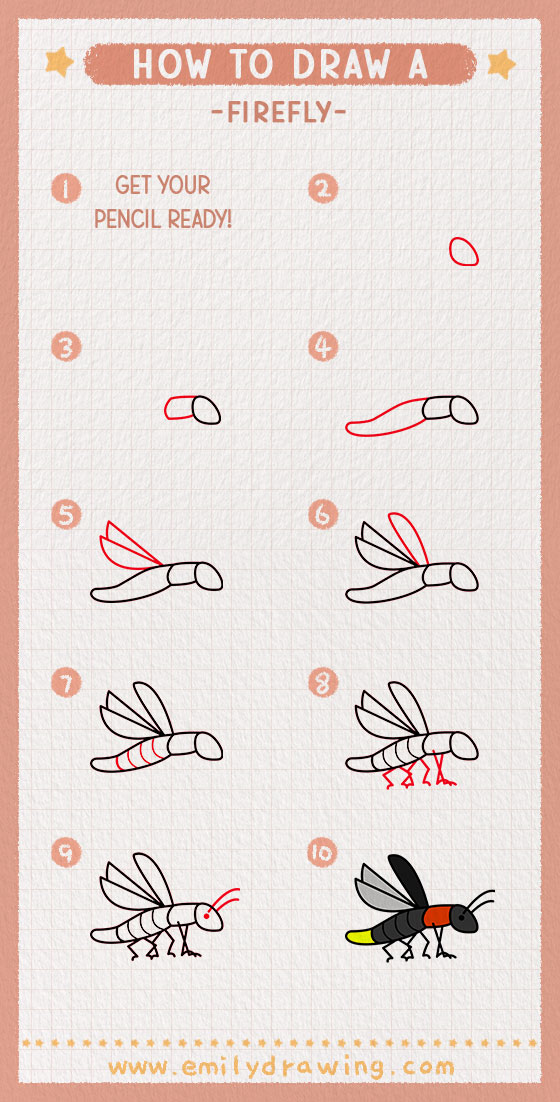
That’s why this easy insect drawing guide is a must for everyone interested in sketching bugs. In this firefly sketch tutorial, you’ll learn to draw a firefly in eight easy steps This will equip you with basic skills to enhance your artwork.
How to Draw a Firefly for Kids?
Our firefly drawing features a sitting firefly. But, with a few minor adjustments and a unique background, you can depict it flying in the sky.
Now, grab your art supplies for this realistic firefly drawing guide.
Materials:
- a piece of paper
- a pencil for the guiding lines and sketching
- an eraser
- a black sharpie or a pen for the outlines
- markers or colored pencils for coloring
- our printable drawing guide (Join my Email List below to get this Tutorial)
Here are my RECOMMENDED Art Supplies!
- Crayola Coloring Set (140 Pieces – Mega Value!)
- 24 Colored Crayon Set
- A4 Printer Paper
- Crayola Coloring Pencils
- HP Home Printer with Instant Ink!
Time needed:
15 minutes.
How to Draw a Firefly — Let’s get started!
Step 1 – Draw the Head
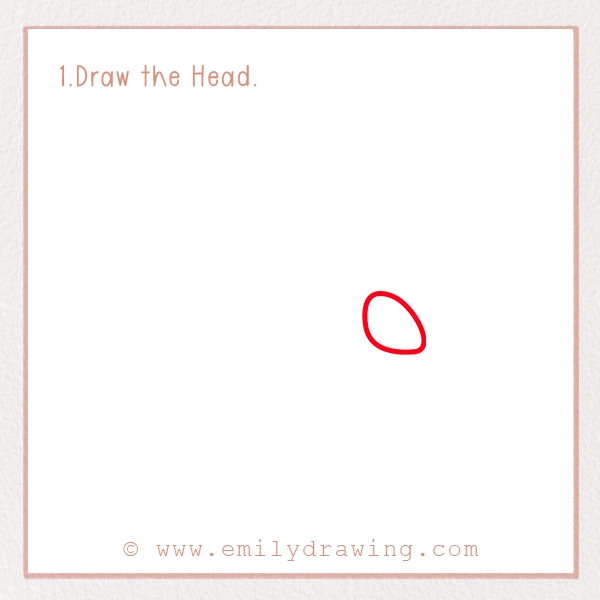
First of all, we need to sketch the head of the firefly. For this, put your pencil toward the left of the paper. Make sure you have enough space behind it to draw the body.
You need to draw an oval shape here. It should be small and slightly tilted to one side, representing the mouthparts of the firefly.
Firefly’s head is the smallest one in its body. So, make sure it is neatly drawn and proportionate to the whole body.
Step 2 – Sketch the Thorax
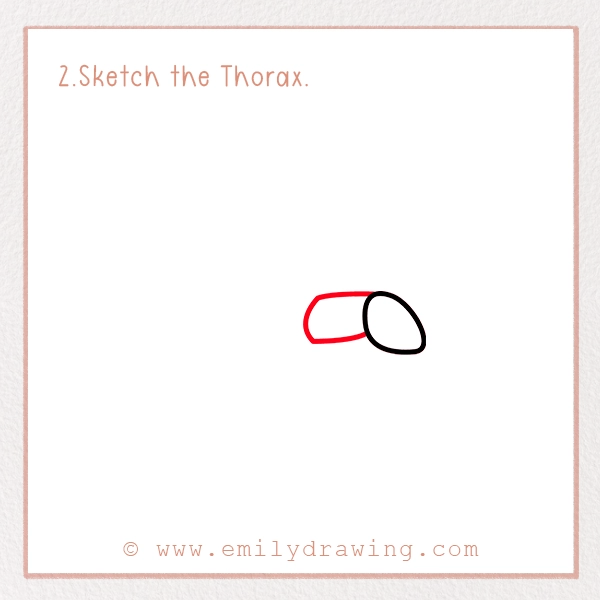
Just like every other insect, fireflies have three body parts: head, thorax, and abdomen—a structure also seen in our beetle drawing tutorial.
You have drawn the head and now it is time to draw the thorax. Remember that your thorax will be larger than the head.
It should be in the form of an elongated oval shape. Don’t elongate it vertically but horizontally. Make sure it is naturally aligned with the head as shown in our picture.
Step 3 – Draw the Abdomen
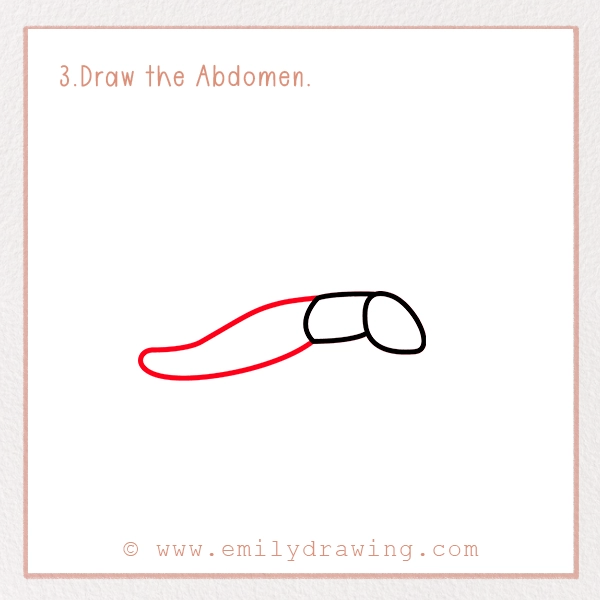
It is the last body part of the firefly. The abdomen is the longest one of the three body parts, so make sure it is larger than the thorax.
For this, sketch an elongated shape from the thorax. It should be rounded in the beginning and slightly taper at the end, away from the thorax.
Make sure that your abdomen gently curves to mimic the natural body flow of the firefly.
Step 4 – Sketch the First Pair of Wings
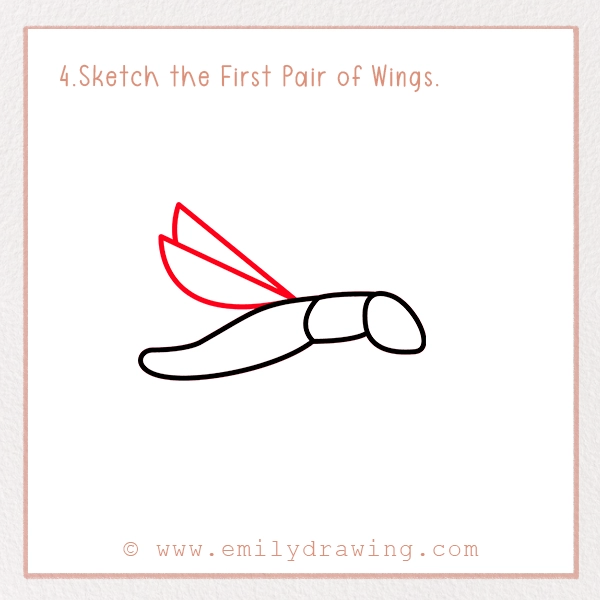
At the beginning of the abdomen, you need to sketch a pair of wings. This pair is actually on either side of the firefly, so we have to draw them in a 2D way.
For this, sketch two long, curved, and narrow oval shapes starting from the base of the abdomen. They should point diagonally upward.
Make sure that these wings overlap at the base of the body.
Step 5 – Draw Another Wing
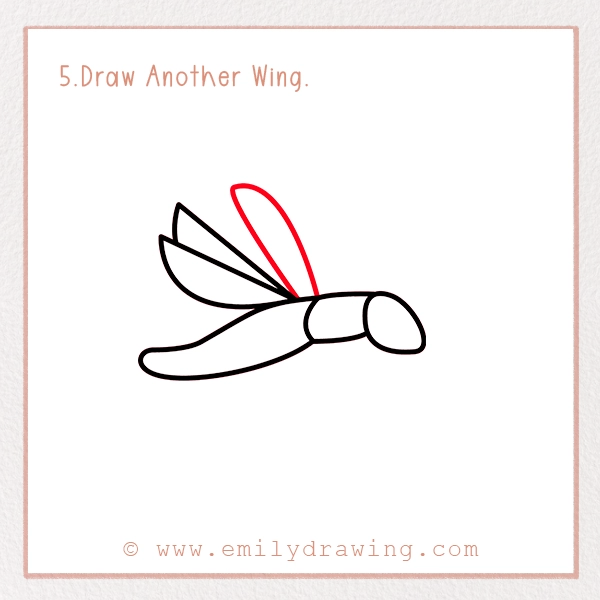
We need to draw one more wing in this how-to-draw firefly realistic drawing. This wing will be on the thorax.
Put your pencil on the base of the thorax, just near the point where you have drawn the overlapping wings. Now, draw a straight slightly tilted line, pointing upward. Then, draw a curve coming down and attaching to the line on the base of the thorax.
Step 6 – Segment the Abdomen
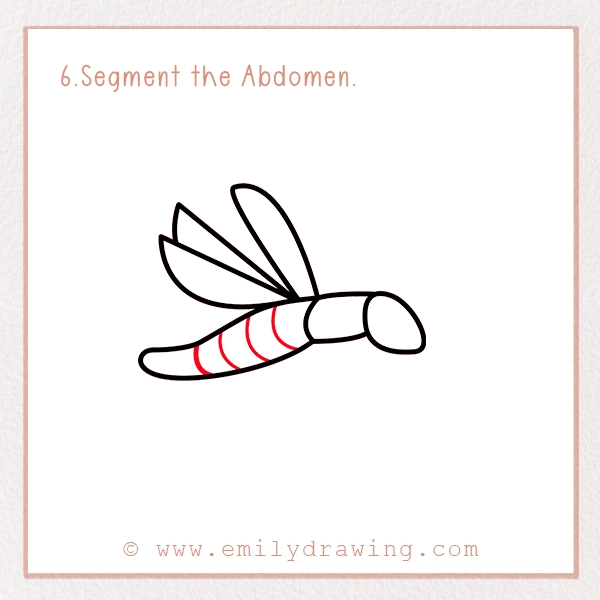
Almost every insect has segments in the abdomen. Multiple curved lines on their body are their signature mark. Of course, fireflies are not an exceptional case.
For our realistic insect drawing, we have to draw the curved lines in the abdomen. These lines should follow the natural body shape of the insect. So, sketch them in a slightly curved shape.
Draw almost 4 to 5 lines that are evenly spaced on the body.
Step 7 – Sketch Firefly’s Legs
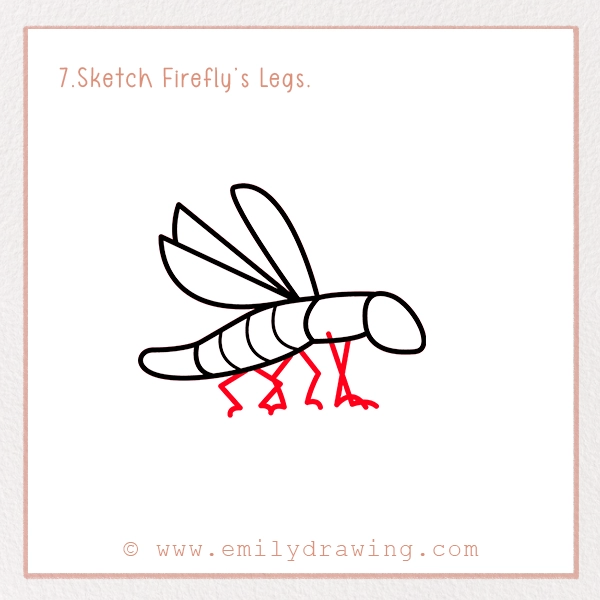
Insects have six legs, three on each side, attached to the thorax. Therefore, we need to include six legs in our realistic firefly drawing.
To do this, draw six thin lines attached to the thorax as shown in our picture—similar to how we sketch limbs in our how to draw a beetle guide. If you don’t want to make your drawing messy, you can draw one pair on the abdomen too, near the thorax.
Make sure these legs are of different postures and bent from their knees. It will give them a sitting posture.
Step 8 – Draw the Firefly’s Facial Details
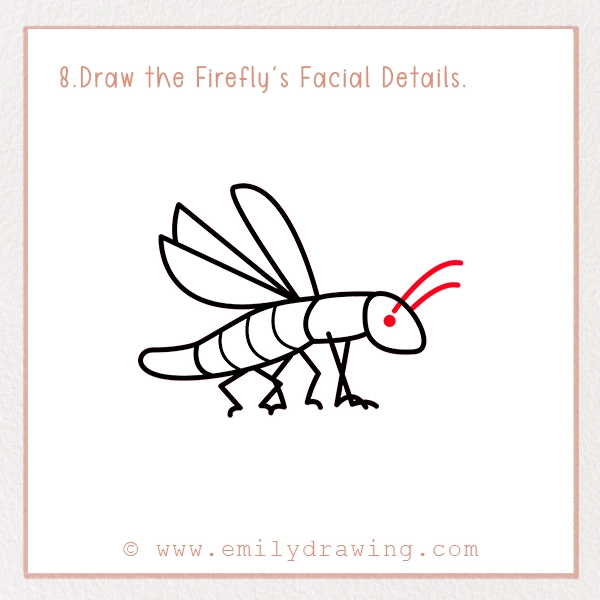
This is the final step in the step-by-step guide on how to draw a firefly. In this step, you should focus on antennas and eye sketching.
Antennas are located on either side of the head. To draw them, sketch a slightly curved line starting from within the head. The second thin line should originate from the outline of the head.
Finally, draw a small dark circle underneath the antenna to represent the eye.
That’s it! Your cartoon firefly drawing is complete.
Step 9 – Coloring Your Firefly Drawing

The guide on how to draw a firefly for kids or preschoolers is incomplete without colors. So, we need to focus on vibrant colors in this step.
According to statistics, there are almost 2000 species of fireflies. These species are different from each other and might have various kinds of body colors. So, you can grab any firefly picture and color your drawing according to it.
Otherwise, the most common colors for firefly drawing are:
- Body: Dark brown or black
- Wings: Transparent or Light Gray
- Abdomen Tip: Bright Green and Yellow
You can do a bit of sketching near the abdomen tip to show it glowing in the night.
Background Tips of Firefly Drawing
If you still want to enhance your drawing, you can go for different kinds of backgrounds for Firefly. Some suggestions are:
- Learn how to draw a firefly in the jar. It is very easy as you just have to outline a curved rectangular shape around the firefly.
- Sketch various kinds of firefly species together.
- Create fireflies in different poses and shapes.
- Sketch the summer evening in the background.
Pin it now, Draw later!
Conclusion
With simple shapes and steps, you can sketch the firefly with ease. In the end, make sure to refine your drawing by erasing all the unimportant lines. Once your drawing is final, show it to your friends and family. Act upon their suggestions to polish your skills.
For more animal or insect drawing tutorials, check out our blog.
