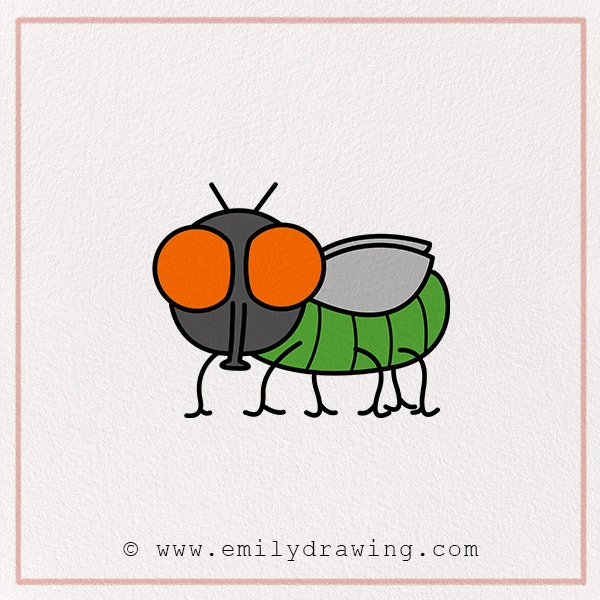
Wherever you go in the world, flies are a constant annoyance to humans. Whether you live in Asia or Europe, their buzzing sound disrupts workflows and spoils moods.
Fossil evidence suggests houseflies have been in the world for about 150 million years. It means it is annoying humans for a long time, just like other ancient creatures, including armadillos. But, when you zoom in, you will see a fascinating and cool insect picture.
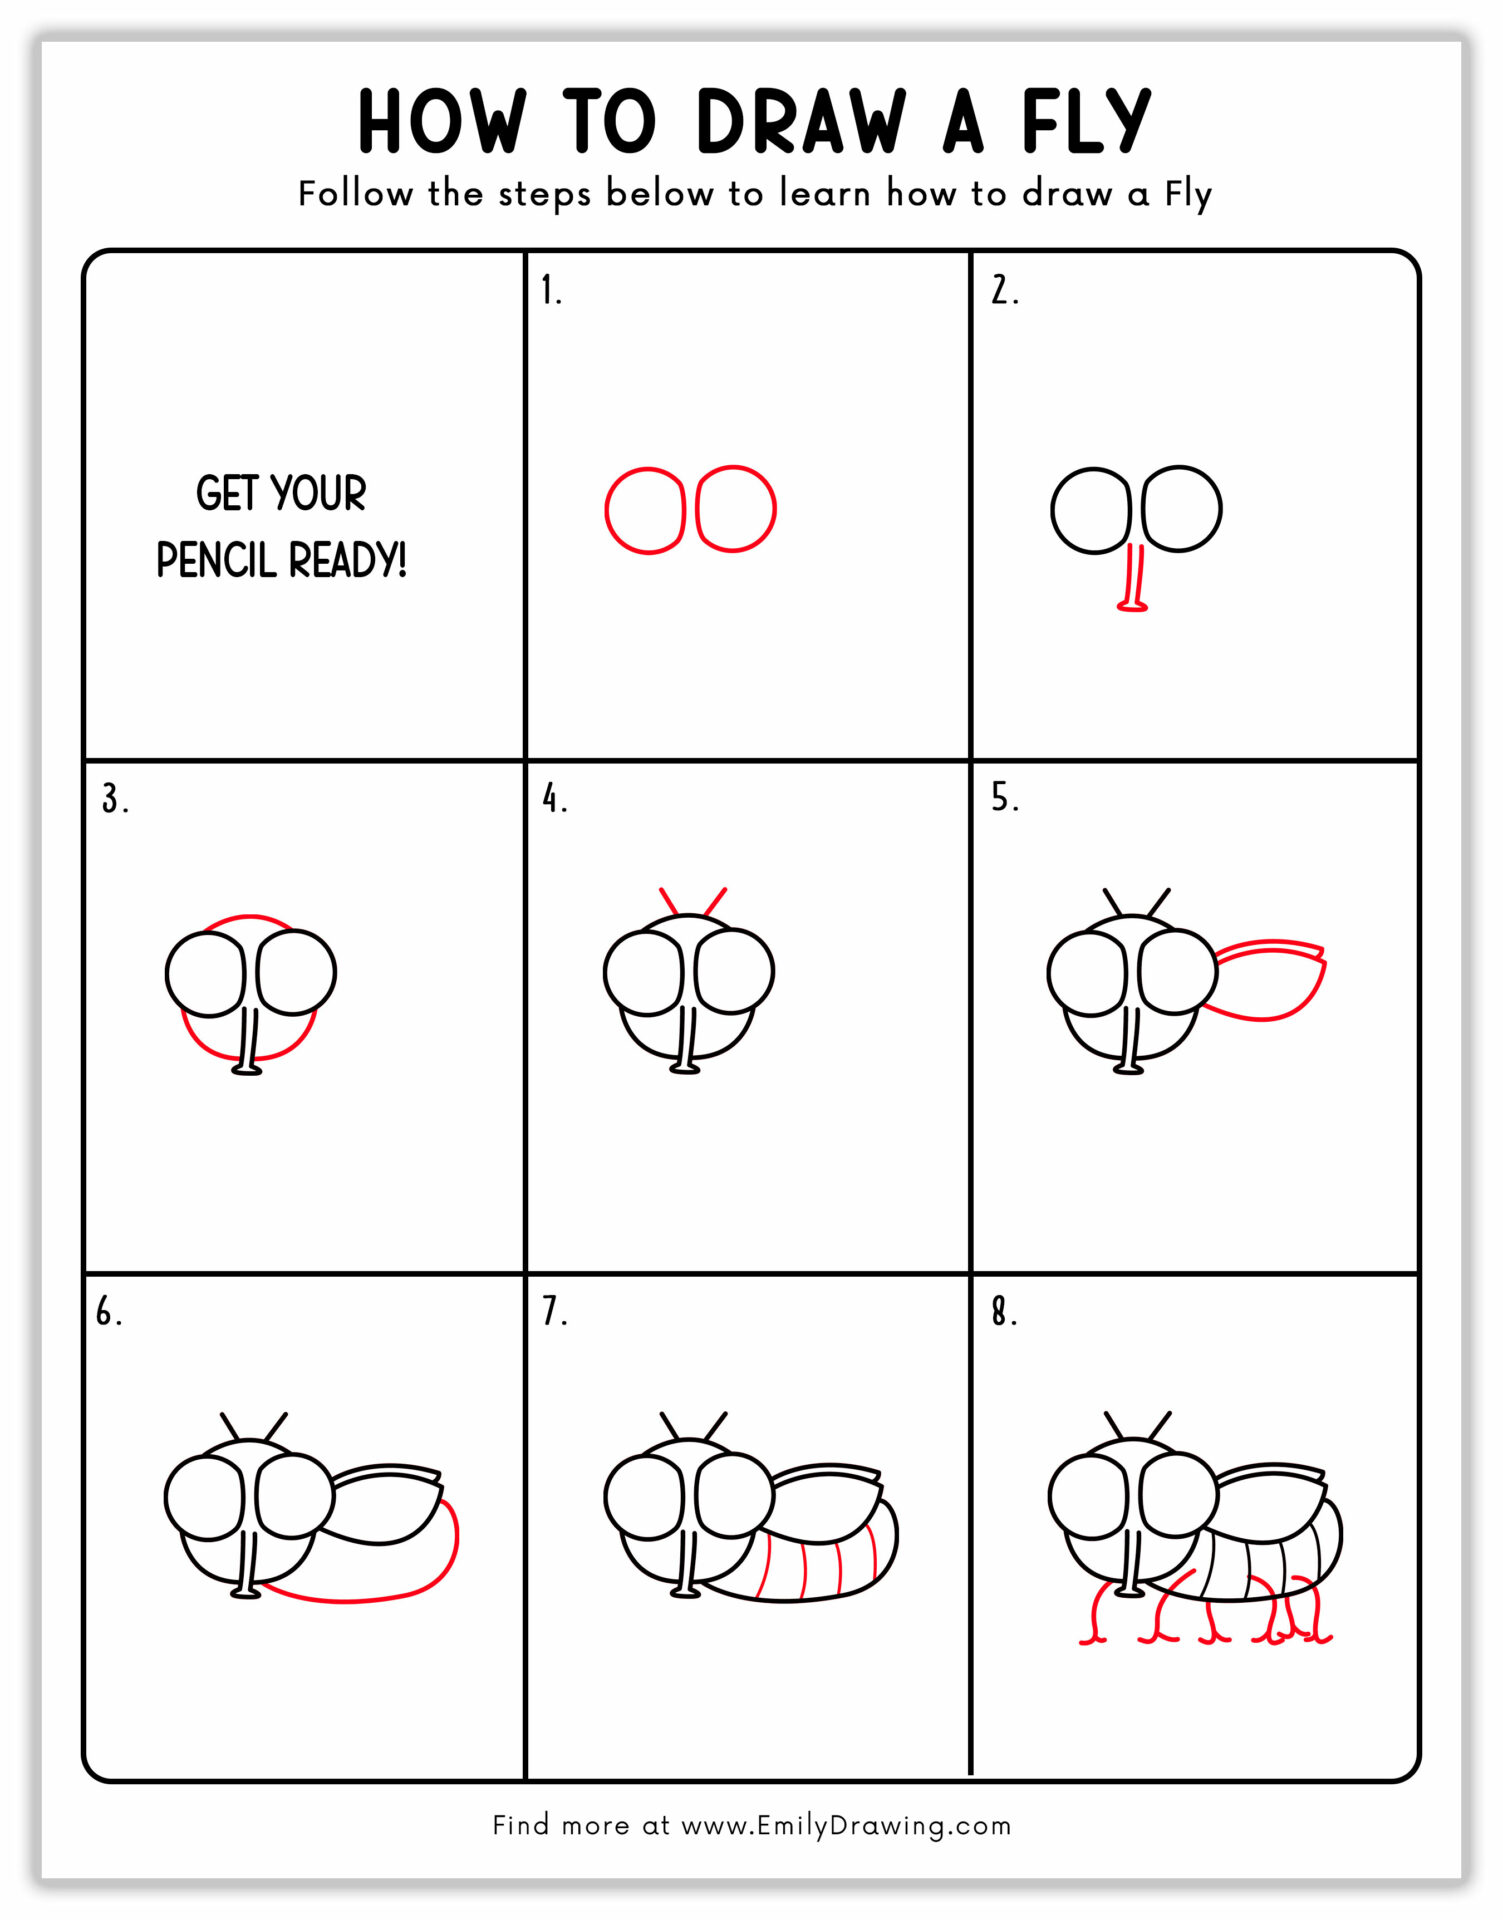
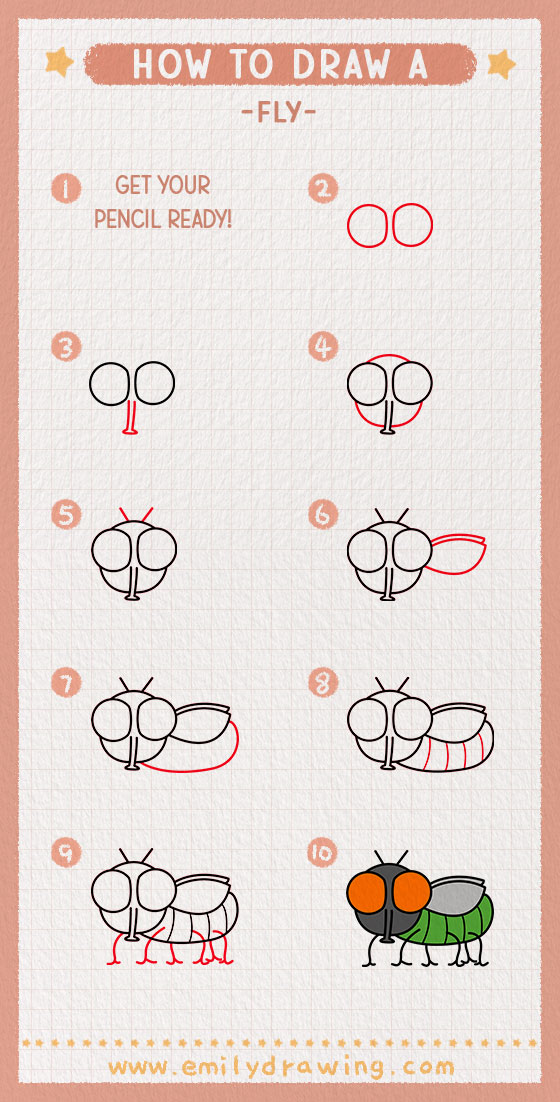
So, kids and beginner artists may want to learn how to draw a fly in a simple and easy way. Fortunately, we have an 8-step guide that contains only a few shapes to sketch a complete fly drawing. You just need to follow the steps one by one to complete your drawing.
How to Draw a Fly? Eight-Step Easy Guide!
Grab all the important art supplies and necessary reference pictures to sketch a cute fly drawing, just like you would when learning how to draw other animals like a camel.
Materials:
- a piece of paper
- a pencil for the guiding lines and sketching
- an eraser
- a black sharpie or a pen for the outlines
- markers or colored pencils for coloring
- our printable drawing guide (Join my Email List below to get this Tutorial)
Here are my RECOMMENDED Art Supplies!
- Crayola Coloring Set (140 Pieces – Mega Value!)
- 24 Colored Crayon Set
- A4 Printer Paper
- Crayola Coloring Pencils
- HP Home Printer with Instant Ink!
Time needed:
15 minutes.
How to Draw a Fly — Let’s get started!
Step 1 – Sketch Two Eyes
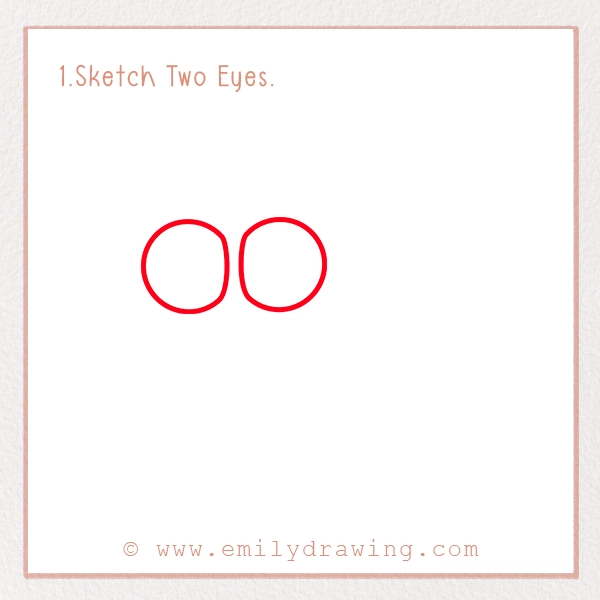
Flies are famous for their compound eyes, through which they can see at 360 degrees simultaneously. In this step, we are going to sketch two eyes.
To do this, draw two large circles in the center of the page. Make sure one side is flat, and the other is rounded with a small gap in between. The flat sides of both circles should be facing each other.
Step 2 – Add the Mouthpart
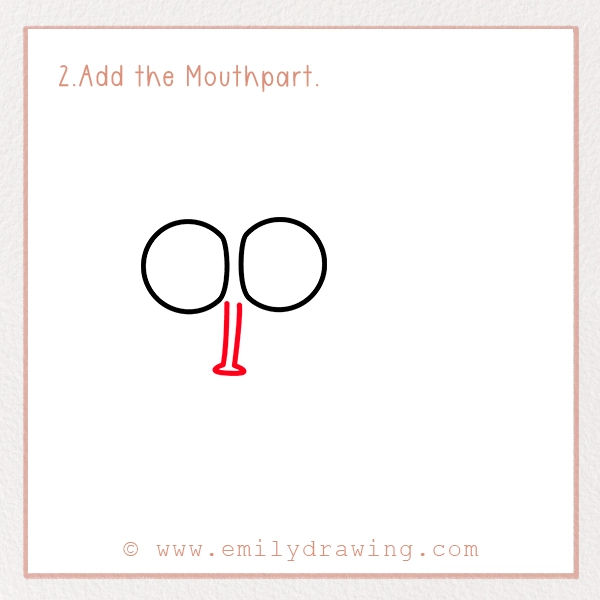
Now, it is time to sketch the mouthparts of the fly. To do this, draw two vertical lines down from the center of the two circles. Make sure these lines are close to each other and not much longer.
Curve the lines slightly outward at the bottom before combining them. This is the fly’s proboscis.
Step 3 – Outline the Head
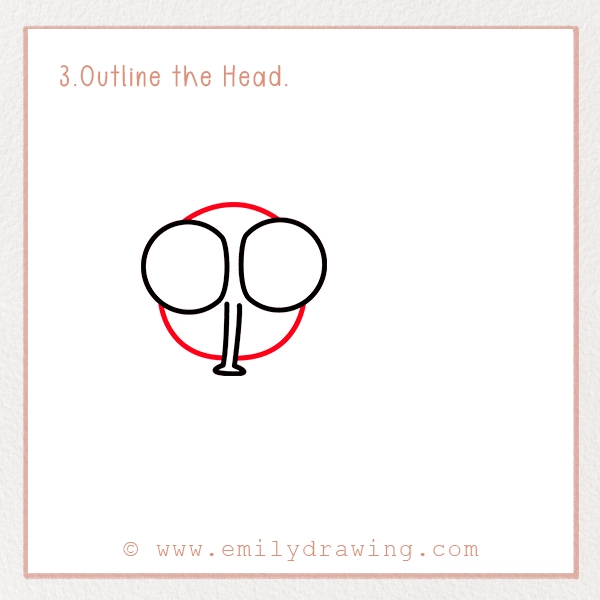
We need to sketch a round and large head of the fly in this step. For this, you should sketch a rounded bottom above the circles, joining them together. Make sure the semi-circle should not be much wider.
Now, put your pencil beneath the circle and create a rounded shape, joining the circle with the mouthpart. Repeat the process with the other eye circle.
Step 4 – Sketch the Antennae
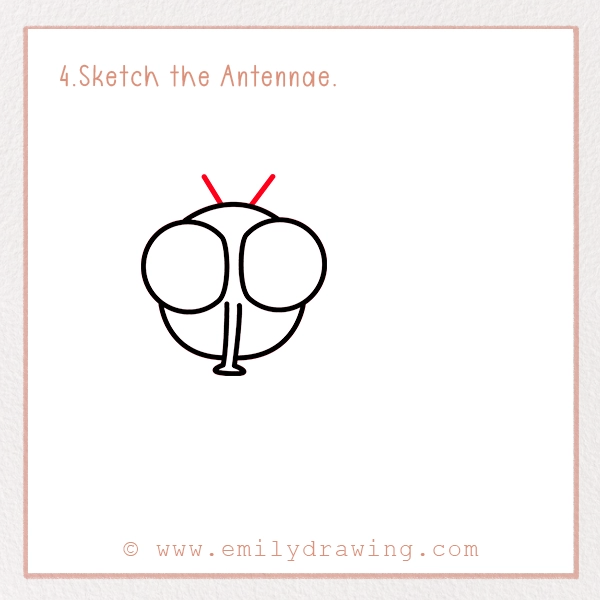
Flies have antennae on their heads. These sensory organs can detect movement, chemicals, and air currents easily, similar to the way armadillos use their sensory systems to detect their surroundings. To add them, you should sketch two short lines, slightly tilted in another direction, on the top of the head.
Step 5 – Add the Wings of the Fly
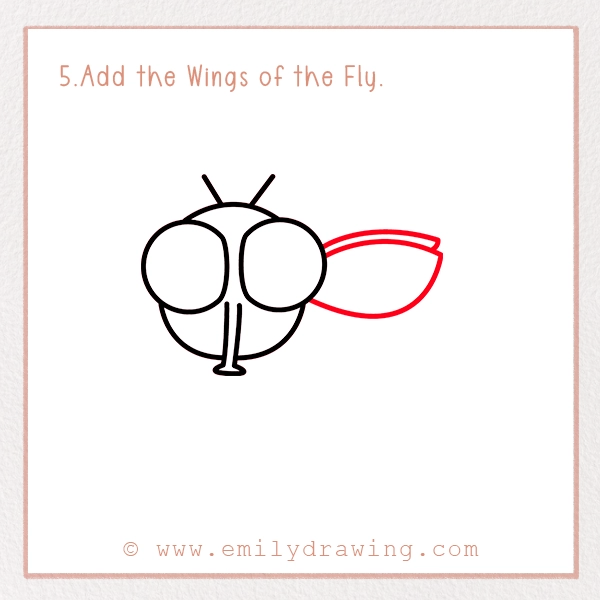
Flies have two wings, one on either side. These are attached to their bodies, and help it in flying and pollinating plants. To draw it here, you should put your pencil on the right side of the fly’s head.
Sketch a teardrop shape starting from the eye. The wing should be pointing slightly backward and not much larger in size than the head.
On top of it, add a thin outline of an oval shape as shown in our picture. This outline will represent the wing present on the other side.
Step 6 – Sketch the Abdomen
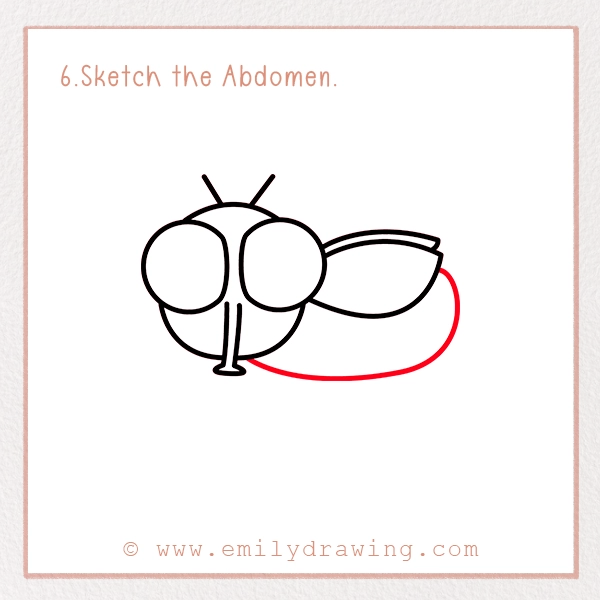
The abdomen is the main body part of the fly, where wings and legs connect, highlighting the fly’s anatomy. This body part should be elongated instead of being wider.
To sketch it, put your pencil near the mouthparts, on the outline of the head’s circle. From there, sketch an elongated oval shape that points in the backward direction. At last, connect it with the wings.
Step 7 – Add Segments in the Abdomen
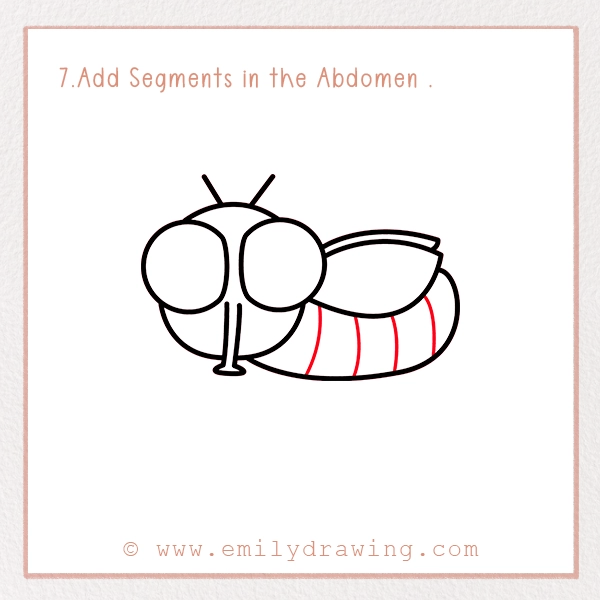
Every insect has segments in their body, giving it a unique look. If you explore our other insect drawing guides, you will notice we always have added segments in our sketches.
In this realistic fly drawing, we have to do the same thing. So, sketch some curved lines along the abdomen. These lines should follow the natural flow of the body. Keep them at an even distance for a clean and simple look.
Step 8 – Sketch the Legs
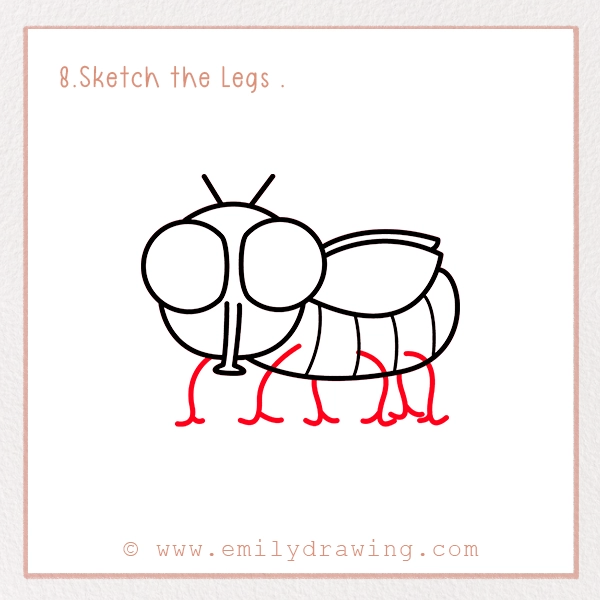
Every insect has six legs attached to their body. Their legs have a knee, bending at an angle, much like the posture you would find in the legs of a woodpecker when drawing them. Moreover, they always end in a paw-like shape.
Flies’ paws are a prominent and crucial part of their body as their taste receptors are in it. From there, they could taste anything before eating it through its tongue.
To sketch the legs, you have to draw six thin lines, curved in the downward direction. You should keep the legs spaced evenly, and end them with a paw for a realistic and clean look, much like the way you’d sketch the legs of a camel in our other guide.
That’s it! Your simple fly drawing is completed.
Step 9 – Coloring the Pencil Sketch of House flies

Houseflies are always dark in color. They have a variety of colors on their bodies, each of them dark in color. So, you need to select dark colors for a realistic house fly drawing.
To help you, there is a coloring guide for each body part of the house fly, just like the detailed coloring steps we provide for drawing animals like woodpeckers:
- Reddish-brown eyes
- Clear and transparent wings
- The face has silvery to black patches.
- The abdomen is mostly yellowish-grey to dark grey in color. It also has narrow dark stripes in it.
These are the real colors of house flies. But, if you want something unique or illustrative in your sketchbook, you can add unique colors too. It is your drawing, so you have all the right to make decisions about it.
Background Tips for Fly’s Drawing
Your basic house fly drawing is complete once you color it. However, if you want to elevate your artwork, adding a unique background can be a great idea.
For this, you can show your house fly flying in the sky. You can depict your house fly sitting and eating food. Or, you can draw any room or greenery in the background of your fly.
If you are feeling extra patient, you can repeat the tutorial three to four times to sketch a group of flies in different postures. You can add different colors to their sketches to make them unique.
Pin it now, Draw later!
Your Fly Drawing is Complete!
Celebrate this achievement by sharing your fly drawing with friends and family. Start your artistic journey on social media and showcase your skills there. If you want to elevate your drawing skills, check out our other drawing tutorials. I hope you will become a great artist one day.
