Grasshoppers are famous among kids due to their exceptional jumping ability and their appearance in Aesop’s Fables, much like mantises, which you can learn to draw here. Over the years, adults also have seen grasshoppers appearing in different kinds of literature for different reasons.
Anton Chekhov uses it in his short story to represent an unfaithful woman. With it, this insect appears in the 1889 painting of Vincent van Gogh. Moreover, it appears in various children’s movies and dramas.
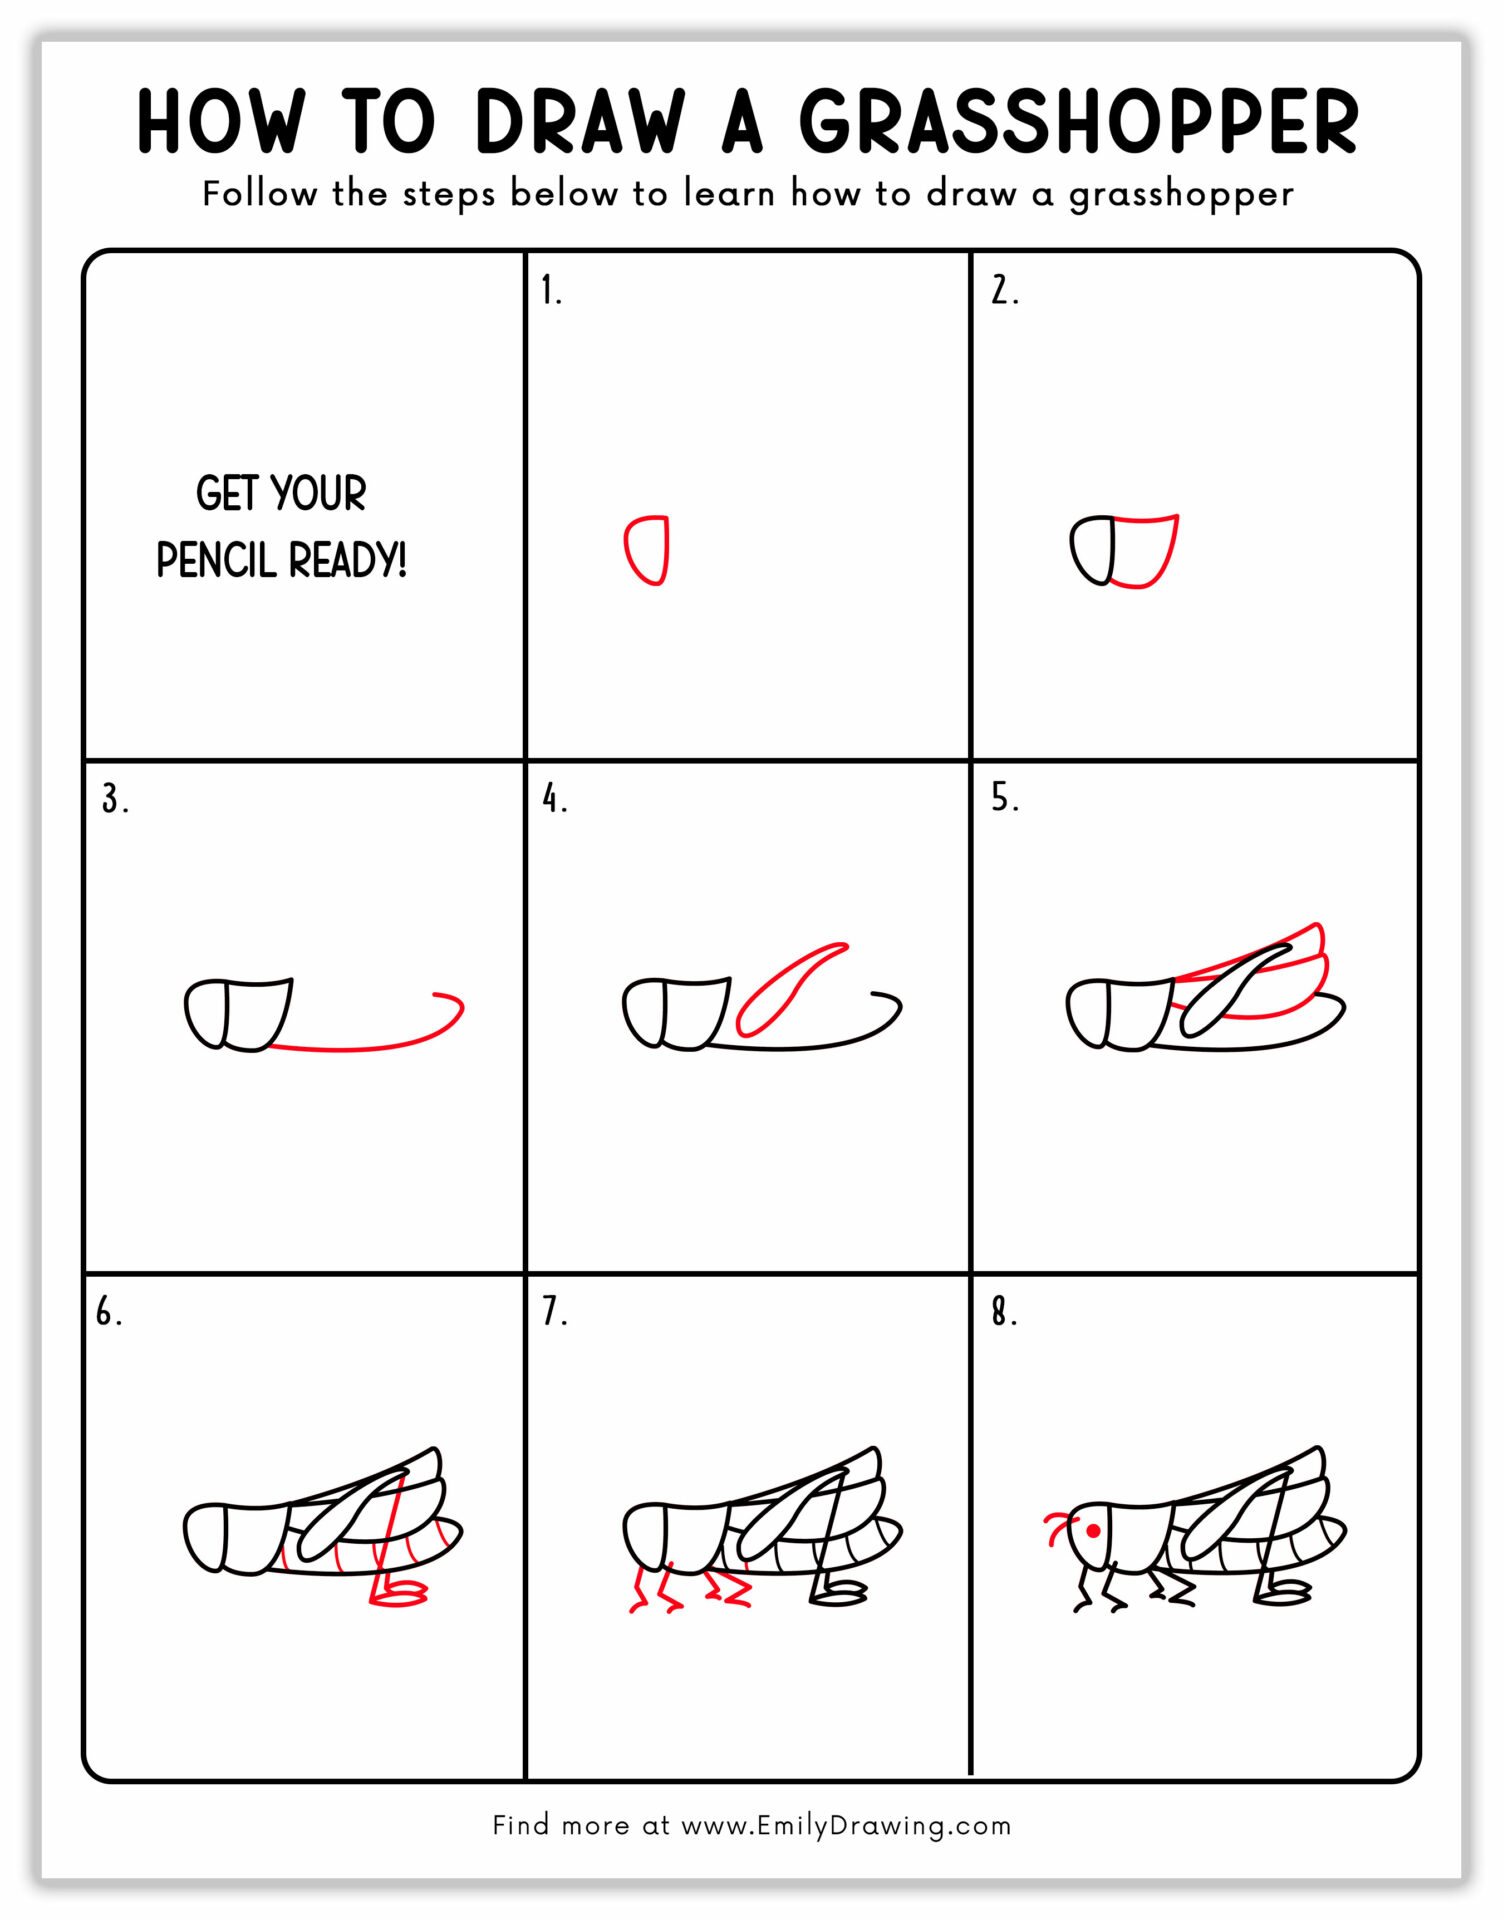
So, kids and novice artists must want to learn how to draw a grasshopper to make it part of their painting and sketchbook — and they might also enjoy drawing a praying mantis! To help them, I am going to share an easy grasshopper drawing tutorial. In the eight steps, you will learn how to create a cute cartoon grasshopper drawing without any difficulty.
So, without wasting any time, let’s delve into the drawing journey.
8-Step Guide of How to Draw a Grasshopper
If possible, you should draw this painting in the park or garden. There is a possibility you will see a real grasshopper there and it gives you a creative punch. Otherwise, nature can soothe your nerves and activate your imaginary mind to help you in making a magical world of grasshoppers on your piece of paper.
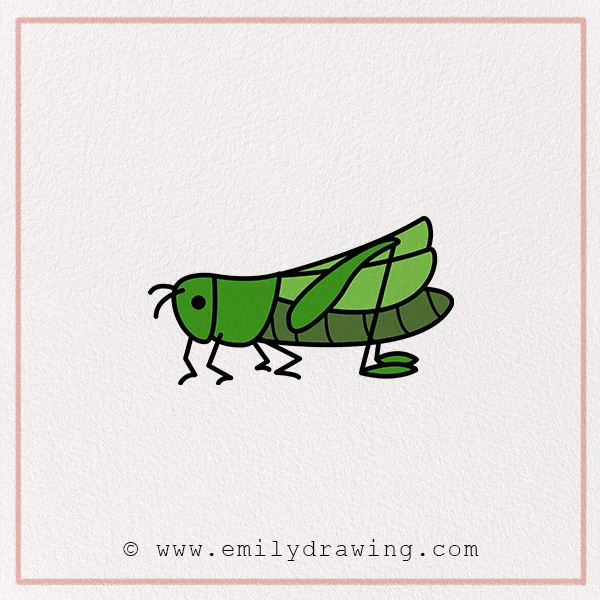
Materials:
- a piece of paper
- a pencil for the guiding lines and sketching
- an eraser
- a black sharpie or a pen for the outlines
- markers or colored pencils for coloring
- our printable drawing guide (Join my Email List below to get this Tutorial)
Here are my RECOMMENDED Art Supplies!
- Crayola Coloring Set (140 Pieces – Mega Value!)
- 24 Colored Crayon Set
- A4 Printer Paper
- Crayola Coloring Pencils
- HP Home Printer with Instant Ink!
Time needed:
15 minutes.
How to Draw a Grasshopper — Let’s get started!
Step 1 – Add the Head of the Grasshopper
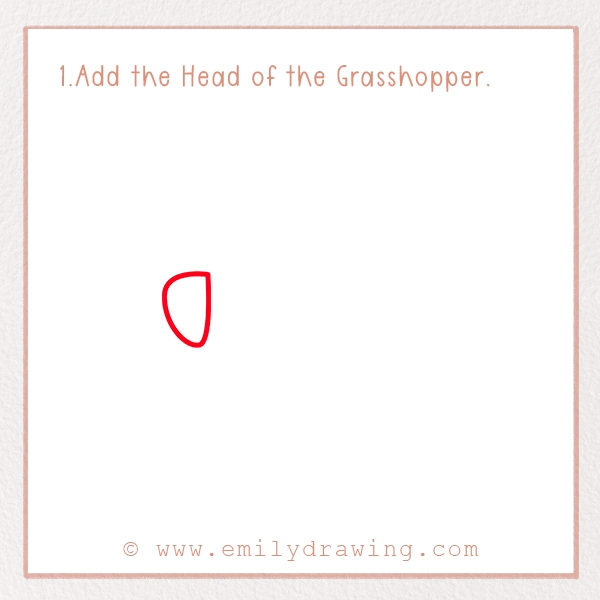
Every other insect drawing starts with the head, as it is the crucial part and the starting point of our drawings.
To do this, you should add a small oval-shaped circle on the left of the page. Make sure it is small and a bit flat from the one side- where you have to sketch the body.
Step 2 – Draw the Thorax
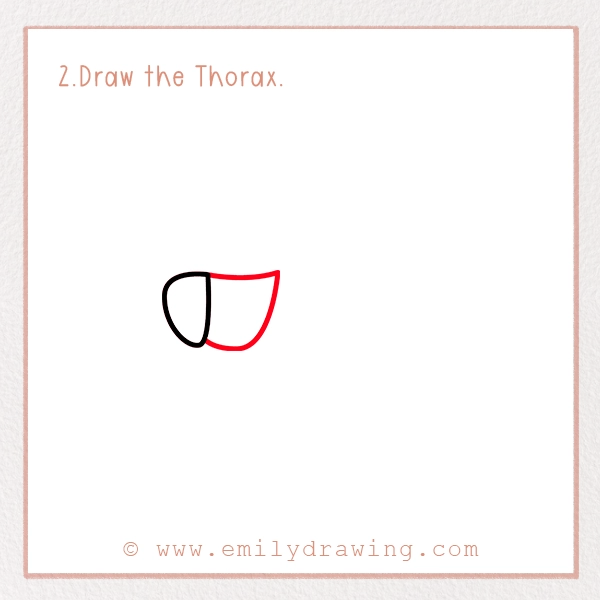
The first section of the grasshopper is completed. So, it is time for the second one.
To add it, you should sketch an irregular oval shape, attached to the flat side of the head. The thorax’s top should have a sharp edge and must be a bit wider than the bottom.
This body part should be double the size of the head to give a realistic look to it.
Step 3 – Sketch the Abdomen
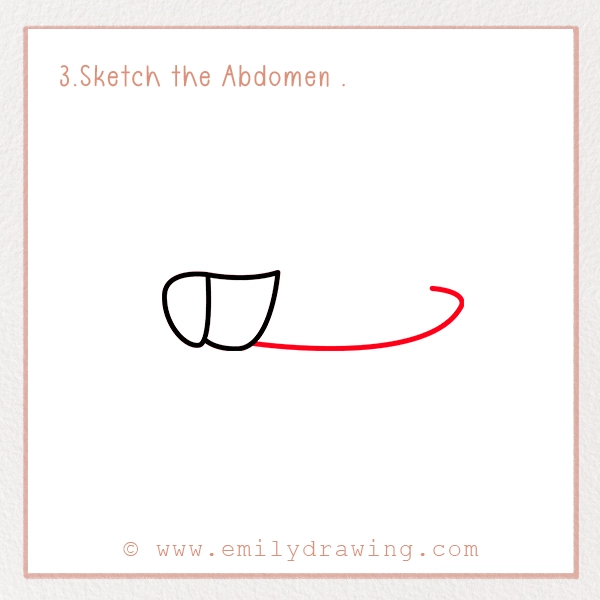
Now, it is time to sketch the abdomen. It is the elongated part of the body and resembles a tail. It is attached to the thorax and is the base of the wings.
In this step, sketch a curved line, starting from the bottom of the thorax. It should be long and taper off slightly towards the end, just like a tail. You shouldn’t draw the complete above line in this step as we have to sketch wings on the abdomen in the next one.
Step 4 – Add The Back Leg
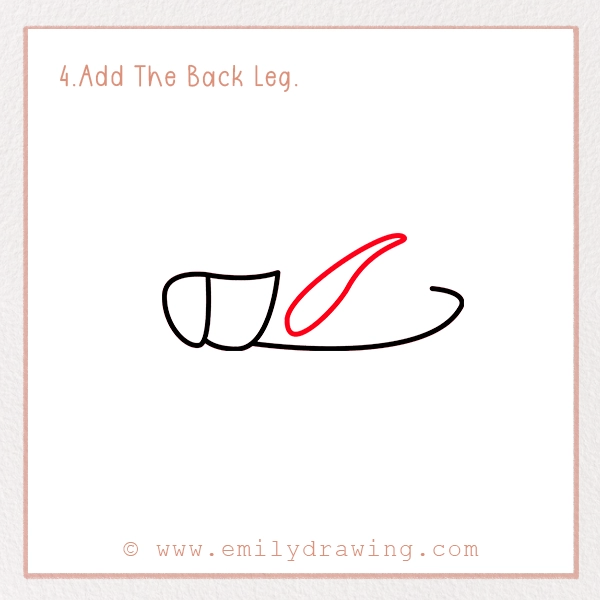
Grasshoppers have long and strong hind legs that are being used for jumping. They are also attached to the abdomen on either side of it. In this step, we are going to sketch the front hind leg.
To have it, sketch a hump-like shape in the middle of the abdomen, facing the upward direction. The shape should taper at the end to give a sharp edge to it.
Step 5 – Sketch the Wings
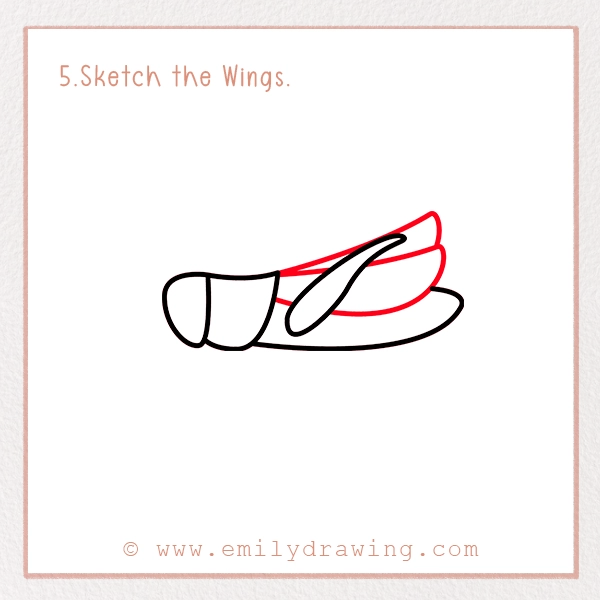
Grasshoppers have two wings attached to either side of the body. In this step, we need to draw both of them.
To have it, sketch an elongated slightly curved shape, starting from the thorax. It should stretch on the whole abdomen area, covering the space we left in Step 3.
On the top of this wing, sketch a similar curved shape as shown in our reference picture.
Step 6 – Sketch the Hind Legs and Add Details to the Body
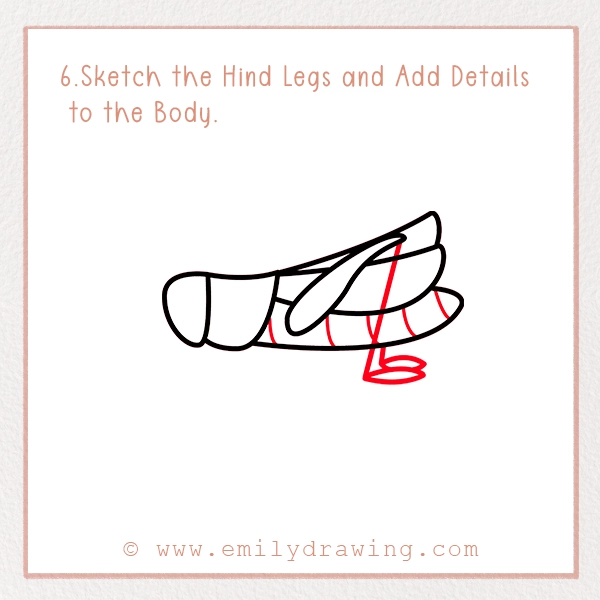
From the hump area, drawn in step 4, sketch a long straight vertical line. It should come way down from the abdomen as we are painting a standing grasshopper. At the end of the line, sketch a hook shape that represents the foot.
Now, it is time to draw the foot on the other side of the body. To have it, you should sketch the line from the bottom outline of the abdomen. It should also end with a hook shape.
Make sure the feet are overlapping with each other as shown in our picture.
Finally, it is time to add segments in the abdomen of the grasshopper. To draw it, you should add thin curved lines, spaced evenly on the body.
Step 7 – Draw the Legs
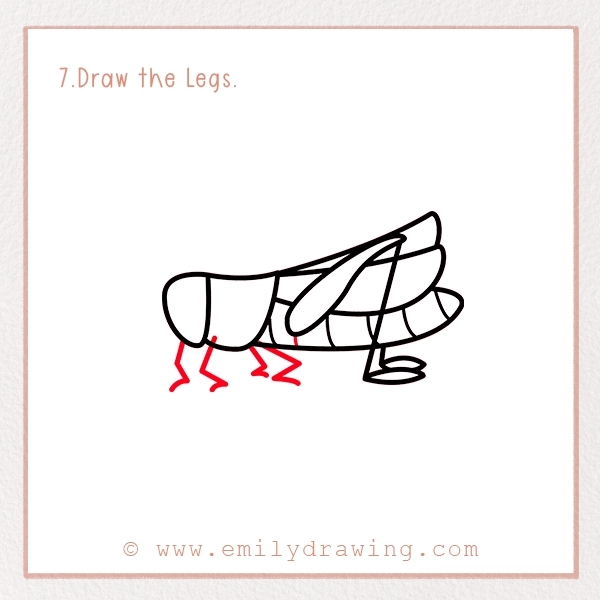
Grasshopper has six legs from which we have drawn two hind legs in the previous step. Now, it is time to draw the rest of the four legs.
To sketch them, you need to add four thin lines, curved in the shape of an “L.” They should end with a paw and must be attached to the thorax of the insect.
Make sure they are evenly spaced and neat.
Step 8 – Complete the Facial Expressions
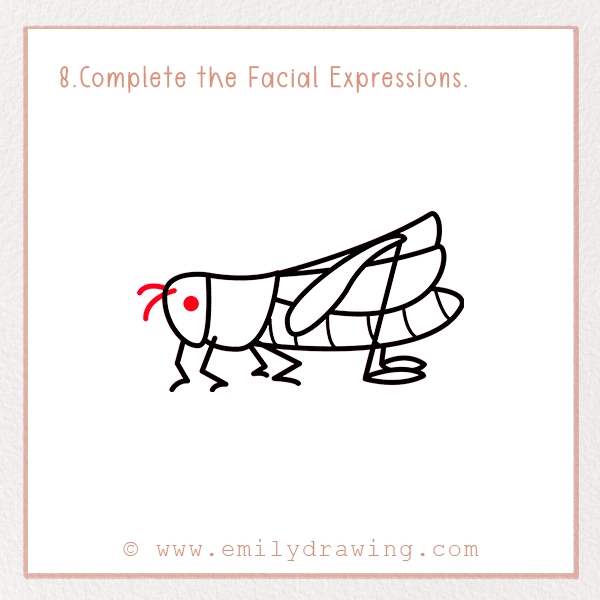
This is the last step in which we need to draw the facial expressions of the grasshopper. For this, you should add a dark circle in the center of the head to indicate the eye.
Above the head, sketch two thin lines, facing upward and slightly tapered from the tip. These are the antennas.
The basic sketch of your grasshopper is complete. So, it is time to add some colors to it.
Step 9 – Coloring your Grasshopper Drawing

The most famous color of grasshoppers is green. You will find these kinds of grasshoppers commonly in the parks and gardens. But, there are a few grasshoppers who are in different colors too.
These are brown, tan, olive, and yellow. Some have brown and pied colors mixed with green on their body. Some have yellow markings along with green on the abdomen.
So, you can grab various colors together to make your grasshopper drawing lively.
Pin it now, Draw later!
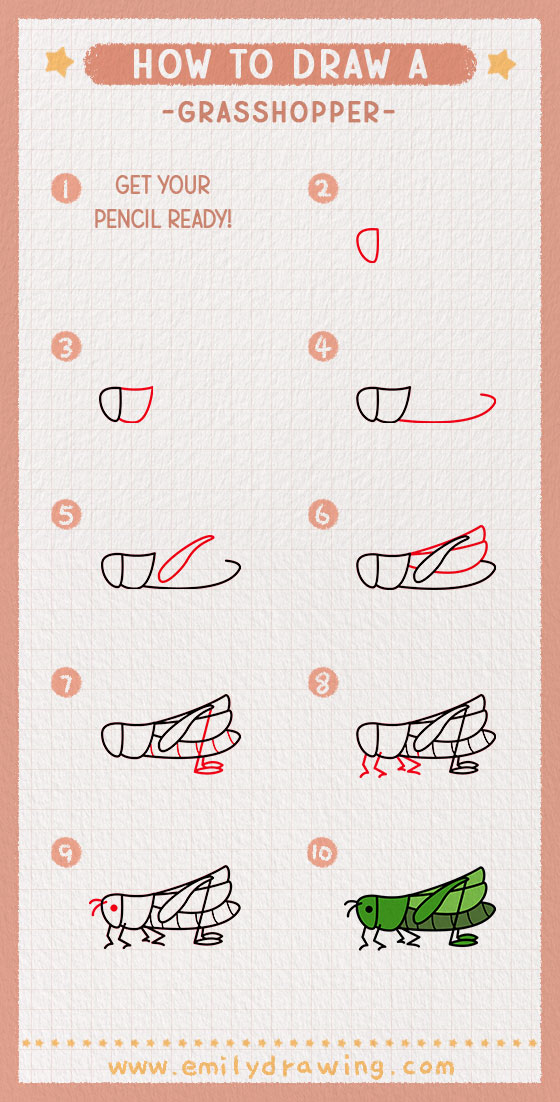
Conclusion
Drawing a grasshopper is easy if you follow these simple eight steps, and once you’re done, you might also like to try drawing an armadillo! It will help you develop basic artistic skills, and you can further refine them by experimenting with different poses. You can add various backgrounds to it, too, to make your drawing unique.
If you want more sketching guides to polish your skills, check out our blog — including fun tutorials like how to draw an armadillo.
