Hello, and welcome to another ten-step tutorial by Emily Drawing! Today’s tutorial is all about our harp seal drawing guide! We will take you through nine simple steps to draw this adorable animal.
Harp seals are medium-sized sea animals growing up to 6 feet long and 300 lbs—similar in wintery charm to other creatures like the Arctic hare, which you can also learn to draw. They have flat heads with a narrow snout. Harp seals also have large eyes, and while this makes them cute, it also makes it easier for them to find their prey. Speaking of which, their diet includes fish and crustaceans such as polar cod, herring, and redfish.
The seals are born with a white fur coat for absorbing the sun and staying warm. As they grow older, their white coats are replaced with gray fur. In addition, these seals have a thick layer of blubber on their bodies, which acts as insulation and also keeps them warm.
These seals can also dive to depths of up to 885 feet. This gives them the chance to find all the food they can eat. With eight pairs of teeth in their upper and lower jaws, eating is a breeze.
Harp seals can live for around 30 years. Each year, they return to their breeding grounds, which are located in Newfoundland, the White Sea, and the Greenland Sea.
As you can see, harp seals are both cute and amazing animals! Now, it’s time to get to the tutorial. Grab your colored pencils or markers, and if you enjoy snowy creatures, check out our guide on how to draw an Arctic hare too!
Materials:
- a piece of paper
- a pencil for the guiding lines and sketching
- an eraser
- a black sharpie or a pen for the outlines
- markers or colored pencils for coloring
- our printable drawing guide (Join my Email List below to get this Tutorial)
Here are my RECOMMENDED Art Supplies!
- Crayola Coloring Set (140 Pieces – Mega Value!)
- 24 Colored Crayon Set
- A4 Printer Paper
- Crayola Coloring Pencils
- HP Home Printer with Instant Ink!
Time needed:
15 minutes.
How to Draw a Harp Seal — Let’s get started!
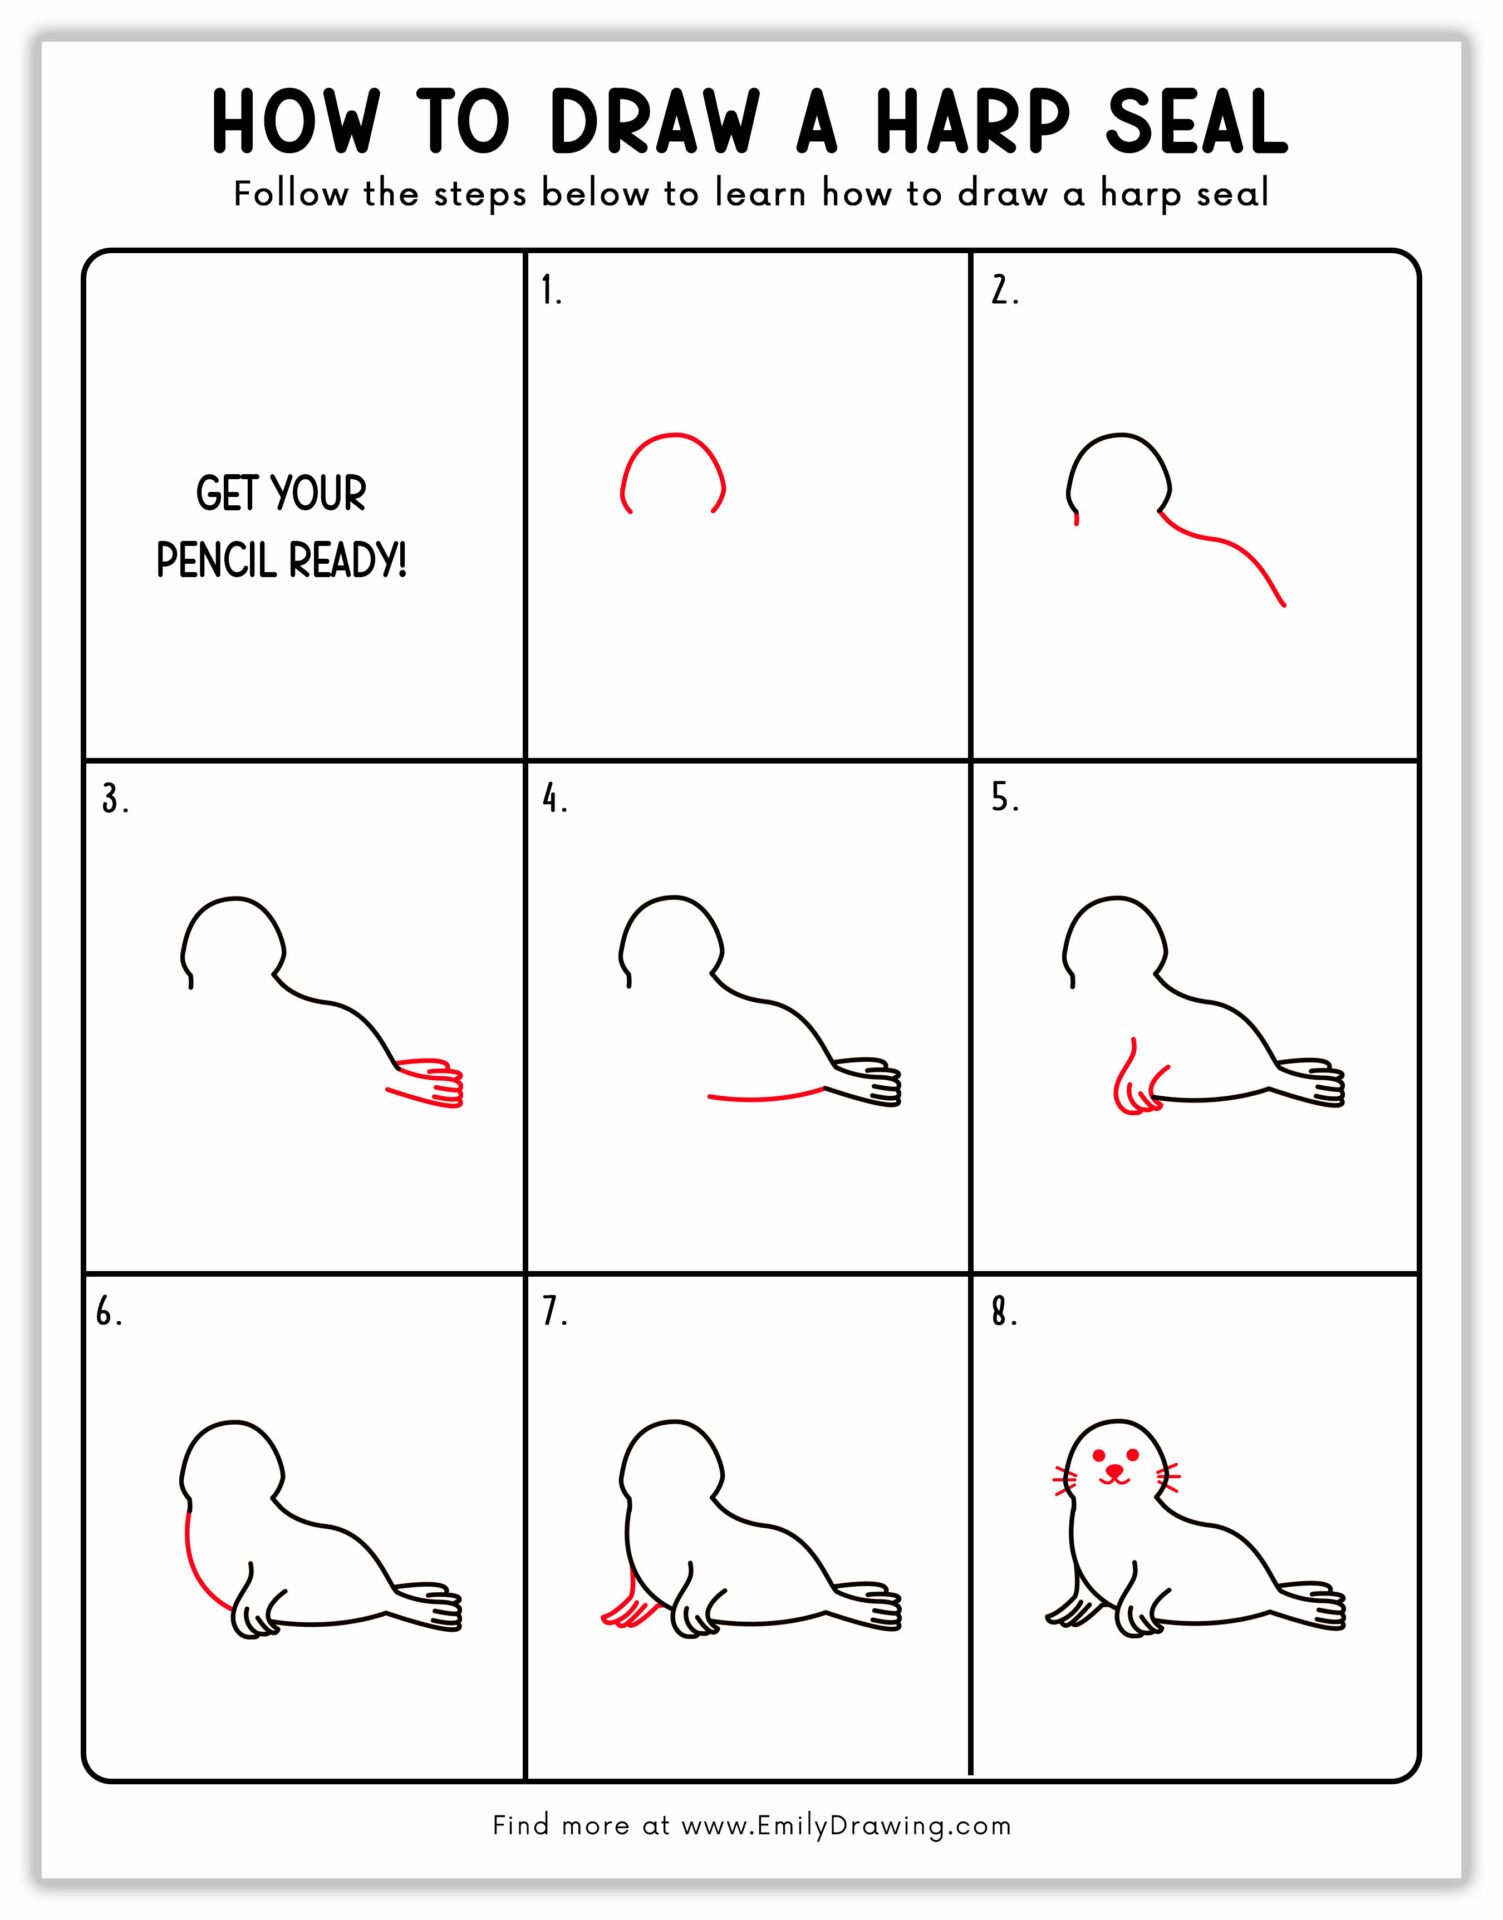
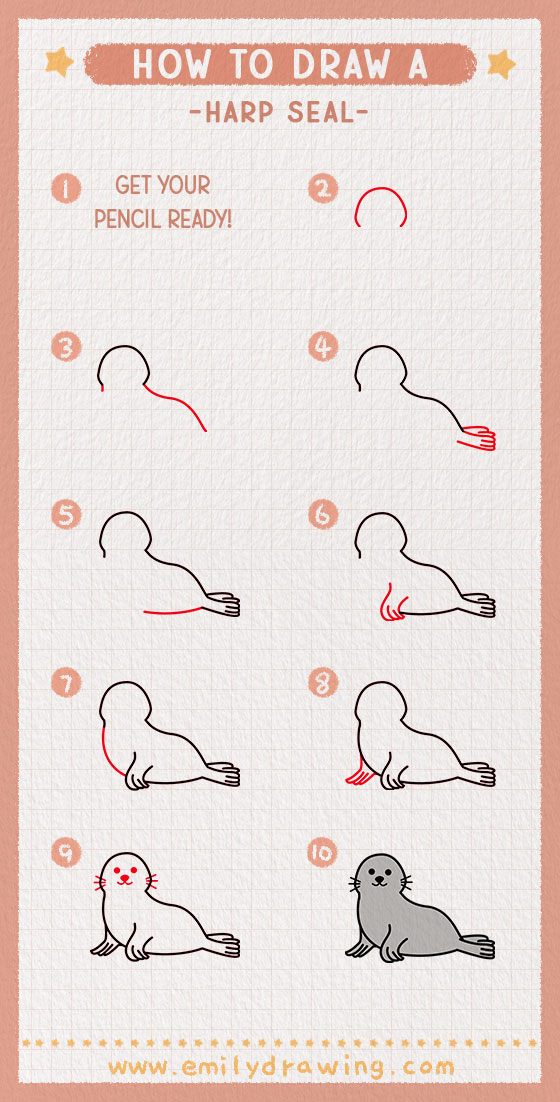
Step 1 – Draw The Top of The Harp Seal’s Head.
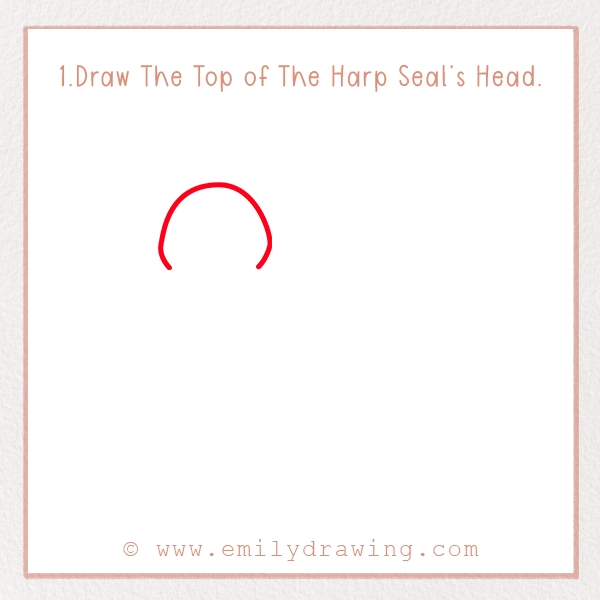
Start by drawing the top of the Harp Seal’s head, which is just a curved line. While this is an easy-to-follow tutorial, the top of the seal’s head is probably the easiest step of them all. It also makes it easier to draw the rest of the seal, as the body starts and ends with the head.
Step 2 – Draw The Harp Seal’s Back.
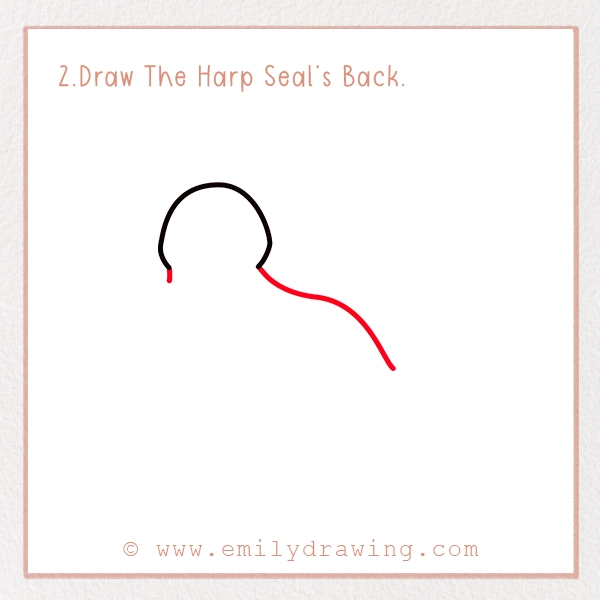
The next step is to draw the seal’s back. You’ll use a line with a slight curve for this step. Don’t worry, it’s easy to copy the line from the tutorial, just keep the back open for adding the rest of the seal’s body.
Step 3 – Draw The Harp Seal’s Back Flippers.
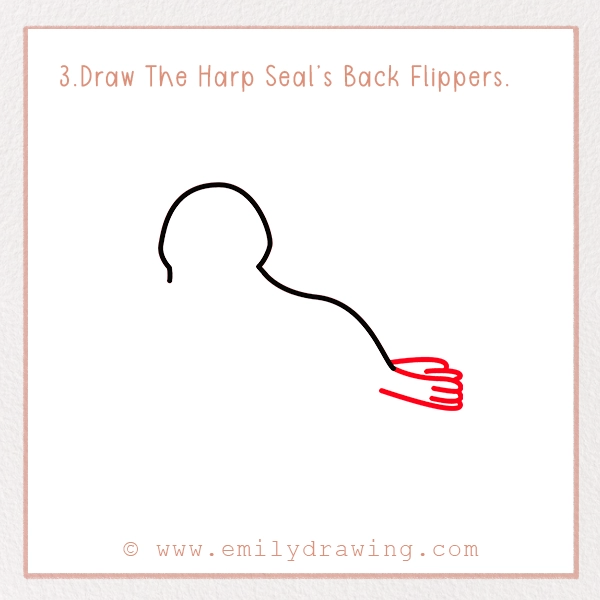
To add the back flippers, start by connecting the first flipper to the line used for the back. The other flipper should be slightly behind the first one. Did you know that harp seals are great swimmers? They can stay underwater for up to 15 minutes, allowing them to both explore and catch their prey.
Step 4 – Draw The Harp Seal’s Belly.
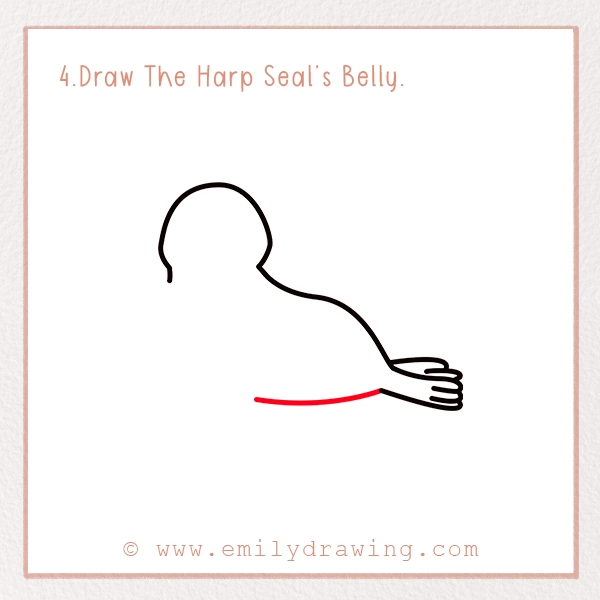
Next, you’ll draw the harp seal’s belly by adding a curved line, which is connected to the first back flipper. The belly should curve upward about halfway, as you’ll need to leave space for the front flippers.
Step 5 – Draw One of The Harp Seal’s Front Flippers.
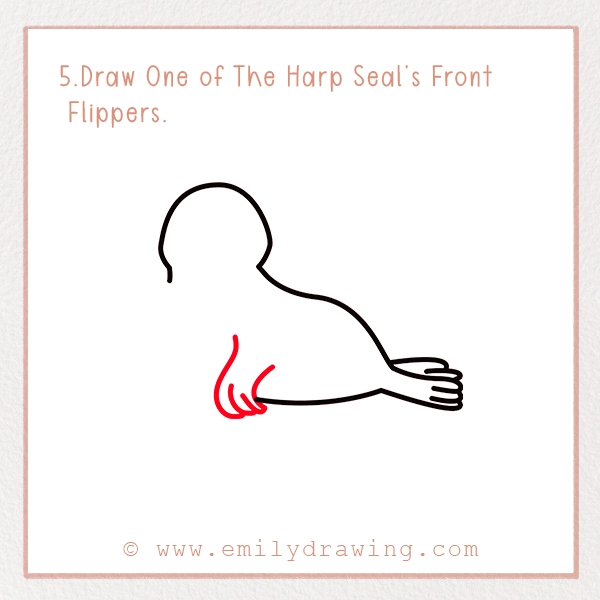
When drawing the first front flipper, the lines should start slightly above the belly, with the harp seal’s claws slightly below the belly. Harp seals have thick, strong front flippers, which are used for both swimming and moving while on land.
Step 6 – Draw The Harp Seal’s Chest.
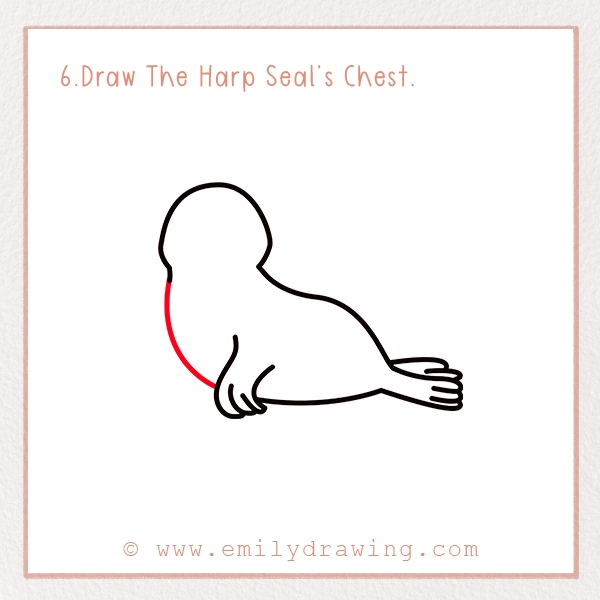
Drawing the harp seal’s chest is as easy as drawing the top of its head. You’ll start on the other side of the front flipper, keeping the line even with the belly. Next, you’ll draw a line that curves upward, connecting it with the head.
Step 7 – Draw The Harp Seal’s Other Front Flipper.
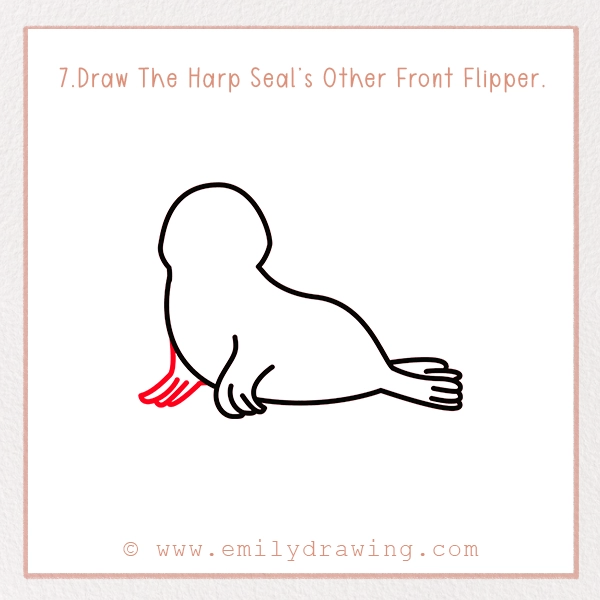
For this step, you’ll draw the harp seal’s other front flipper. This flipper is on the other side of the seal’s body, so it should look like it’s sticking out from behind its belly. The claws are also slightly below the belly; about even with the other claws. With this step, you’re finished drawing the harp seal’s body.
Step 8 – Draw The Harp Seal’s Face and Details.

This is a fun step because you’re adding the harp seal’s face and other details. Start with three dots: two for the eyes and one for the nose. The seal’s mouth is connected to the nose, just like with other animals, with a smile. Next, you’ll add three whiskers on each side of the seal’s face. The whiskers help harp seals sense vibrations underwater.
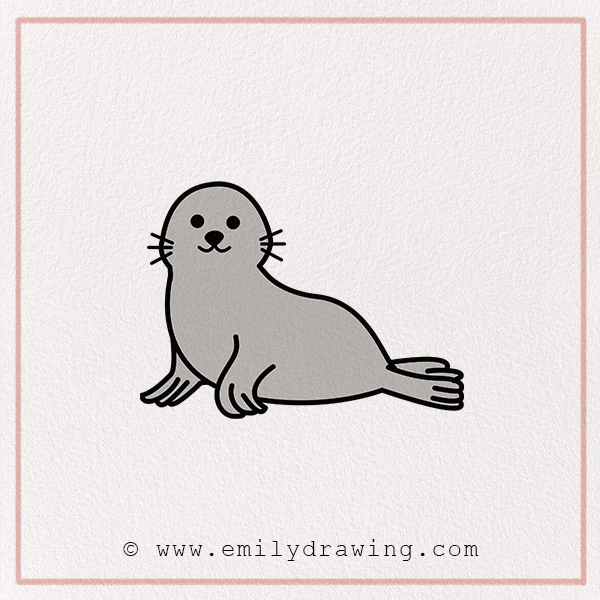
Step 9 – Color In Your Drawing!
There’s still one more step in this “how to draw a harp seal” tutorial, and that step is coloring your harp seal! We’ve chosen to create a realistic seal drawing by coloring an older harp seal with gray fur. This way, you can add a pop of color to your picture instead of leaving the seal uncolored. If you want to color a baby seal without leaving it white, you could always look for a slightly off-white shade. You also want to color in the background to create the scene you have in mind. Is your harp seal underwater or on land? Maybe it’s returned to its breeding grounds. You may even create a fantasy land with a unique color scheme. We want you to have fun while learning to draw this awesome sea animal—and maybe next try your hand at something a little more fierce, like our tutorial on how to draw a bobcat.
Pin it now, Draw later!
We’ve just completed this marine animal tutorial on how to draw a harp seal together. Did you have fun drawing this adorable but really cool sea creature? If you want to draw other animals, feel free to browse through the tutorials on our site—like our step-by-step on how to draw a bobcat for another furry, wild creature. We offer a range of simple drawing tutorials!
Get the FREE Printable Drawing Guide