Leopards are large feline spotted cats found across Africa, Asia, and parts of the Middle East. They are famous because of their unique hunting, fierce spotted body, and large paws.
Due to these fascinating facts, they are interesting animals to draw. Moreover, their tawny coat makes them a challenging artistic project that every novice artist wants to experience.
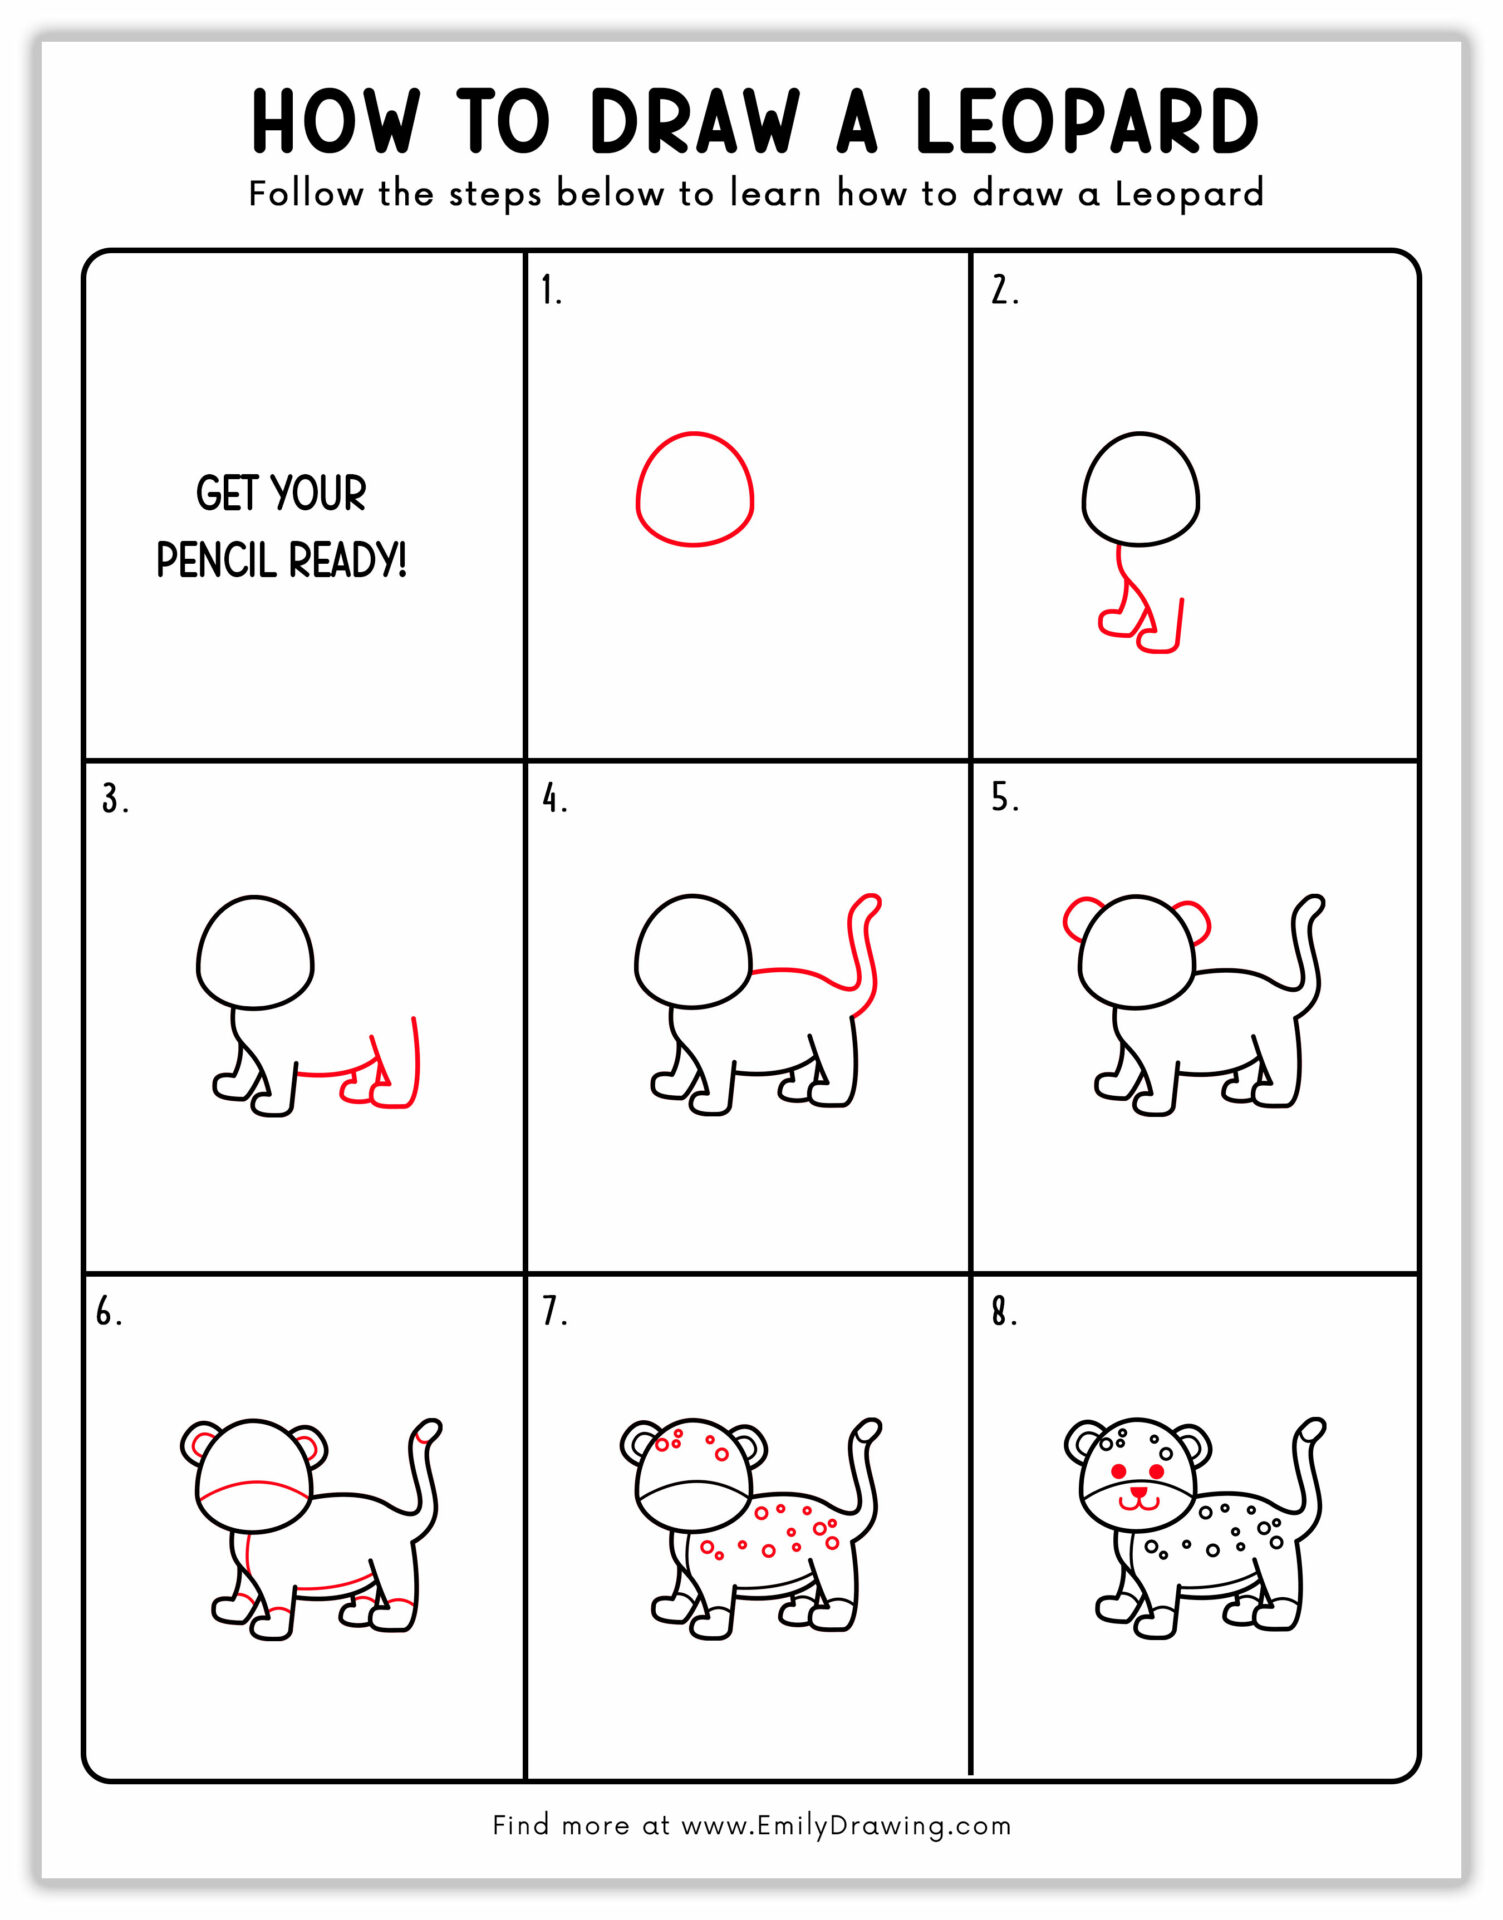
In this easy leopard drawing tutorial, I will take you through eight steps of drawing a cartoon leopard. These steps are so easy and interesting that young artists will love them. So, without wasting any moment, let’s start the leopard drawing tutorial.
How to Draw the Leopard for Kids?
Before starting the tutorial, make sure you have all the necessary art supplies. I suggest you read this full tutorial before starting your drawing. This will help you to determine which art supplies you want.
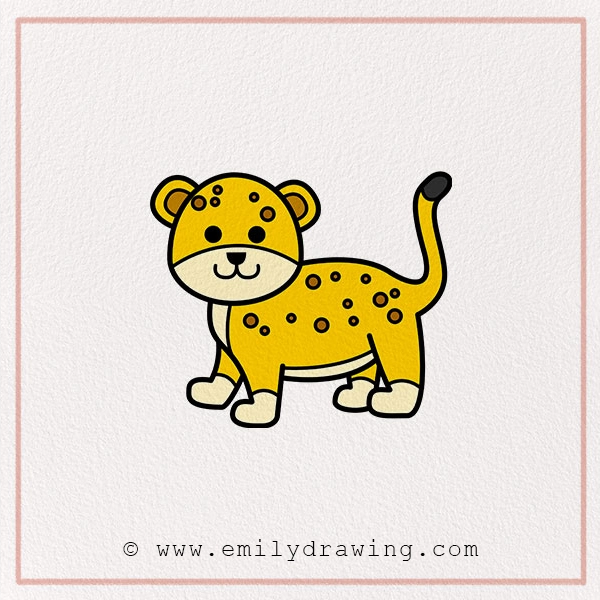
Materials:
- a piece of paper
- a pencil for the guiding lines and sketching
- an eraser
- a black sharpie or a pen for the outlines
- markers or colored pencils for coloring
- our printable drawing guide (Join my Email List below to get this Tutorial)
Here are my RECOMMENDED Art Supplies!
- Crayola Coloring Set (140 Pieces – Mega Value!)
- 24 Colored Crayon Set
- A4 Printer Paper
- Crayola Coloring Pencils
- HP Home Printer with Instant Ink!
Time needed:
15 minutes.
How to Draw a Leopard — Let’s get started!
Step 1 – Draw the Leopard Head
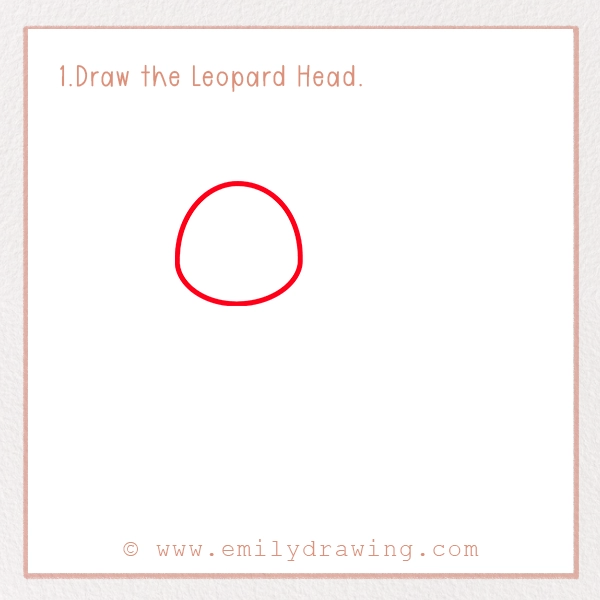
All the drawings of cat-like animals start with the head. They are the base of the leopard’s face and full body. So, you should make sure to do this step carefully.
For this, put your pencil or pen on the top center of your page. Now, draw a small oval or circle. Make sure to keep the head’s size medium to make it a perfect propositional to the body. Ensure the circle is smooth and well-shaped.
Step 2 – Sketching the Leopard’s Front Body and Legs
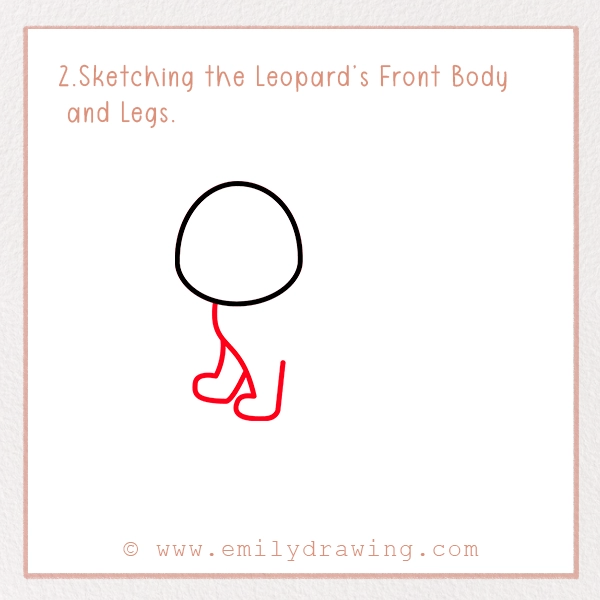
Now, it is time to draw the front of the leopard’s body and legs. For this, draw a short slightly curved line beneath the circle. This line should curve inward at the bottom to make the rear leg. At the base of the leg, draw a small rounded shape for the paw.
Then, draw two curved lines at the spot where the front body is converting into the leg. End it with the claw too. This leg will resemble the “L” shape.
Step 3 – Sketch the Belly and the Rear Legs
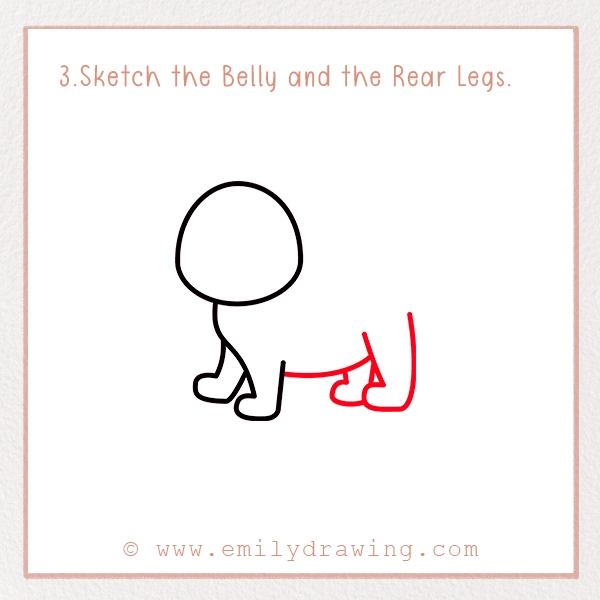
Now, we need to sketch the belly and rear legs in this how-to-draw leopard with pencil tutorial.
Here, put your pencil on the rear leg and create a slightly rounded shape, resembling the belly. Its size should be the one you want for your leopard’s body.
Then, draw a small curved vertical line to end it with a rounded shape for the paw. Your first rear leg is drawn.
At last, draw the last leg. It will be partially hidden by the body, and only a portion of it will be visible. So, simply draw an “L” shape near the first rear leg. This “L” should be pointed in the forward direction.
Step 4 – Draw the Complete Leopard Body
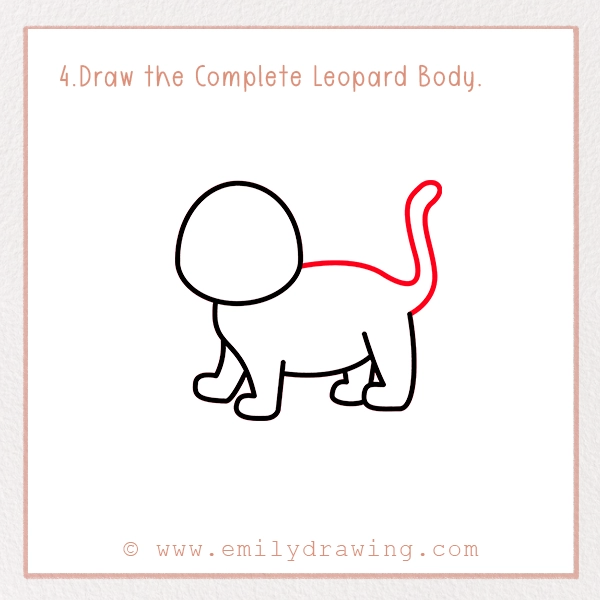
This is the last step in completing the leopard’s body. Here, we will complete the torso and will sketch the tail.
For this, you should draw a horizontal curved line starting from the head and ending an inch away from your rear leg. Now, you need to draw the tail.
For this, draw a slightly “S” shaped tail pointing in the upward direction. This long curved tail should be thicker at the base and gradually taper to a thin tip.
Step 5 – Sketch the Leopard’s Ears
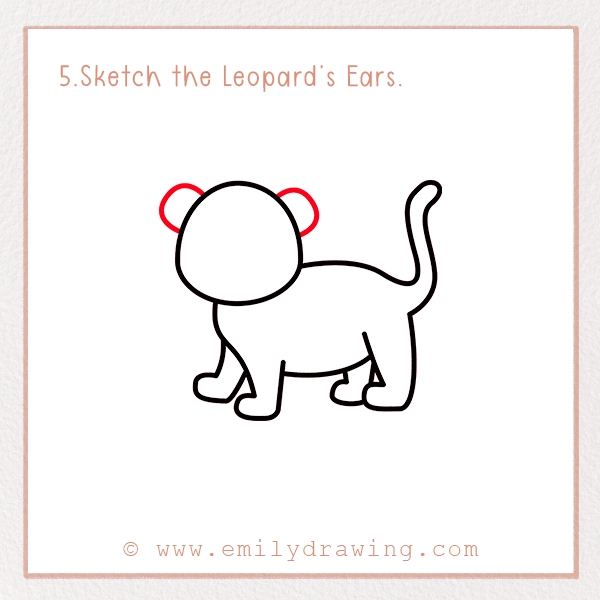
In this how-to-draw the leopard guide, it is time to sketch the ears. For this, you need to draw half circles or “C” shapes. They should be positioned symmetrically on each side of the head.
Step 6 – Add Body Details
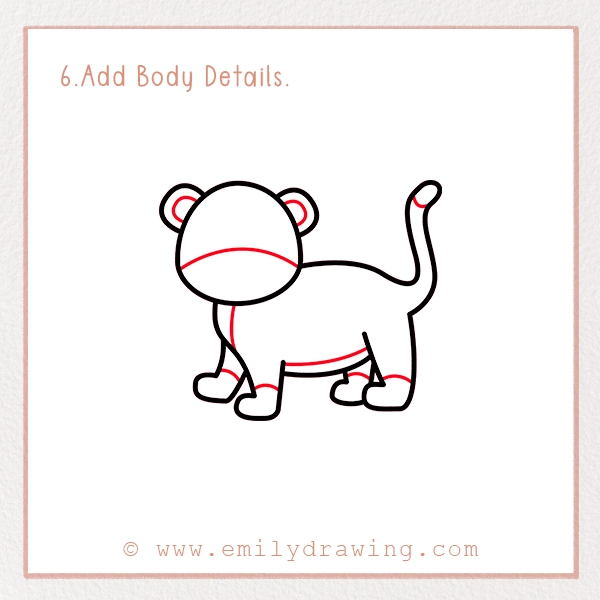
This is one of the easiest steps in this leopard drawing guide. You need to draw a few refined lines to give a realistic look to your animal.
For this, draw a smaller curve or oval shape at the bottom center. It should align with the bottom half of the head and leave room above it for eyes. This area is known as the muzzle.
Draw two small circles inside the ear to refine their look.
Now, draw a small curved line at the tip of the tail. Similarly, draw the curved lines on the four legs to refine the paws.
At last, draw thinner lines outlining the front and belly of the leopard. It will give depth to your drawing.
Step 7 – Add Body Spots
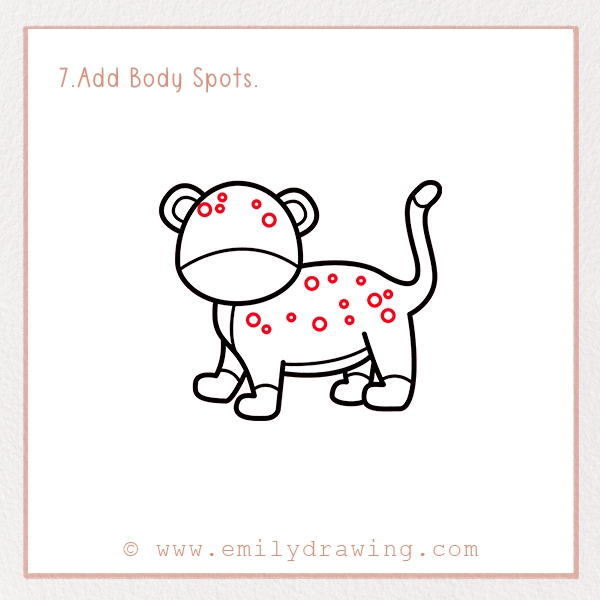
A leopard is famous for its unique body spots. It has a tawny coat covered in distinctive rosette-shaped spots. This coat helps them camouflage themselves in the bushes and trees they inhabit.
You could go for rose-shaped spots if you want. But, as we are focusing on leopard easy drawing tutorials for kids, we will draw small irregular circles.
You could draw the circles in different shapes and make them irregular now and then. Enjoy this step as there are no strict rules here.
Step 8 – Draw the Leopard’s Face
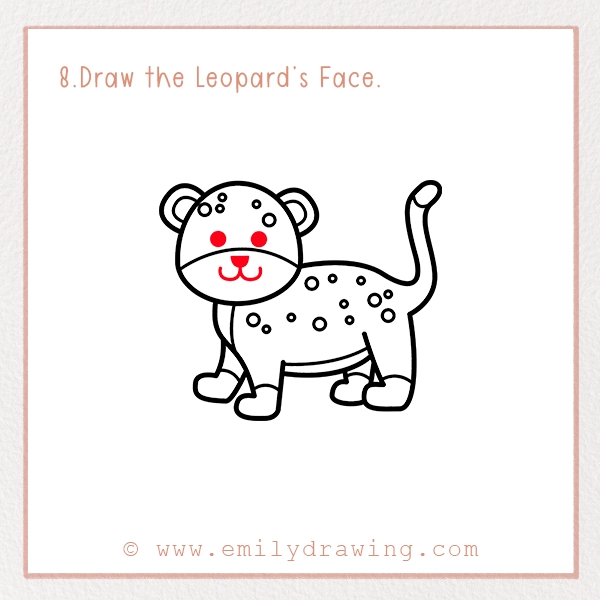
This is the last step where we will learn how to draw a leopard’s face.
For this, add two dark small circles above the muzzle line to indicate eyes. In the lower bottom of the head, beneath the muzzle line, add a small rounded triangular shape. It will resemble the nose. From the nose, add two curved lines, creating a smile.
That’s it! The pencil sketch of the leopard is complete. Now, it is time for the most fun part of this tutorial.
Step 9 – Coloring the Pencil Leopard Drawing

Leopards are famous for their bright yellow color and brown spots. You could go with these colors to bring life to your cute leopard drawing.
You can go for a bright yellow color for the leopard’s body. For the mouth, paws, and outline of the body, you can go with the lemon or pale yellow color. The tip of the tail can be black to make your drawing colorful.
Pin it now, Draw later!
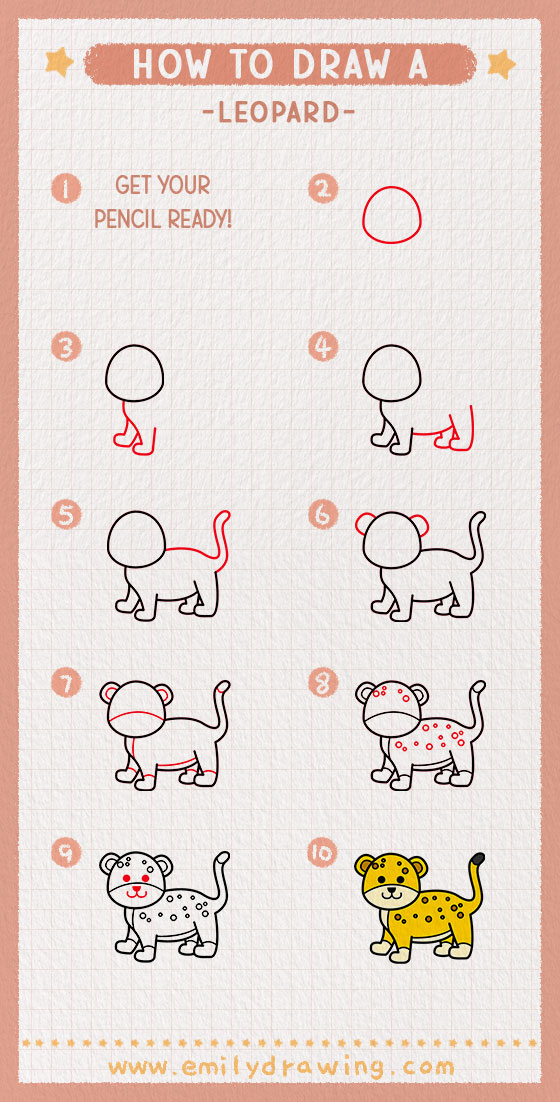
If you want to do something unique, you can check the realistic pictures of different leopard species. It will help you draw different poses and textures and do different colors in your leopard drawing.
Your Leopard’s Drawing is Complete!
Congratulations! Now, share your artistic piece with your followers, friends, and family on social media. Moreover, keep exploring our drawing guides for more amazing tutorials.
