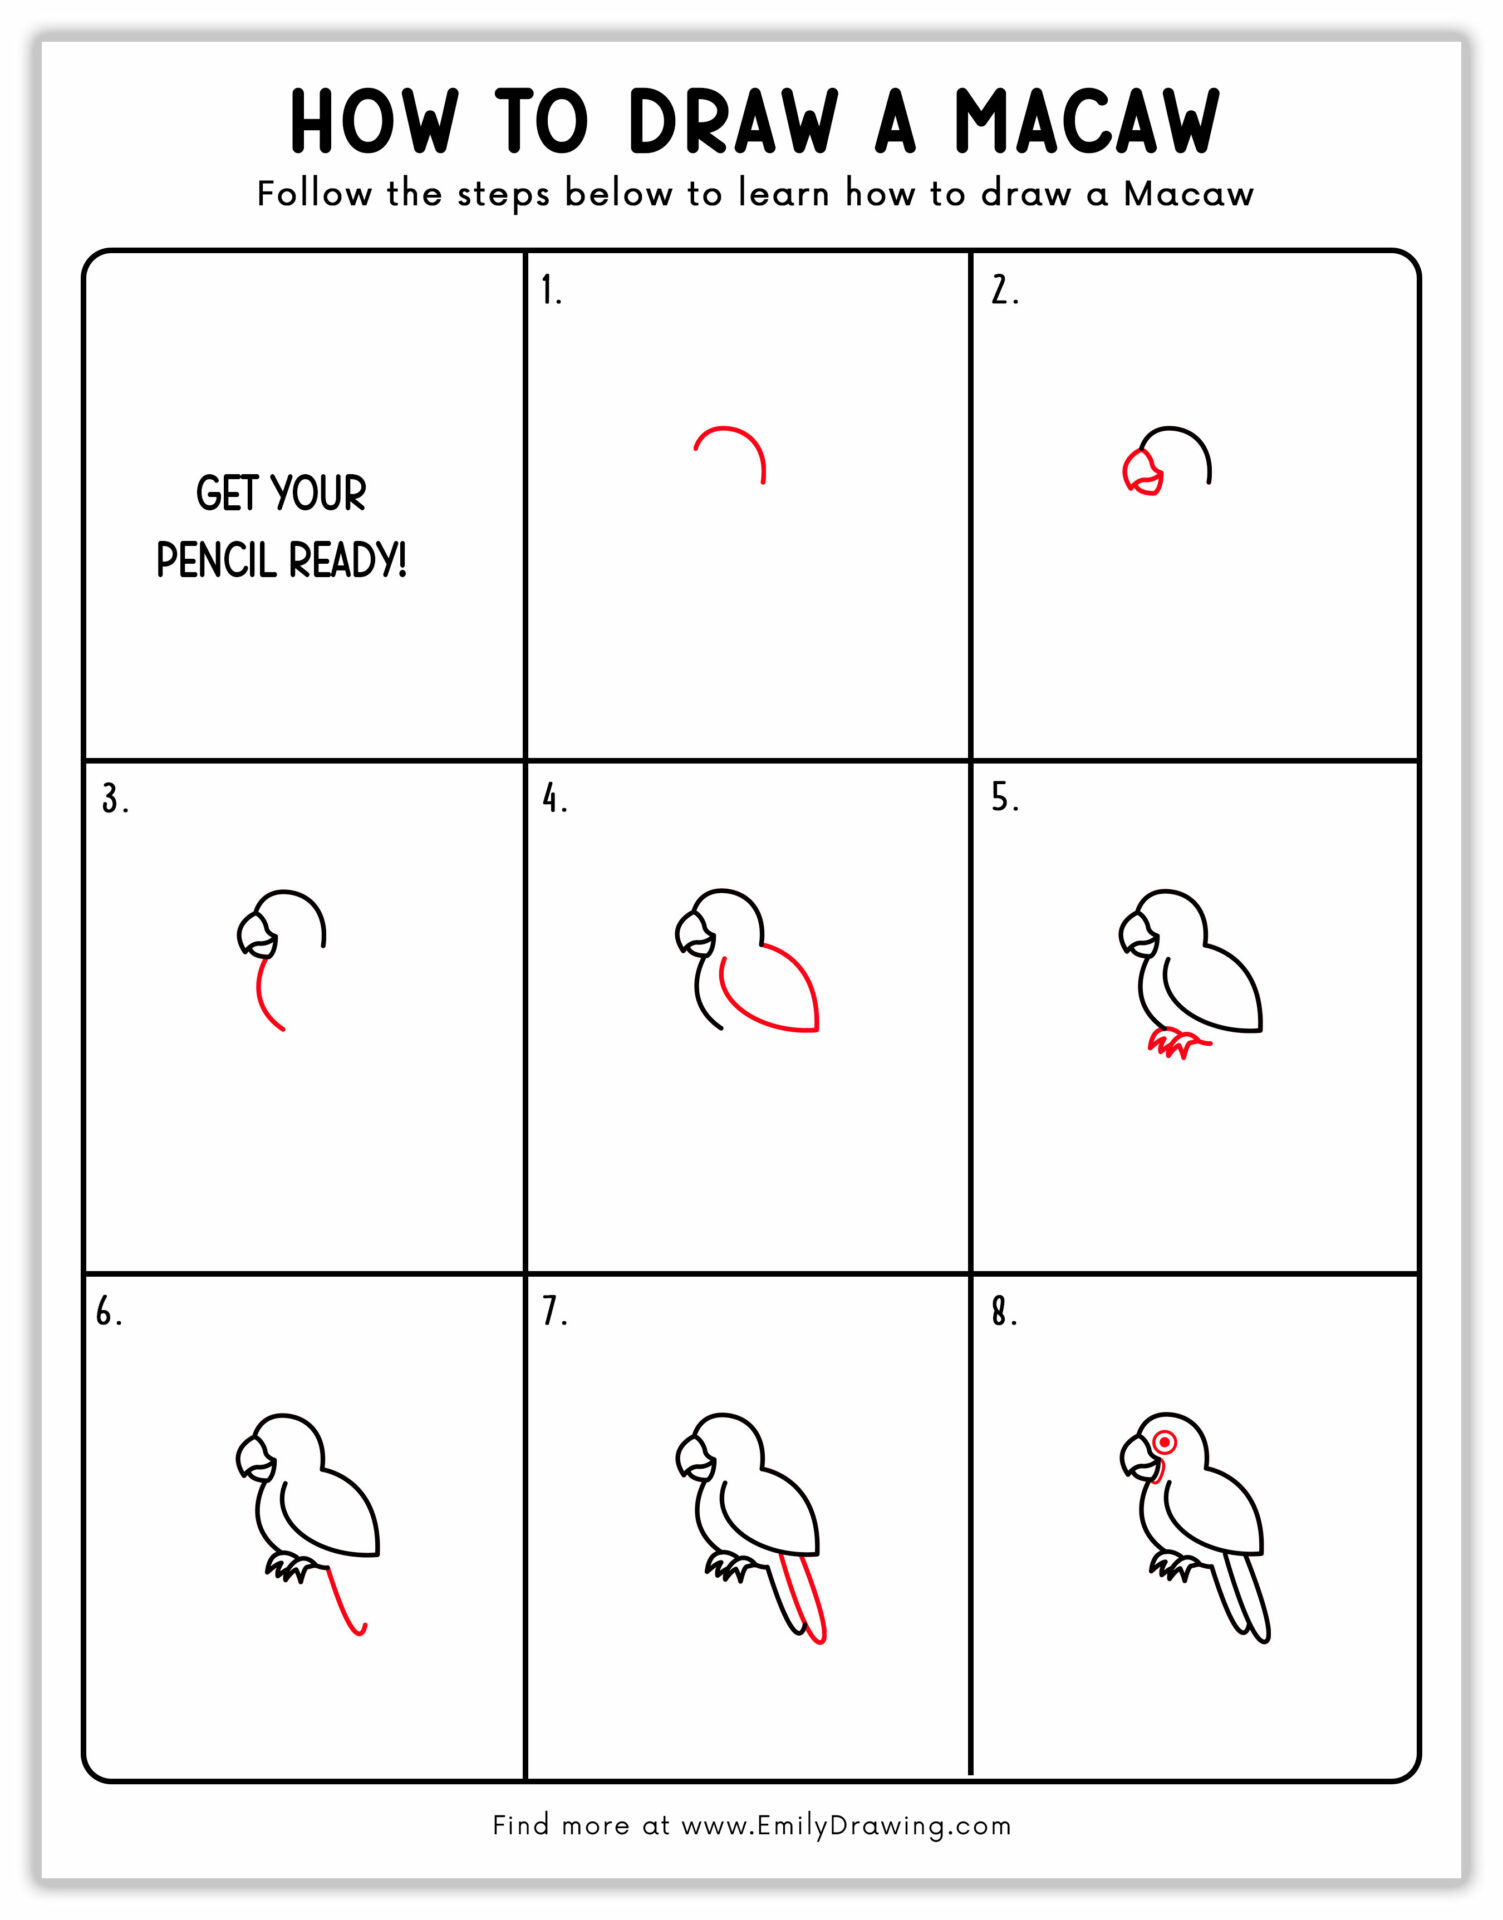
This drawing guide contains the eight simple steps of how to draw a blue and yellow macaw. Blue macaw drawing is popular among kids and novice artists, much like learning how to draw a parrot, which also captivates young artists with its colorful beauty. So, I decided to help you in creating the masterpiece with the help of a few lines and shapes.
This tutorial will help you in sketching a realistic macaw drawing in a sitting posture, just like the techniques used when you learn how to draw a woodpecker. After following these steps, you’ll have a realistic macaw sketch to kickstart your professional artistic journey.
Some Interesting Facts about Blue and Gold Macaw
- They are highly social and intelligent birds that can mimic human voices.
- They are loud and famous for their squeaky voices and natural habitats.
- In a lot of cultures, they are a symbol of intelligence, beauty, and freedom. Artists use them in their drawings to represent these symbols.
- Their bodies have a lot of technical drawing aspects. Their powerful beaks, black feathers, eye-catching colors, and large expressive eyes make them an interesting subject for drawing.
- They are active birds. So, you will find them in a variety of poses and doing different activities around their habitats.
Due to these facts, it is important to learn how to draw a macaw.
How to Draw a Realistic Blue and Yellow Macaw?
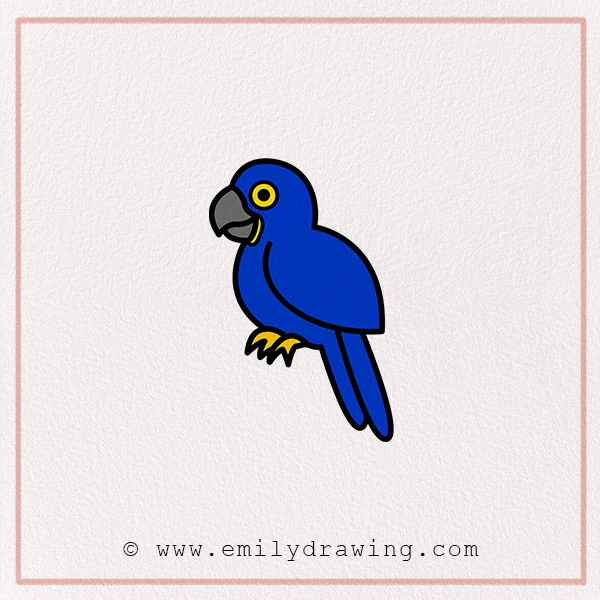
Materials:
- a piece of paper
- a pencil for the guiding lines and sketching
- an eraser
- a black sharpie or a pen for the outlines
- markers or colored pencils for coloring
- our printable drawing guide (Join my Email List below to get this Tutorial)
Here are my RECOMMENDED Art Supplies!
- Crayola Coloring Set (140 Pieces – Mega Value!)
- 24 Colored Crayon Set
- A4 Printer Paper
- Crayola Coloring Pencils
- HP Home Printer with Instant Ink!
Time needed:
15 minutes.
How to Draw a Macaw — Let’s get started!
Step 1 – Start with the Head
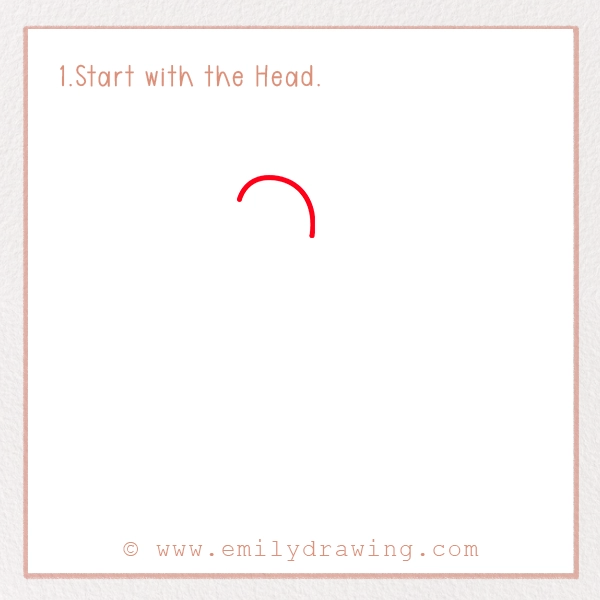
A lot of our drawing guides start with the sketching of the head, and this guide is no exception. We have to draw the head as the foundation for the macaw body.
For this, put your pencil on the top corner of the page. Then, sketch a wide “C” shape or a curve. Make sure the front line is small and the back line is a bit large. The outline of your head is ready.
Step 2 – Add the Beak
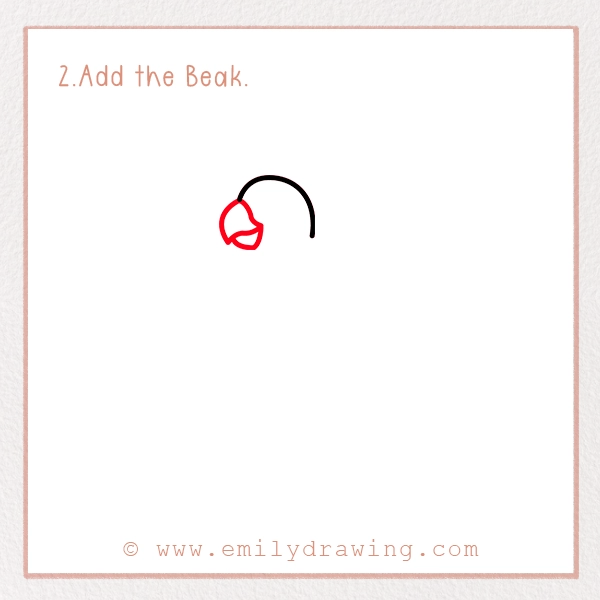
Now, it is time to draw the famous beak of the macaw. For this, put your pencil or pen on the front side of the head, where the curve ends.
Now, draw a large hooked shape that resembles the beak. Beneath it, add a small curve to make the lower part of the beak.
Make sure that the upper part is large and appears stronger than the lower part.
Step 3 – Front Body
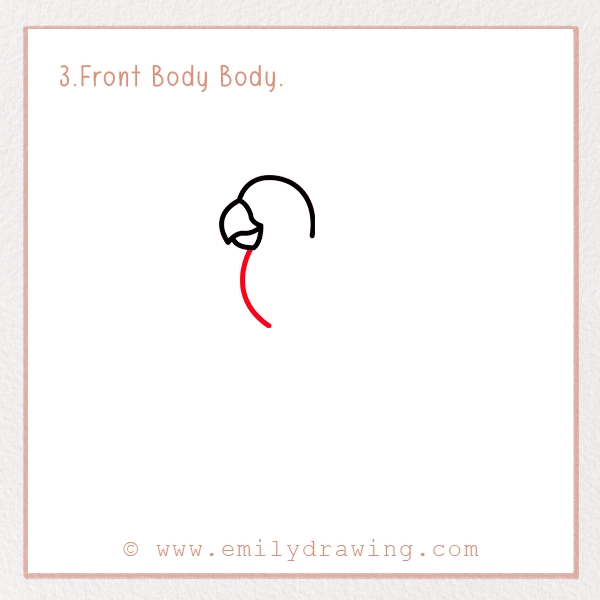
It is time to sketch the front body. For this, you just need to add a curved line beneath the beak. It should be on the front where the beak is present.
Make sure it is larger than the head to create a realistic proportion of the bird.
Step 4 – Sketch The Wing
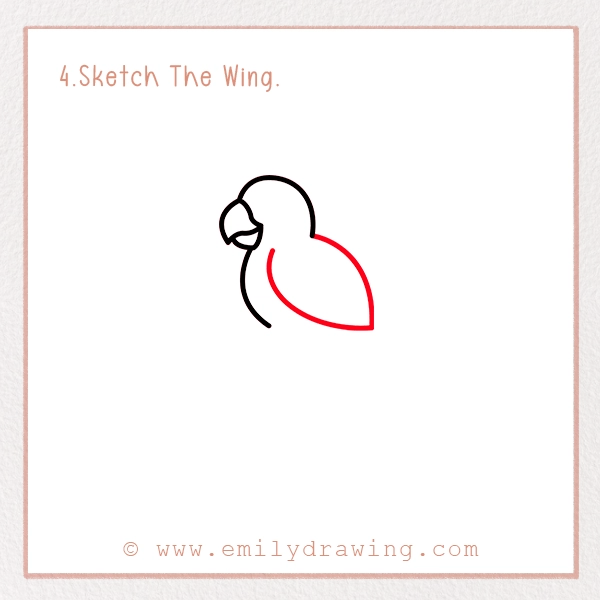
Just like step 3, this step is also going to be really simple. You have to draw the famous wings of the macaw.
For this, sketch a teardrop shape on the backside of the macaw. Start drawing it from the back of the head and create your first curve. Then, draw the second one on the inner side of the body. You should ensure there is a sharp corner where both curved lines meet.
Moreover, the inner curved line should remain at a decent distance from the front body’s curved line.
Step 5 – Sketch the Legs
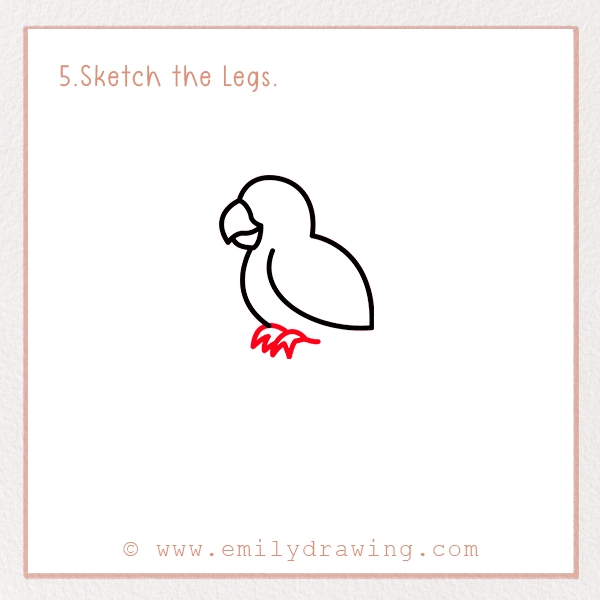
In this how-to-draw-a-macaw guide, we are focusing on sketching sitting macaws. So, you should sketch the legs resembling the sitting posture.
For this, you have to do two things. One is to extend the front curved line, stopping it just an inch before the tip of the wing. Make sure this curved line remains parallel to the wing’s curved lines.
After doing this, add curved claw-like shapes at the bottom of the macaw’s front body. They should be curved downwards to mimic the bird’s natural grip.
Step 6 – Add the Tail
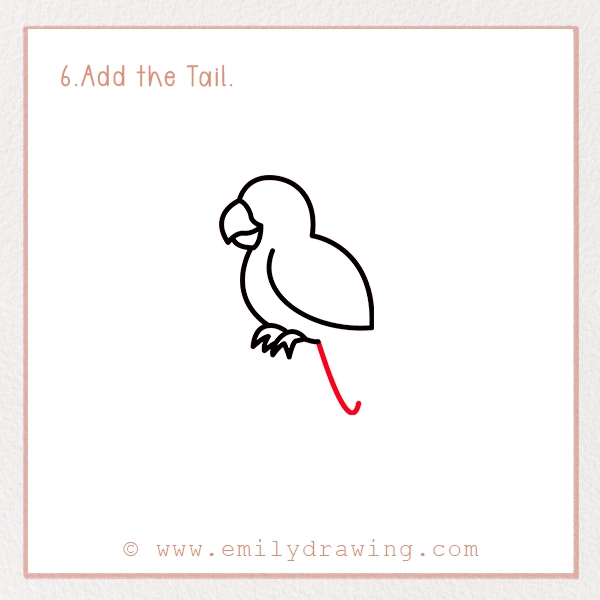
In this step, we are going to sketch the elongated and elegant tail of this bird.
To do this, sketch a small curved line with the claws, as shown in the picture. Now, draw a long tilted line in the downward direction. At the end of it, curve it slightly in the upward direction.
Step 7 – Sketch Macaw’s Tail Features

Now, we need to draw another layer of the tail to sketch its features. Add the curve with the tail’s line to give it a feather’s shape, a feature that’s also beautifully explored in our tutorial on how to draw a woodpecker. Make sure it is attached to the wings.
Step 8 – Add Facial Expressions
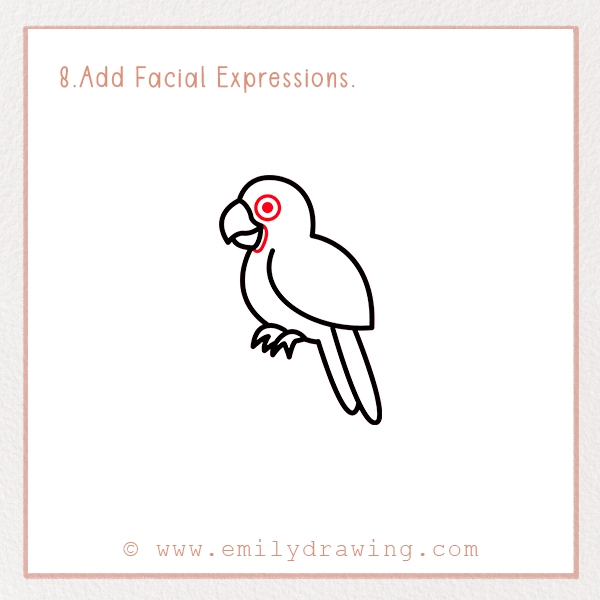
This is the last step where you have to add different facial expressions of the macaw.
For this, add a small circle near the beak of the parrot. In the circle, add a dark big dot to make the realistic macaw’s eyes.
Now, sketch some fine curved lines near the beak to pop up the facial features of the macaw in your drawing. These lines will give a realistic vibe to the macaw’s paintings.
Step 9 – Coloring the Macaw Drawing

If you are aiming for a realistic blue and yellow macaw drawing, remember to highlight their vibrant colors with bold blues and golden hues. You should color the body of the macaw in blue and add yellow or gold in the claws, much like the attention to vibrant details emphasized when learning how to draw a camel.
If you don’t like blue and gold macaws, you can go for other colors too. For example, scarlet and colorful macaws are known as the rainbows of the rainforests. Green and red macaws are also famous.
You can outline the macaw’s drawing with a black marker and add some refined lines on its body for a realistic look, similar to the techniques shared in our guide on how to draw a parrot. You can use a light pencil to draw small lines on the feathers of your macaw’s drawing.
Pin it now, Draw later!
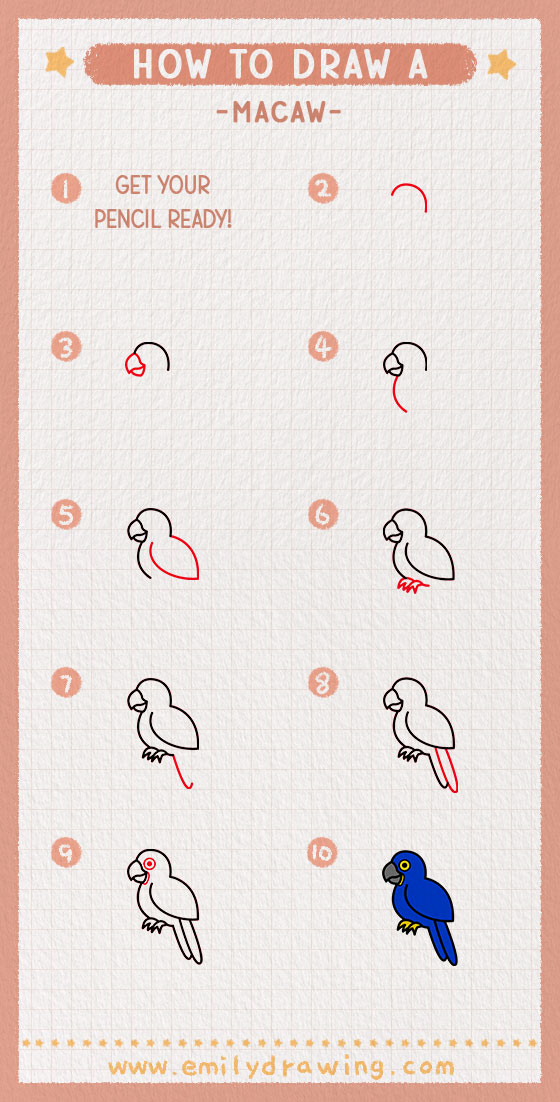
Draw a Macaw for Kids
This drawing tutorial is so simple that your kids can follow it to have their realistic and cute macaw drawings. You can sit with them and guide them where they feel stuck.
Once their drawing is completed, you can give them feedback to help them polish their skills. This drawing activity can be a great way to build a bond with your children.
Otherwise, you can draw macaws on their birthday cards to make the occasion special for them.
If you want other animal drawing tutorials, like learning how to draw a camel, keep checking our updated drawing guides. We keep updating our guides for professional artists, novice artists, and kids.
Get the FREE Printable Drawing Guide
