Mantis shrimp is not a real shrimp but a type of stomatopod: a relative of crabs and lobsters. They have been on Earth for about 400 million years, and have almost 400 species.
Scientists are fascinated by Mantis because of its exceptional vision and strong punch. They have done extensive research on the eyes and brain of this marine animal and found new things every time.
For example, Mantis has 16 different color receptors in the eyes and brain. It helps them to discern ultraviolet, polarized, and visible light with great precision.
Due to these fascinating research and facts, mantis shrimp is an interesting subject to draw. However, novice artists find it difficult to draw this insect on their piece of paper.
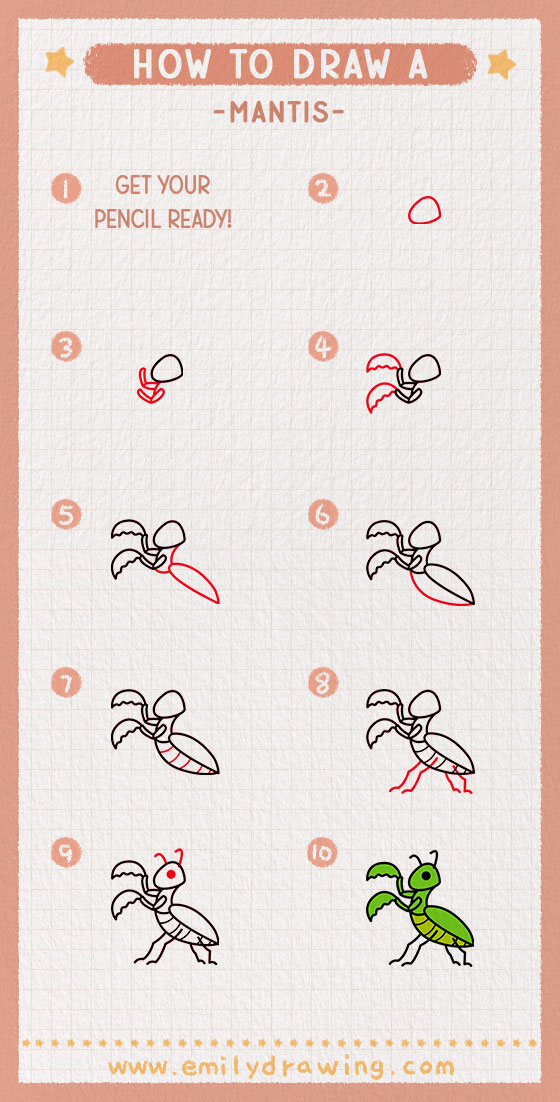
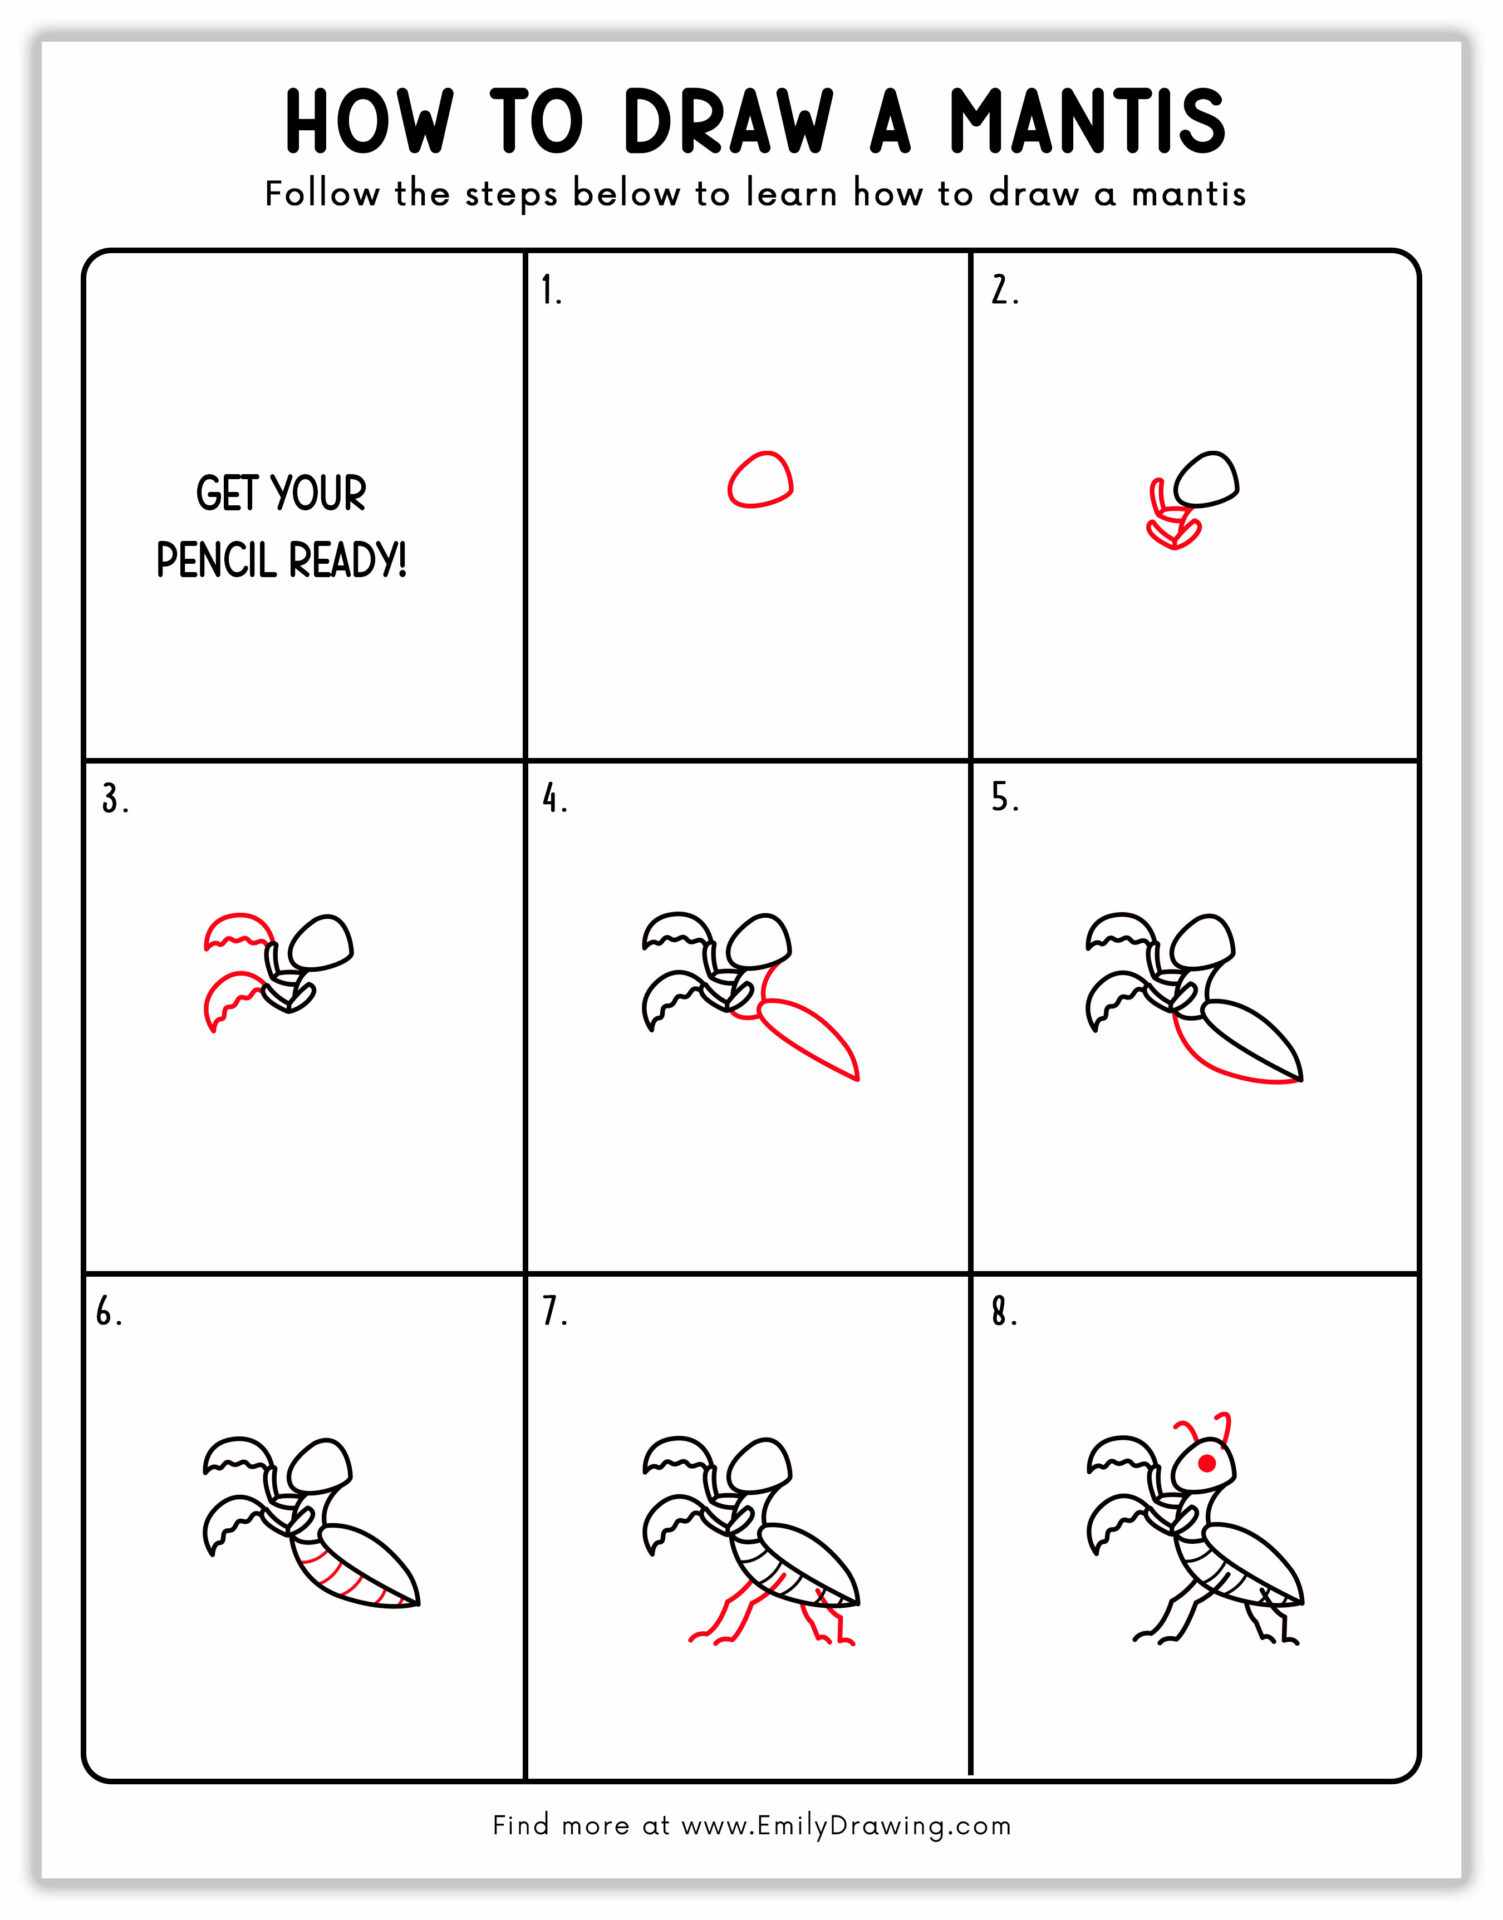
To help them, I have created this 8-step guide. It includes simple shapes and steps to help you achieve a full-fledged marine animal drawing.
How to Draw a Mantis Shrimp with a Pencil?
You will find a lot of reference pictures of this marine animal in the books and on the internet. So, collect them along with the art supplies to create a fascinating mantis drawing.

Materials:
- a piece of paper
- a pencil for the guiding lines and sketching
- an eraser
- a black sharpie or a pen for the outlines
- markers or colored pencils for coloring
- our printable drawing guide (Join my Email List below to get this Tutorial)
Here are my RECOMMENDED Art Supplies!
- Crayola Coloring Set (140 Pieces – Mega Value!)
- 24 Colored Crayon Set
- A4 Printer Paper
- Crayola Coloring Pencils
- HP Home Printer with Instant Ink!
Time needed:
15 minutes.
How to Draw a Mantis — Let’s get started!
Step 1 – Sketch the Head

In the first step, we should sketch the head that is the base of the mantis drawing. To draw it, you should add a dome shape or small oval to represent the head.
You can sketch it on the upper-middle part of the drawing area as our mantis’ drawing will depict a standing insect, ready to attack.
Step 2 – Draw the Base of the Raptorial Legs

Just like the vision, Matis’s raptorial legs are also famous. They are being used to attack and smash the prey, and are strong enough to even crack the crab’s shell.
In this step, we are going to draw the base of these legs- the point from where they are attached to the body. This point is in the shape of an “L.”
To sketch it, you should draw a small vertical line on the front of the head. With it, draw two hook shapes attached to each other in the form of an “L.” They should be bent in such a form that it indicates a joint.
Repeat the same process just beneath this “L” shape to indicate the second raptorial leg.
Step 3 – Draw the Claws of Raptorial Legs

This step is going to complete the forelegs (raptorial legs) of the Mantis. To sketch them, you should draw a claw on the top of each raptorial leg.
For this, you should sketch two dome shapes, each attached to the forelegs. They should be larger than the head as they are the most powerful and prominent part of the body. The bottom of these claws should be rugged or wavy in shape.
Step 4 – Sketch the Thorax and Wings

We have to draw two main things in this step: the thorax and the wings. First of all, we have to focus on the thorax.
The vertical line we draw in the second step is the front line of the thorax. So, what you have to do only is sketch a curved shape at the bottom of the head, parallel to the front line. The curved line should be facing the inward direction. At the end of it, sketch a curved line to close the thorax shape.
Now, we have to draw its wings. To do it, you should add a sketch of a tear-drop shape, starting from the thorax. It should be long as its tip is the final point of our body’s length. So, keep it as long as you want the body of your drawing.
Step 5 – Sketch the Abdomen of the Mantis

It is time to sketch the last body part of Mantis; the abdomen. To draw it, you should sketch an elongated half-oval shape, starting from the thorax. It should taper at the end, and connect it with the tip of the wing.
Step 6 – Add Segments to the Abdomen

Every insect has a segmented body, which gives it a unique appearance. In many species of Mantis, each segment is a different color, making the insect’s body colorful and distinctive.
In this step, we have to make these segments. For it, draw thin curved lines that are evenly spaced from each other on the abdomen. These lines should follow the natural shape of the body to have a realistic mantis drawing.
Step 7 – Sketch the Hind Legs

There are a total of six legs of the Mantis: two on the front and four at the back. We already have drawn two front legs, so it is time to focus on the hind legs.
To sketch them, you should draw thin bent lines extending downward and facing forward. They should be attached to the abdomen.
The first pair of legs should be large in size and end in a claw-like shape. The last pair can be at the tip of the abdomen, facing the other direction from the first pair, and smaller in size. In this way, we can depict a standing mantis.
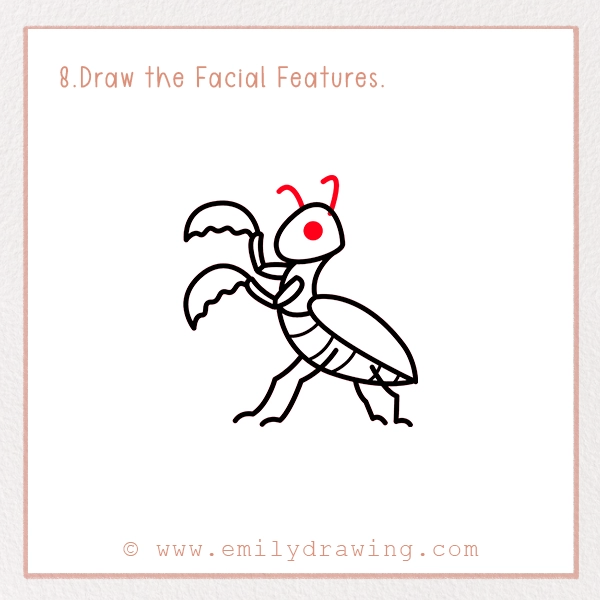
Step 8 – Draw the Facial Features

This is the last step of completing the Mantis sketch. Here, we need to focus on the eyes and antennas of this marine animal.
To draw the eye, you should create a small dark circle in the center of the head. That circle can have a small white dot in the center to depict the pupil.
At last, draw two thin lines on the top of the head. These lines should curve slightly at the top to depict the natural shape of the antennas.
At this point, a complete pencil sketch of the Mantis should be in your sketchbook.
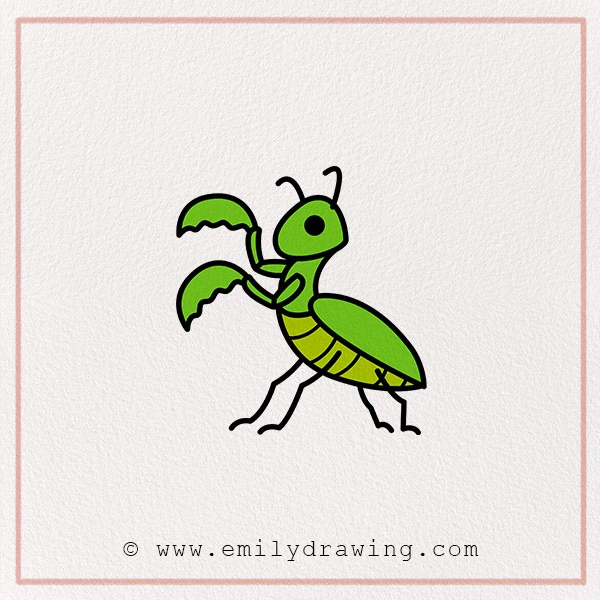
Step 9 – Color a Mantis Shrimp Pencil Drawing

Mantis has almost 400 species, and each of them has unique colors. Our drawing depicts the color of one species. You can use this as a reference, or you can search for other mantis species to color your drawing accordingly.
Pin it now, Draw later!

There are a few colorful and famous mantis species that you may want to know:
- An orange-spot Mantis shrimp has orange, yellow, green, and white spots on its body.
- Peacock mantis shrimp is the most famous one as it has a shell similar to a peacock. Blue, green, and yellow are on the body, while the legs are red and the eyes are purple.
- Zebra mantis shrimp have cream and brown stripes.
- Red Sea Mantis shrimp are beige with thin red stripes and dark rear ends.
Except for it, you can find other species and colors too. Moreover, you can add a colorful background to your mantis drawing to help it stand out from the rest.
Once you master the Mantis drawing, you can check other drawing tutorials too. These will help you in becoming an expert artist in a few days.


