Moths are the most misunderstood insects. Some believe they are different from butterflies because they are nocturnal- sleeping during the day and navigating at night. But, in reality, they are just like butterflies that love to spend time on the flowers.
They are cute and important for the ecosystem as they are a key indicator of a healthy environment. Moreover, their population is way larger than butterflies. That’s why their appearance is important when you want to sketch a healthy biodiverse environment. It is also a crucial insect to draw for those who want to learn how to sketch beautiful butterflies.
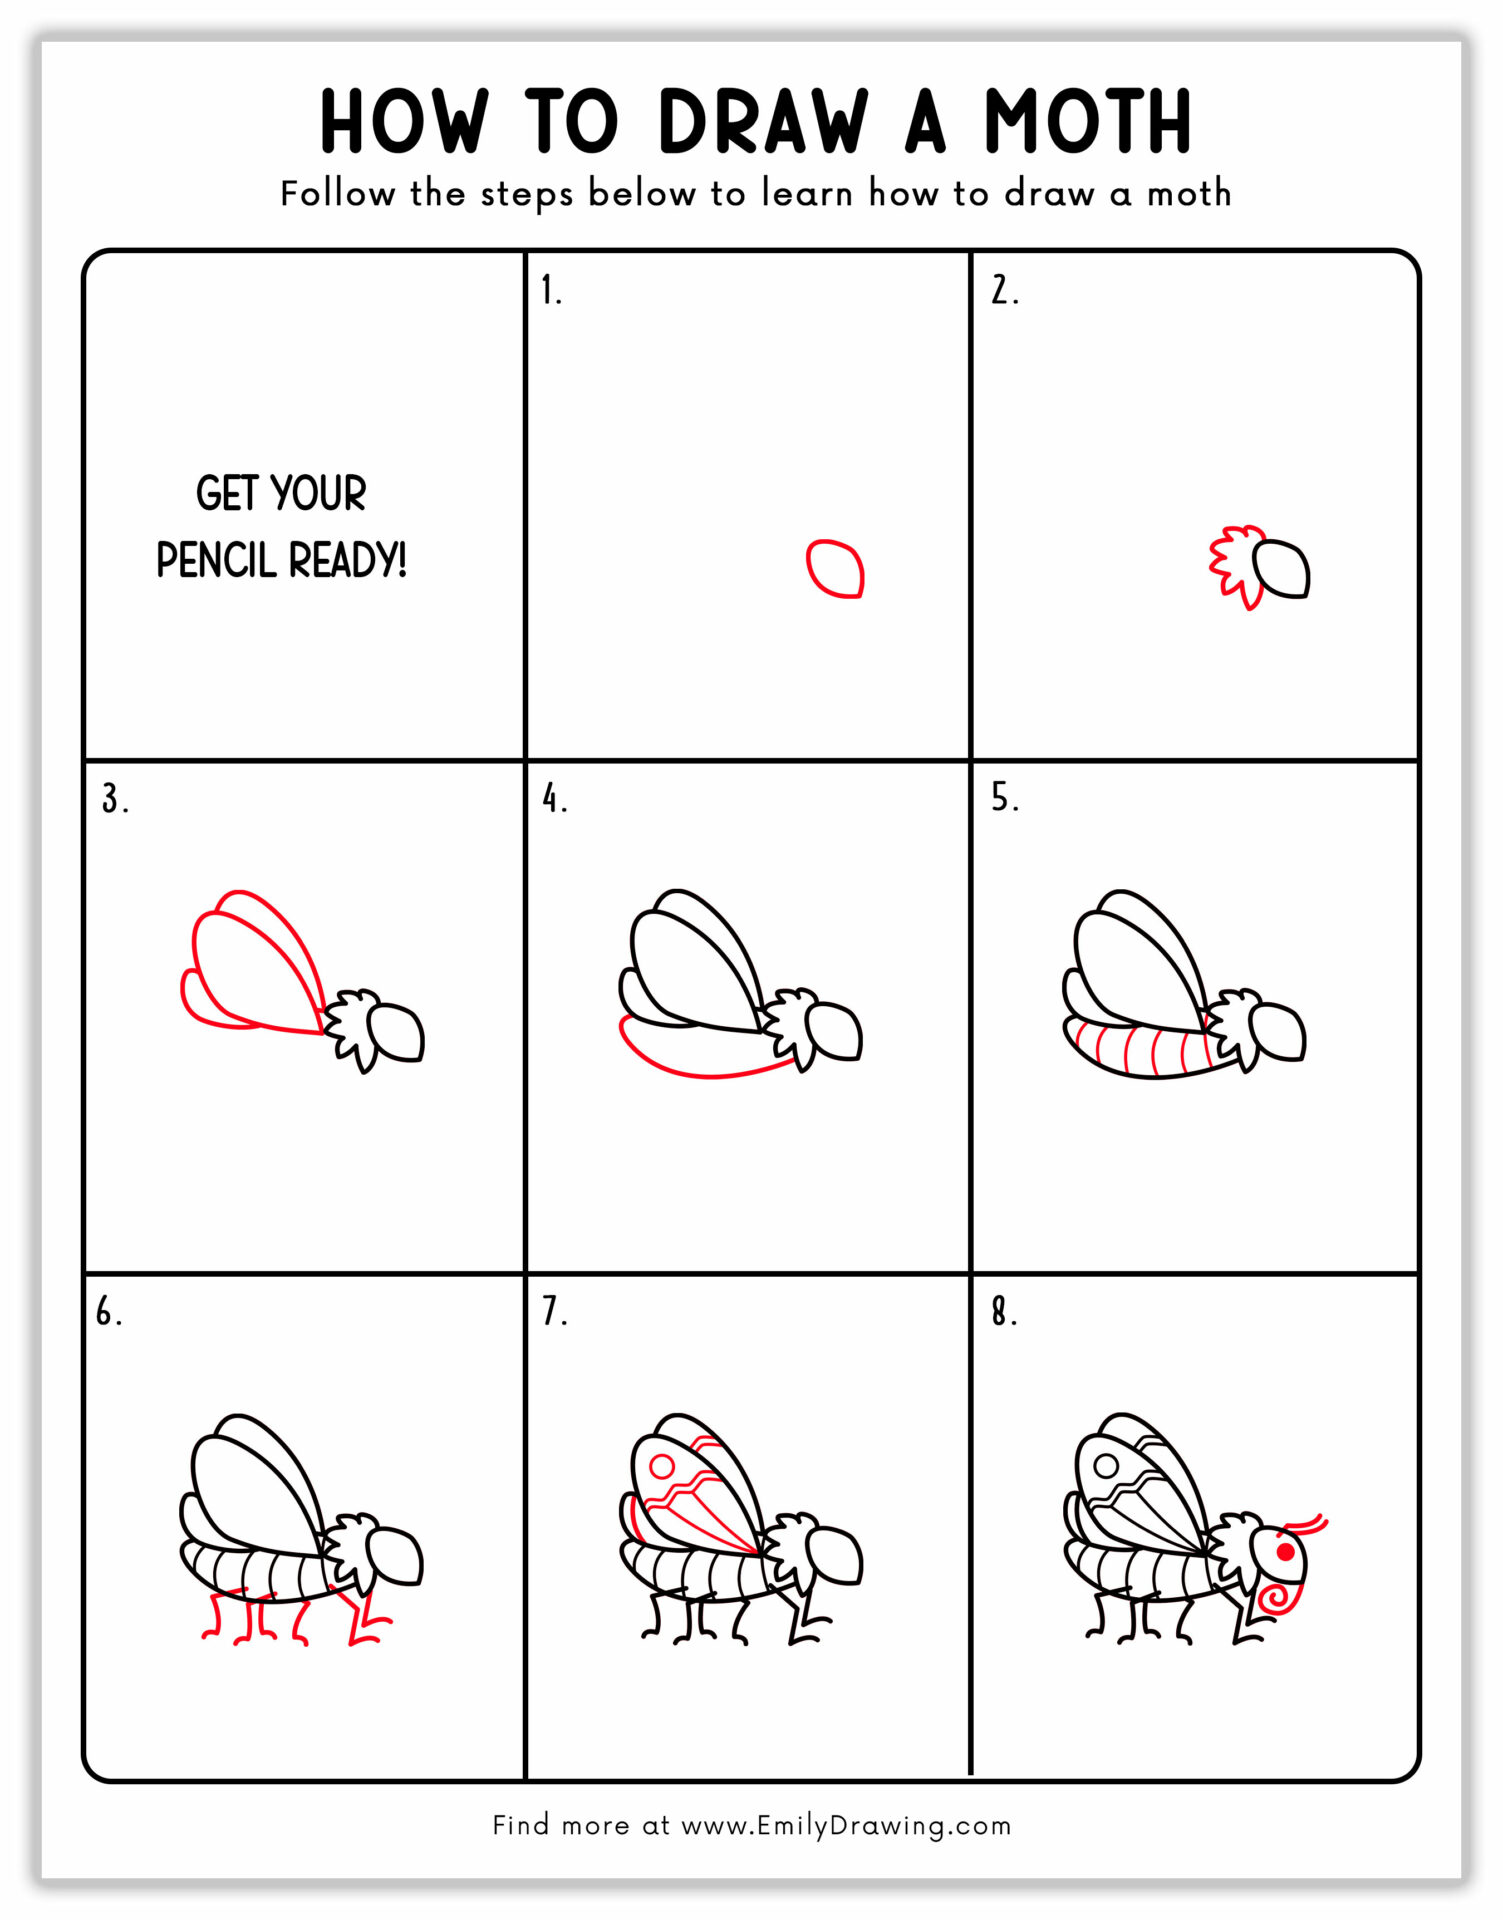
How to Draw a Moth? 8-Step Easy Drawing Guide
I suggest you start this drawing while sitting in nature. The beautiful weather and greenery will soothe your nerves, and help you in sprinkling creative thoughts in your sketch.
Materials:
- a piece of paper
- a pencil for the guiding lines and sketching
- an eraser
- a black sharpie or a pen for the outlines
- markers or colored pencils for coloring
- our printable drawing guide (Join my Email List below to get this Tutorial)
Here are my RECOMMENDED Art Supplies!
- Crayola Coloring Set (140 Pieces – Mega Value!)
- 24 Colored Crayon Set
- A4 Printer Paper
- Crayola Coloring Pencils
- HP Home Printer with Instant Ink!
Time needed:
15 minutes.
How to Draw a Moth — Let’s get started!
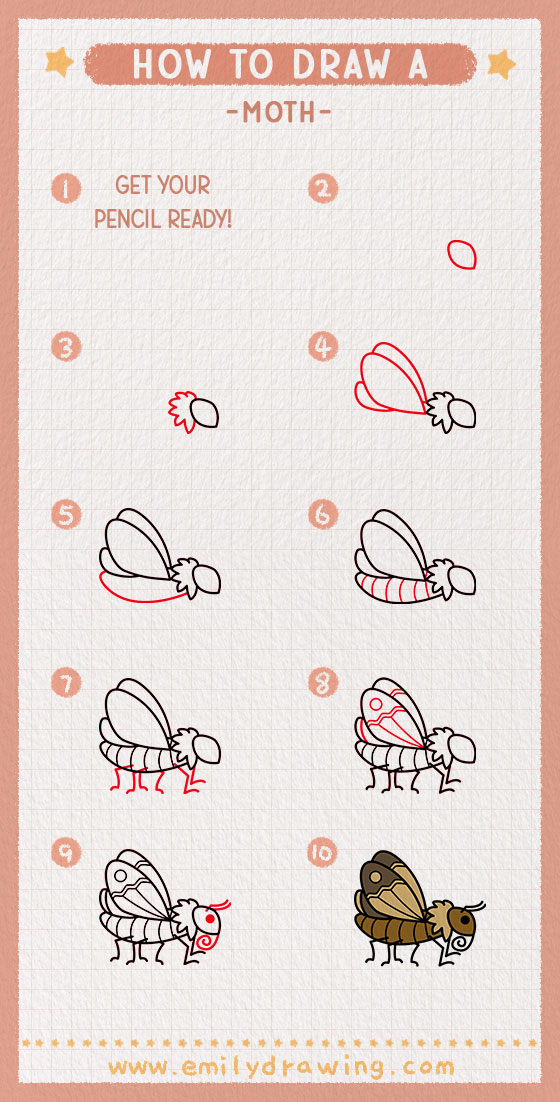
Step 1 – Draw the Head
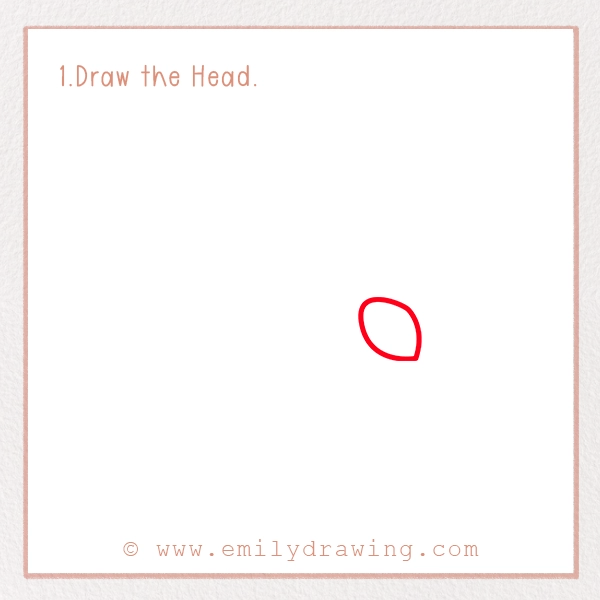
On the left side of the page, sketch a small oval shape. This oval shape is the base of the head in which we will draw eyes and antennas in the later step. Make sure it is a bit irregular, as shown in our picture, to make it realistic.
Step 2 – Sketch the Thorax
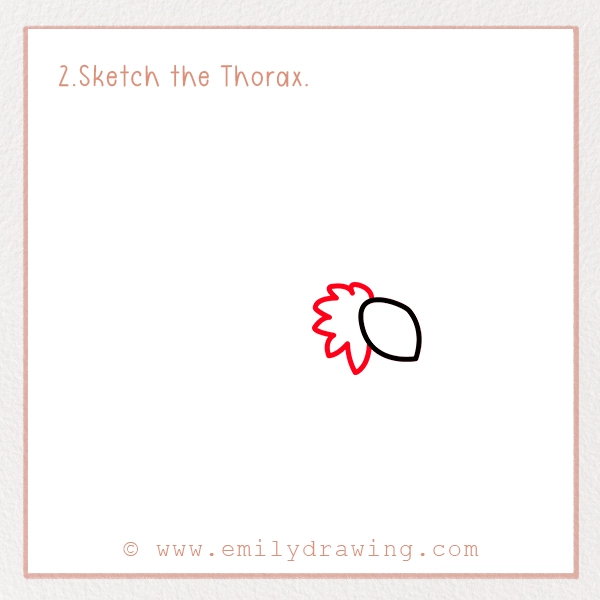
From the head, sketch a small thorax. It is the second part of the body and a bit larger than the head. In the moth, this body part has a lot of hair.
To draw it, you should add a small oval shape that is attached to the head. One side of it should be wavy to depict the hair.
Tip: If you want to have a realistic moth drawing, you can add small thin lines inside the thorax by extending the waves. These lines will make the thorax hairy.
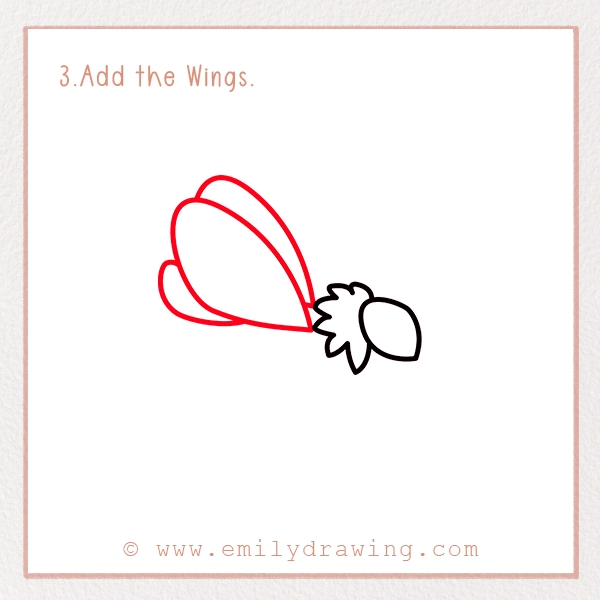
Step 3 – Add the Wings
Just like butterflies, moths have large and beautiful wings. It enhances their beauty and helps them in navigating different flowers. Moreover, a few species of moth travel from one place to another. So, they need wings for it too.
They are attached to the abdomen, just beneath the thorax. They are in two parts: fore-wing, and hind-wing. We have to draw two of them in this step.
For this, sketch an oval shape, or a tear-drop shape, starting from the thorax. It should be wider, and its bottom should be in the form of a flat line.
On top of this first wing, sketch another wing shape. It should outline the first wing, as shown in our picture. It is the tip of the second wing.
At the end of the first wing, draw another small wing shape, starting from the lower side of it. This is the margin of the second wing.
Step 4 – Sketch the Abdomen
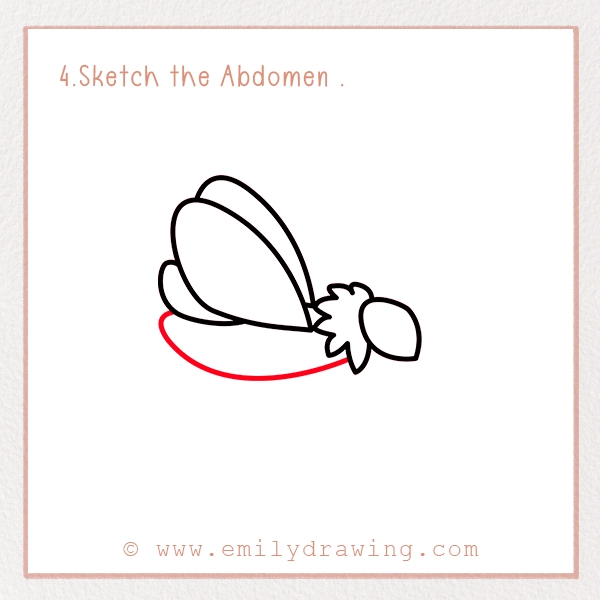
Beneath the wings, sketch an elongated oval shape. It will indicate the abdomen- the longest and main body part of the moth.
This elongated shape should taper toward the end, giving it a tail-like shape. Make sure the abdomen is not too thin but not too bulky. It should be elongated horizontally and a bit wider.
Step 5 – Add Segments to the Abdomen
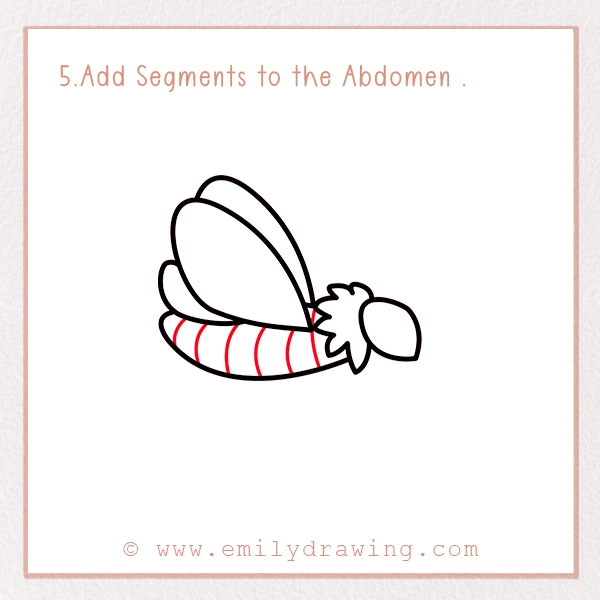
Insects are famous for their segmented body as these give them a unique appearance. Moths are not an exceptional case, so we have to sketch segments on the body to give it a realistic look.
For this, you just have to draw thin curved lines. These lines should be evenly spaced, and follow the natural flow of the body.
Step 6 – Sketch Six Legs of The Moth
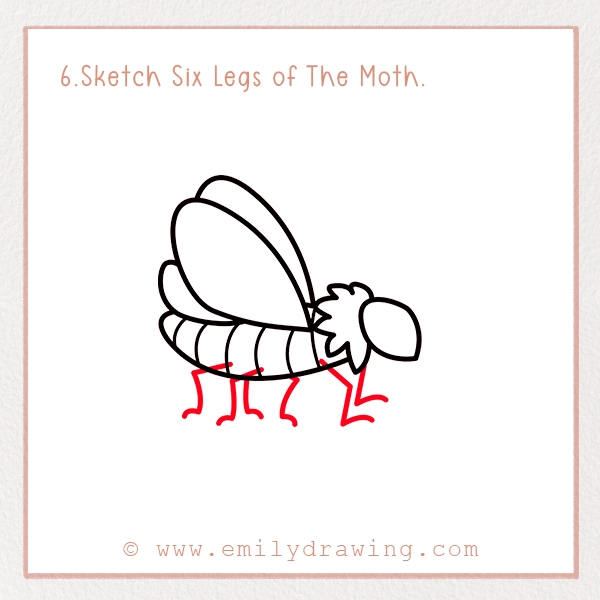
Every insect has six legs; three attached on both sides of the body. They are attached to the abdomen and are bent at different angles to indicate the joints. In this step, we are going to sketch them.
For this, you should draw six thin curved lines with a hook-like shape at the bottom. This hook shape indicates the foot.
Make sure these feet are at a decent distance from each other, and scattered throughout the abdomen.
Step 7 – Draw Details on Wings
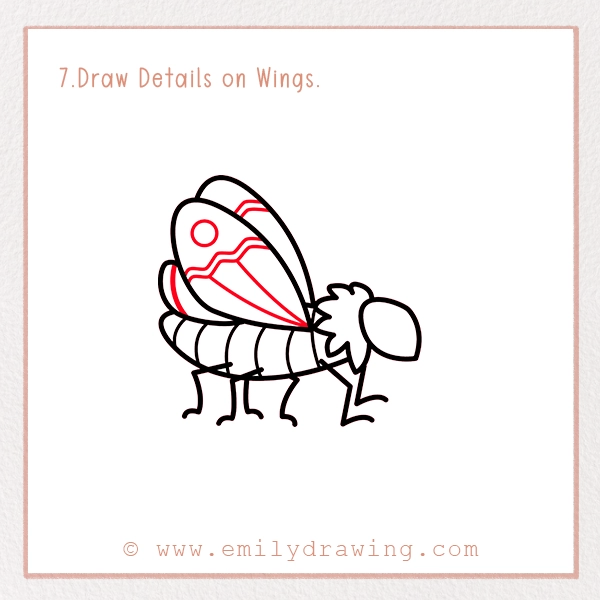
Moths are famous for their beautiful and detailed wings. These wings resemble those of butterflies so we have to add various shapes in it to make them unique.
To do this, you should add different types of lines on the wings. These lines can be wavy, straight, or circular. You can check our picture to get an idea of wing details. Otherwise, you can add your creativity and make unique shapes on wings.
Step 8 – Add Facial Details
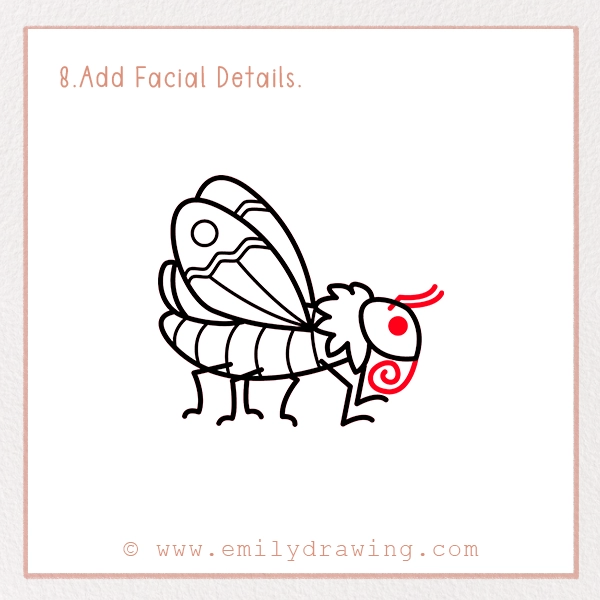
This is the last step of completing the moth drawing. In it, you have to sketch an eye, an antenna, and a proboscis.
Here, first of all, add a large dark circle to indicate the eye. This circle should be on the top part of the head.
Above it, you need to sketch two thin lines that are tapering toward the end. These lines should be facing in the forward direction.
At last, we have to draw proboscis. It should be at the bottom of the face. To sketch it, you should draw a spiral thin line shape.
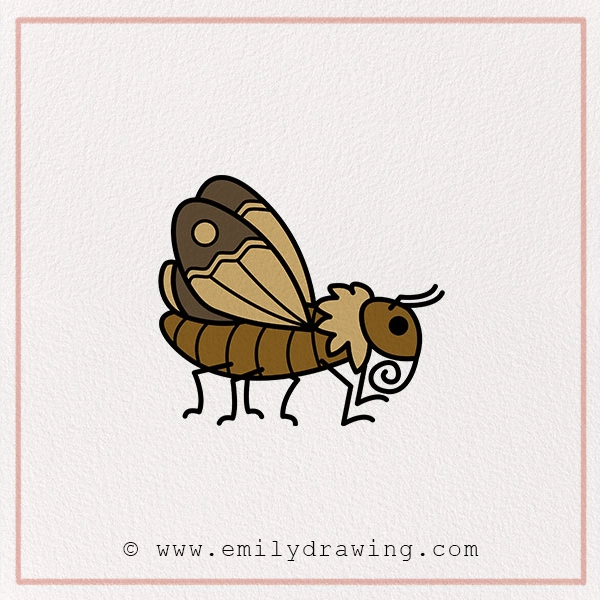
At last, your moth sketch is complete. However, your art is incomplete without colors.
Step 9 – Add Colors to Your Moth Drawing

There are almost 160,000 species of moths in the world, each having unique colors on their bodies. Some moth species are way more beautiful and colorful than butterflies. So, you can browse the species and add various colors to your pencil sketch.
If you want to add your favorite colors to your moth drawing, you can do it too. This will give an illustrative look to your painting.
Pin it now, Draw later!
Background Tips for Moth Drawing
We can add unique backgrounds to our moth pencil drawing to stand it out from the crowd. Some suggestions for this are:
- Depict Moth sitting on the flower.
- Show a park in the background of the moth.
- You can draw a flying moth.
If you check the pictures of moths on the internet and in books, you will find various reference pictures. These will give you an idea of what should be the background of the moth.
By the way, if you want to enhance your artistic journey, you can check out our drawing tutorials.
