Do you know parrots are believed to be some of the smartest creatures around? They have large brains, colorful bodies, and strong beaks that make them attractive and playful birds.
It has a large lifespan and can mimic human voices. So, kids want them as their companions.
Wouldn’t it be fantastic if you would draw a parrot for your kids, or if you could teach young artists how to draw a parrot? If you find it a difficult task, I could help you.
I am going to teach you how to draw a realistic parrot in a few easy steps. The instructions will be so simple that kids and novice artists can easily follow them.
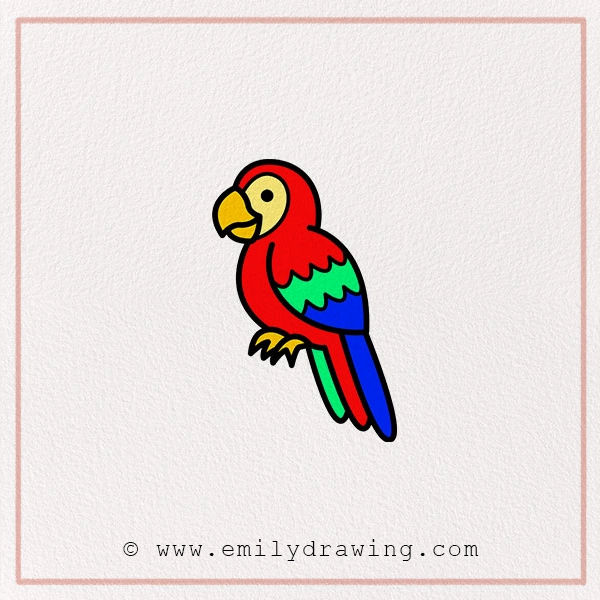
Materials:
- a piece of paper
- a pencil for the guiding lines and sketching
- an eraser
- a black sharpie or a pen for the outlines
- markers or colored pencils for coloring
- our printable drawing guide (Join my Email List below to get this Tutorial)
Here are my RECOMMENDED Art Supplies!
- Crayola Coloring Set (140 Pieces – Mega Value!)
- 24 Colored Crayon Set
- A4 Printer Paper
- Crayola Coloring Pencils
- HP Home Printer with Instant Ink!
Time needed:
15 minutes.
How to Draw a Parrot — Let’s get started!
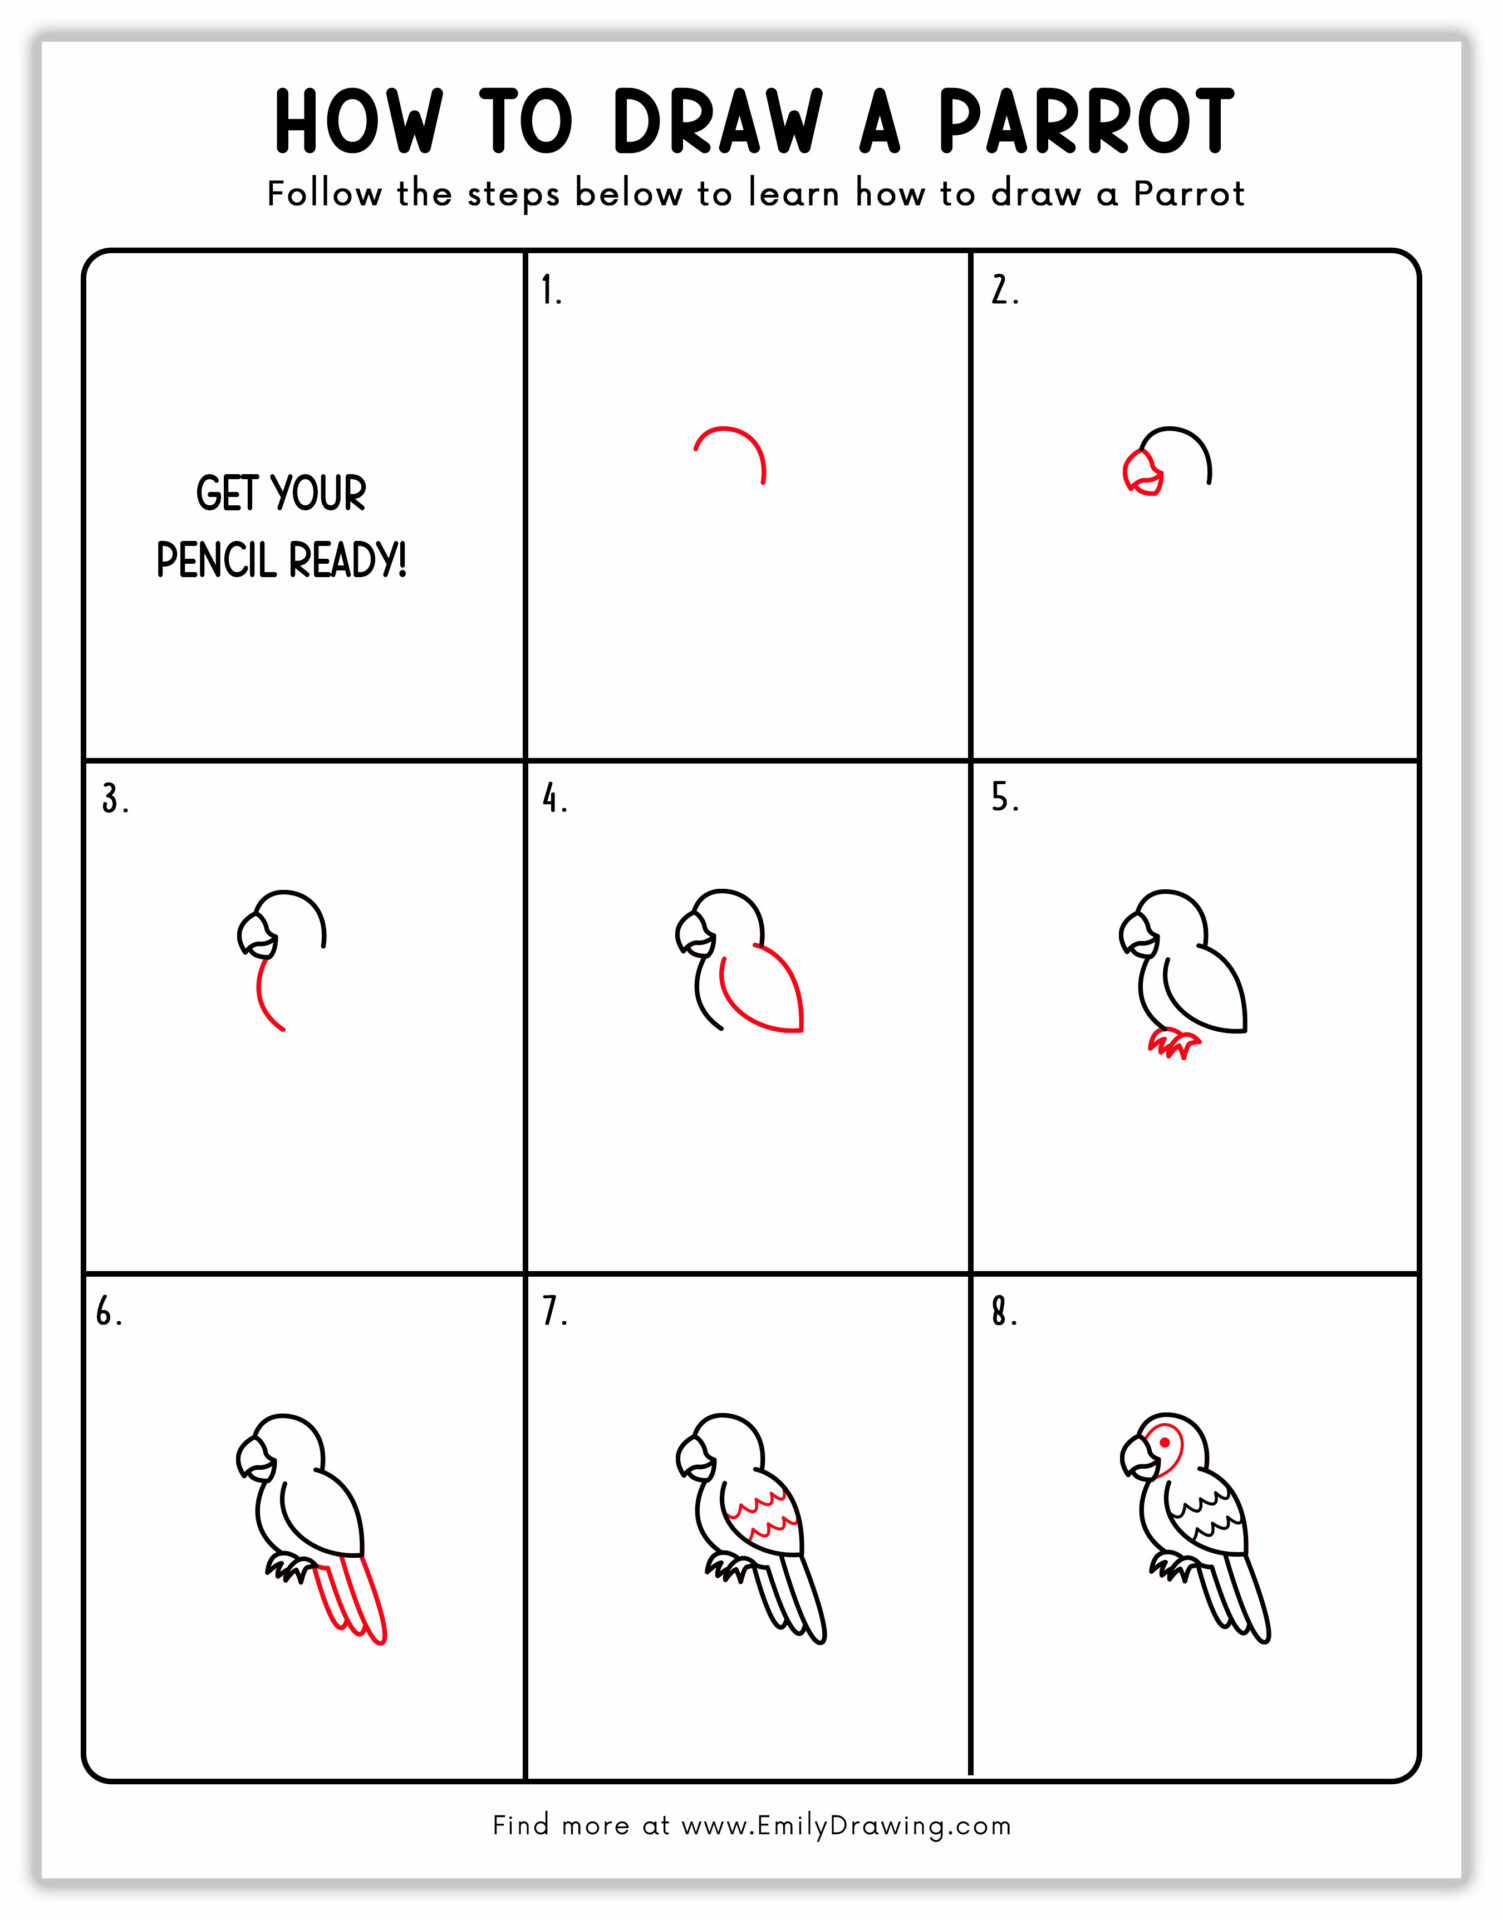
Step 1 – Draw an Outline of Head
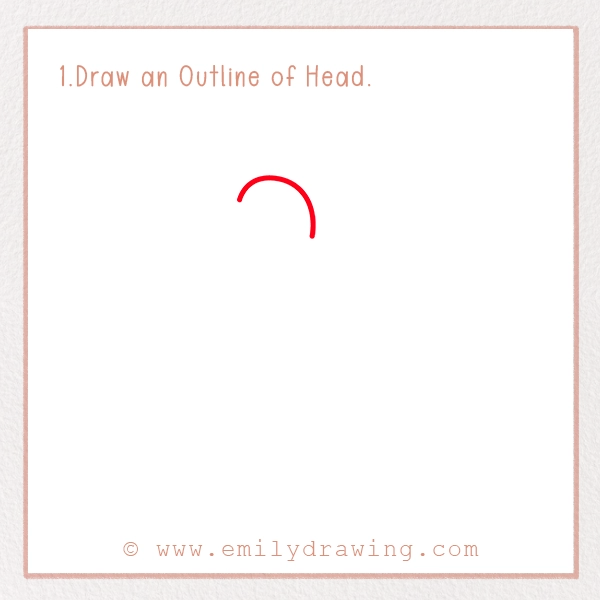
First of all, draw a vertical and horizontal line on the page to determine the center of it. This will help you in drawing your parrot at the center of the page.
Note: Draw these lines with light hands so that you can erase them later on.
Now, sketch a simple curved line resembling an upside-down “U” to form the top of the parrot’s head. Draw it on the top center of the page.
Step 2 – Draw the Beak
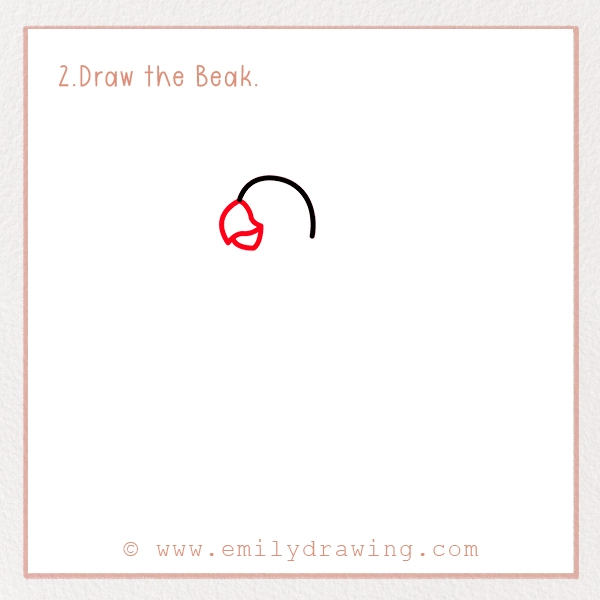
A parrot is famous for its strong beak. So, it is time to draw it.
For this, you have to draw the rounded triangular shape below the curve of the head. It should curve slightly downward at the tip.
Add the small curve beneath the triangular shape as shown in our reference picture. It would make a realistic parrot drawing.
Step 3 – Sketch the Neck and Front of the Body
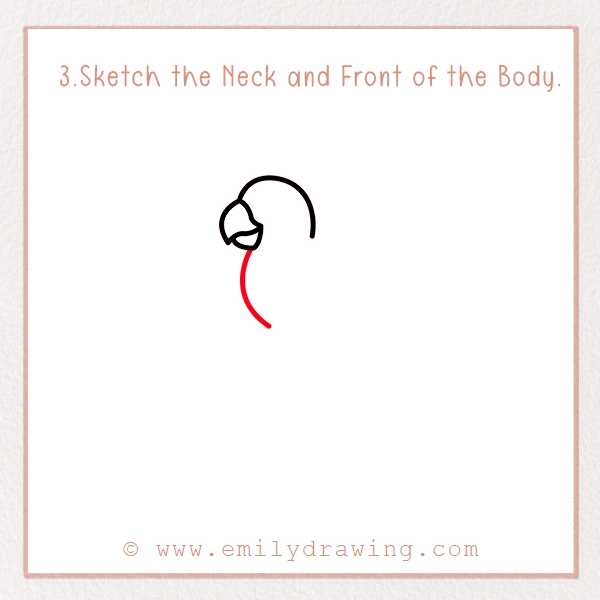
It is the simplest step in this “How to Draw a Parrot for Kids” tutorial. What you have to do is draw a curved line beneath the beak. It will make the neck and front of the body.
Make sure that the curve starts from the inward direction and extends slightly in the outward direction to make the chest and body.
Step 4 – Sketch the Wing
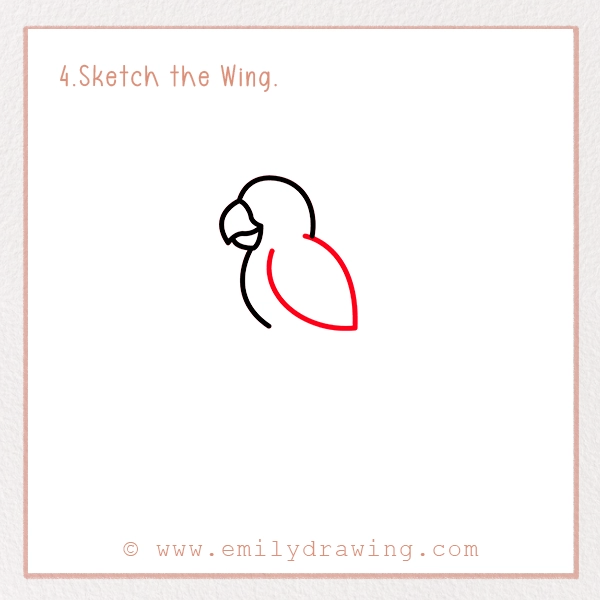
This step is going to focus on making the base of the wing.
For this, sketch a large oval-like shape on the lower right of the parrot’s body. The tip of it should stop where you want to draw the tail.
Step 5 – Draw the Feet
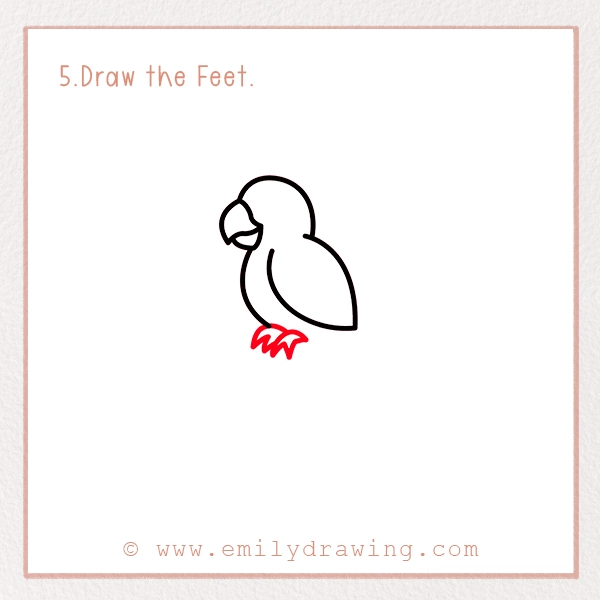
This step is crucial for learning how to draw a parrot on the branch or perch. You have to sketch the feet in the way that it looks like your parrot is sitting.
For this, sketch the parrot’s feet beneath the body. Draw two small, claw-like shapes with two distinct toes on each foot.
Make sure to curve them slightly downward as if they are holding onto any branch or perch.
Step 6 – Sketch the Tail Feathers
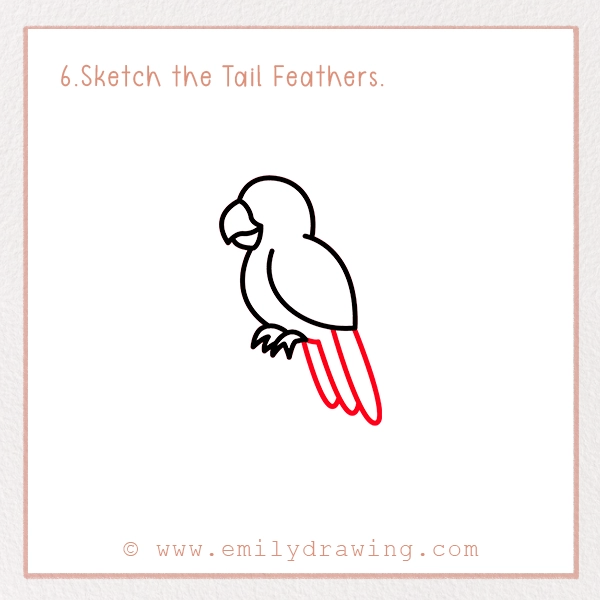
Starting from the wing and ending near the feet, draw three parallel lines. These lines should be slightly curved and facing the downward direction. Taper these lines slightly toward the bottom to form the long, pointed feathers.
If you want, you could draw a few extra lines in between these feathers to give a layered look to it.
Step 7 – Add Details to Wings
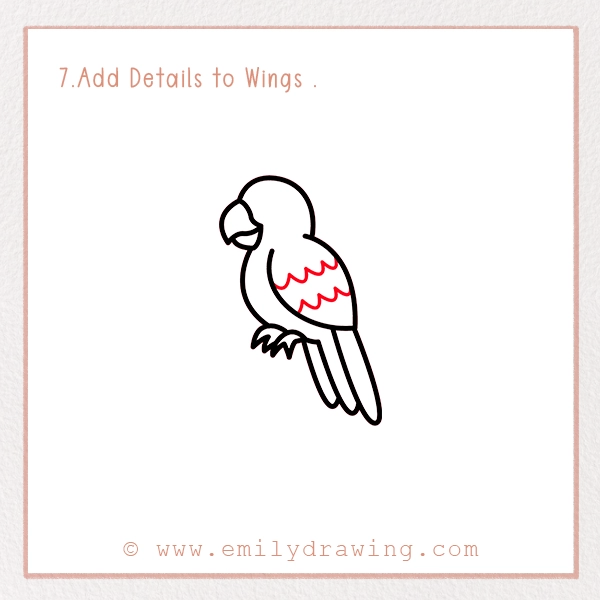
How to draw a realistic parrot? A lot of you are asking me this question. So, these next steps are going to help you in sketching a realistic parrot.
For this, add two to three wavy lines inside the oval wing shape to represent the feathers. These curve lines will be large on the top of the wing and will gradually become smaller in size.
These wavy lines will give a layered look to your wings.
Step 8 – Add the Facial Features
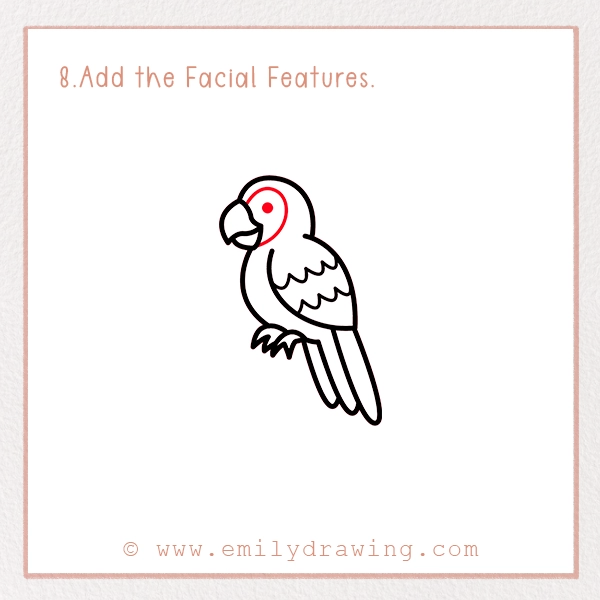
This is the last step in pencil parrot drawing. For this, you have to draw eyes and some lines on the face of the parrot to give it a realistic look.
For this, draw a small circle inside the head, just behind the beak. In fact, start the circle from the top of the beak and end it where the parrot’s beak is ending.
Inside this circle, draw a small dark spot for the eyes.
Step 9 – Coloring Your Parrot

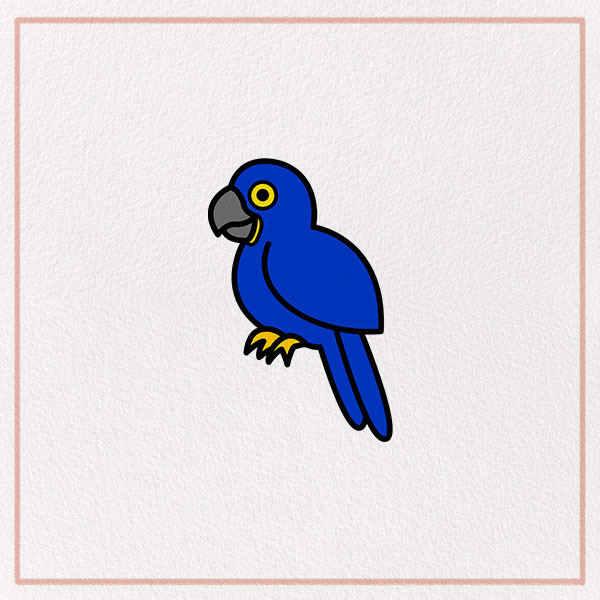
Once you have your pencil drawing, leaving it black and white is not a good idea. You should add vibrant colors to it to make it a realistic picture.
Parrots are famous for their special colors, such as black, red, green, blue, and yellow. There are various species of them and each has unique colors. So, you could grab any picture of a parrot and color it accordingly.
You could use a dark black marker for popping up the outline of it. Moreover, you could add various colors in the feather and tail lines to give it a vibrant look.
Pin it now, Draw later!
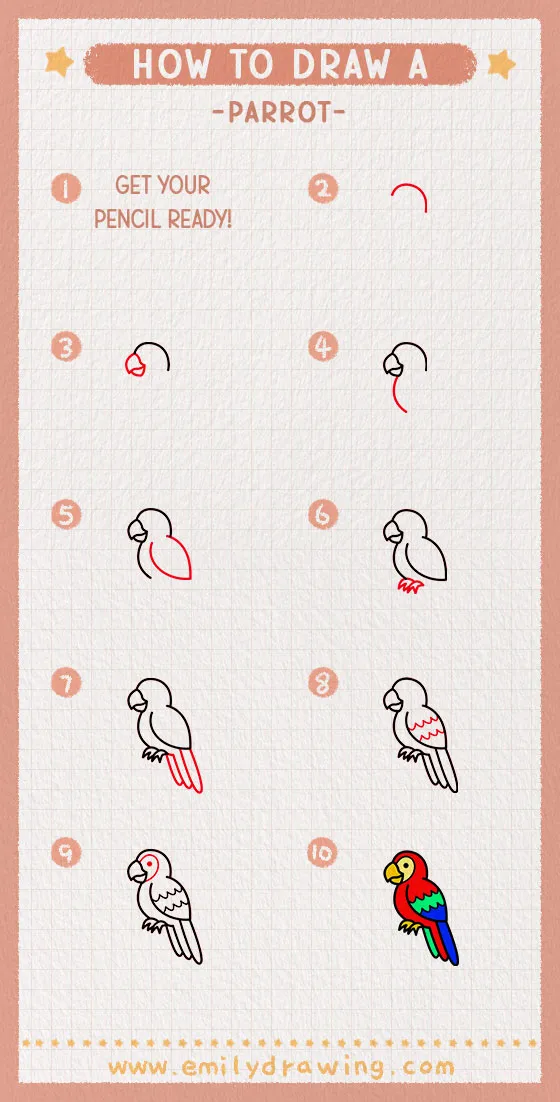
Congratulations! You have taken your first step toward the artistic journey. Keep practicing drawing a professional parrot picture. If you want to have more animal drawing tutorials, you can check out our blog. We keep uploading easy drawing guides for kids and novice artists.
