Hello, and welcome to our fun 10-step pine tree drawing tutorial on how to draw a pine tree!
Pine trees are beautiful evergreen trees, which means they keep their needles all year—making them perfect inspirations for festive illustrations like our Christmas tree drawing tutorial. This gives them their descriptive name—evergreen—because they keep their color despite the season. they can grow super tall, like over 100 feet! Pine trees grow all over the world and provide valuable habitat to many animals, such as squirrels, birds, and insects. There are many species of pine trees and each of them have qualities that make them a little bit different.
Pine trees have long thin needles instead of flat leaves like other trees. These needles help them conserve water and survive in diverse climates. They also have pine cones, as well as pine nuts, which many people enjoy eating!
Let’s get started on this guide showing how to sketch a pine tree from start to finish! Find some drawing materials and keep reading for Step 1. As always, we will have visual aids accompanying the written instructions. Let’s go!
Materials:
- a piece of paper
- a pencil for the guiding lines and sketching
- an eraser
- a black sharpie or a pen for the outlines
- markers or colored pencils for coloring
- our printable drawing guide (Join my Email List below to get this Tutorial)
Here are my RECOMMENDED Art Supplies!
- Crayola Coloring Set (140 Pieces – Mega Value!)
- 24 Colored Crayon Set
- A4 Printer Paper
- Crayola Coloring Pencils
- HP Home Printer with Instant Ink!
Time needed:
15 minutes.
How to Draw a Pine Tree — Let’s get started!
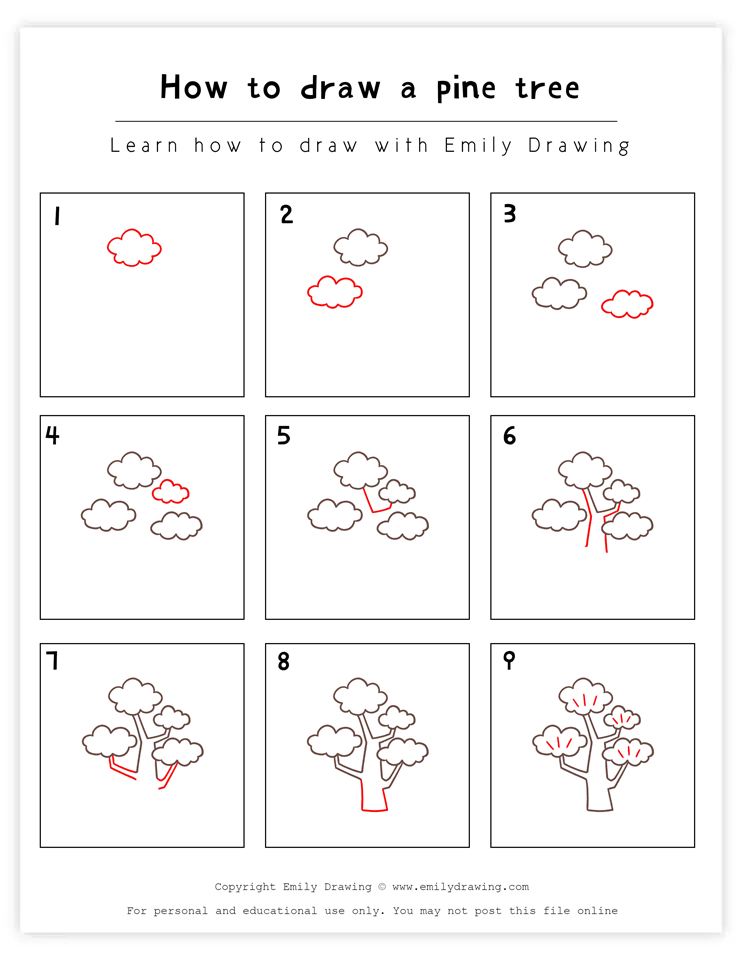
Step 1 – Draw some foliage.

First, let’s draw some foliage. Draw a fluffy shape formed from scalloped lines. It should kind of look like a cloud! It’ll start looking like a tree in a few steps, don’t worry!
Step 2 – Continue drawing foliage.

Draw the same shape just below the first one, but a little bit to the left. Make the curves be a bit different so that we have some visual variety!
Step 3 – Add more shape to the tree!
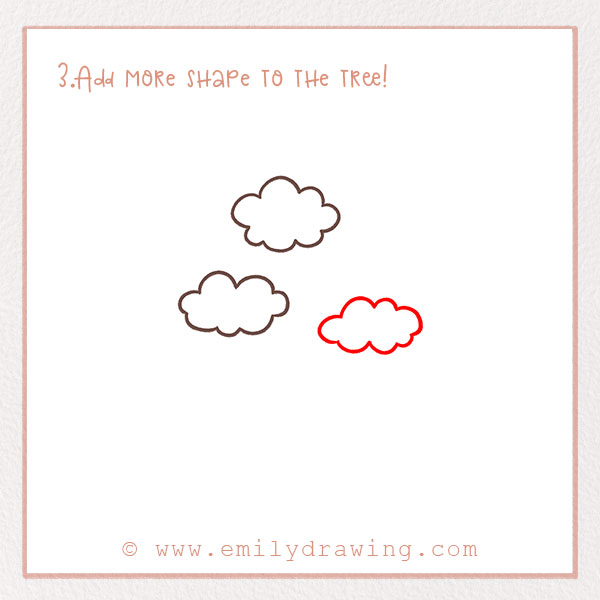
Once again, add another mass of needles. Draw a fluffy shape, just like the first two, but this time on the right side. Again, add some variation to the shapes and angles. Great job!
Step 4 – Add the last bit of foliage.

Let’s wrap up the foliage aspect of the tree. Draw one more fluffy shape in between the shapes you drew in Steps 1 and 3. This one should be a little bit smaller to make the tree look more interesting.
Step 5 – Start adding the trunk.
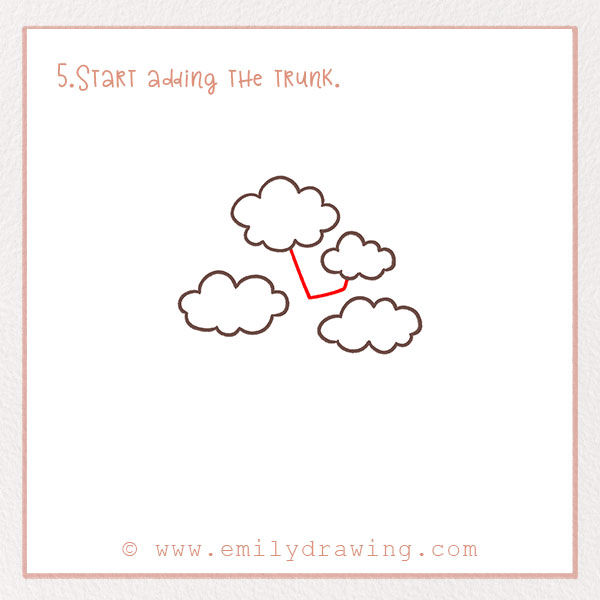
Our tree needs to have a trunk, of course! Pine trees can have different kinds of patterns on their trunks. Have you ever looked at one up close?
To begin drawing the trunk, form a slanted line in the middle of all the shapes so far. Draw another line next to it extending towards another foliage shape. Check out the photo! These are the first few branches.
Step 6 – Continue drawing the trunk.
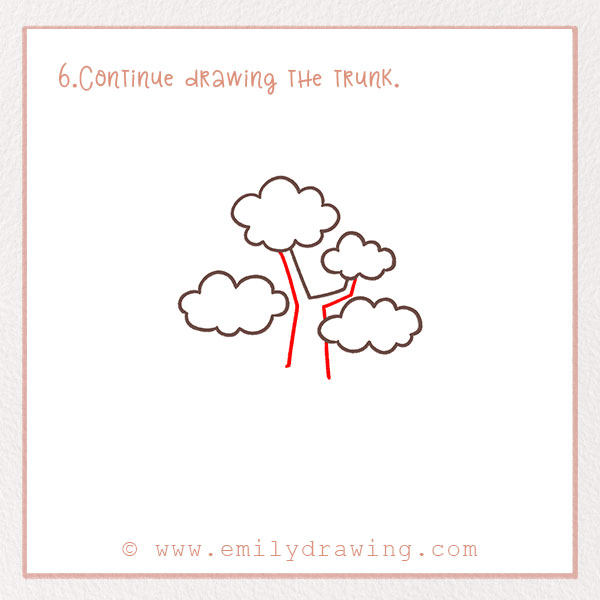
Let’s keep drawing the trunk. Refer to the photo for this step. You’ll want to mimic the lines you just drew and extend them downwards to form a thick section of the trunk.
Great job! We’re making progress. It is starting to look more like a tree!
Step 7 – Continue drawing the trunk!
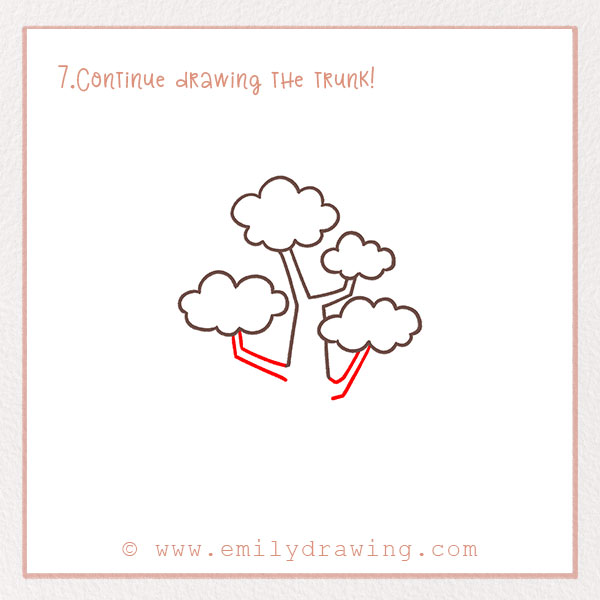
Again, add on more to the branches and trunk. Draw two bent lines on the right and left side. They should form the branches that hold the shapes from Steps 2 and 3. Our tree is getting more complex! These branches are where birds might build little nests.
Step 8 – Finish the trunk.
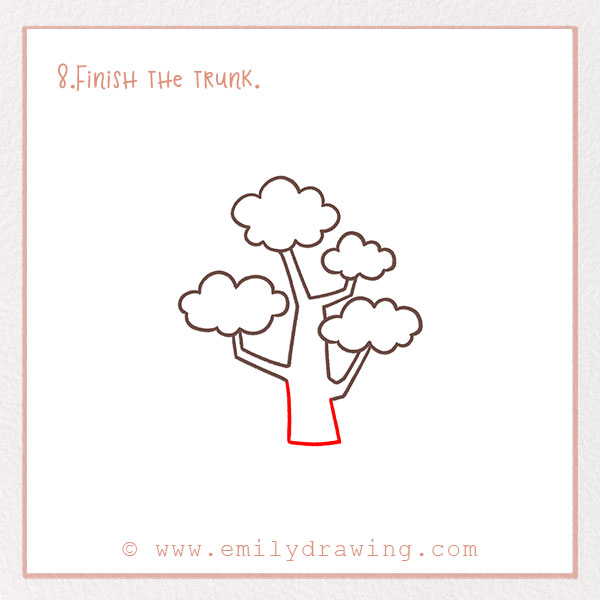
Finally, complete the base of the trunk. This should be the thickest part of the tree. After all, it needs a strong foundation to hold all of those needles! Great job!
Step 9 – Add details to the foliage.
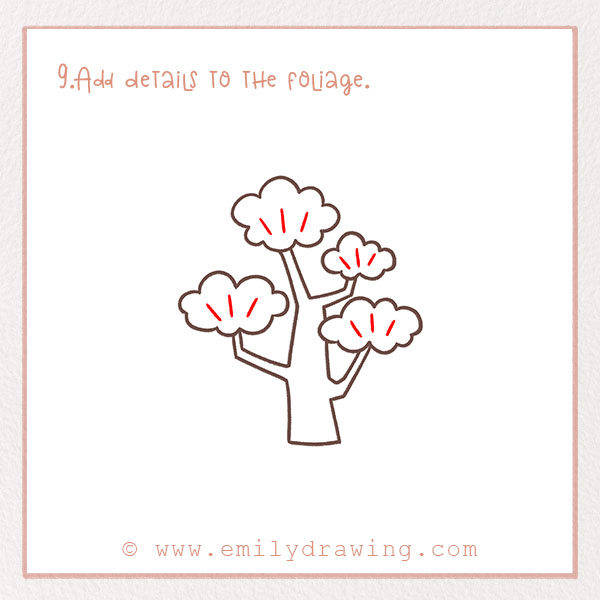
We are going to make the foliage resemble needles more. To do this, add a bunch of short slanted lines within all the shapes from Steps 1–4. Make sure they are different sizes to add some visual variety. After all, each tree is unique!
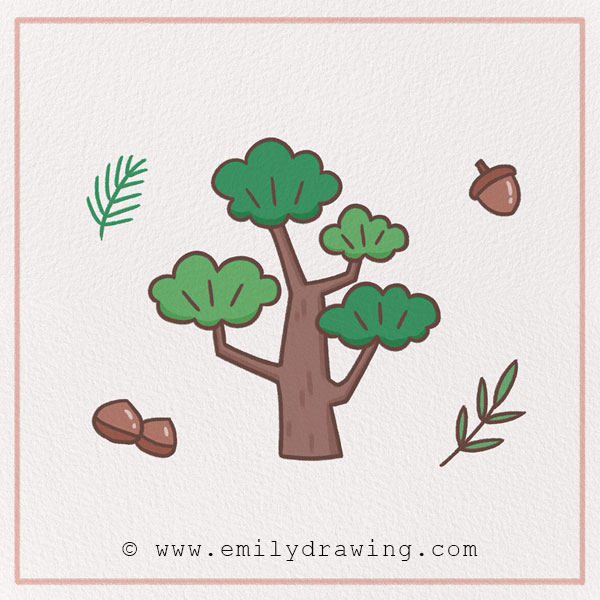
Step 10 – Color in your pine trees!

Last but not least, let’s color in the trees! In real life, they have a brown trunk and green leaves. However, your drawing has no limits, so just do your thing and have fun. Color in the background, too. Is it snowing, or is it summer? For a wintery twist, try pairing it with a festive project like our how to draw a Christmas tree tutorial. Don’t forget to sign your new drawing!
Pin it now, Draw later!
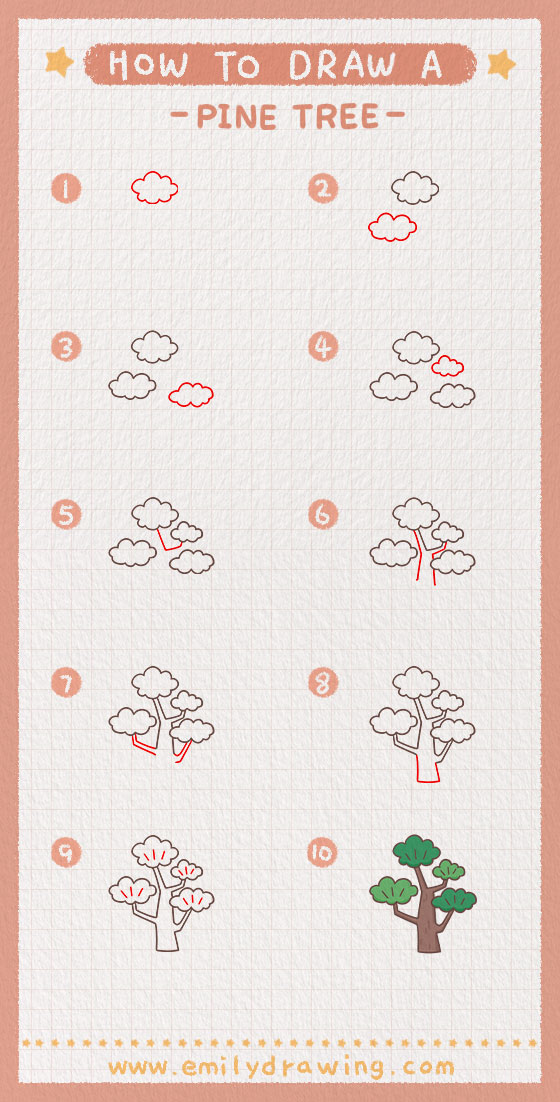
Fantastic! Thanks for joining us. Did you enjoy this tutorial on drawing a pine tree? If you would like more plant-themed tutorials, be sure to browse that page on our site—including how to draw a cactus, which is perfect for desert scenery. We have a cactus drawing tutorial, flower, and more. We always like to throw in facts so that you learn a few things along the way.
