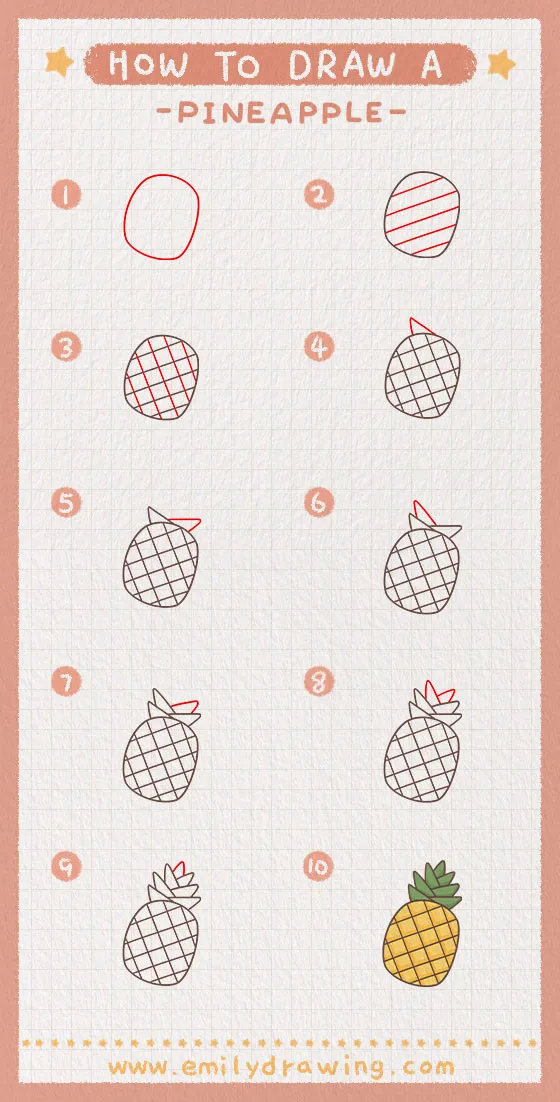
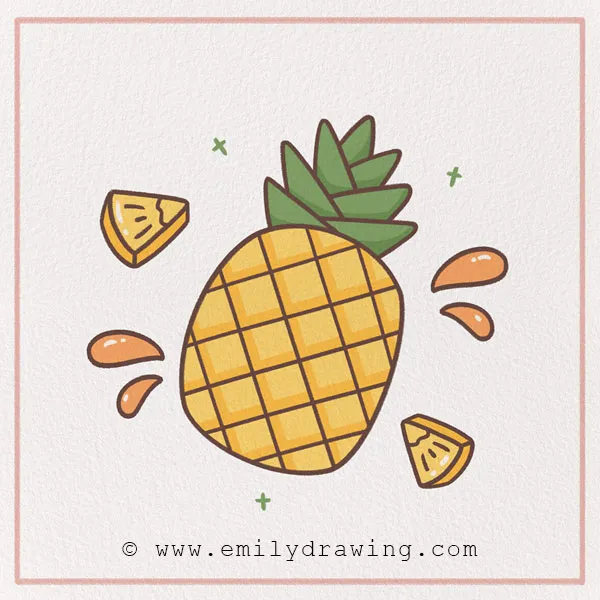
Hello, and welcome to our 10-step tutorial on how to draw a pineapple!
Pineapples are delicious fruits. Did you know that they are technically berries, just like strawberries? There are tons more interesting facts about pineapples. For example, pineapple plants only produce one single fruit for an entire season! However, pineapple plants can live for up to 50 years, so they will produce a lot during their lifetime. Have you ever tried a pineapple?
Let’s get started on this drawing tutorial! Find some art supplies and keep reading to begin your creation.
If you enjoy drawing fruits, you might also like How to Draw a Watermelon or How to Draw a Strawberry.
Materials:
- a piece of paper
- a pencil for the guiding lines and sketching
- an eraser
- a black sharpie or a pen for the outlines
- markers or colored pencils for coloring
- our printable drawing guide (Join my Email List below to get this Tutorial)
Here are my RECOMMENDED Art Supplies!
- Crayola Coloring Set (140 Pieces – Mega Value!)
- 24 Colored Crayon Set
- A4 Printer Paper
- Crayola Coloring Pencils
- HP Home Printer with Instant Ink!
Time needed:
13 minutes.
How to Draw a Pineapple — Let’s get started!
Step 1 – Draw the shape of the pineapple.
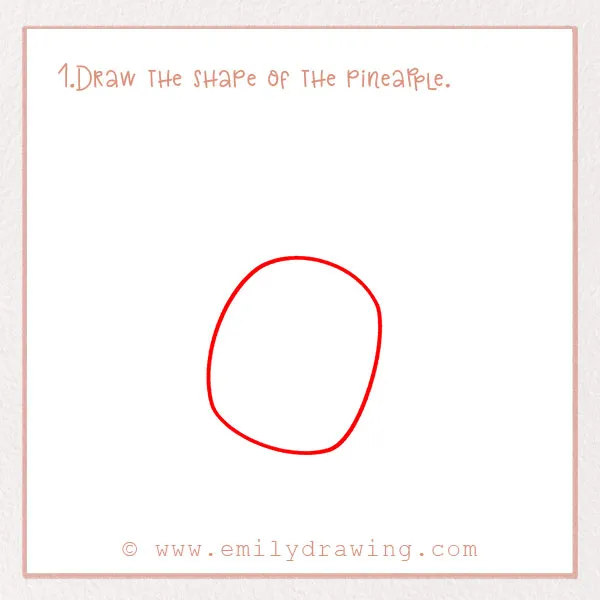
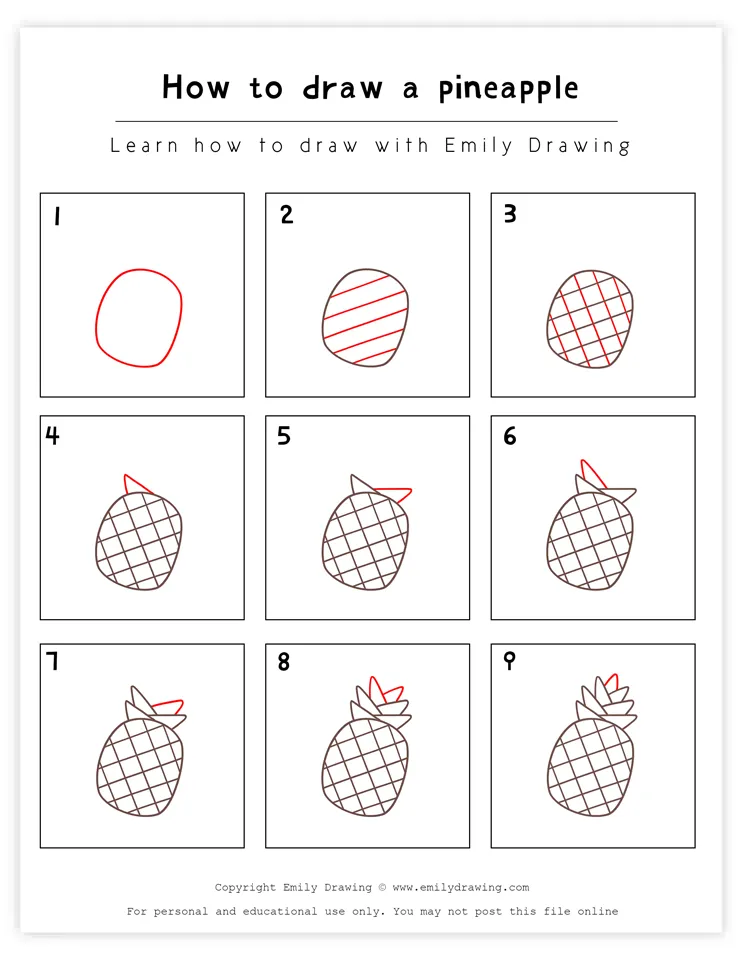
Let’s start by drawing the general shape. On the bottom two-thirds of the page, draw a large oval. It should be a little uneven to make it look like real fruit. Make it tilted to the right as well. Check out the photo.
Step 2 – Add the pattern.
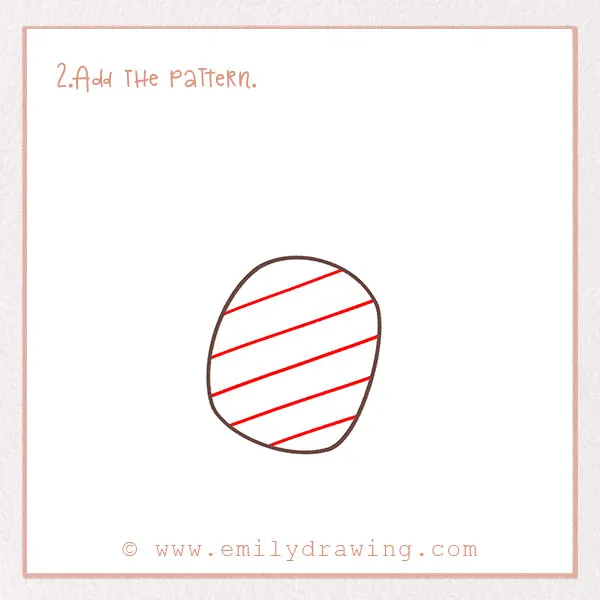
You probably know that pineapples have unique markings. The skin has a diamond pattern with small thorns.
Let’s start to form those now. Inside the shape you drew in the last step, draw six parallel lines that go diagonally across the pineapple.
Step 3 – Add more of the pattern.
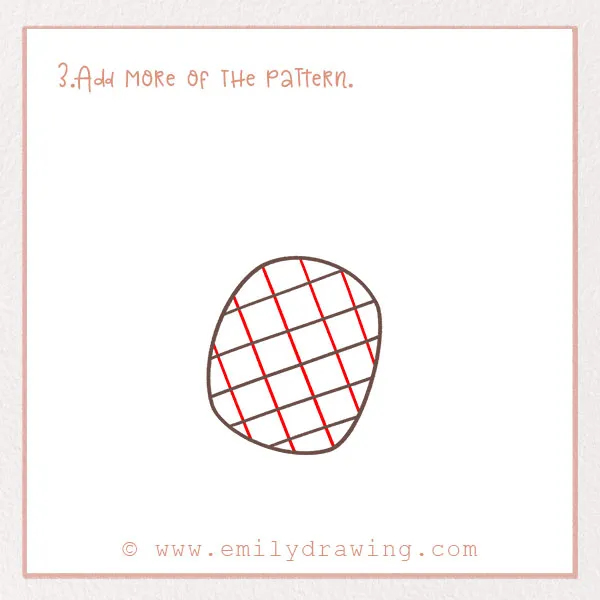
This is similar to the last step. Draw six more lines, but this time going the opposite direction. Your pineapple should have a diamond pattern now. Check out the photo.
For more tutorials involving geometric or rounded shapes, try How to Draw a Diamond or How to Draw an Ice Cream Cone.
Step 4 – Draw the first pineapple leaf.
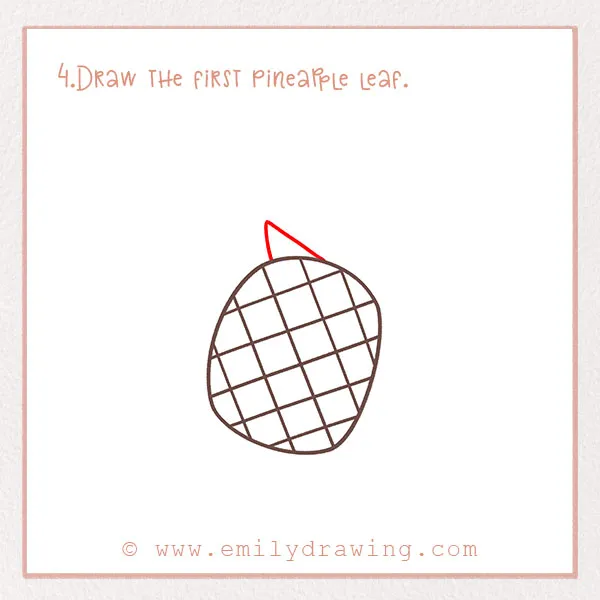
Pineapples have very recognizable leaves. They are very pointy and can be quite sharp, and often have a waxy texture to them. Let’s add the first leaf to the pineapple now. On the top left of the fruit, draw a triangle. The point should extend up and to the left. Good job!
Step 5 – Add another pineapple leaf.
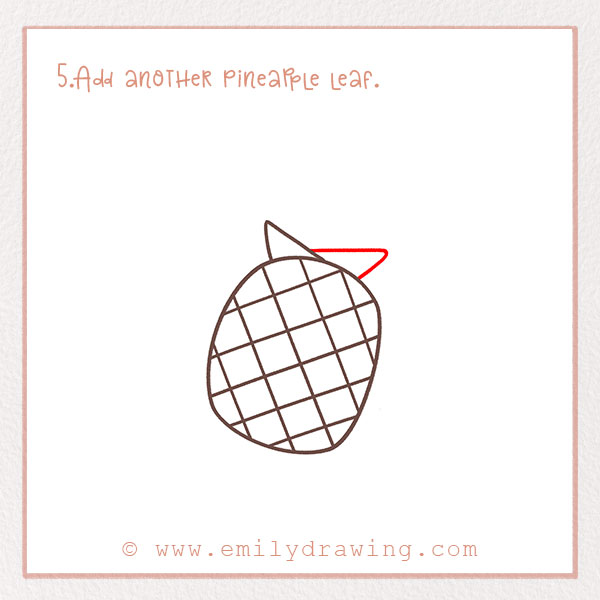
The rest of the steps are going to focus on the leaves. For this step, let’s add another leaf right next to the last one. It should be the same shape but pointing in the opposite direction. Check out the photo!
If you enjoy adding fine details, consider exploring How to Draw a Sunflower or How to Draw Mushrooms.
Step 6 – Add a third leaf.
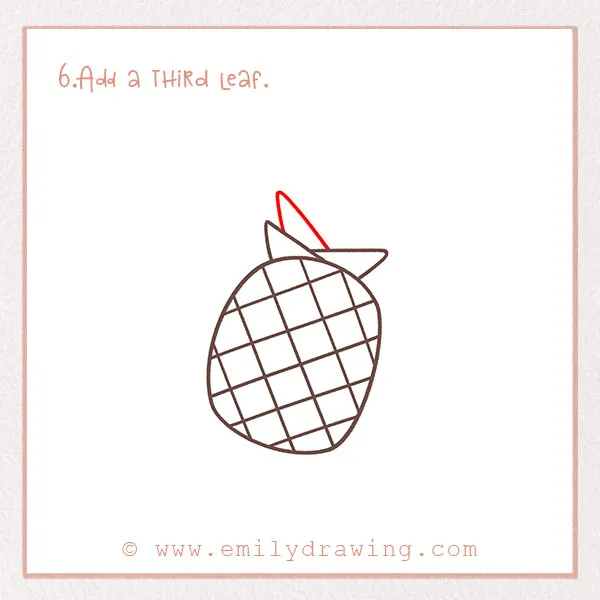
Let’s keep adding leaves. Did you know that if you cut the leafy portion of a pineapple off and plant it, you can grow a whole pineapple plant?
Add another leaf on top of the leaf you drew in Step 4. It should be the same shape. You’ll notice a pattern start to form. Great job!
Step 7 – Add another leaf.
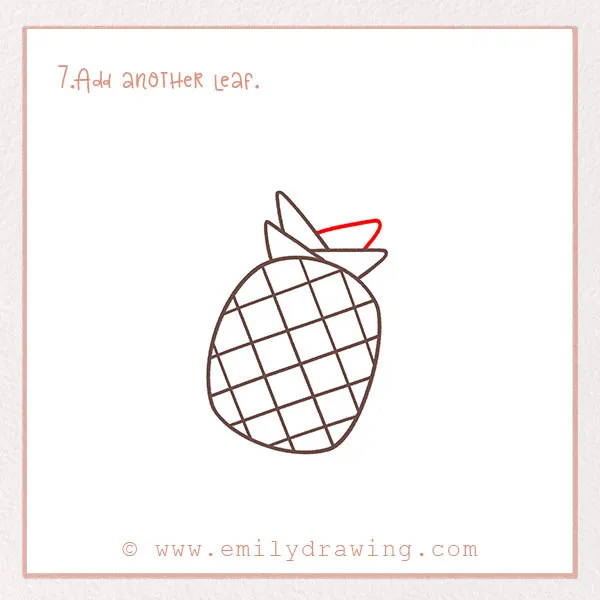
On top of the leaf you drew in Step 5, add another. You should have a total of four leaves now. But we aren’t done with the leaves yet!
Step 8 – Add two more small leaves.
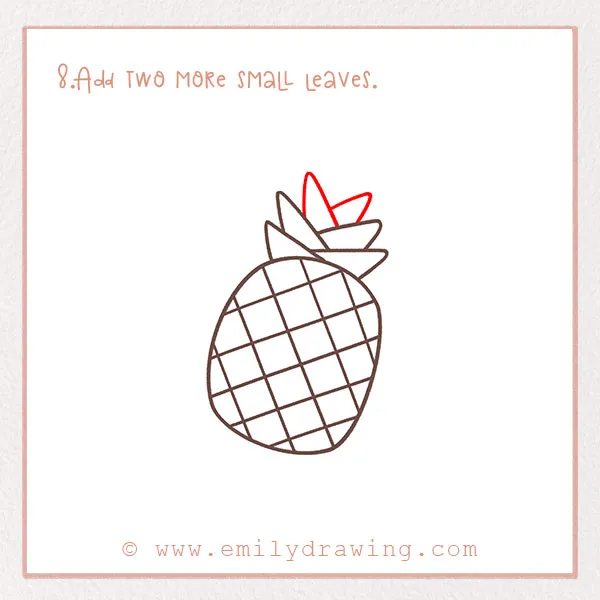
Add two more leaves above the ones you’ve drawn already. They should be a bit smaller and more narrow. It’s starting to look like a real pineapple!
Step 9 – Add one more leaf.
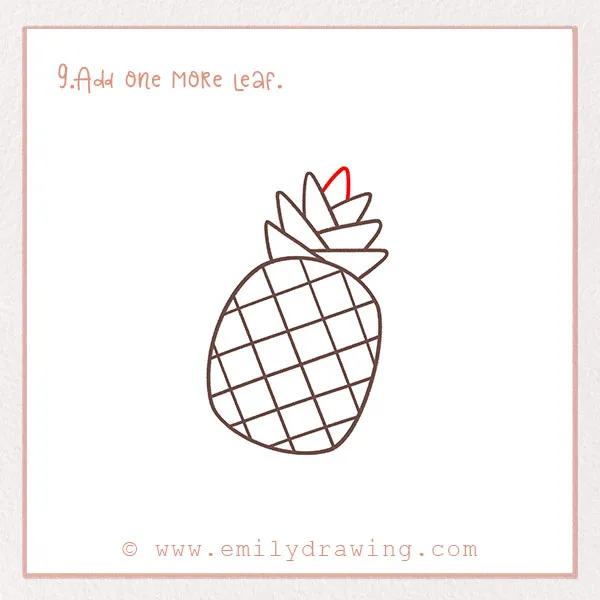
We are almost done! Just draw one more final leaf. It should be centered above the leaves from Step 8. Make sure it is standing straight up. Check out the photo!
Step 10 – Color in your pineapple!

We’ve just got one more step left, and in our opinion, it’s the most fun! It’s time to color in your drawing. Of course, pineapples have yellow and brown skin and green leaves. Have fun!
Great job! Did you enjoy this tutorial? Let us know in the comments below, and share your new drawing with others!
After completing your pineapple, try drawing How to Draw a Cupcake or How to Draw a Popsicle.
Now you have a pineapple in your drawing portfolio! Browse our other tutorials on this site for more step-by-step drawing projects that are simple but awesome. We’ve got lots of tutorials, including more food-themed ones such as how to draw a popsicle.
Pin it now, Draw later!
