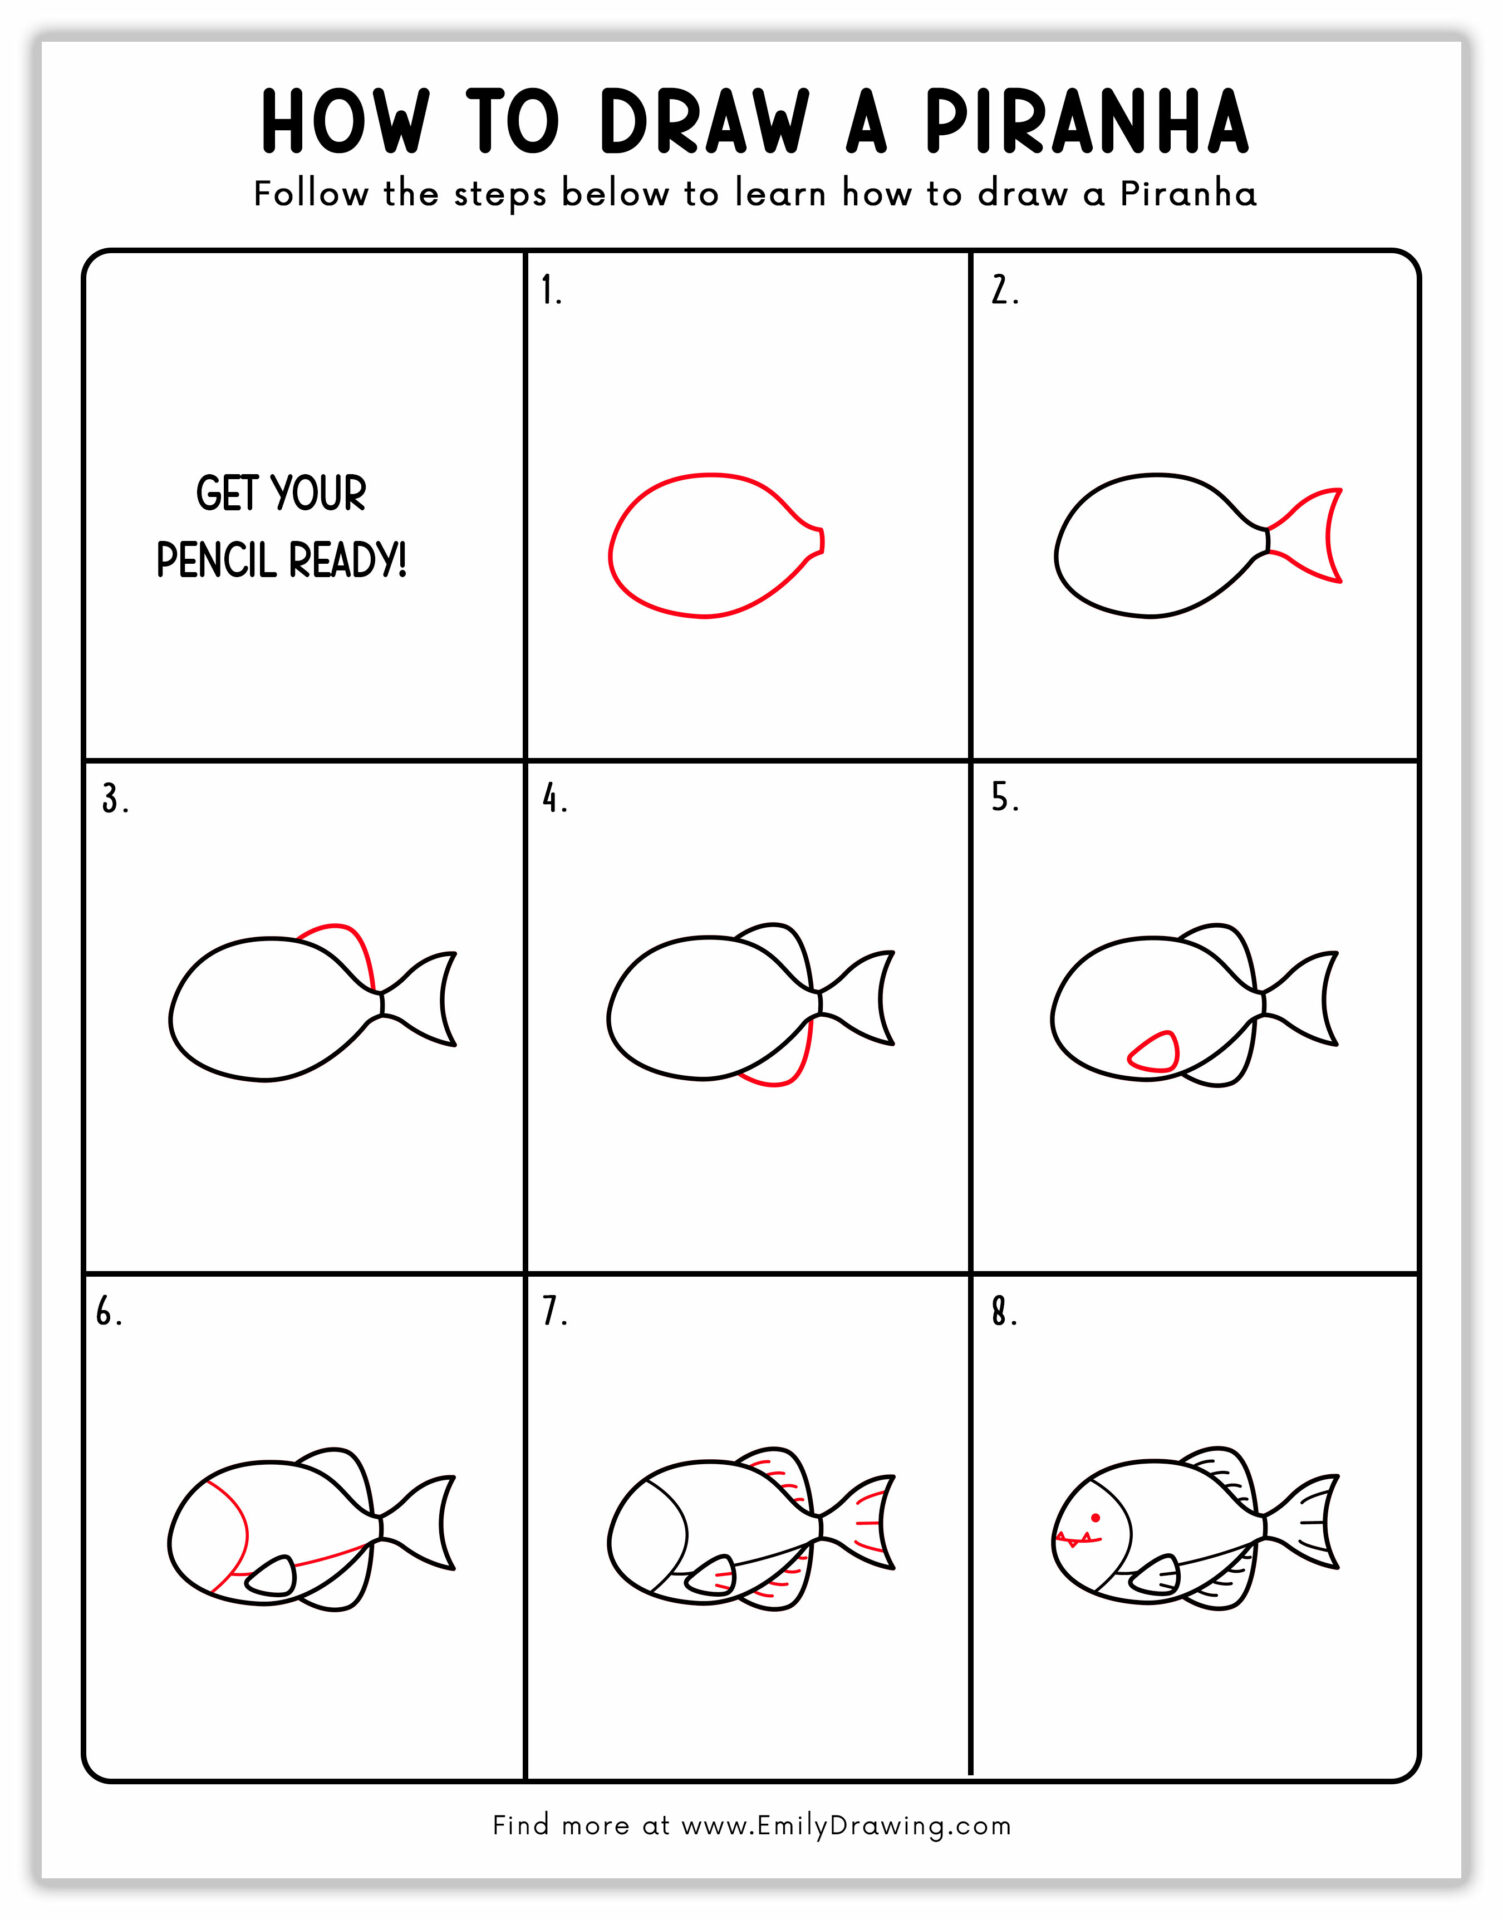
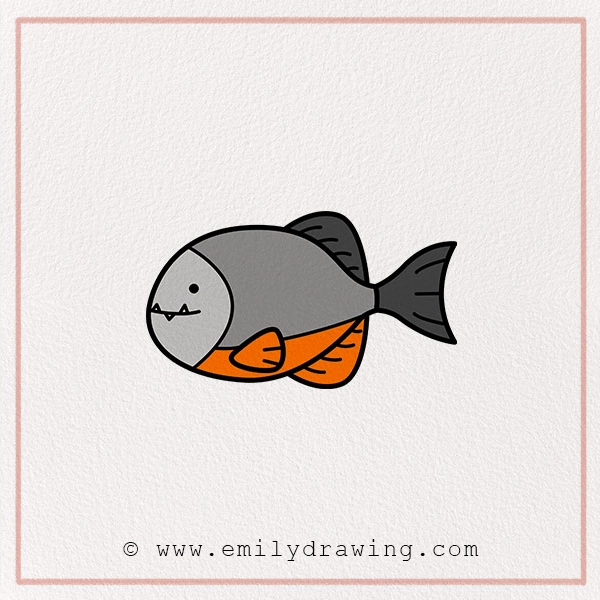
It is the eight-step guide to How to Draw a Piranha Fish for Kids and Beginners. I will guide you in each step and help you draw the fish progressively so that you can have a realistic Piranha drawing at the end of this tutorial.
So, grab your art supplies and learn how to draw a Piranha.
Fun Facts about Piranha Fish
Before we delve into the fish drawing tutorial, here are a few fun facts about Piranha for kids.
- Piranhas have a fierce reputation because of their sharp teeth and powerful jaws, which can bite through tough material.
- These are freshwater fish and can be found in the Amazon River.
- They are social animals that live in groups known as shoals.
- They are primarily scavengers.
- There is a popular myth that these fish feed on humans.
- Its different species vary in length, with some just a few inches long while others can grow up to 18 inches.
- They play an important role in the ecosystem by eating decays and dead.
These are just a few interesting facts about this fish. Now, let’s delve into the step-by-step guide to the Piranha drawing tutorial.
How to Draw a Piranha Fish Step-by-Step Easy Guide
Materials:
- a piece of paper
- a pencil for the guiding lines and sketching
- an eraser
- a black sharpie or a pen for the outlines
- markers or colored pencils for coloring
- our printable drawing guide (Join my Email List below to get this Tutorial)
Here are my RECOMMENDED Art Supplies!
- Crayola Coloring Set (140 Pieces – Mega Value!)
- 24 Colored Crayon Set
- A4 Printer Paper
- Crayola Coloring Pencils
- HP Home Printer with Instant Ink!
Time needed:
15 minutes.
How to Draw a Piranha — Let’s get started!
Step 1 – Draw the Piranha’s Body
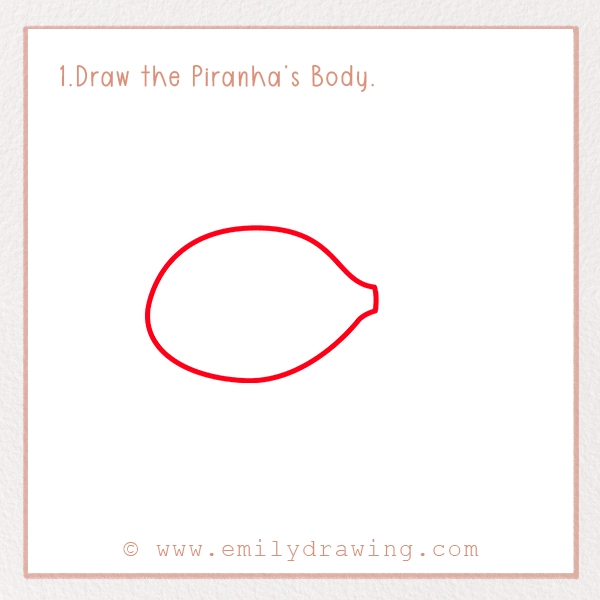
The first step is going to focus on drawing the body of fish. For this, you need to put your pencil in the center of the page.
Now, draw an egg or oval shape. The left side of this body should be more rounded for the head. On the other hand, the right side should have a small inward curve. In our reference picture, you should observe this notch. It is where the tail is going to attach.
Make sure the body is perfect as it is the base of your whole drawing. I suggest you draw it initially with a light pencil and then use a dark marker.
Step 2 – Draw the Piranha’s Tail
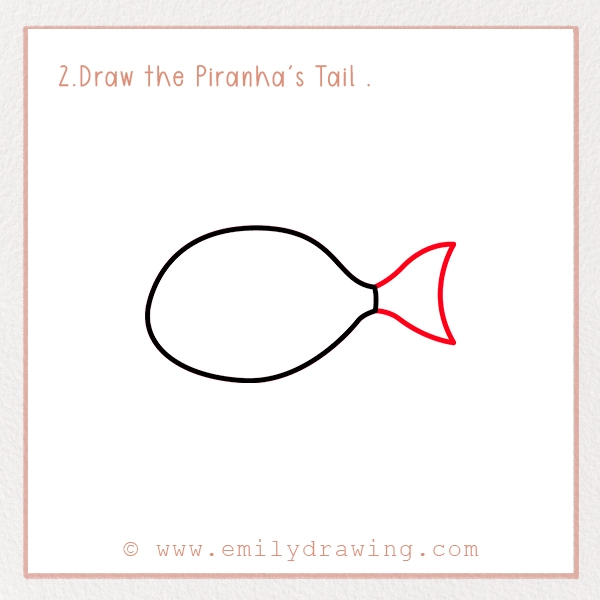
In this second step of easy Piranha drawing for kids, we are going to focus on the tail.
Here, you need to draw a triangular and fan-like shape at the notch. The triangle should extend outward and slightly upward and downward, giving it a natural tail-like appearance.
Make sure that the tail is smaller than the body to have a perfect proposition.
Step 3 – Draw the Piranha’s Dorsal Fin
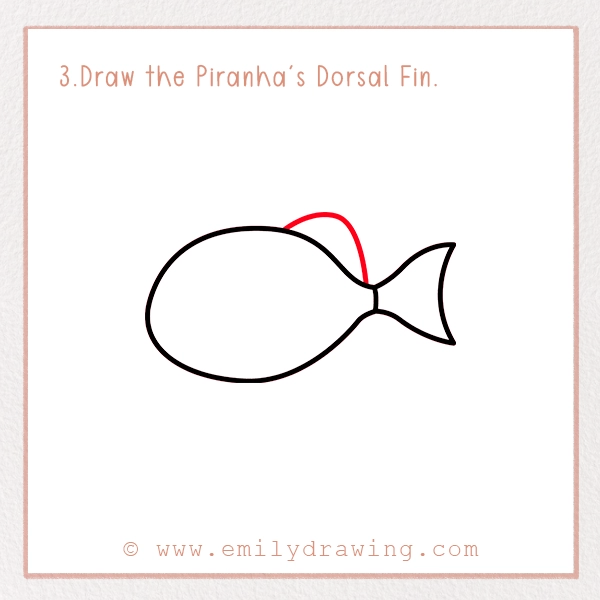
Now, it is time to draw the dorsal fin that helps the fish balance their body while moving and taking sharp turns.
For this, you need to draw a small triangular fin on the top of the body. It should be near the tail, toward the back. Moreover, it should point slightly backward.
Step 4 – Draw the Anal Fin
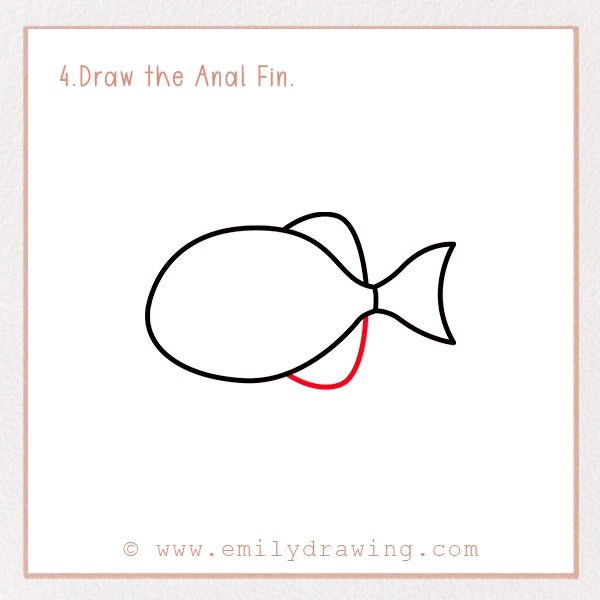
Just like the dorsal fin, the anal fin is also crucial for fish. It also helps it remain upright and prevents it from rolling down in the water. It acts like a keel on the bottom of the boat.
In Piranha, it is located underside the body, in front of the tail fin. You have to draw it just like you draw the dorsal fin. Make sure it is more rounded and triangular in place of the pointed one.
Step 5 – Draw the Pectoral Fin
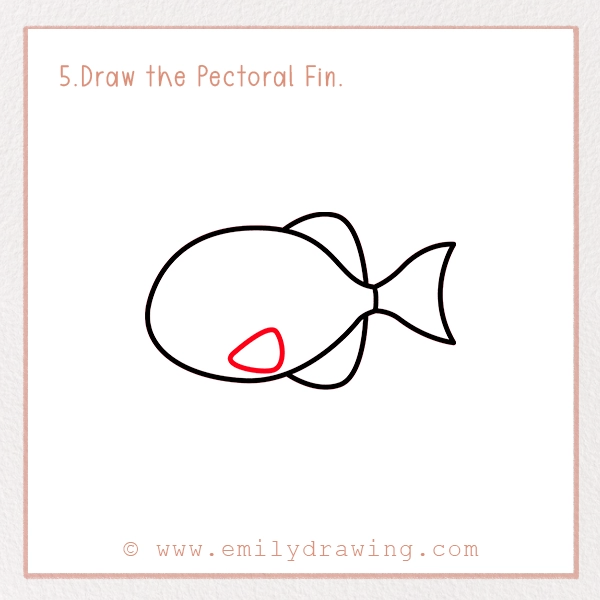
The pectoral fin is another crucial part of the fish’s body. It helps them in moving the body in the freshwater with ease.
For the realistic Piranha drawing, you need to draw this fin. So, put your pencil near the middle and slightly lower part of the body. There, draw a small rounded oval or leaf-like shape.
Step 6 – Draw the Fish’s Body Detailing
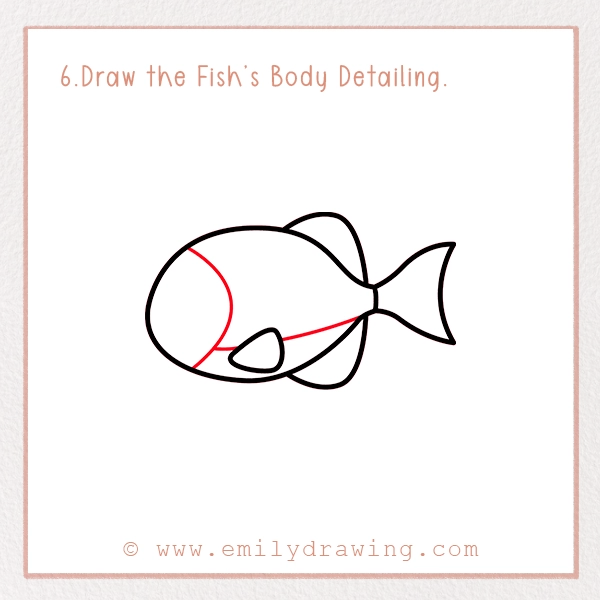
In this How to Draw a Piranha Fish easy guide, we are going to learn how to draw the cheek of the fish and the lower body part.
For drawing the fish’s gill cover, draw a half circle or curved line on the head. Refer to the picture for a better idea. Make sure that the curve line flows naturally with the fish’s head to give it realistic vibes.
Now, draw a line that will go through the pectoral fin. Make sure to erase the line from the fin.
Note: This line should be flowing naturally according to the fish’s body.
Step 7 – Enhance Fins and Tail
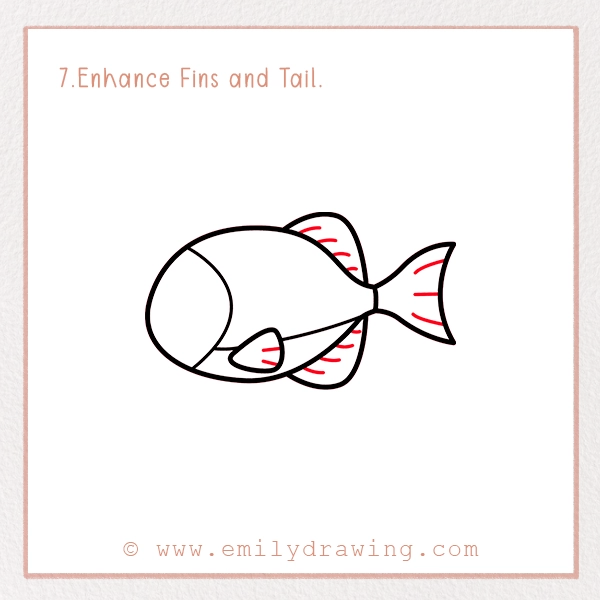
This step is crucial for having a realistic Piranha fish drawing. For this, add different curved lines in the dorsal fin, anal fin, pectoral fin, and the tail.
These lines should follow the shape of the fins and the tail to create a natural flow. This step is going to take a while so you should better start your favorite music and podcast in the background.
Step 8 – Draw Face Details
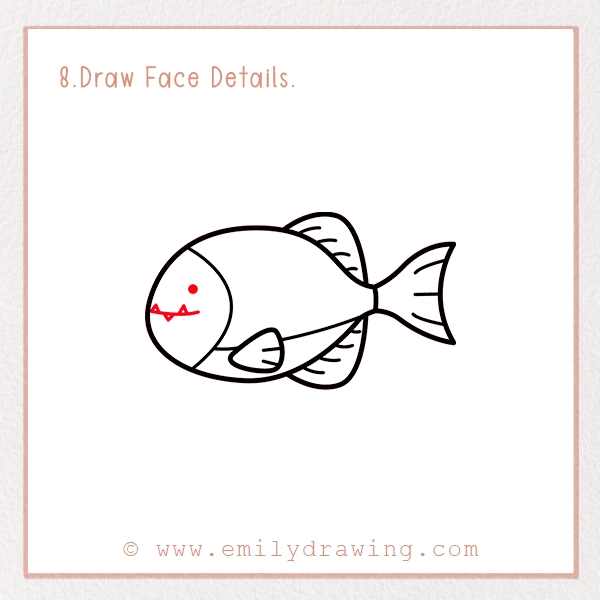
Now, it is time to draw the eyes and the infamous sharp teeth that give the signature fierce look to Piranha.
For this, add a small dark dot in the middle and slightly toward the gill line of the fish. Now, draw a small smiling line in the center of the face as shown in the reference picture. This smiling line will give a less fierce look to your Piranha drawing for kids. On this line, draw small, sharp, triangular shapes for teeth.
At last, your drawing is complete! Check your drawing’s proposition before proceeding with the fun part.
Step 9 – Coloring Your Piranha Fish Pencil Drawing

Kids will love coloring their realistic Piranha pencil drawings. For this, grab your colors and start the fun.
Piranha fish are known for their silver body and red bellies. That’s why their one species is famous as the red-bellied Piranha fish.
So, you could grab the same colors and start your coloring. For a realistic Piranha drawing, you could do shading in the tail and fins. It will darken these parts and make it a best fish drawing.
If you don’t want these colors, you could check the pictures of other Piranha species, and color your drawing according to them.
Pin it now, Draw later!
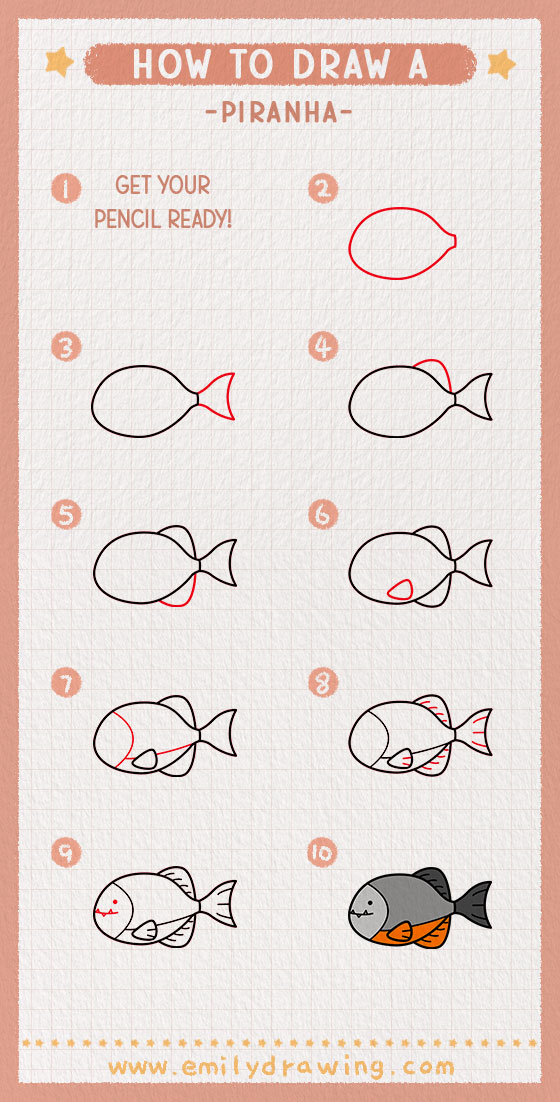
This is the end of an easy step-by-step guide on how to draw a Piranha fish for kids and beginners. I hope a masterpiece must be on your page. Otherwise, you could keep practicing to make it perfect.
You can share it with your friends and family for their feedback. Moreover, check our other drawing guides too to become an expert artist.
