A lot of people prefer having Puffer Fish as their pet. They prefer the species of green spotted puffer and the Pignose Puffer. But, you have to keep this creature alone in the tank as it is aggressive.
By the way, in Japan, it is an expensive delicacy and is known as fugu. So, a lot of kids and fugu lovers must want to learn how to draw a Puffer Fish.
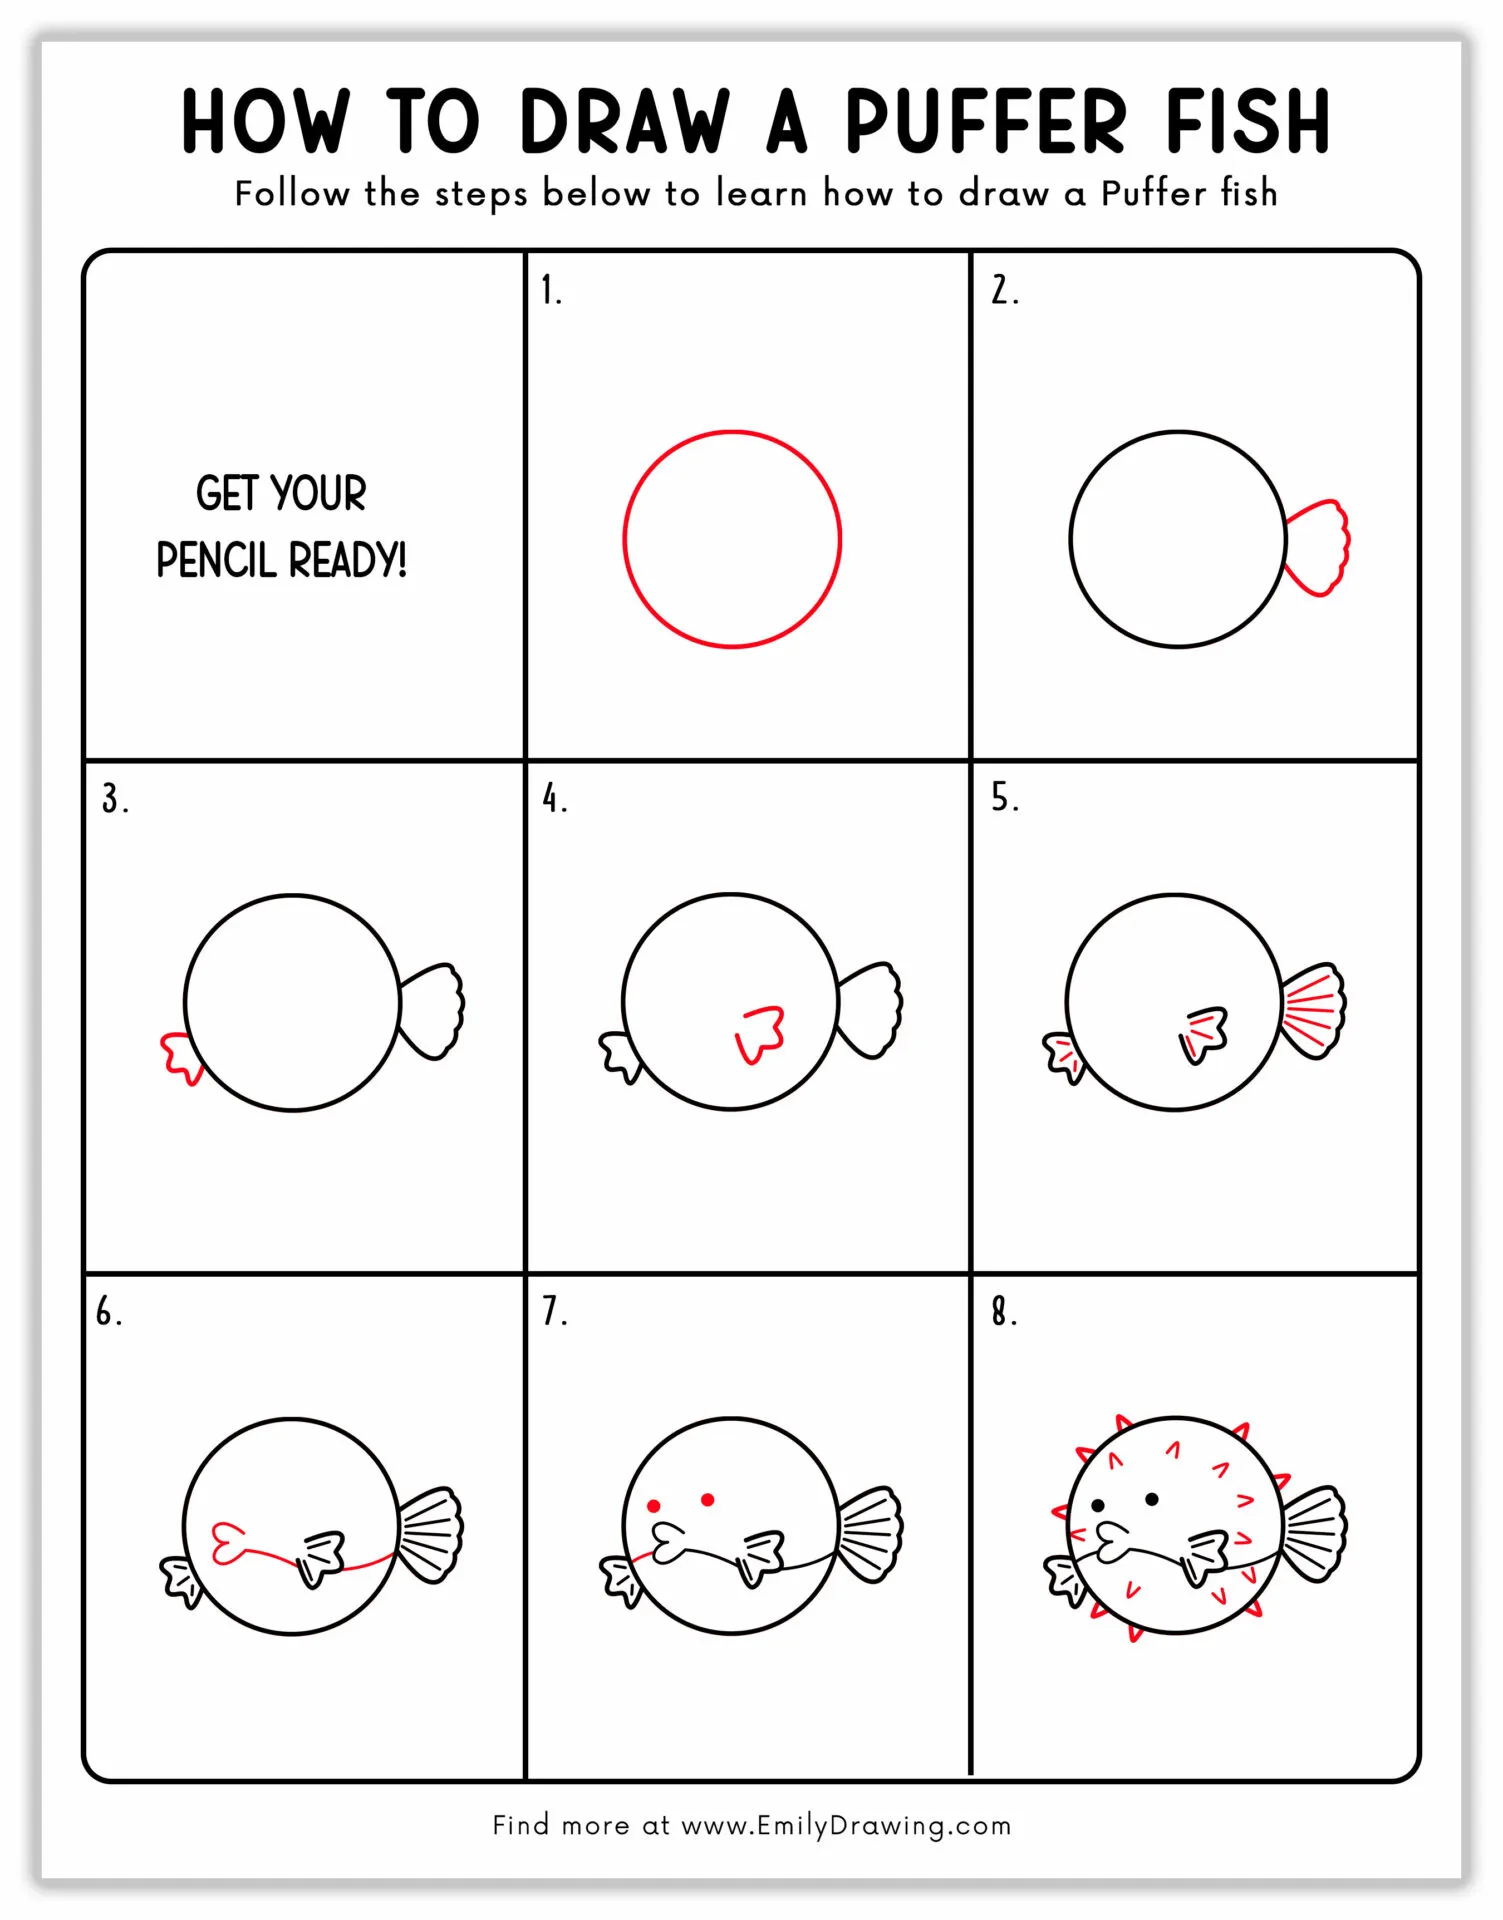
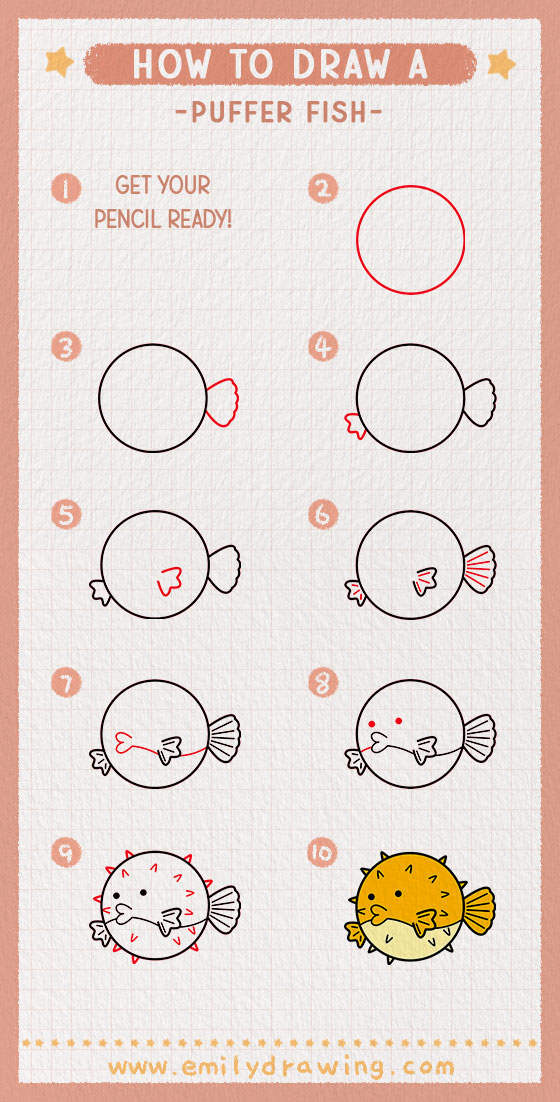
That’s why, in this tutorial, I am going to share an eight-step guide to realistic Puffer fish drawing. These steps are simple to follow and so easy that young learners can create their art pieces within 20 to 25 minutes.
So, without wasting any moment, let’s explore the tutorial.
How to Draw a Puffer Fish for Kids?
Grab your art supplies before starting this tutorial. I suggest you read this drawing guide till the end before starting your painting. Because it will help you get a better idea about the drawing and how to make your Pufferfish unique from others.
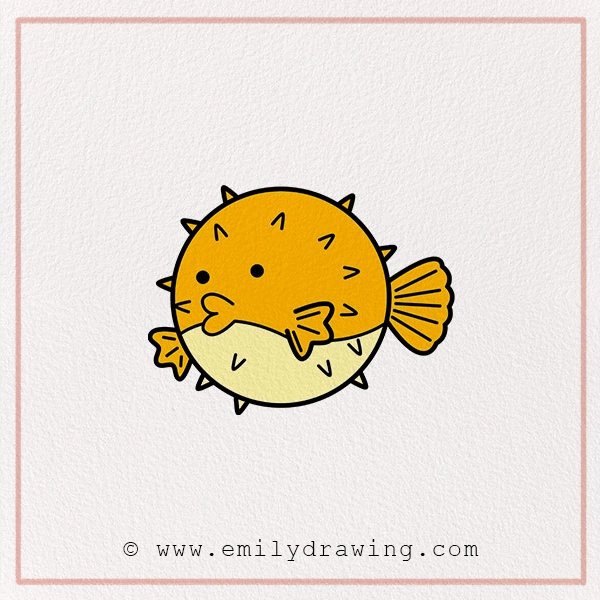
Materials:
- a piece of paper
- a pencil for the guiding lines and sketching
- an eraser
- a black sharpie or a pen for the outlines
- markers or colored pencils for coloring
- our printable drawing guide (Join my Email List below to get this Tutorial)
Here are my RECOMMENDED Art Supplies!
- Crayola Coloring Set (140 Pieces – Mega Value!)
- 24 Colored Crayon Set
- A4 Printer Paper
- Crayola Coloring Pencils
- HP Home Printer with Instant Ink!
Time needed:
15 minutes.
How to Draw a Puffer Fish — Let’s get started!
Step 1 – Draw the Body

Just like our other animal drawing tutorials, we will start this tutorial by sketching the body.
For this, you have to draw a large smooth circle in the center of the page. Make sure to keep it large because your whole pufferfish drawing will be inside this circle.
Tip: Kids can use any circular object to sketch the outline of this circle. It will ensure perfection.
Step 2 – Draw the Tail Fin
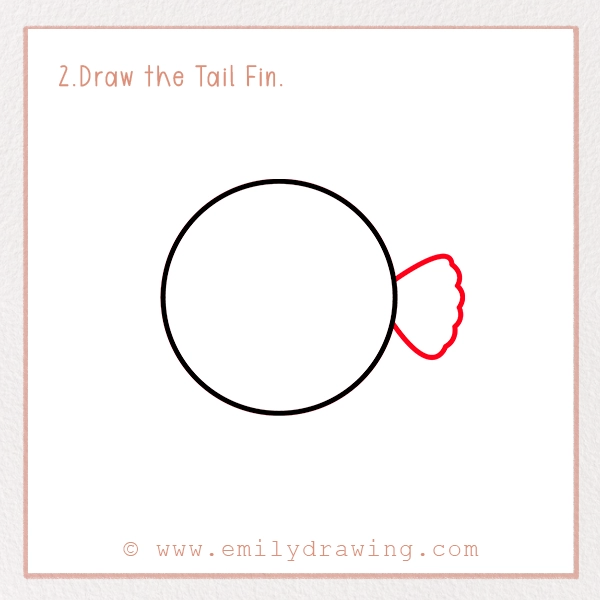
After the base of the body, we have to sketch the tail fin. For this, you need to draw the fan-like shape at the right side of the circle. It should have a slightly wavy outer edge to give it a textured look.
Draw it in the center of the right side’s body outline, and make sure it is of small to medium size to have a balanced proposition.
Step 3 – Sketch the Side Fin
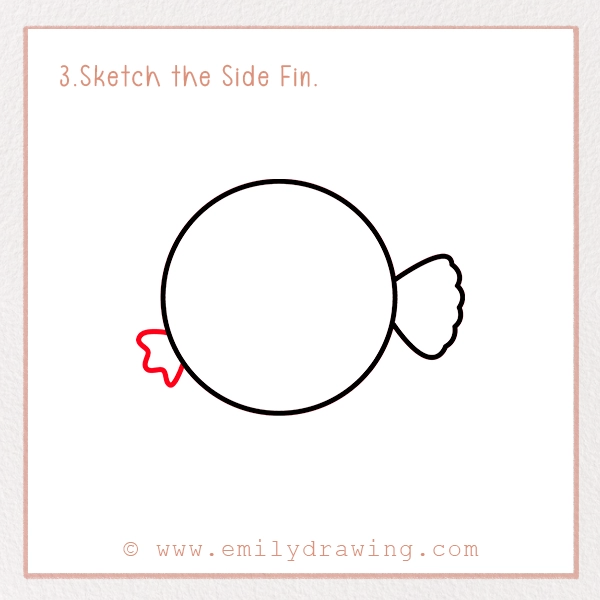
In this how-to draw a cartoon puffer fish guide, we need to create a side fin now.
It should be way smaller than the tail fin and have a spiky outer edge. You should sketch it on the left side of the circle, a bit lower in position than the tail fin. This will give the puffer fish drawing a balanced look.
Step 4 – Sketch the Inner Fin
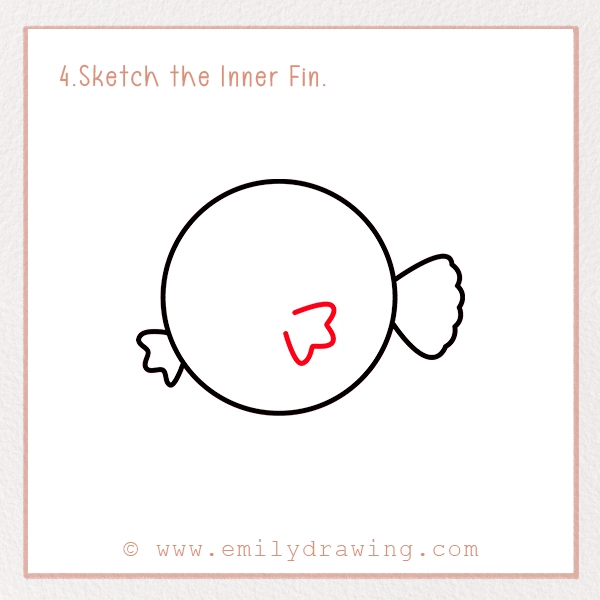
The famous fugu has different fins for moving and stabilizing the body. So, we need to draw another fin in this step to complete our Puffer Fish drawing.
This fin will be on the inner side of the body and will be similar to the one we sketched in Step 3. You have to sketch this small fin in between the tail and the outer fin. Its direction should be toward the tail.
Refer to our picture for better understanding.
Step 5 – Add Details to Fins
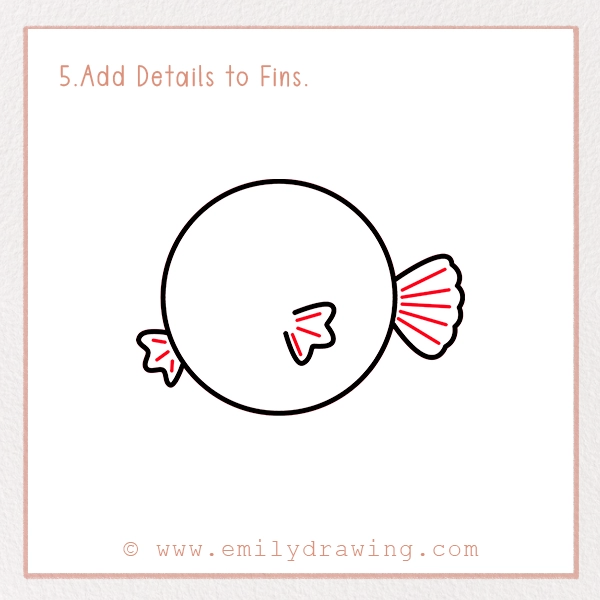
For a realistic Puffer Fish drawing, we need to add some details to all the fins. These details will enhance your drawing, giving it a professional look.
So, add some curved lines in the tail and inner and outer fins. You should start it from the base of the fin and extend it outward to create a ribbed and textured appearance.
Step 6 – Create the Mouth and Lower Body
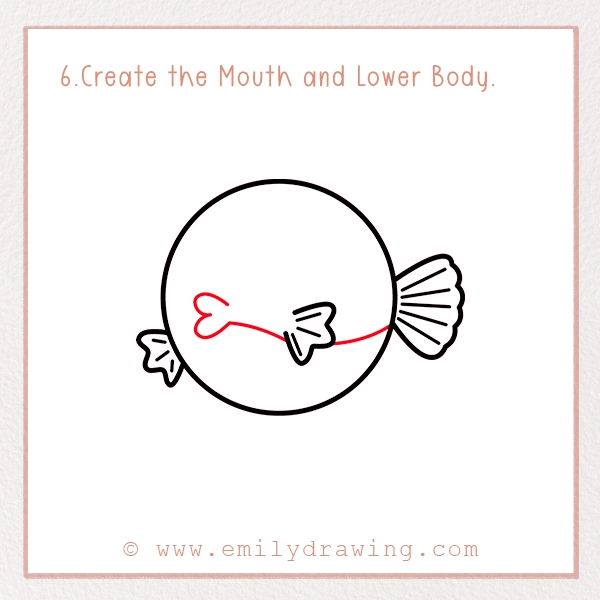
Now, we are going to add some Pufferfish accessories to make a cute pufferfish drawing. This will help us in making the lower body and base of the face.
For this, add a small curved line, joining the tail fin and the inner fin as shown in our picture. Make sure that this curved line follows the natural shape of the circle.
After this, add another tilted line extending toward the other side of the circle, but stop it in the middle to sketch the lips of the fish.
Here, draw a small heart shape whose lower part is connecting with the line. This line has created the lower body part of the Puffer Fish.
Step 7 – Add Details of the Face
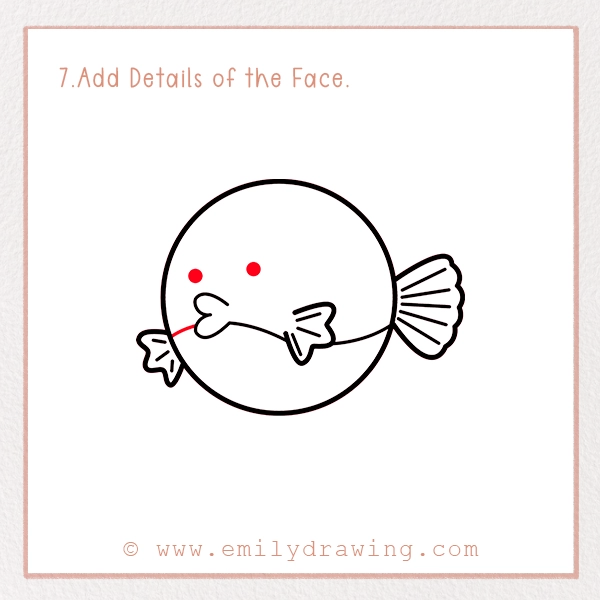
Now, it is time to make our Puffer fish drawing cute. For this, sketch a line that joins the lips with the outer line of the circle.
Then, draw two small circles above the lips to make the eyes. You can draw a small dot in the eyes to give them a lively look.
I hope a playful and whimsical Pufferfish is staring you back at this moment. This type of Pufferfish is mostly used in stylized and cartoonish illustrations.
Step 8 – Add Body’s Spikes
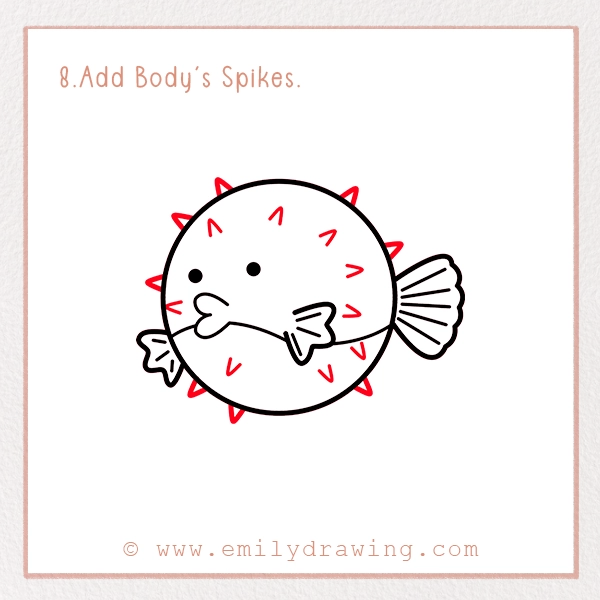
This is the last step in how to draw a cute Puffer Fish tutorial. It will take a while to complete so make yourself comfortable.
What you have to do here is add small spikes to the body of the fish. These spikes should be small and triangular in shape, with each one pointing outward. This will give the vibe that the fish is in the defense stance.
Make sure to space spikes evenly and vary their sizes to give them a natural look.
Step 9 – Color Your Puffer Fish’s Pencil Sketch

Now, this is the optional but most fun part of the drawing: coloring the Puffer Fish’s sketch.
You should grab the colors and some reference pictures of Pufferfish, then unleash your creativity. The most common color of this fish is bright yellow and lemon. You can see our drawing’s picture in this color.
Apart from this, there are white-spotted puffer fish that have dark shoulders, white spikes, and light grey bodies. Another species features a black body and white spots.
You can choose any of the colors to make your drawing realistic and lively.
Pin it now, Draw later!
If you want to do something unique, you could add a lively background to it. Otherwise, celebrate your fish drawing and share it with your loved ones. Moreover, check our other animal drawing guides to polish your artistic skills
