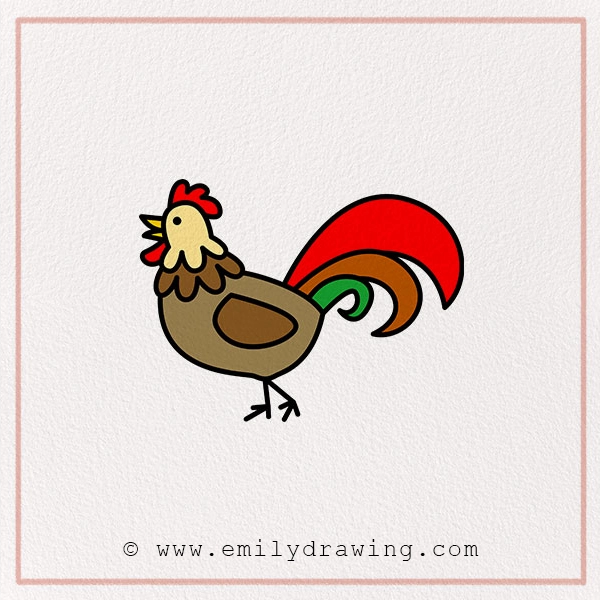
Roosters are bold, colorful, and full of personality! If you’ve ever wanted to draw one, you’re in the right place. In this tutorial, we’ll break it down into simple steps so you can create your very own rooster masterpiece. Grab your pencil, and let’s get started!
Why Draw a Rooster?
Drawing a rooster is not just fun but also a great way to practice sketching different shapes and textures. Roosters have fluffy combs, sleek bodies, and elegant tail feathers that make them an exciting subject for artists of all skill levels. Whether you’re an aspiring young artist or a parent looking for a creative activity to enjoy with your child, this step-by-step guide is perfect for you.
Did you know? Roosters are natural timekeepers! They crow at dawn, helping farmers and villagers start their day. In some cultures, roosters symbolize bravery, energy, and good fortune. Now, let’s begin drawing this amazing bird!
Materials:
- a piece of paper
- a pencil for the guiding lines and sketching
- an eraser
- a black sharpie or a pen for the outlines
- markers or colored pencils for coloring
- our printable drawing guide (Join my Email List below to get this Tutorial)
Here are my RECOMMENDED Art Supplies!
- Crayola Coloring Set (140 Pieces – Mega Value!)
- 24 Colored Crayon Set
- A4 Printer Paper
- Crayola Coloring Pencils
- HP Home Printer with Instant Ink!
Time needed:
15 minutes.
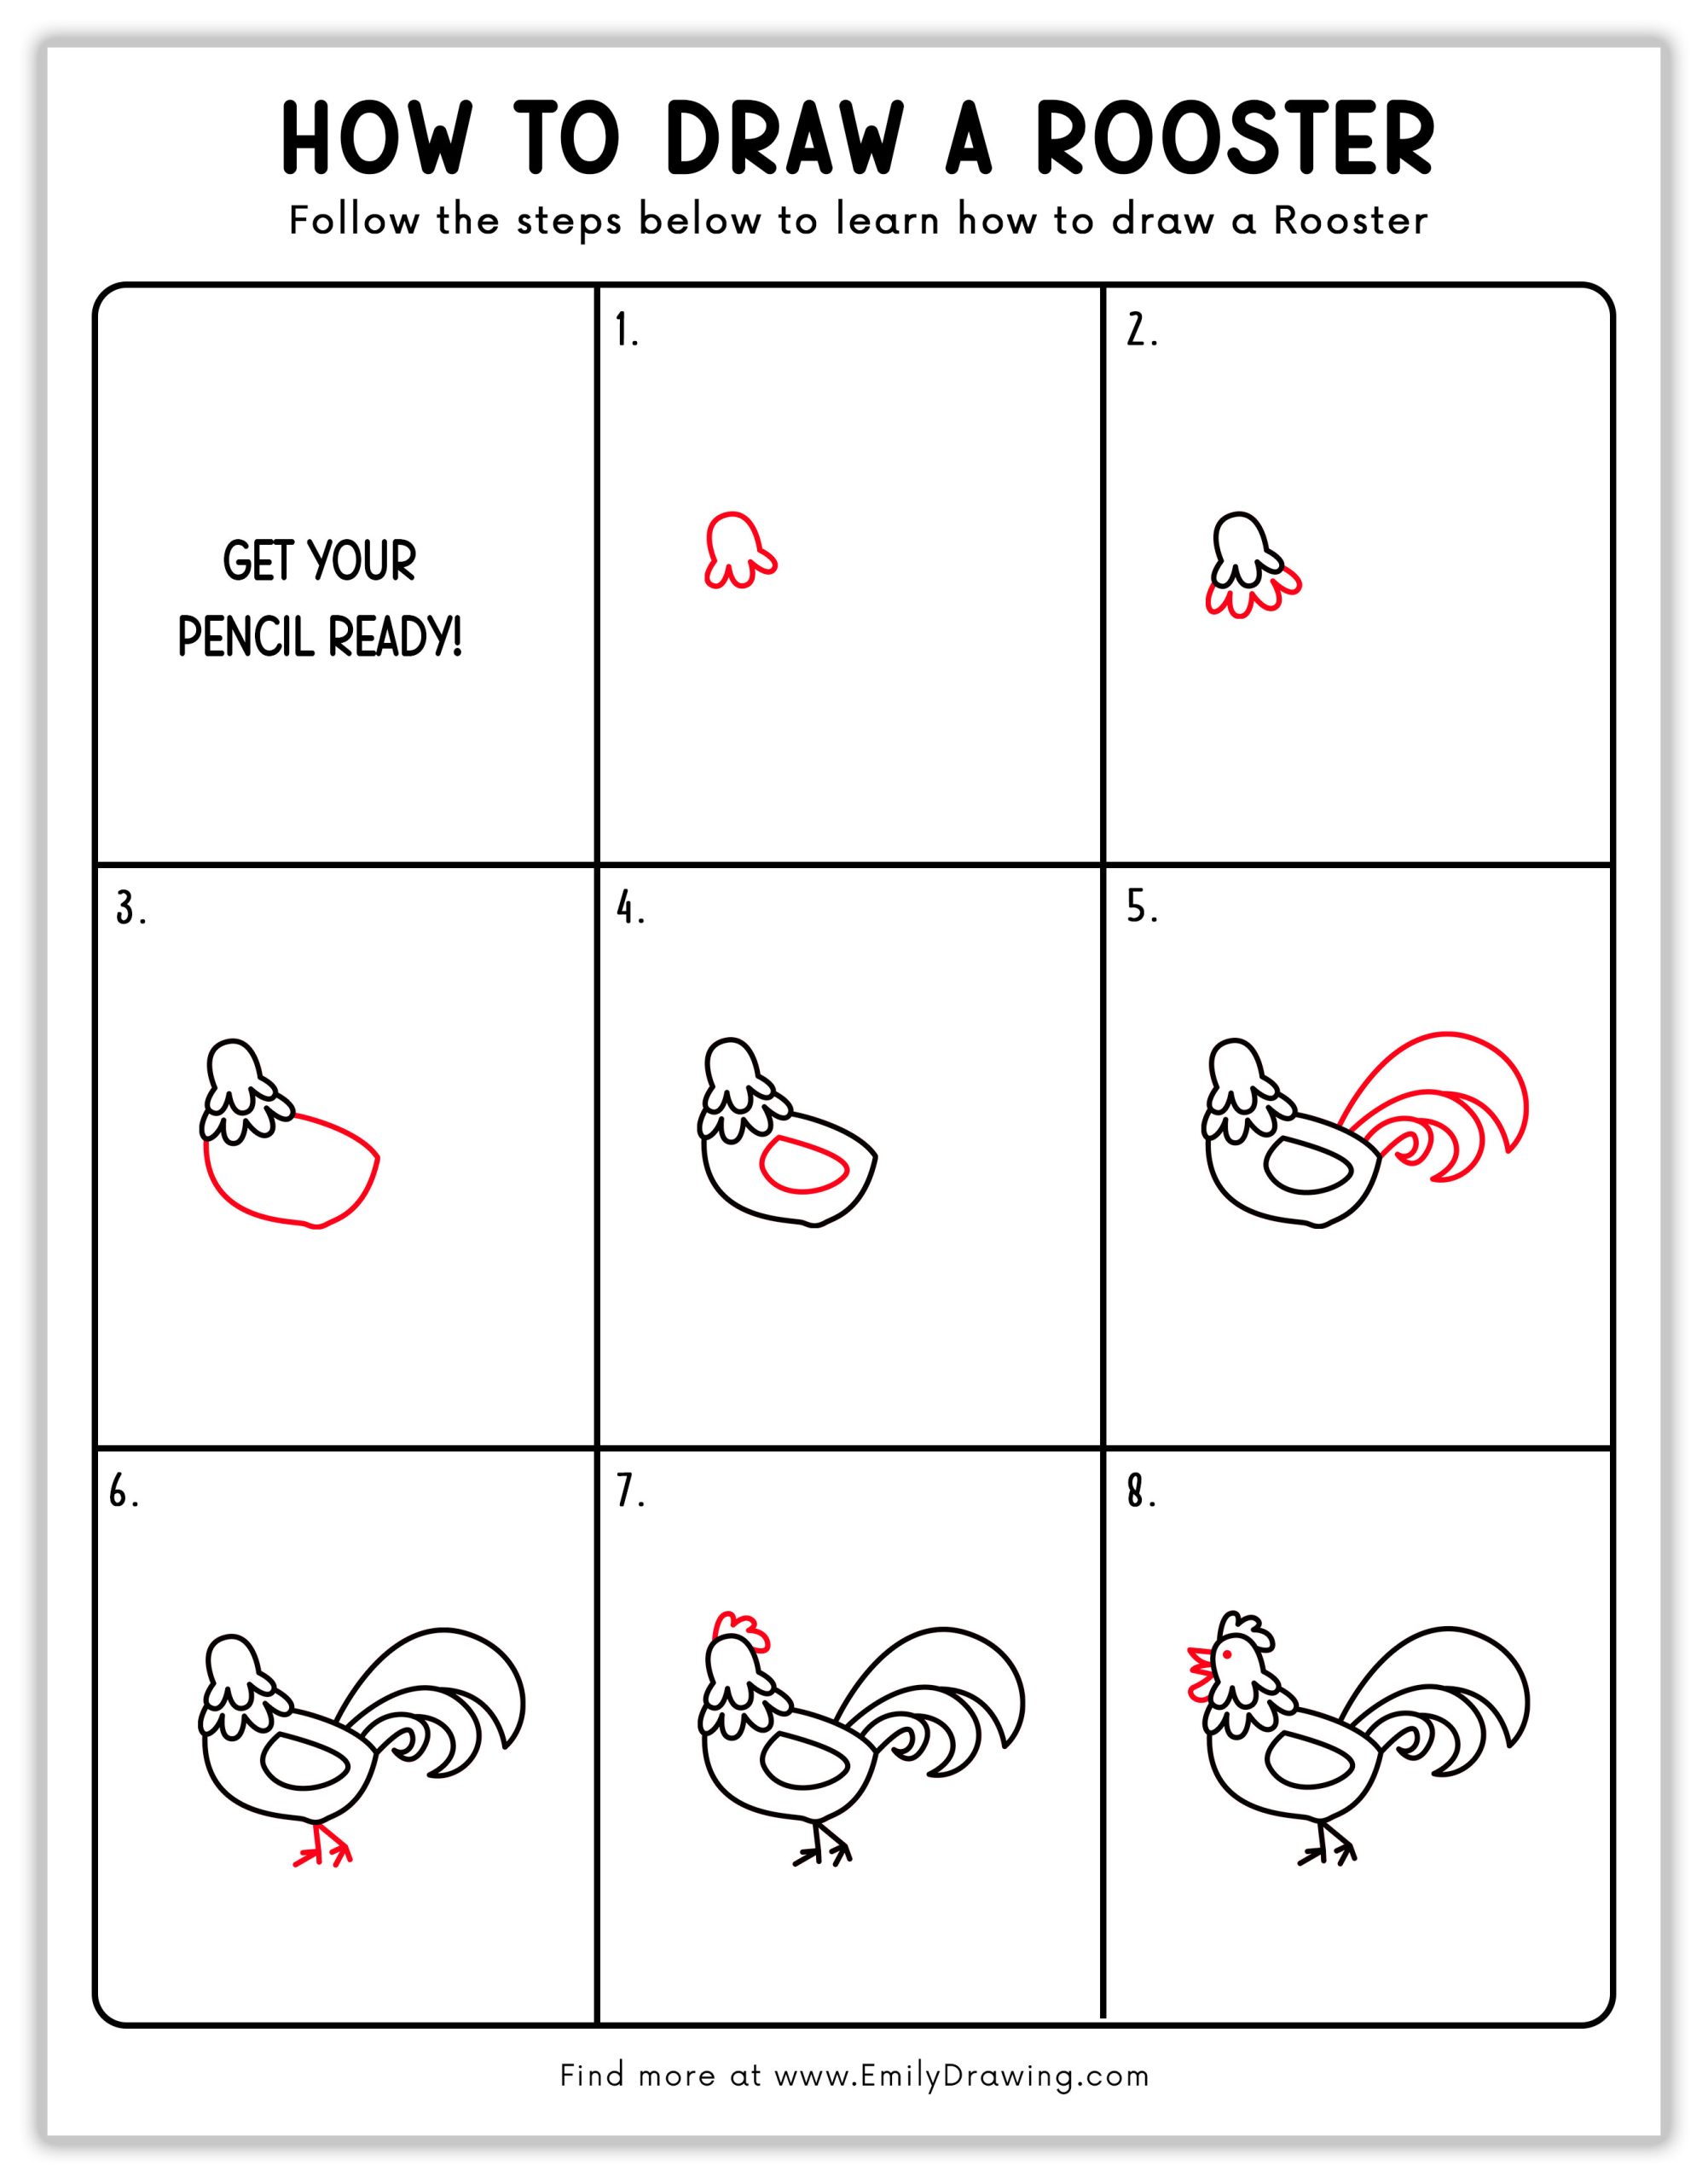
How to Draw a Rooster — Let’s get started!
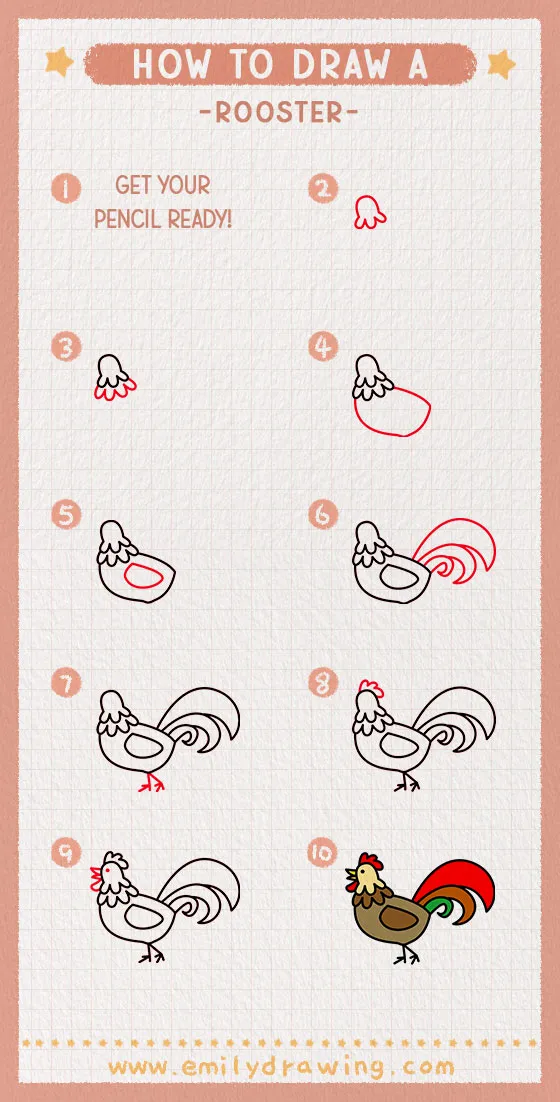
Step 1 – Draw the Rooster’s Comb
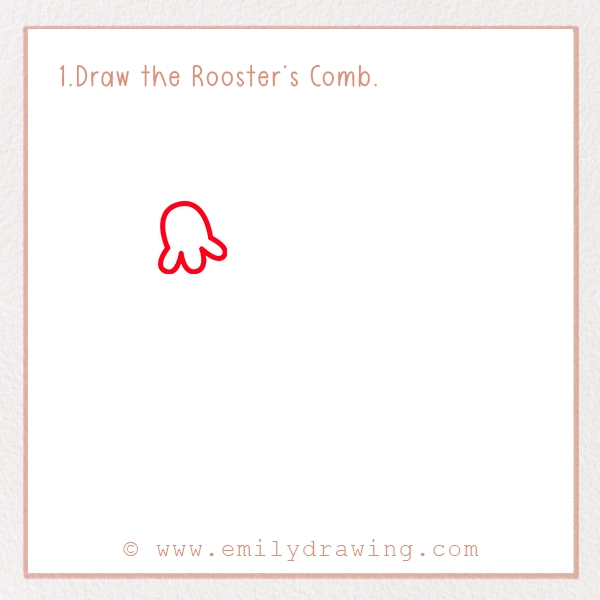
Start with a small wavy shape that looks like a fluffy cloud. This is the rooster’s comb the red, fleshy part on top of its head. Keep your strokes light so you can easily adjust if needed! Roosters use their combs to help regulate body temperature, making them an essential part of their anatomy.
Tip: If you want a unique-looking rooster, experiment with different comb shapes. Some roosters have tall combs, while others have small, rounded ones!
Step 2 – Add the Wattle
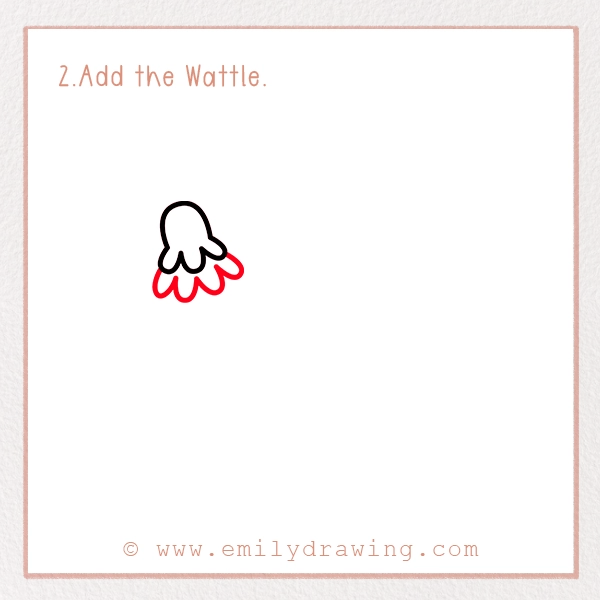
Now, draw a smaller wavy shape below the comb. This is the wattle—the red, droopy skin that hangs under a rooster’s beak. Roosters use their wattles to attract hens and regulate body temperature!
Fun Fact: The bigger and redder a rooster’s comb and wattle, the healthier and more attractive it looks to hens.
Step 3 – Sketch the Body
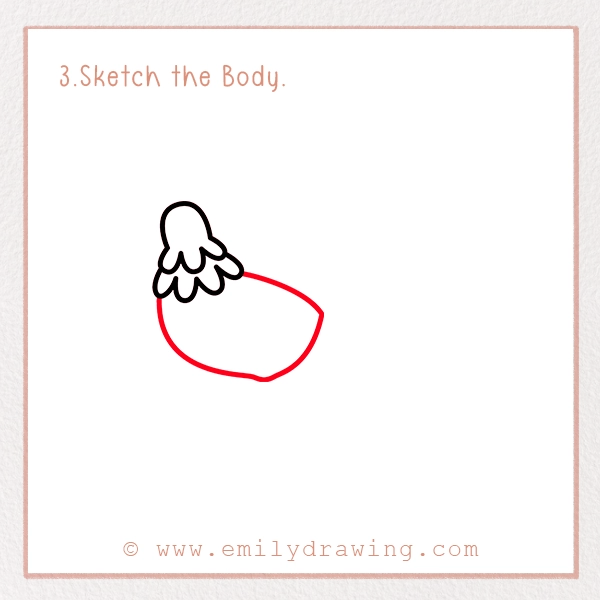
Next, draw an oval shape attached to the head. This will be the rooster’s body. Make sure it’s slightly tilted to one side, giving your rooster a dynamic and lively posture. Roosters are known for standing tall and proud, so keep that in mind as you sketch!
Tip: You can make the body rounder for a plumper rooster or slimmer for a leaner look.
Step 4 – Add the Wing
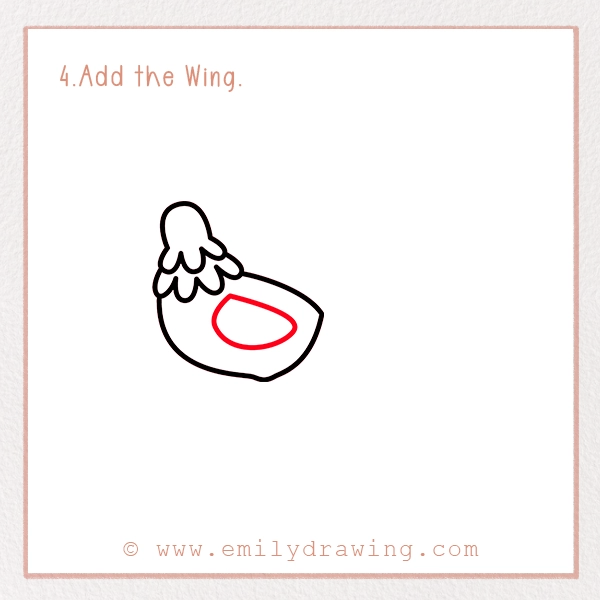
Inside the body, draw another smaller oval. This will be the rooster’s wing. Feel free to add small feather details inside to make it more realistic! Roosters’ wings are not just for show, they help with balance and short bursts of flight when needed.
Fun Fact: Roosters, like other chickens, can’t fly long distances, but they can jump and glide short distances to escape predators.
Step 5 – Draw the Tail Feathers

Now comes the fun part, the magnificent tail! Roosters have long, curving tail feathers. Draw several curved lines fanning out from the back of the body. Have fun with this step by making the tail big and dramatic! The tail is one of the rooster’s most eye-catching features, often displaying iridescent colours in real life.
Tip: Try adding a mix of short and long feathers to make the tail more realistic.
Step 6 – Sketch the Legs and Feet
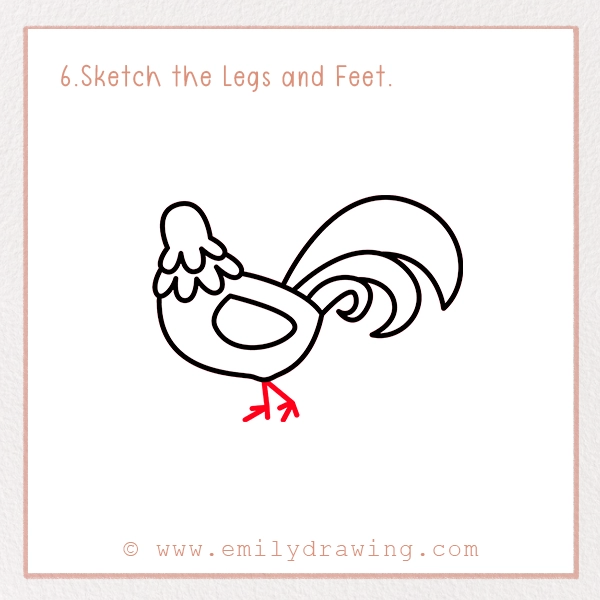
Roosters have strong legs and sharp claws. Draw two straight lines extending downward from the body, ending with three toes pointing forward and one pointing backward. Add tiny claws at the end of each toe. Did you know that roosters use their sharp claws to defend their territory? They can be quite fierce when protecting their flock!
Fun Fact: Roosters have a spur on the back of their legs that they use to fight off threats.
Step 7 – Add Facial Details
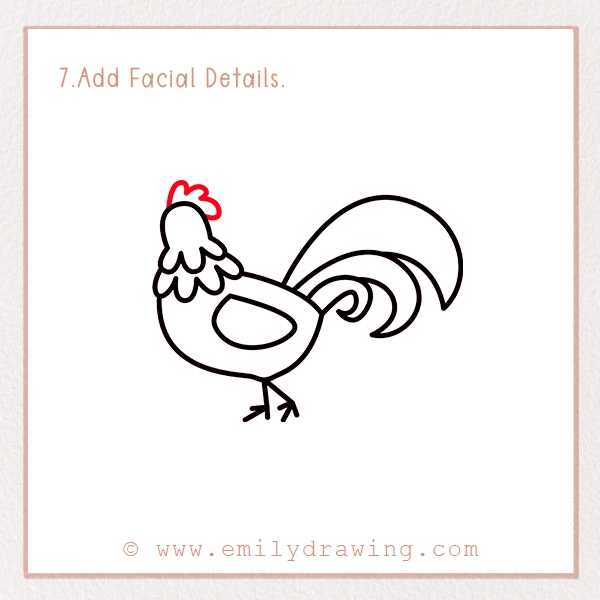
It’s time to bring your rooster to life! Draw a small beak in front of the head. Add a round eye just above the wattle, and don’t forget a tiny dot inside the eye to make it sparkle. Roosters have excellent eyesight, which helps them spot danger from far away.
Tip: Add small curved lines around the eye to give your rooster more expression.
Step 8 – Draw the Beak
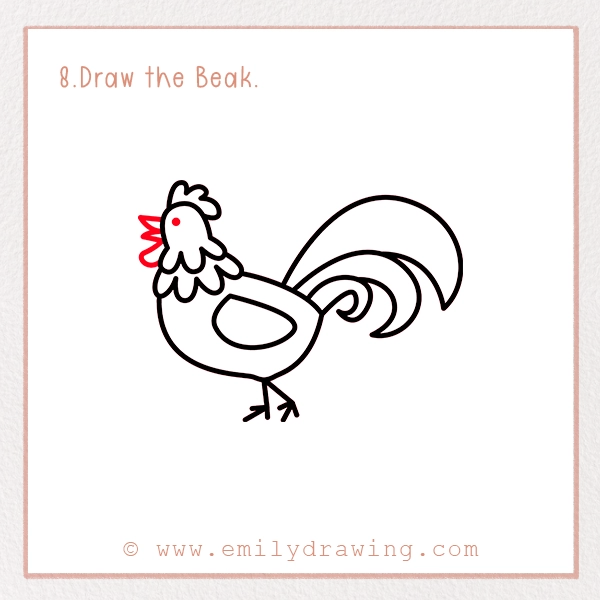
A rooster’s beak is strong and slightly curved. Draw a small triangle shape pointing forward from the head, just below the eye. Then, add a small line in the middle to separate the upper and lower parts of the beak. Roosters use their beaks to peck at food and communicate with other chickens!
Fun Fact: Roosters can recognise over 100 different faces, including humans and other animals.
Step 9 – Color Your Drawing!
Now, it’s time to make your rooster pop with colour! Roosters are famous for their vibrant red comb and wattle, golden-brown feathers, and striking black tail. Use your favourite colouring tools to bring your rooster to life!
Pin it now, Draw later!
Fun Coloring Ideas:
- Traditional roosters have red, orange, and black feathers.
- Try a fantasy rooster with blue, purple, or even rainbow feathers!
- Use shading techniques to make your drawing more three-dimensional.
Fun Facts About Roosters
- Roosters have been human companions for thousands of years!
- They have excellent eyesight and can see a wider range of colors than humans.
- Roosters crow to protect their territory and wake up their flock—no alarm clock needed!
- They have a special dance called tidbitting to impress hens by picking up and dropping food while making clucking noises.
- A rooster’s comb shape and size vary depending on its breed. Some have big, floppy combs, while others have small, upright ones.
- Unlike hens, roosters have strong, colorful feathers and long tail plumes.
- Some roosters are trained as pets and can even learn tricks!
Tips and Tricks for Better Drawing
- Use light pencil strokes at first so you can erase mistakes easily.
- Observe real-life roosters or pictures for inspiration!
- Add shading to give your drawing depth and dimension.
- Experiment with different tail shapes to make your rooster unique.
- Try drawing your rooster in different poses, like standing on one leg or flapping its wings.
- Use different art styles! You can make a cartoon rooster, a realistic rooster, or even a stylized fantasy rooster.
Great job! You’ve just learned how to draw a rooster step by step. We hope you had fun following this tutorial. Drawing is a great way to express creativity, and practicing different animals can help improve your artistic skills. Keep experimenting, and don’t be afraid to add your own special touch!
If you enjoyed this tutorial, why not try drawing a whole farm scene with hens, cows, and ducks? Don’t forget to share your drawing with friends and family, or even post it on social media with #EmilyDrawing! Keep practicing, and check out more drawing guides for other fun animals.
Happy drawing!
Get the FREE Printable Drawing Guide