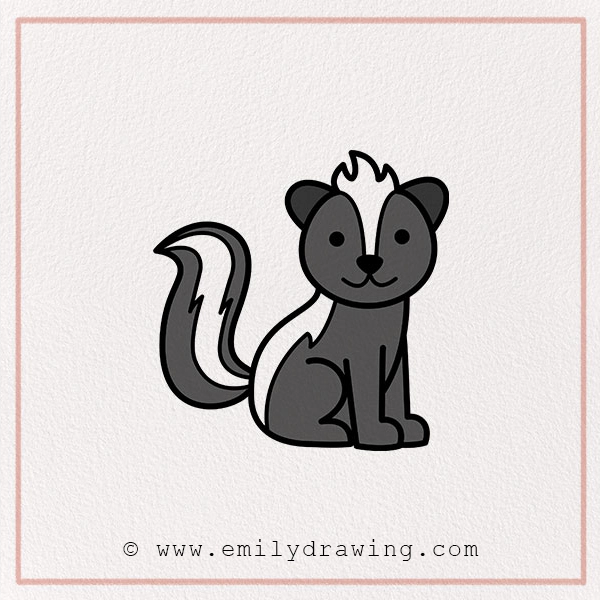
Hey there, young artists and creative parents! Are you ready to learn how to draw a super cool skunk? In this tutorial, we’ll guide you through drawing a skunk in just a few simple steps. Did you know that skunks are not only famous for their unique black-and-white stripes but also for their special way of protecting themselves? Let’s grab our pencils and get started on this fun drawing adventure!
Materials:
- a piece of paper
- a pencil for the guiding lines and sketching
- an eraser
- a black sharpie or a pen for the outlines
- markers or colored pencils for coloring
- our printable drawing guide (Join my Email List below to get this Tutorial)
Here are my RECOMMENDED Art Supplies!
- Crayola Coloring Set (140 Pieces – Mega Value!)
- 24 Colored Crayon Set
- A4 Printer Paper
- Crayola Coloring Pencils
- HP Home Printer with Instant Ink!
Time needed:
15 minutes.
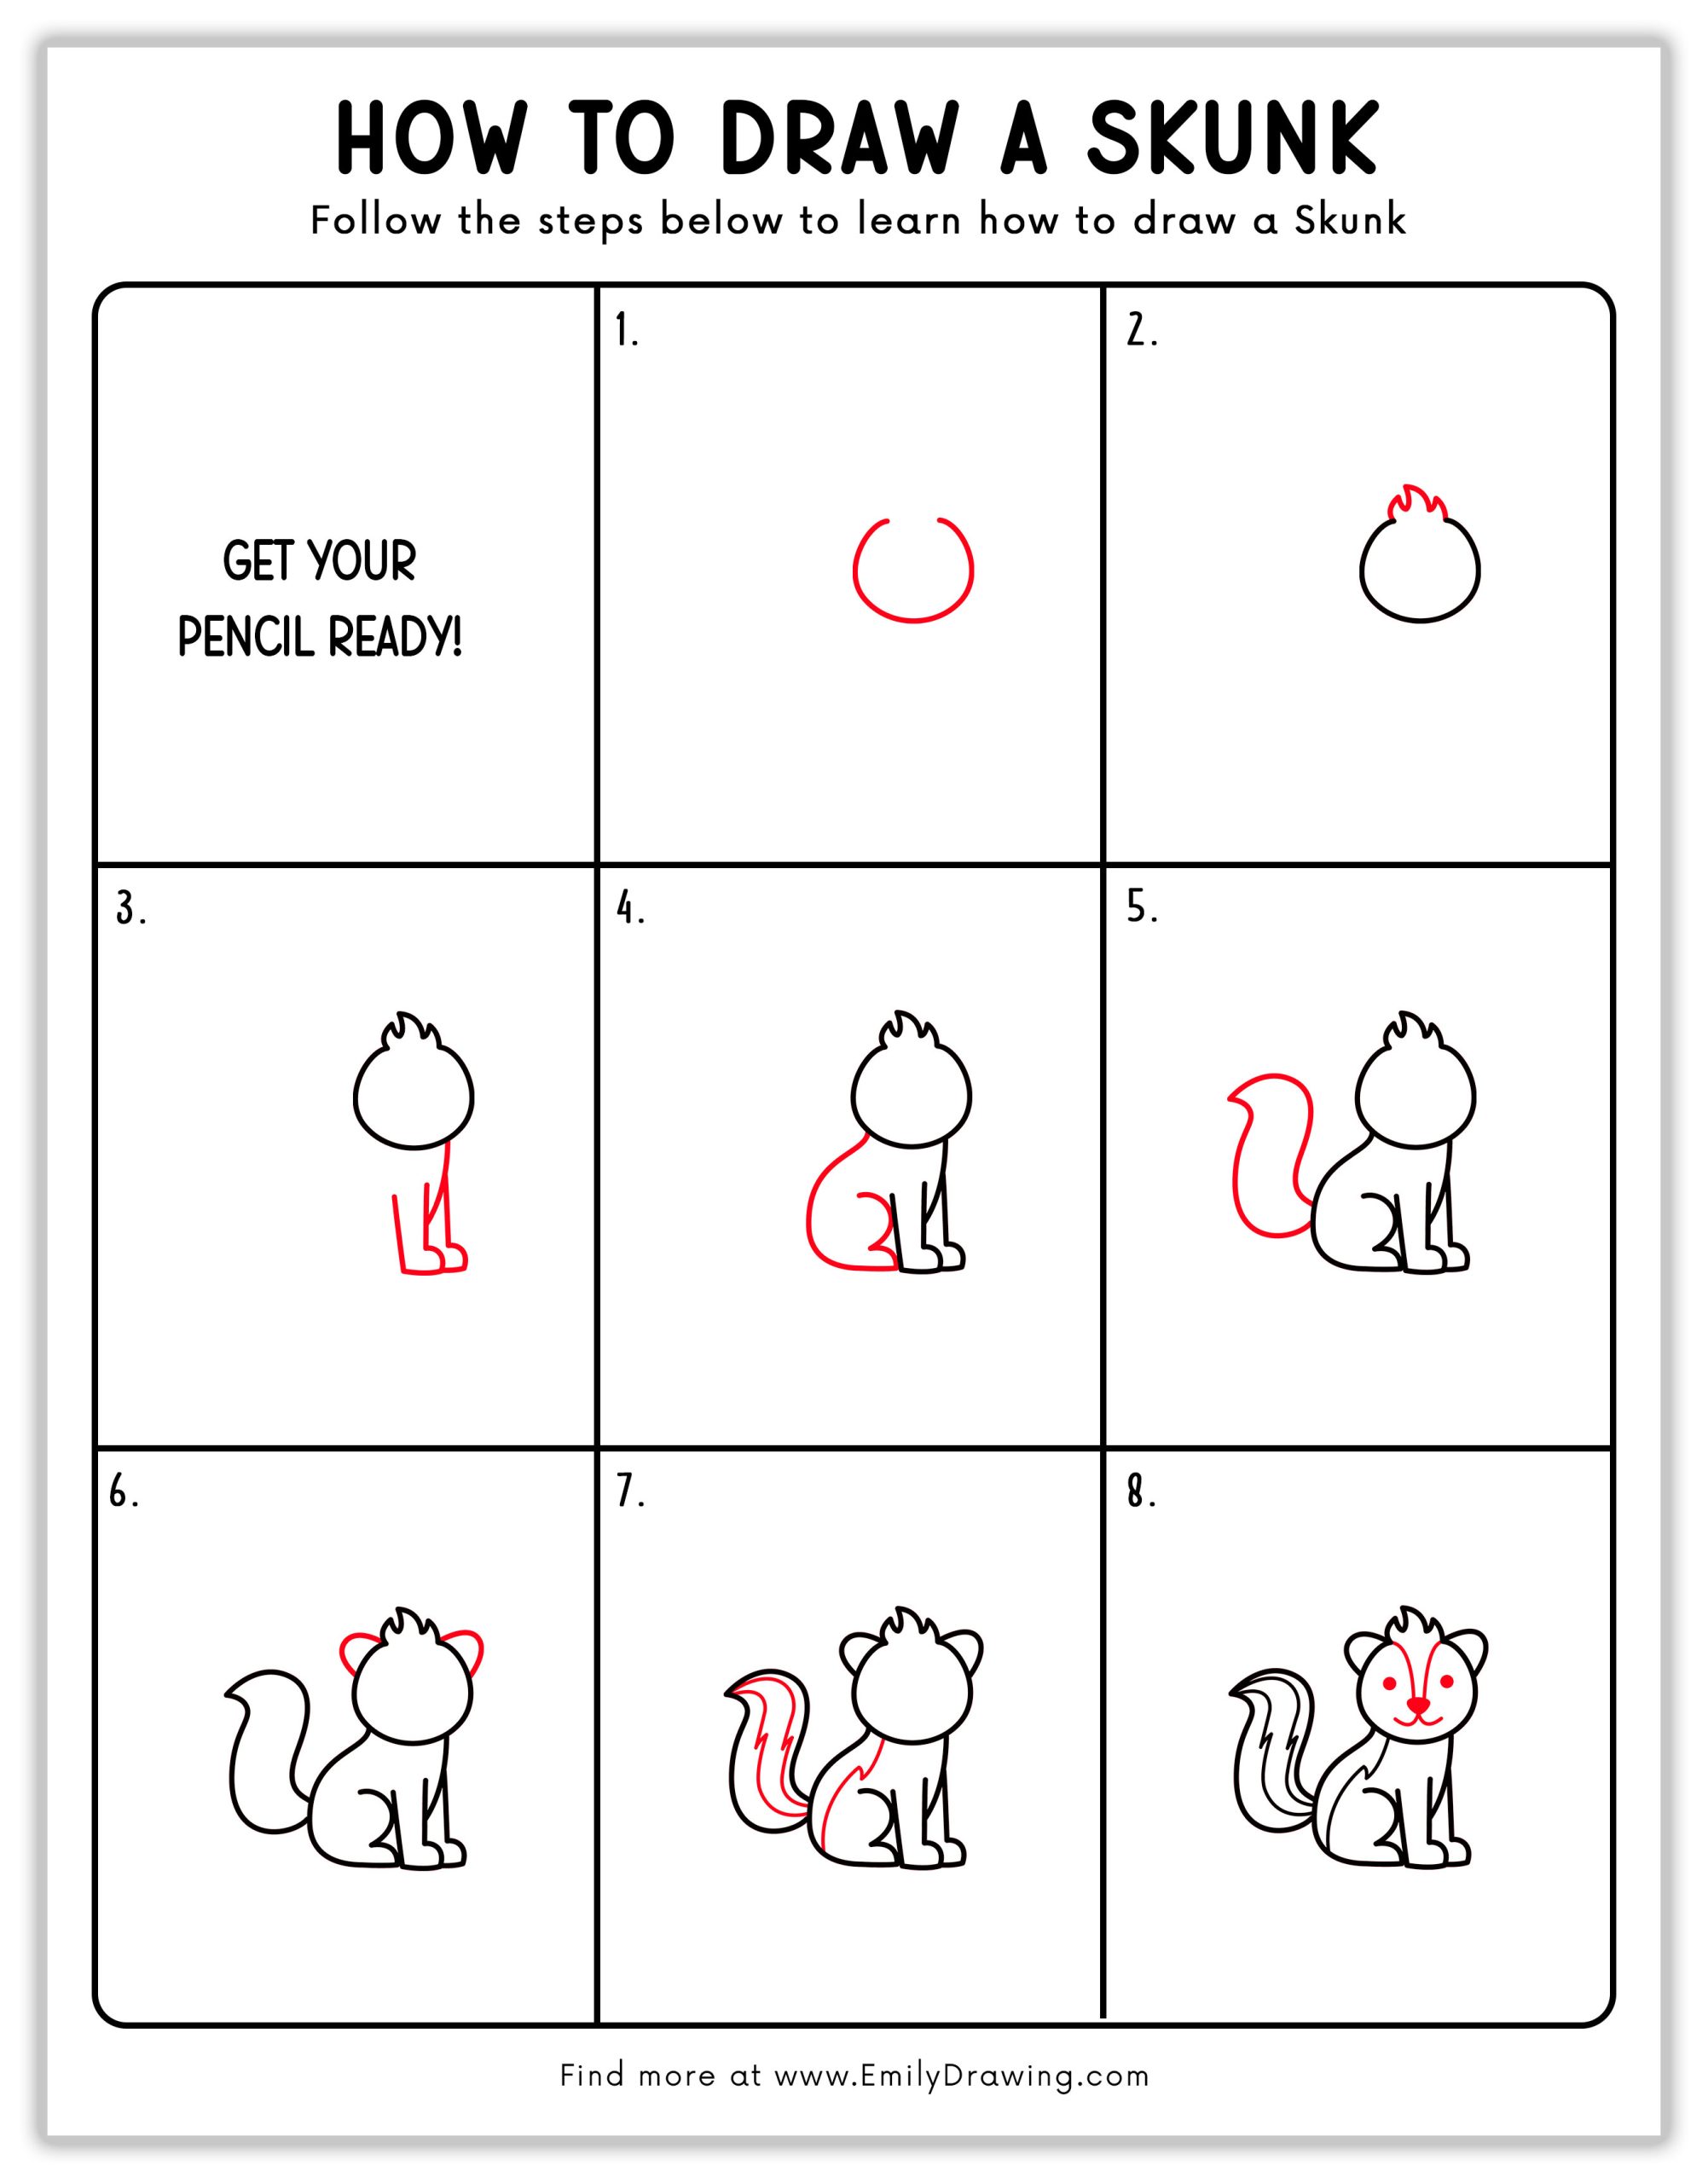
How to Draw a Skunk — Let’s get started!
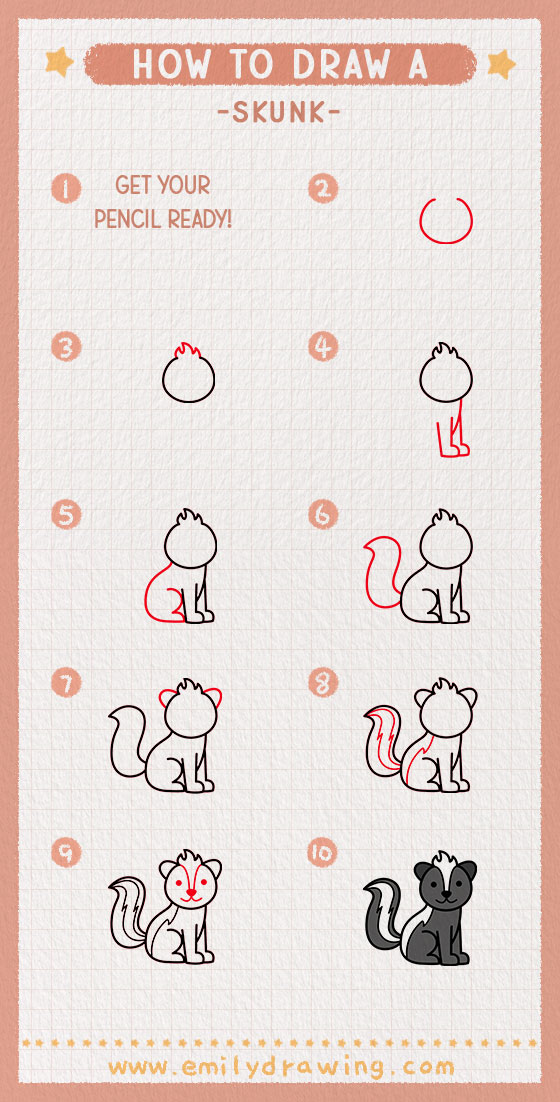
Step 1 – Start with the Head Shape
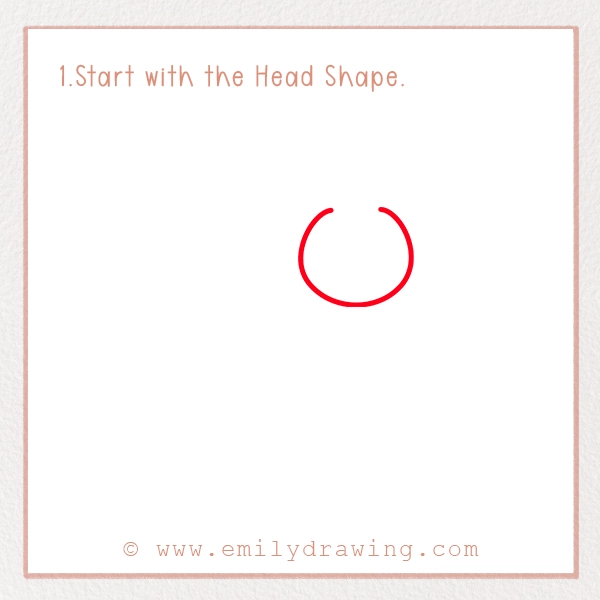
Begin by drawing a simple, curved shape, almost like a half-circle. This will be the base of the skunk’s head. Try to make the curve smooth so it looks nice and even.
Tip: If you’re having trouble making the curve perfect, use light pencil strokes so you can erase and adjust it easily!
When sketching, don’t rush! Take your time to ensure the shape looks just right. A well-drawn head shape sets the foundation for the entire drawing.
Step 2 – Add the Fluffy Fur on Top
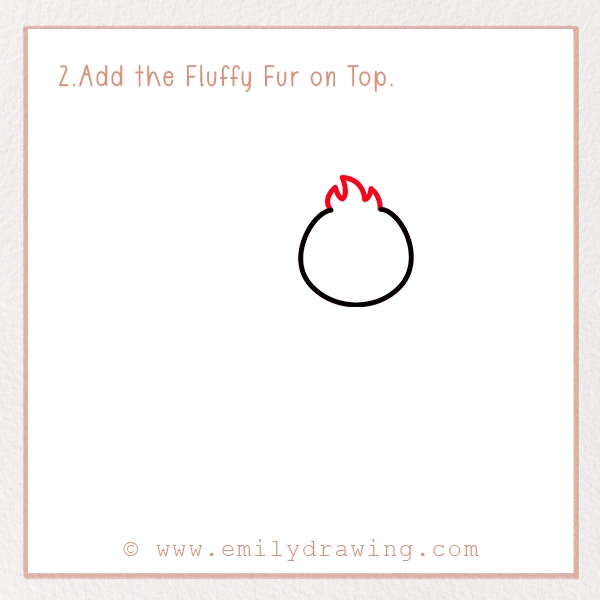
On top of the head, draw three small, spiky tufts of fur. This gives our skunk a fluffy and cute look. Once done, connect the bottom of the fur to form a full circle for the head.
Fun Fact: Skunks have thick fur that helps protect them from the cold!
You can experiment with different fur styles to give your skunk its own personality. Whether it’s fluffier or smoother, the choice is yours!
Step 3 – Draw the Front Legs and Body
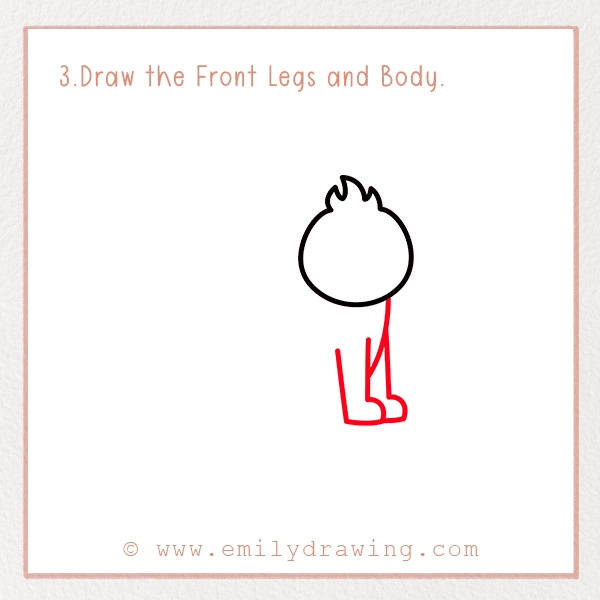
From the bottom of the head, draw two short lines downward to create the front legs. Then, draw a curved line going back to form the skunk’s body. Make sure to keep the lines soft and rounded to give the skunk a friendly and cuddly look!
Tip: If you want to make the legs look more natural, add small curves where the joints would be.
Don’t forget to draw small paws at the bottom of the legs! Little details like this make your drawing even more realistic.
Step 4 – Shape the Back and Hind Leg
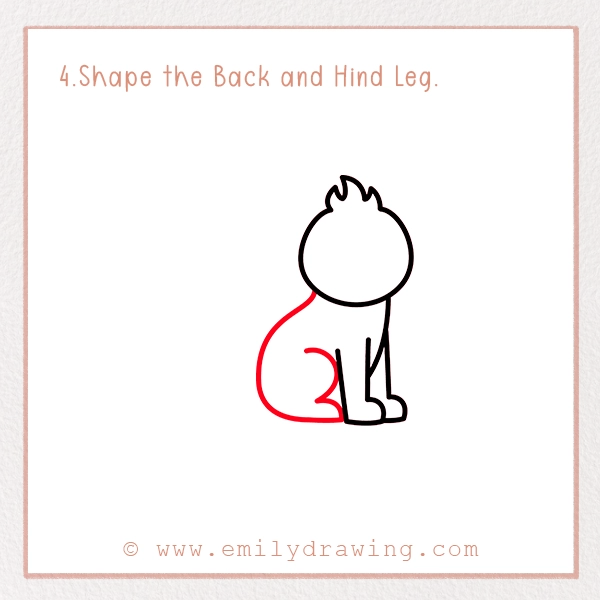
Now, draw a smooth curved line from the middle of the body down to create the back leg. Make sure the leg bends at the knee slightly so it looks natural. Add a small paw at the bottom to complete it.
At this point, your skunk should be taking shape! If the legs look too long or too short, don’t be afraid to adjust them.
Step 5 – Draw the Big, Bushy Tail
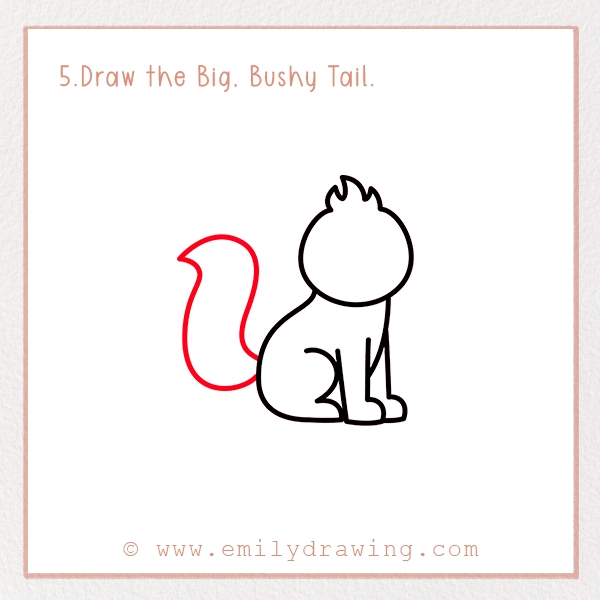
One of the most special things about a skunk is its big, fluffy tail! Draw a large, curved shape coming from the back of the skunk’s body. The tail should have a slightly wavy shape to make it look extra fluffy!
Fun Fact: A skunk’s tail can puff up when it feels scared. This is a warning sign before it sprays its famous stink!
Make the tail as big as you like! Some skunks have enormous tails that make them look even cuter.
Step 6 – Add the Ears and Final Details
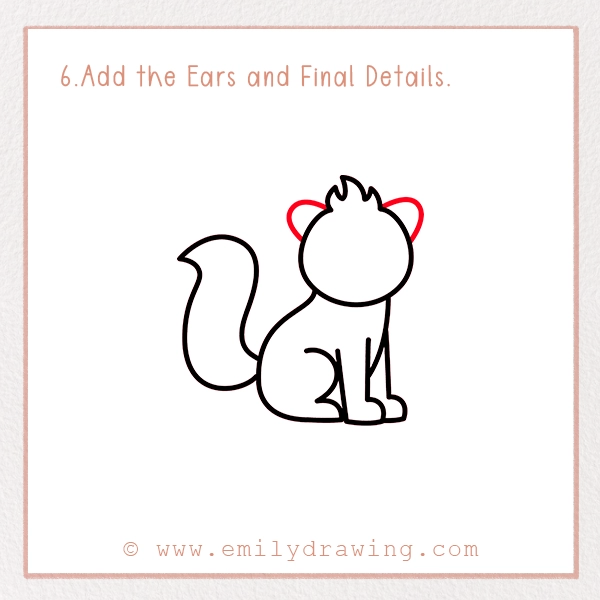
Now, let’s give our skunk some cute ears! Draw two small, rounded ears on each side of the head. Then, add a little curved line inside each ear to show the inner ear detail.
Ears can be tricky, but don’t worry! If one ear looks bigger than the other, just adjust it slightly.
Step 7 – Add the Skunk’s Unique Stripes
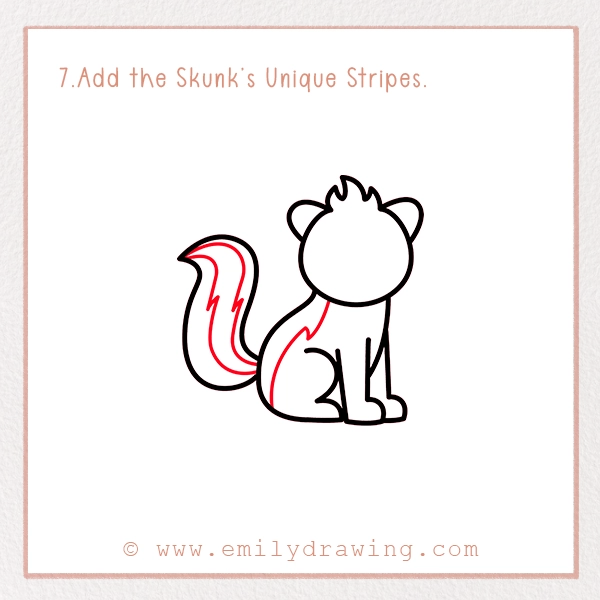
Every skunk has a special white stripe running down its body! Draw a wavy line starting from the head, down the back, and onto the tail. You can also add a smaller stripe near the face to give it a true skunk look.
Tip: If you want to make your skunk extra fluffy, add small, jagged lines around the tail and body to show the texture of the fur.
These stripes are the signature of a skunk. Without them, people might think you drew a different animal!
Step 8 – Draw the Face
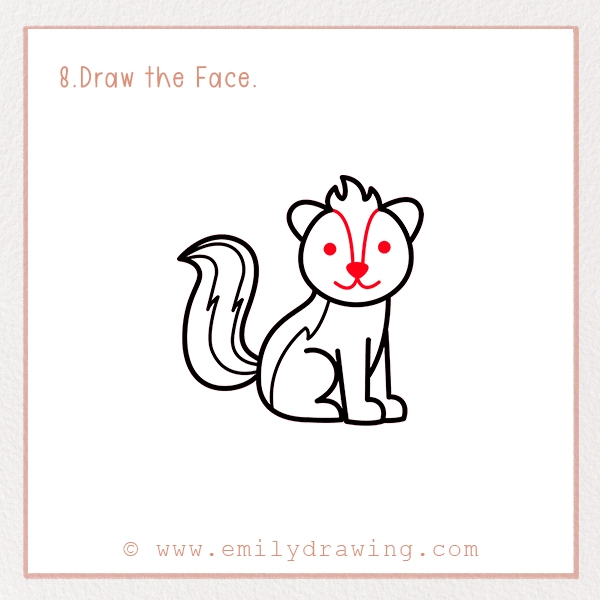
Let’s bring our skunk to life! Add two round eyes, a tiny triangle-shaped nose, and a cute smiling mouth. You can also add little dots for extra cuteness. Your skunk is almost complete!
Feel free to give your skunk different expressions! Maybe it’s winking, grinning, or looking curious.
Step 9 – Color Your Drawing!
Now that we’ve finished our skunk drawing, it’s time to color it! Skunks are usually black with white stripes, but you can get creative and use any colors you like. Try adding some pink in the ears and a little shading to make your drawing pop!
Fun Fact: Some skunks can have slightly different fur colors, like brown or grey, instead of black!
Pin it now, Draw later!
Fun Facts About Skunks!
- Skunks can spray their smelly defense up to 3 meters (10 feet) away!
- Baby skunks are called kits and stay with their mothers for about a year.
- Even though skunks have a strong smell, they are actually very clean animals and groom themselves often.
- Skunks are nocturnal, which means they are most active at night.
- They can live up to seven years in the wild!
Tips and Tricks for Better Drawing
- Always start with light pencil lines so you can erase mistakes easily.
- Use reference pictures of real skunks to make your drawing even more realistic.
- If your skunk looks a little plain, try adding a background like a forest or some grass!
- Shading can add depth to your drawing. Try adding some light and dark areas to make your skunk pop!
- Have fun and don’t worry about making mistakes. Every drawing is unique!
We hope you had fun learning how to draw a skunk! Keep practicing, and don’t be afraid to add your own creative touch. Share your drawing with friends and family or even post it online using #EmilyDrawing.
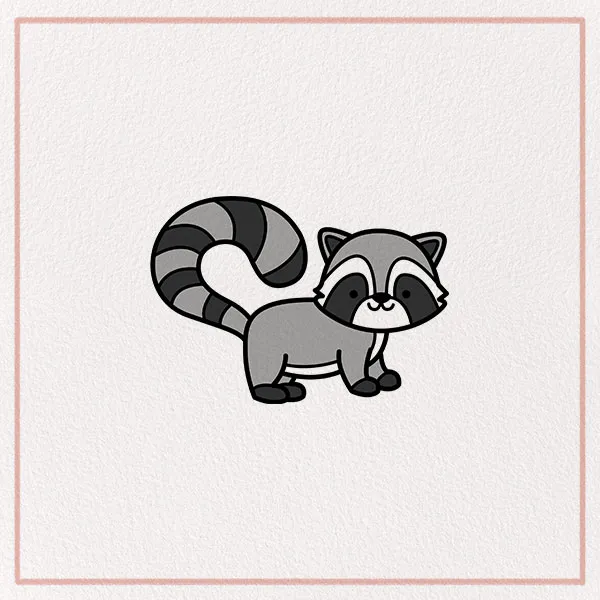
Now that you’ve mastered drawing a skunk, why not try drawing other animals? Maybe a fox, a raccoon, or even a cute little bunny! The more you draw, the better you’ll become. Keep creating, and enjoy your artistic journey!
Get the FREE Printable Drawing Guide