Do you want to learn the fundamentals of wasp drawing? Do you want to enhance the artistic skills of your kids or young students? If yes, then you are in the right place.
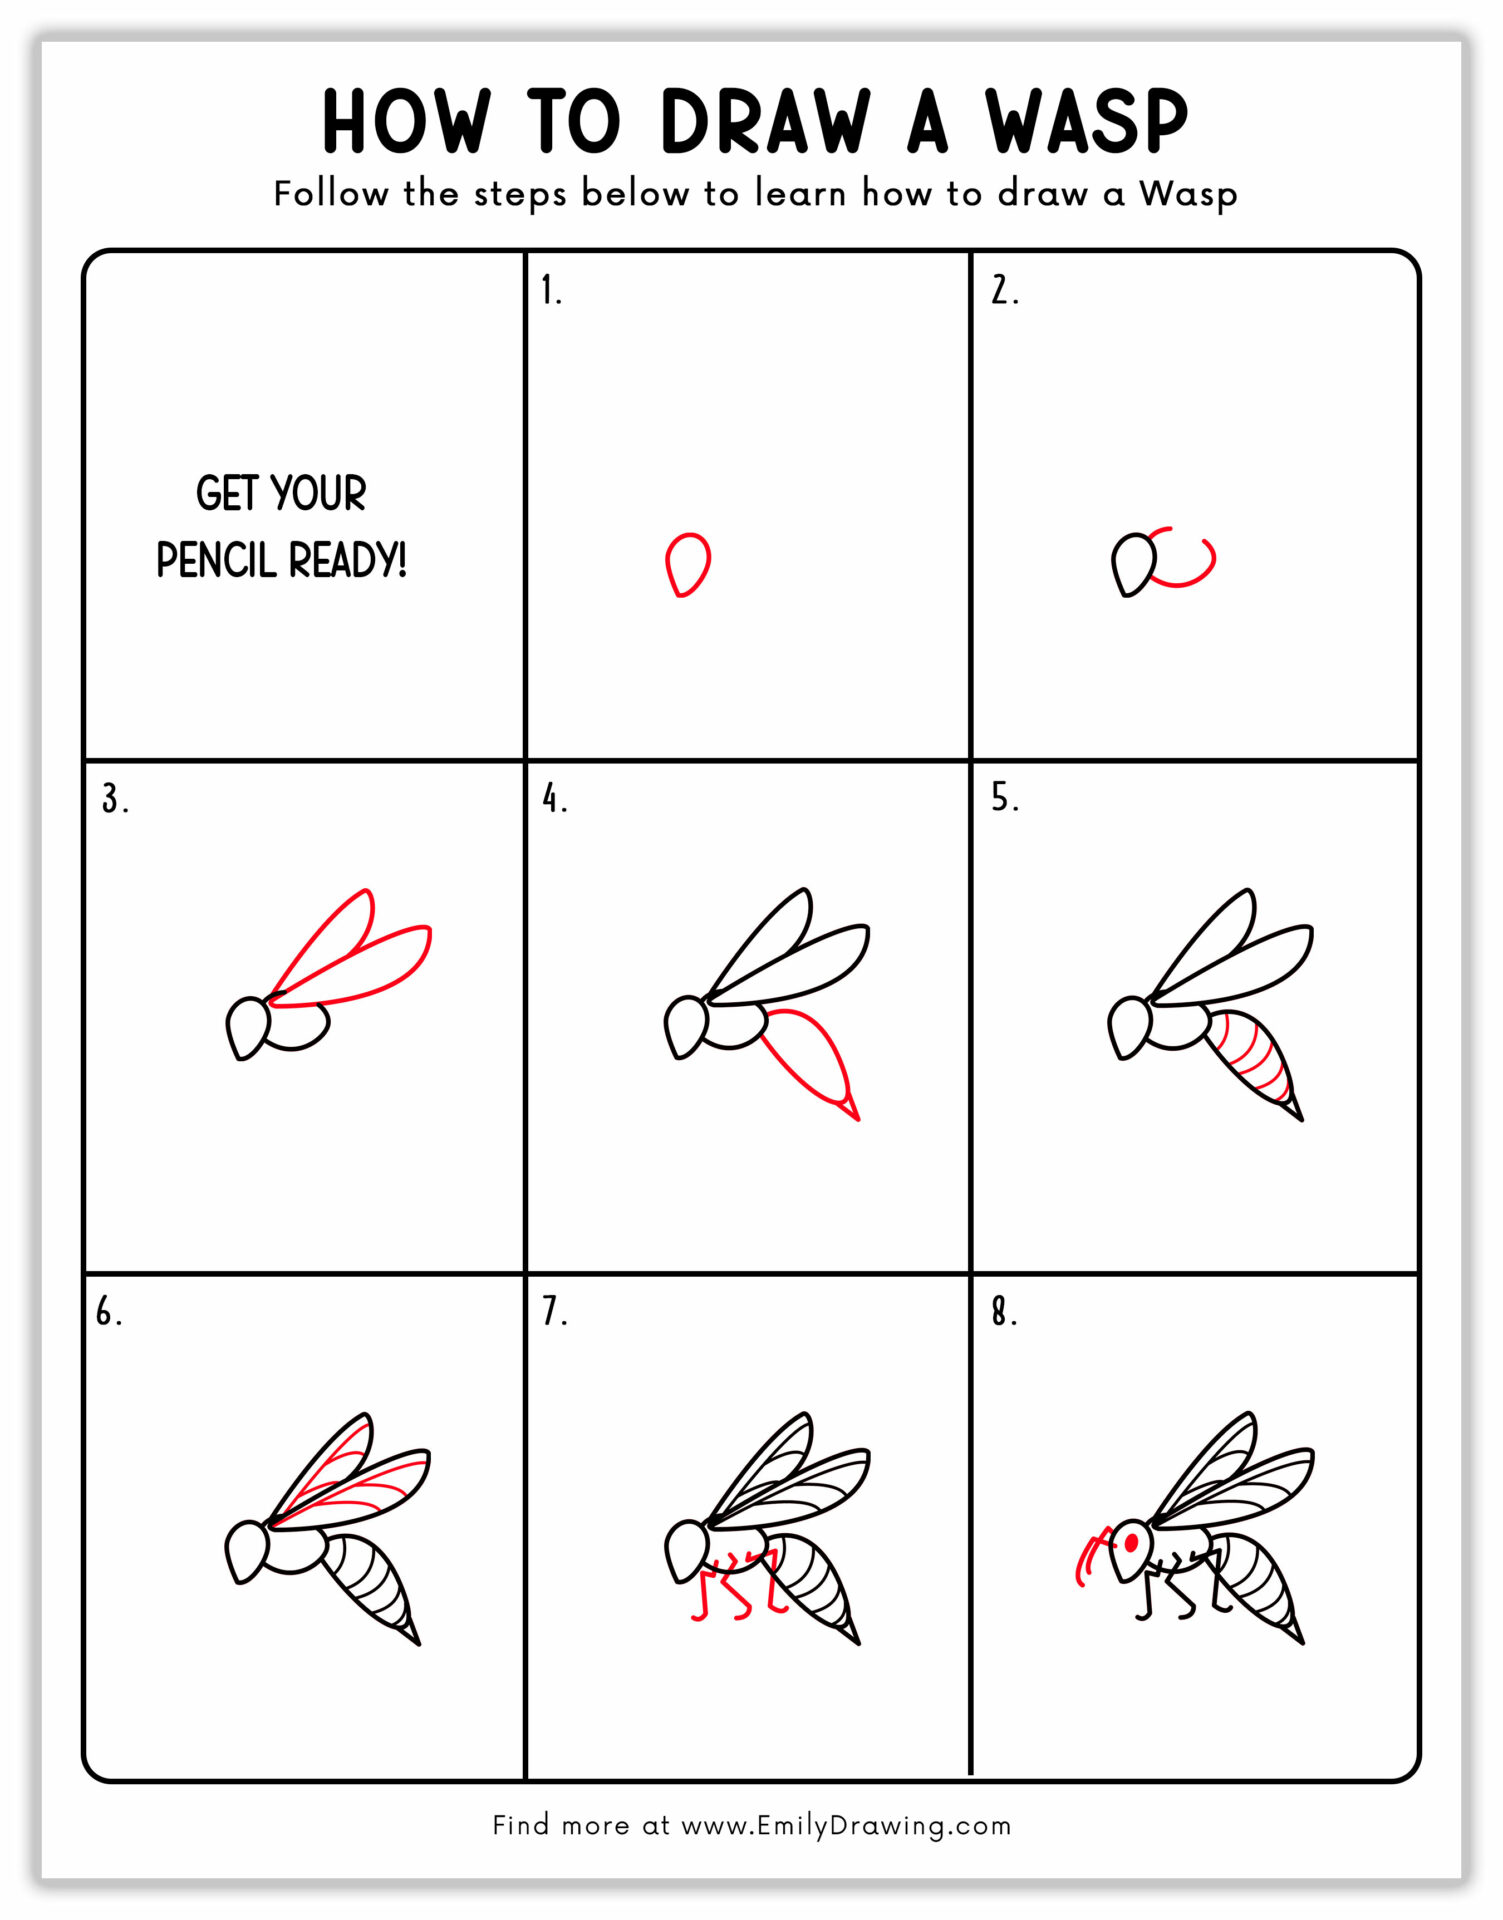
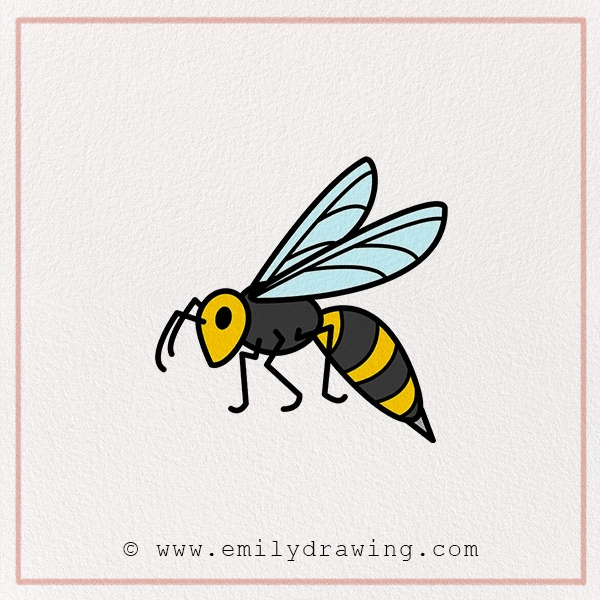
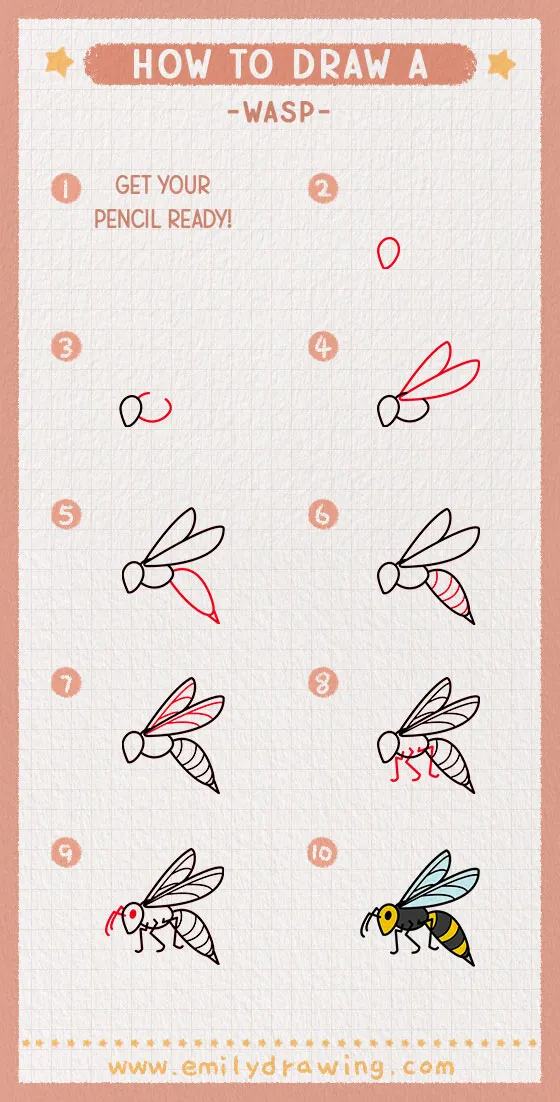
This easy wasp drawing tutorial will help you to know how to draw a wasp in simple eight steps. You can complete this tutorial within 25 minutes with minimum effort.
So, let’s delve into it without wasting any time.
Step-by-Step Guide of How to Draw a Wasp for Kids
Kids mostly prefer pencil drawings while adults can go with the drawing tablets. For pencil drawing, grab all the important art supplies. Once they are with you, start the painting by following this tutorial.
Materials:
- a piece of paper
- a pencil for the guiding lines and sketching
- an eraser
- a black sharpie or a pen for the outlines
- markers or colored pencils for coloring
- our printable drawing guide (Join my Email List below to get this Tutorial)
Here are my RECOMMENDED Art Supplies!
- Crayola Coloring Set (140 Pieces – Mega Value!)
- 24 Colored Crayon Set
- A4 Printer Paper
- Crayola Coloring Pencils
- HP Home Printer with Instant Ink!
Time needed:
15 minutes.
How to Draw a Wasp — Let’s get started!
Step 1 – How to Draw a Wasp Head
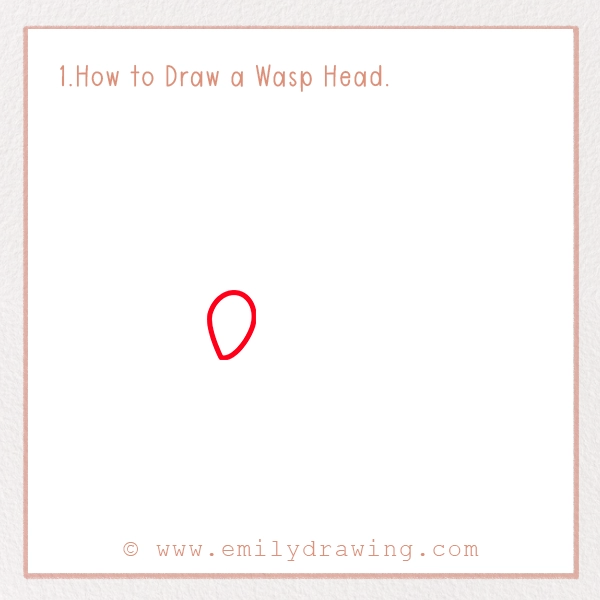
Wasp head contains one pair of sensory antennae, two kidney-shaped clusters of compound eyes, and mouthparts for biting and licking.
In this step, we will only make the base of the wasp’s head. For this, sketch an oval or tear-drop shape in the center of the page. The narrow end of the oval should be pointing toward the direction where you want the body.
Moreover, on the front, you need to create a pointed end that is facing downward in this oval. This pointed end will represent the evil mouthparts of the wasp that is used for biting.
Step 2 – Sketch the Thorax
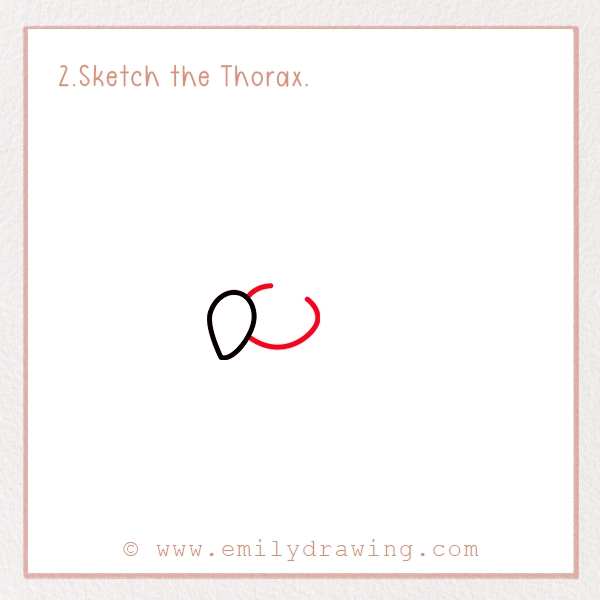
Wasp has three body parts: head, thorax, and abdomen. We have already drawn the head so it is time to sketch the thorax.
To do this, sketch a slightly oval shape or curved shape attached to the head. Make sure it is neatly drawn and slightly larger than the head.
Moreover, keep a small opening on the top of the thorax as we need to draw wings here.
Step 3 – Sketch the Wings of the Wasp
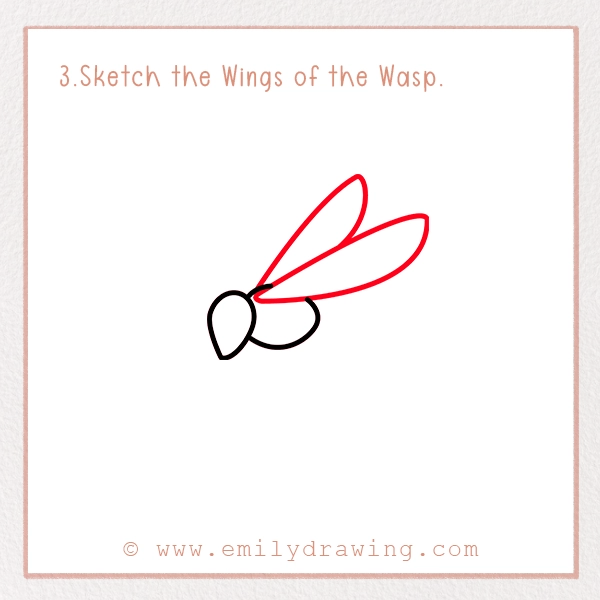
On the thorax’s opening, we need to draw a set of wings. Wasp is famous for its membranous wings, so sketching them will give a realistic look to our drawing.
For this, sketch two elongated oval shapes that are pointing backward. Make sure that these wings slightly overlap at the base of the thorax.
Step 4 – Sketch the Abdomen
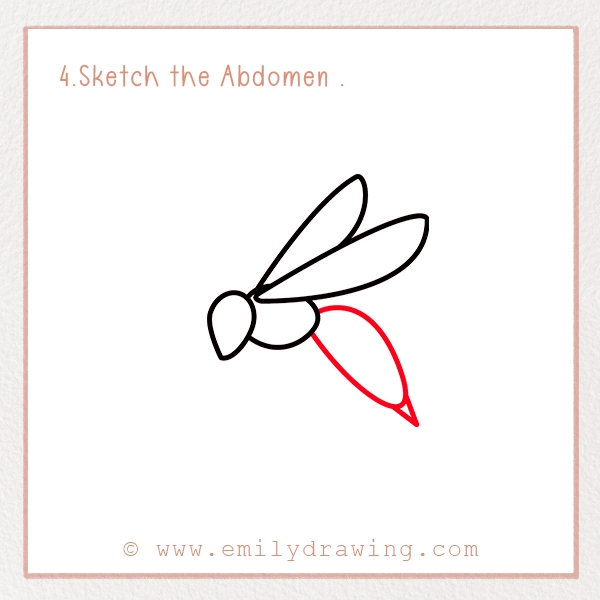
Wasps can be distinguished from other bees by their abdomen. It has a unique abdomen that is narrow and has a pointed end. This pointed end is venomous and is used for stinging.
To draw this, put your pencil on the back of the thorax. From there, sketch an elongated oval shape that has a pointed end. The body should start getting narrower as it extends and tapers toward the end.
Make sure that the end of the abdomen feels evil.
Step 5 – Refine the Abdomen
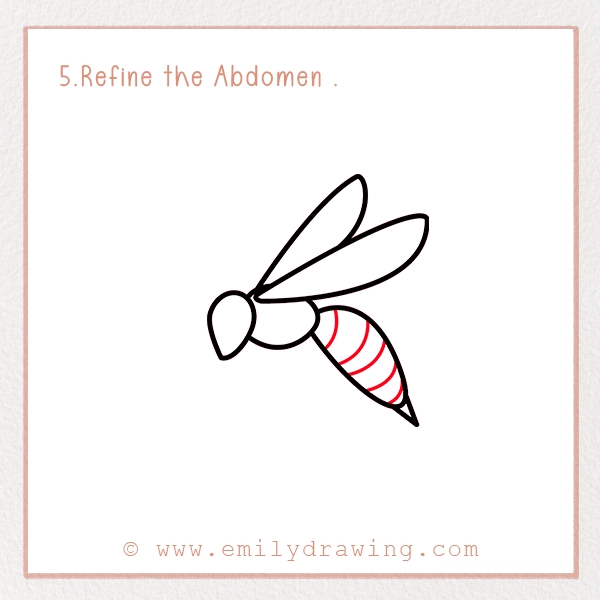
We need to further refine the abdomen in this realistic wasp drawing tutorial. To do this, draw lines across the abdomen to create a striped pattern. Make sure that the lines are following the flow of the abdomen’s shape to give it a natural look.
Step 6 – Refine the Wings
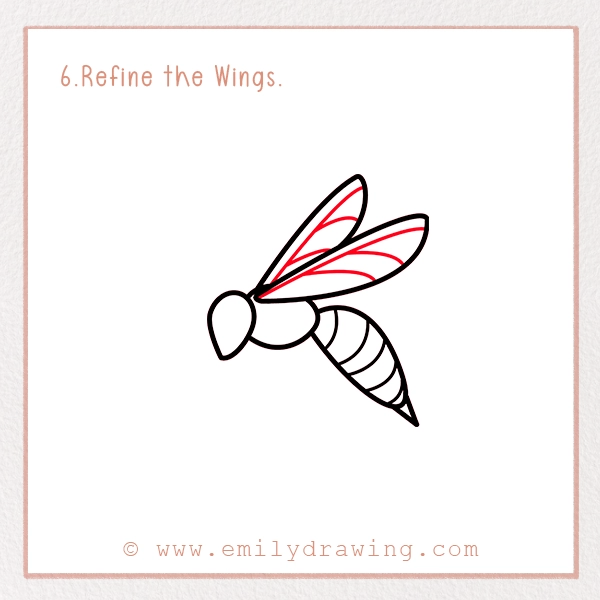
It is time to refine the wasp’s wings. For this, you need to create an outline of the wings as shown in our picture.
These outlines will give a 3D look to your wasp drawing as they indicate the second pair of wings that are on the other side of the body.
Make sure to keep this outline thin and follow the shape of the oval wings.
Next, draw curved lines inside the oval shapes. These lines should follow the shape of the wings. These curved lines should be drawn with a thin pencil or marker as they indicate veins of wings.
Step 7 – Draw the Legs
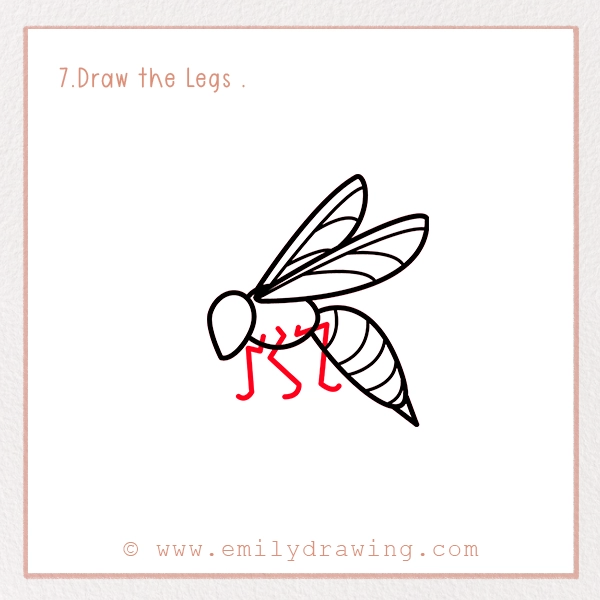
In this How to Draw a Wasp for Kids tutorial, we are going to sketch legs now. To do this, we need to add different zig-zag shapes attached to the thorax.
Wasps have six legs, three on each side. Each leg has three different segments. In this tutorial, we are only drawing the front three legs to avoid messiness in the drawing. But, if you want, you can draw size legs attached to the thorax.
Each line should have three different segments: one attached to the thorax, the second to the middle part, and the last part a foot.
Make sure they are evenly spaced and have these three segments for a natural look.
Step 8 – Add the Facial Details
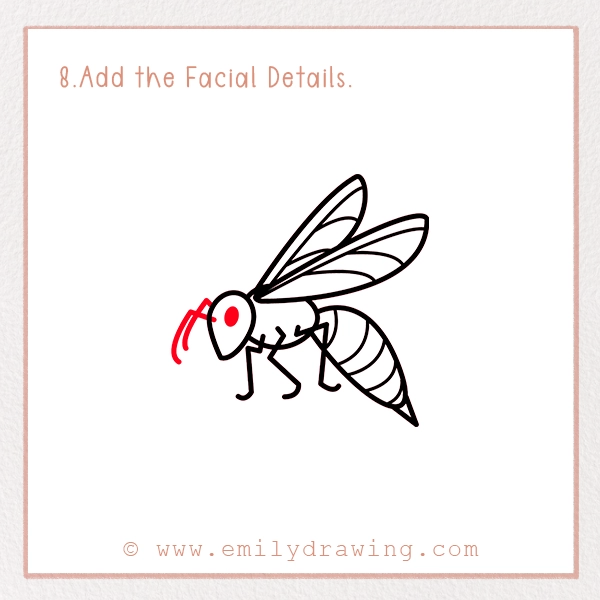
It is the final step of how to draw a wasp. For this, sketch a small dark oval or circular shape on the head to represent the eyes.
Finally, add two antennas extending from the top of the head. These should be long and slightly curved.
Your pencil sketch is complete. If you want to celebrate it here, that’s fine. Otherwise, the next step can further refine your drawing.
Step 9 – Color your Wasp’s Pencil Sketch Drawing

Coloring your animal sketches can make them lively. Kids love coloring so it is the best idea to color your Wasp’s drawing.
For coloring, you can either go with realistic colors or any fancy colors to make your drawing cartoony. It is completely your choice.
Our drawing has realistic colors. But there are different species of wasps, and each has their unique colors. Some common ones are black, yellow, brown, metallic blue, orange, dark blue, and red. Mostly, stripes are of different colors than the body to make them prominent.
Sketch the Background of Wasp
Once you have the basic skills of drawing a wasp, you can further refine your artistic skills. One way of doing it is to draw interesting backgrounds.
There can be different types of backgrounds you can choose from. Some suggestions are:
- Draw a Wasp nest.
- Add a group of wasps of different species.
- Sketch the Wasp in the room or house.
- Draw a Wasp flying or stinging.
Pin it now, Draw later!
Conclusion
In the end, erase any stray lines and errors from your drawing to give them a refined and neat look. Moreover, share it with your friends and family members to get their feedback. Listen to their criticism with an open mind and refine your artistic skills by acting upon their pieces of advice. If you want, you can draw other animals, too, by checking our different tutorials.
