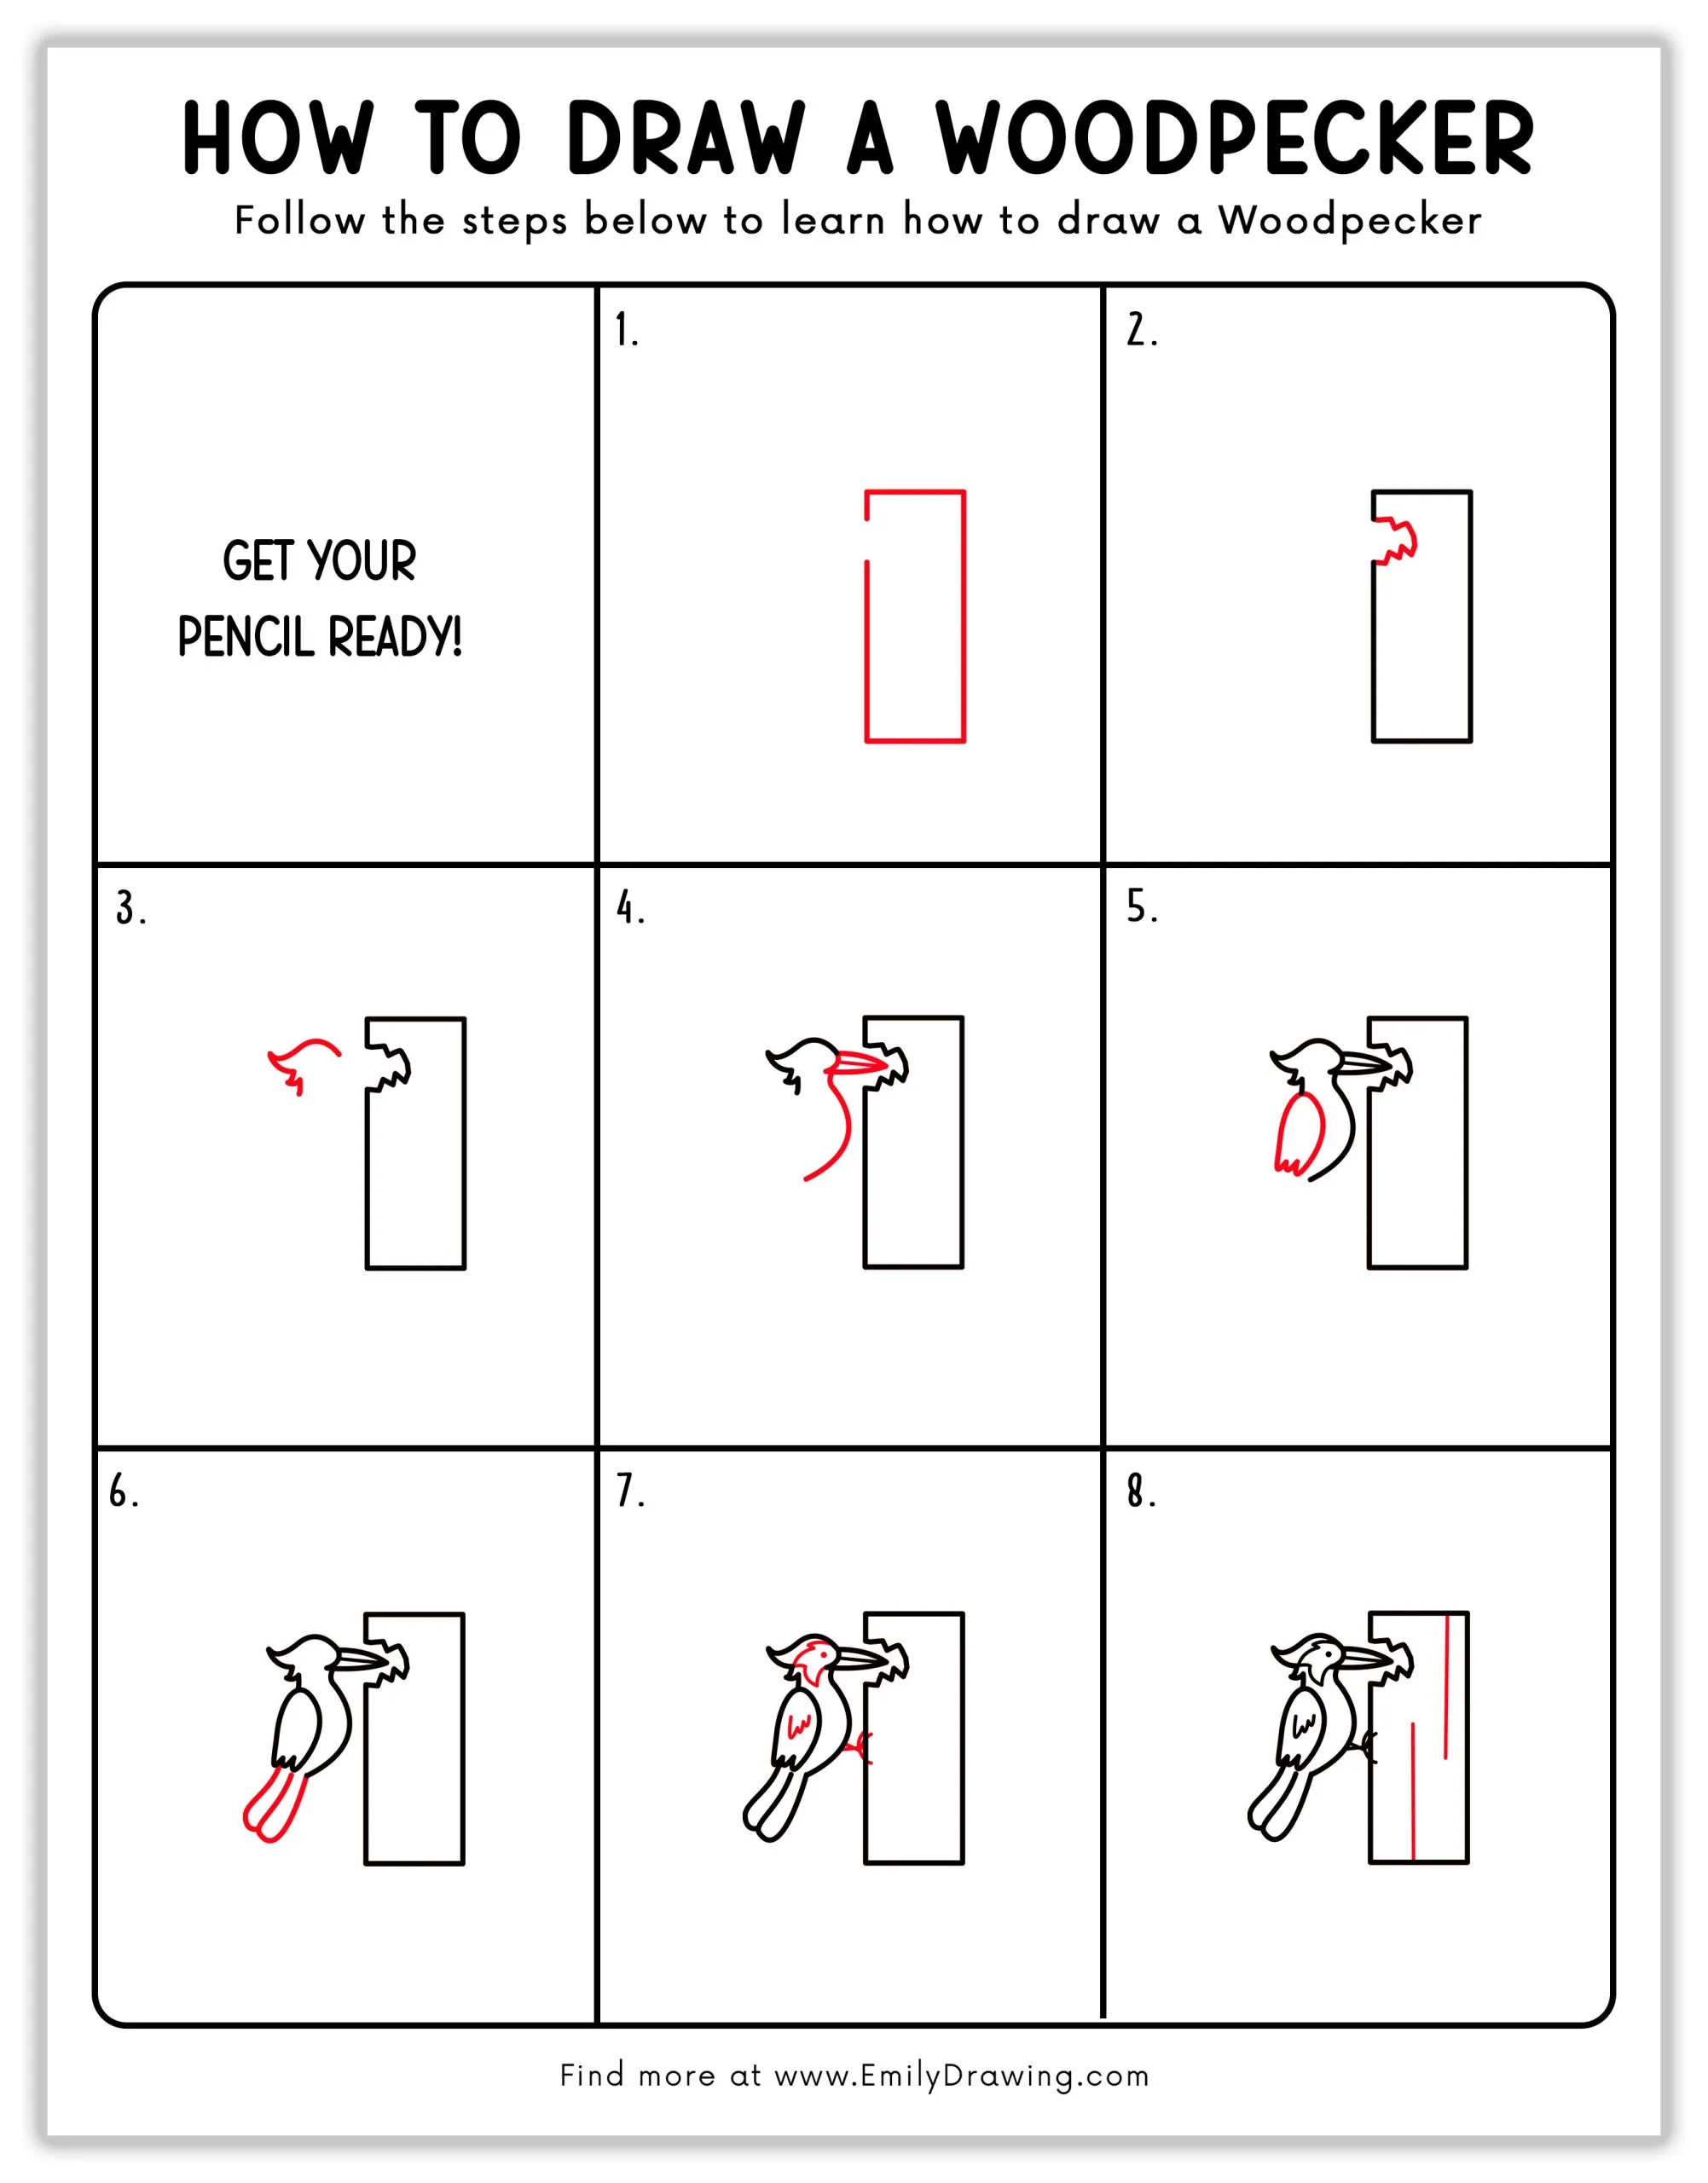
Have you ever wanted to draw a woodpecker? These amazing birds are known for their drumming sounds and striking feathers! In this tutorial, we’ll guide you through simple steps to draw your very own woodpecker. Woodpeckers are fascinating creatures that can peck up to 20 times per second, and their bright colors make them a fun subject to draw. So, grab your pencil, and let’s get started!
Woodpeckers belong to the Picidae family, and there are over 200 species of them worldwide. They are found in forests, woodlands, and even urban parks. Their sharp beaks and long tongues make them excellent insect hunters, and their unique adaptations help them survive in different environments.
Materials:
- a piece of paper
- a pencil for the guiding lines and sketching
- an eraser
- a black sharpie or a pen for the outlines
- markers or colored pencils for coloring
- our printable drawing guide (Join my Email List below to get this Tutorial)
Here are my RECOMMENDED Art Supplies!
- Crayola Coloring Set (140 Pieces – Mega Value!)
- 24 Colored Crayon Set
- A4 Printer Paper
- Crayola Coloring Pencils
- HP Home Printer with Instant Ink!
Time needed:
15 minutes.
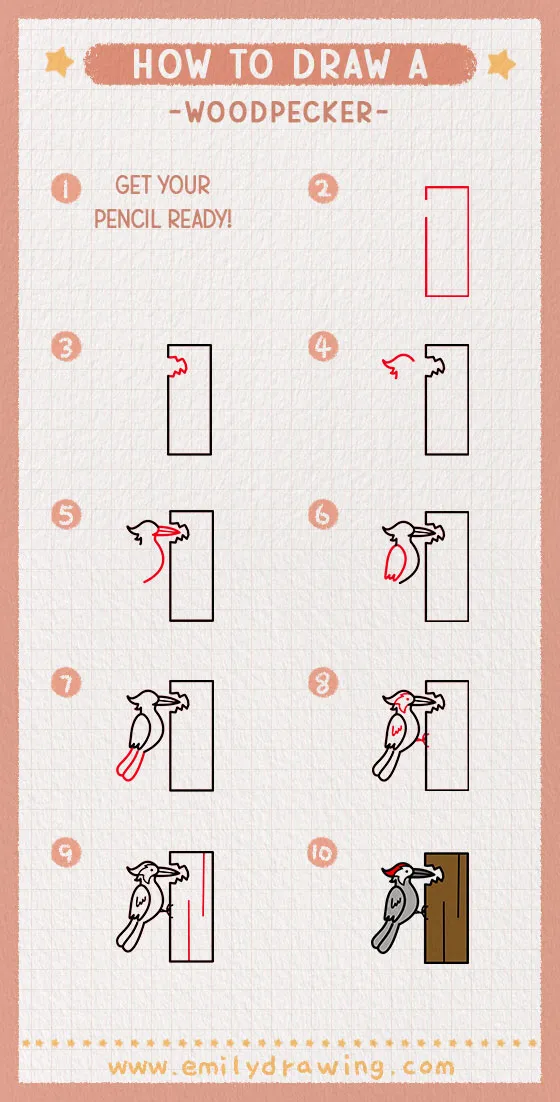
How to Draw a Woodpecker — Let’s get started!
Step 1 – Draw the Tree Trunk
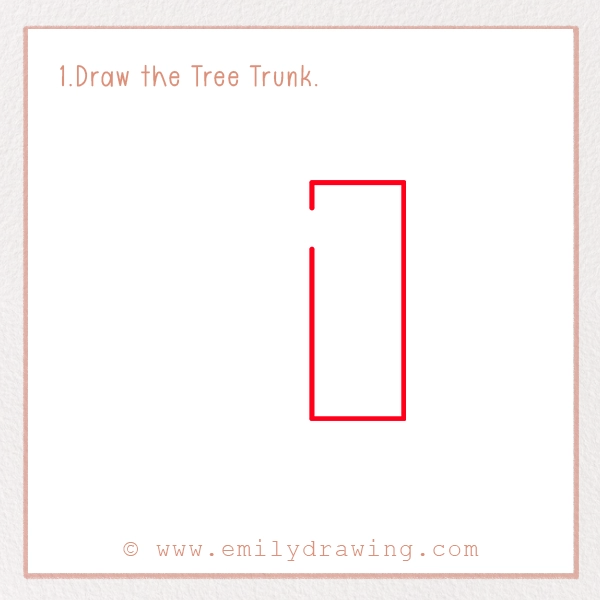
Start by drawing a vertical rectangle. This will represent the tree trunk where the woodpecker is perched. Keep it simple and straight! Woodpeckers often choose trees with soft bark, making it easier to drill holes for food and nesting.
To make the tree look more natural, add slight curves to the edges instead of drawing a perfect rectangle. Trees in nature aren’t perfectly straight, and adding a few bumps will give it a realistic touch.
Step 2 – Add the Pecked-Out Hole
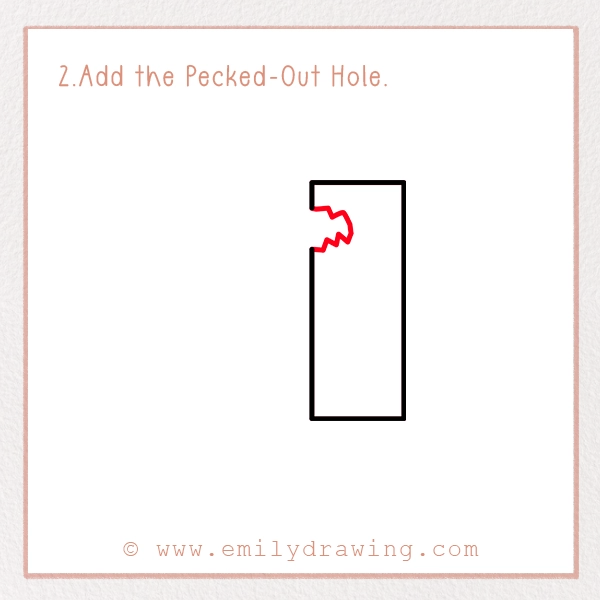
On the right side of the tree, draw a small jagged shape. This will be the part of the tree the woodpecker has been pecking at. Woodpeckers drill holes in trees to find insects and create nests. Some species even store acorns in tree bark for later!
The holes woodpeckers make can be different shapes depending on the species. Some create small round holes, while others, like the pileated woodpecker, make large rectangular holes.
Step 3 – Draw the Head

Now, draw the head of the woodpecker. Sketch a small, rounded shape extending from the side of the hole. Woodpeckers have distinctive head shapes with strong neck muscles to support their continuous pecking. Be sure to leave space for the beak in the next step.
Woodpeckers’ heads are specially designed to absorb the shock of pecking. Their skulls have spongy bone structures that help protect their brains.
Step 4 – Draw the Neck, Chest, and Beak
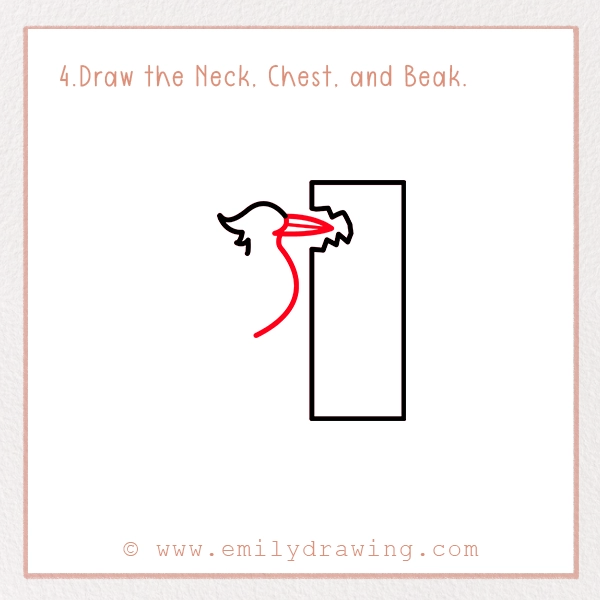
Extend a curved line from the head to form the woodpecker’s neck and chest. Their necks are surprisingly strong, helping them maintain balance while drilling. Then, add a small pointed shape to the head to create the beak. Woodpeckers have strong, chisel-like beaks that help them break through wood to find insects. Fun fact: their beaks are self-sharpening, so they never go dull!
Some woodpeckers have long beaks, while others have shorter, more compact ones. Their beak shape depends on the type of food they eat and the trees they peck.
Step 5 – Add the Wing
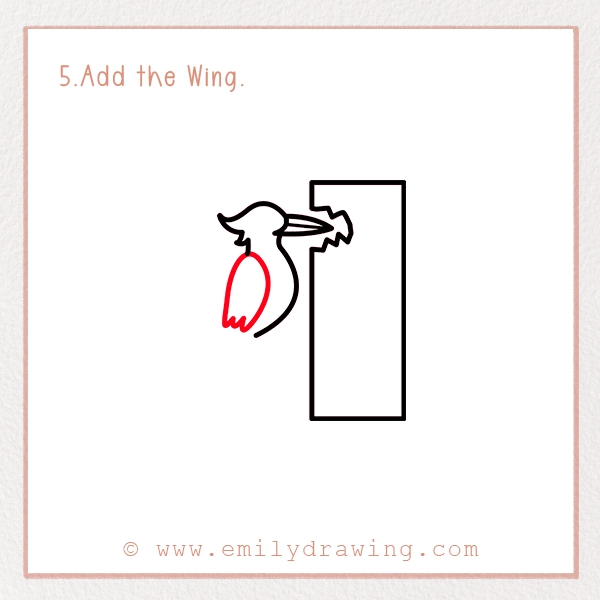
Now, sketch the shape of the woodpecker’s wing. It should be attached to the body, slightly curved, and extend downward. Woodpeckers have strong wings that help them fly between trees in search of food. Many species have beautifully patterned wings with black, white, and red markings.
Take your time with the wing’s details, as feather patterns can make your drawing look more realistic. You can add small lines to show individual feathers.
Step 6 – Draw the Feathered Tail
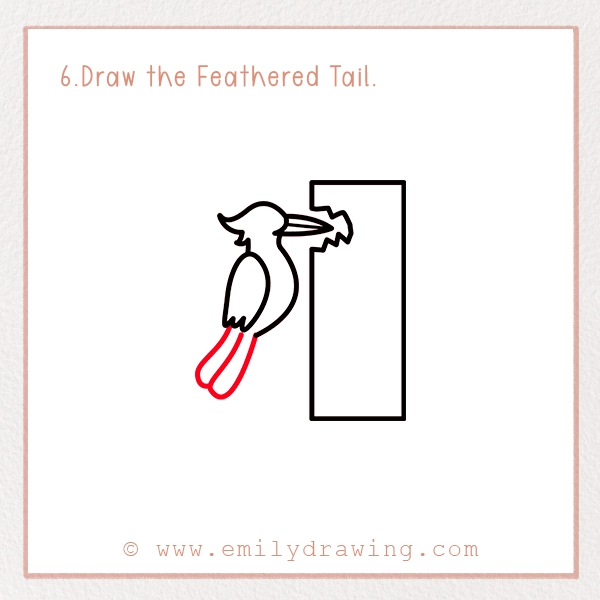
Woodpeckers use their tails to balance while pecking. Draw a few long tail feathers pointing downward. These feathers act as a support when the bird clings to the tree. Their stiff tail feathers help them stay in place as they hammer away at the bark.
Woodpecker tails are designed for stability. Unlike other birds, their tail feathers are extra stiff, allowing them to press against tree trunks for balance.
Step 7 – Add the Eye, Legs, and More Details
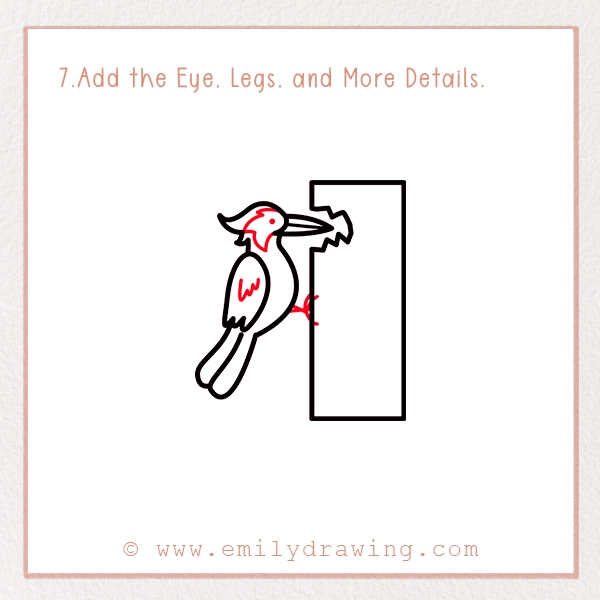
Give your woodpecker some personality! Draw a small circle for the eye and add a few details to the face. Some woodpeckers, like the pileated woodpecker, have a red crest that gives them a striking look. Next, sketch the legs gripping onto the tree trunk. Woodpeckers have two forward-facing toes and two backward-facing toes, which help them grip the tree tightly. Finally, add patterns to its feathers to make it look more realistic. Some woodpeckers have red crests, black-and-white speckled wings, or even yellow tints on their feathers.
Their zygodactyl feet (two toes in the front, two in the back) give them a strong grip, making it easy to climb up and down tree trunks.
Step 8 – Add Details to the Tree Trunk
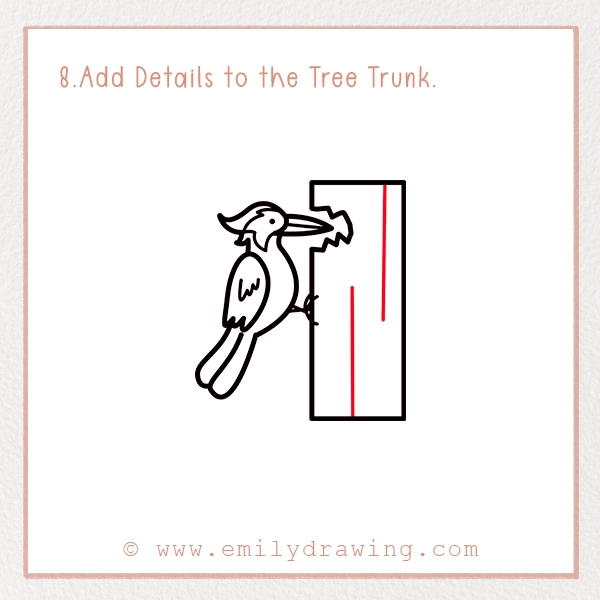
To make your drawing even better, add texture to the tree. Draw a few lines to represent the bark and extra pecking marks on the trunk. Woodpeckers create deep holes in search of insects, and some even dig tunnels to raise their young.
Adding small knots and cracks to the bark will make your drawing look more realistic.
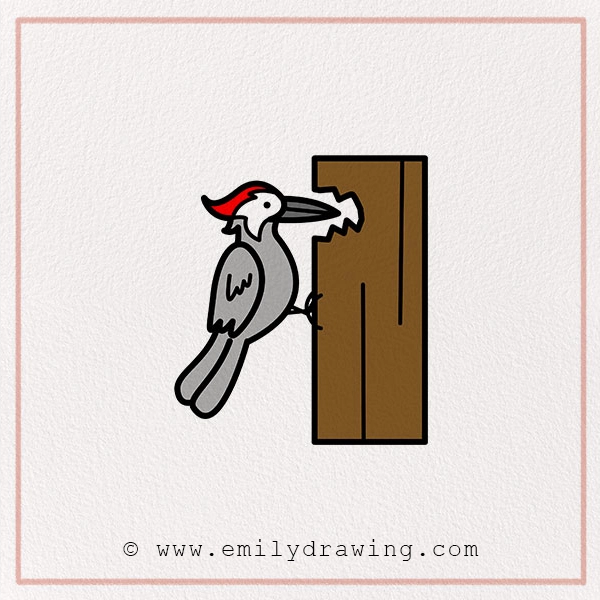
Step 9 – Color Your Drawing!
Woodpeckers are colorful birds! Use red for the crest, black for the wings, and white for the belly. Some woodpeckers have bright yellow or orange patches. Don’t forget to color the tree brown! Adding shading can also make your drawing pop.
Use colored pencils, markers, or even paint to bring your drawing to life. Adding shadows and highlights will make it more three-dimensional.
Pin it now, Draw later!
Fun Facts About Woodpeckers
- Woodpeckers can peck up to 20 times per second!
- They have special skulls that cushion their brains from all that pecking.
- Some woodpeckers store food inside tree holes like little pantries!
- Their long, sticky tongues can reach deep into tree bark to grab insects.
- A woodpecker’s pecking is not random it creates a rhythm that can attract mates or signal danger.
- Woodpeckers don’t get headaches from pecking because their skulls are specially designed to absorb shock.
Tips and Tricks for Better Drawing
- Use light pencil strokes first so you can easily erase mistakes.
- Pay attention to symmetry—woodpeckers have balanced features!
- Experiment with different poses, like a flying woodpecker or one sitting on a branch.
- Try using colored pencils or markers to add depth and texture to your drawing.
- Look at real woodpecker photos for inspiration on feather patterns and details.
- If you want a challenge, try drawing different species like the pileated woodpecker or the downy woodpecker.
- Practice drawing different tree types to create unique backgrounds for your woodpecker.
We hope you had fun drawing your very own woodpecker! Keep practicing, and try drawing other birds too. Woodpeckers are just one of many amazing birds you can learn to draw. If you enjoyed this tutorial, why not try drawing an owl or a hummingbird next? Don’t forget to share your masterpiece with friends or post it online using #EmilyDrawing.
The more you draw, the better you get, so keep experimenting with new techniques and have fun along the way!
Get the FREE Printable Drawing Guide