Are your kids fascinated by anacondas? Snakes are all around the world, and kids encounter them now and then. They are fearful yet fascinated by these crawling mammals.
So, isn’t it a good idea for them to learn how to draw green anaconda? This simple 8-step guide could help young artists sketch a big anaconda drawing with the help of simple lines and shapes.
Here, you just need to grab some art supplies. These are pencils, pens, crayons, permanent markers, and drawing papers. Moreover, a few reference pictures could also help you in adding your creativity to the anaconda drawing.
Now, without wasting any moment, let’s start the drawing.
Step By Step Guide for Anaconda Realistic Drawing
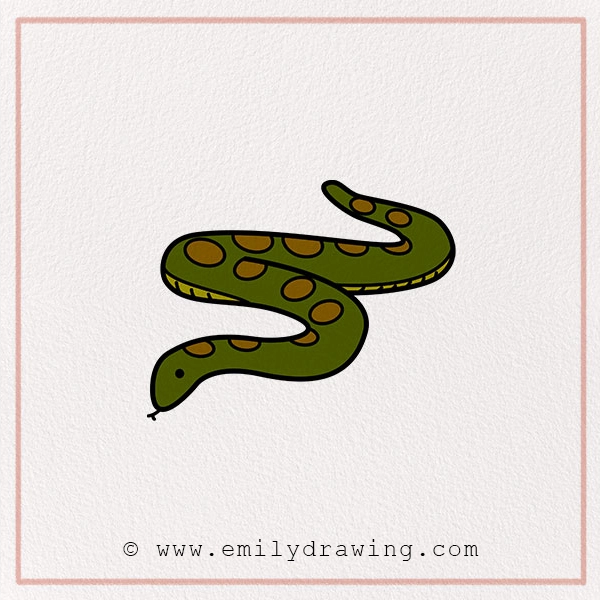
Materials:
- a piece of paper
- a pencil for the guiding lines and sketching
- an eraser
- a black sharpie or a pen for the outlines
- markers or colored pencils for coloring
- our printable drawing guide (Join my Email List below to get this Tutorial)
Here are my RECOMMENDED Art Supplies!
- Crayola Coloring Set (140 Pieces – Mega Value!)
- 24 Colored Crayon Set
- A4 Printer Paper
- Crayola Coloring Pencils
- HP Home Printer with Instant Ink!
Time needed:
15 minutes.
How to Draw an Anaconda — Let’s get started!
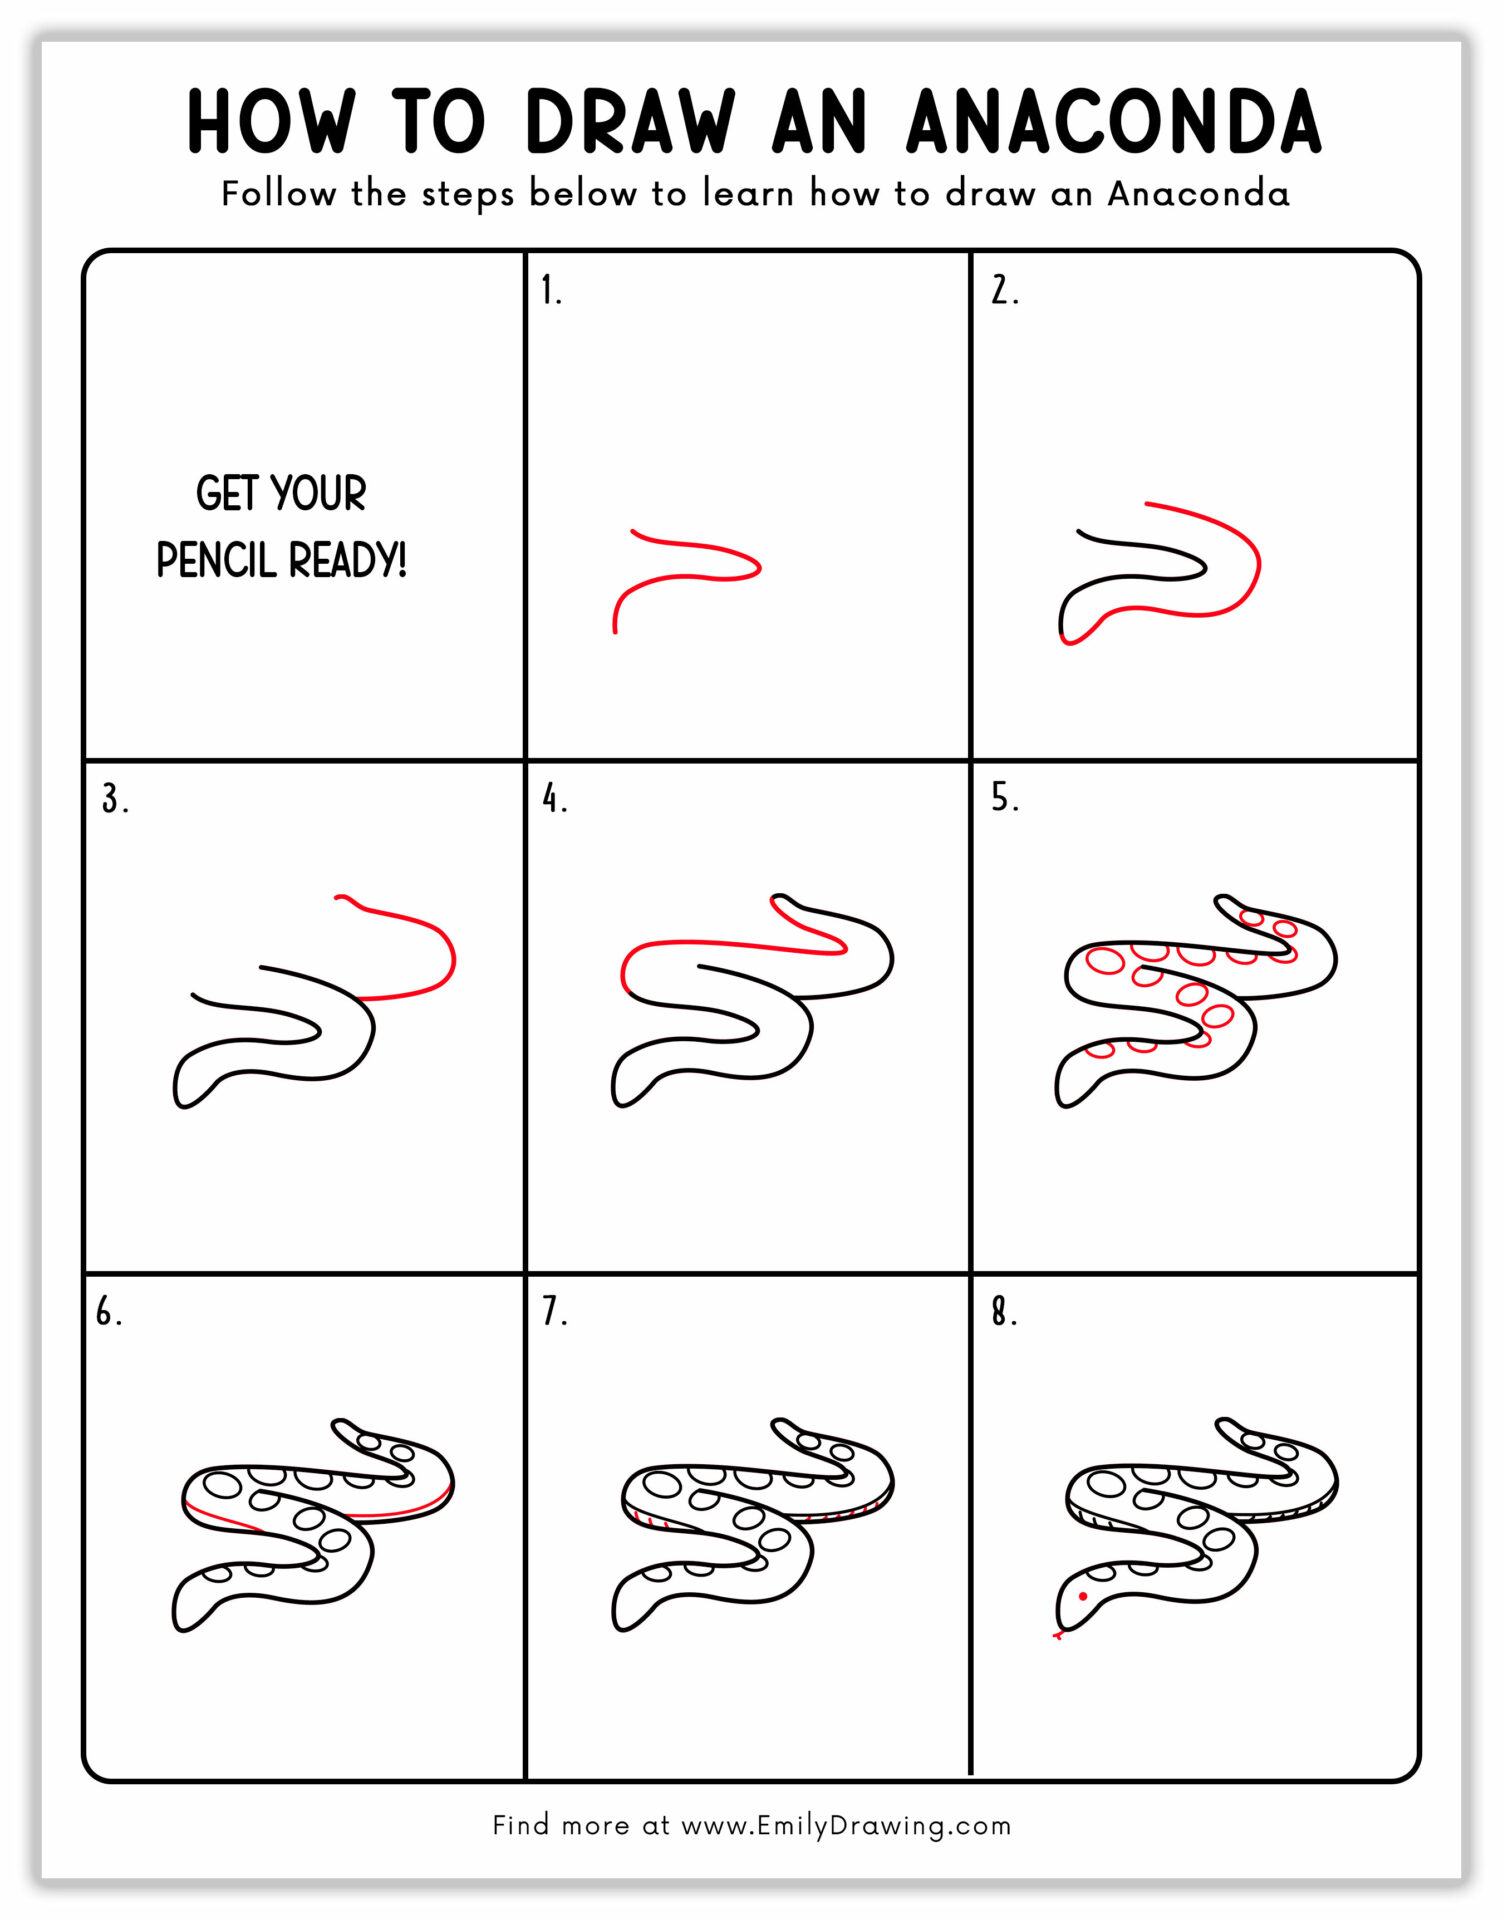
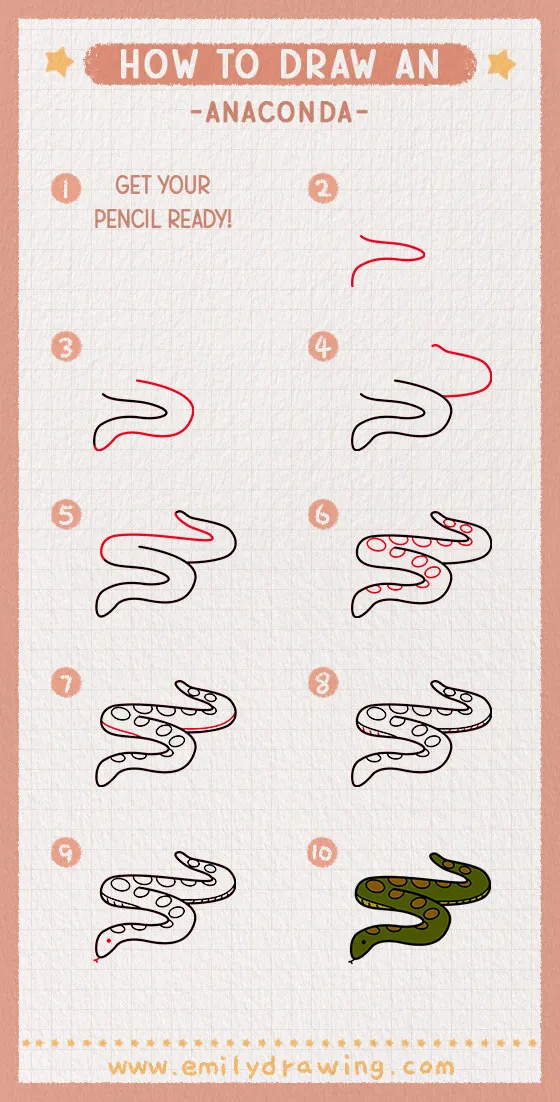
Step 1 – Start with the Snake’s Body Outline
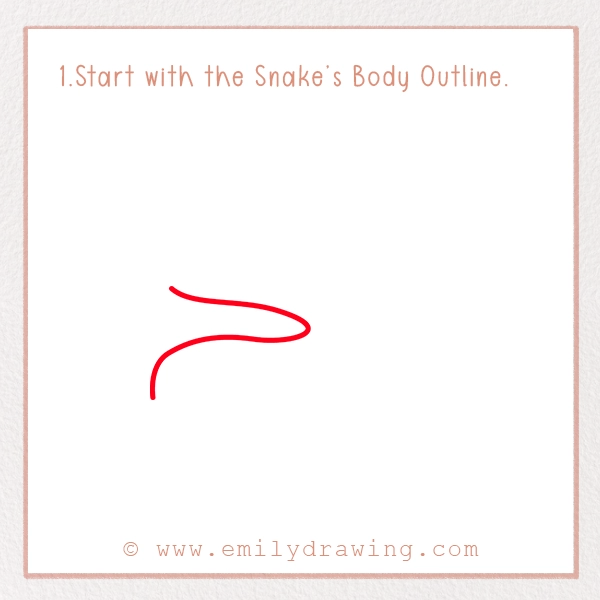
You should start the drawing by sketching a curved line, similar to a loop, in the middle of the page. This line will make the base of the snake’s body, giving it a direction and flow.
Step 2 – Extend the Body
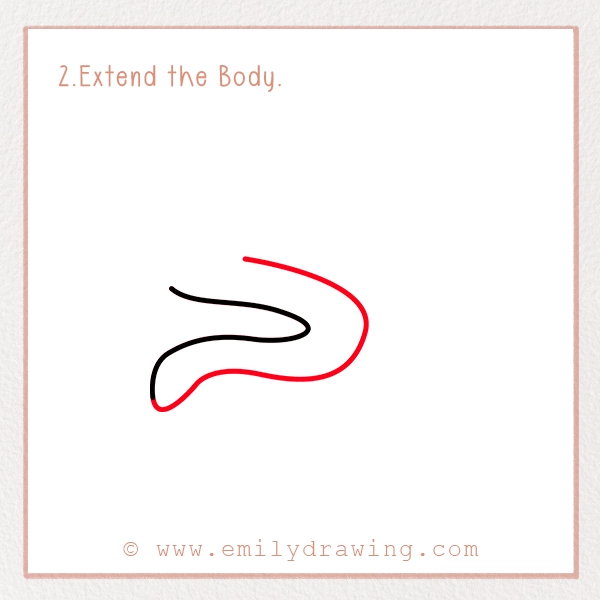
Now, we need to extend the snake’s body. For this, sketch another curved line that is parallel to the first one. At the joining point, make sure to curve it slightly to give the shape of the snake’s face. See our picture for a better idea.
Here, you also need to make sure that these lines remain at a consistent distance and make the snake’s body thick.
Step 3 – Create the Second Part of the Body
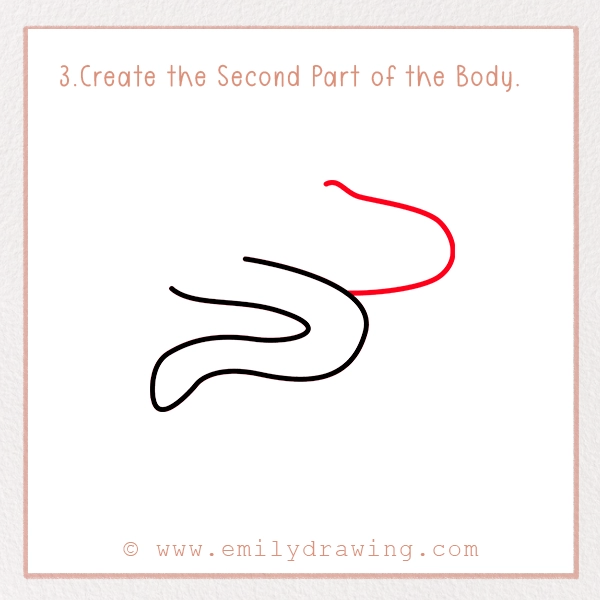
For the second part of the body, you have to create a “C” shape that resembles the curve you make in the first step. Your drawing should show the snake’s body is in a continuous loop, as shown in our picture.
Step 4 – Create the Tail
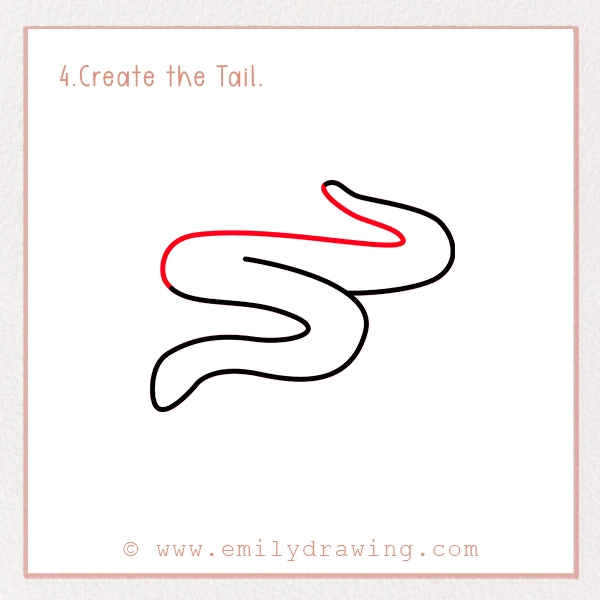
This is the last step of creating an anaconda’s body. In it, you have to extend the curve you sketched in the second step.
Make sure that this curve remains parallel to the loop you create in the third step and that the thickness of the body remains consistent.
At the end of it, start reducing the distance between two curve lines and taper the end to form the tail.
Note: Make sure the tail has a tip, and it gradually starts getting thin for having a realistic anaconda drawing.
Step 5 – Add the Patterns on the Body
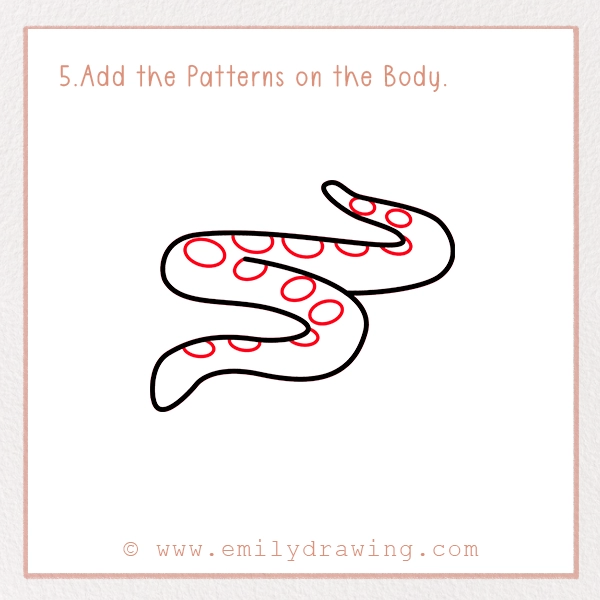
The real anaconda has different spots on its green surface. In fact, they are its iconic markings. So, you should also draw them to give depth and a professional look to your drawing.
For this, add small rounded spots or ovals throughout the snake’s body. It should follow the curvature of the body. Moreover, make sure to keep these shapes at an even distance across the length of the snake.
Note: You could refine these patterns by giving them a bold outline and varying their sizes.
Step 6 – Add Contour Lines
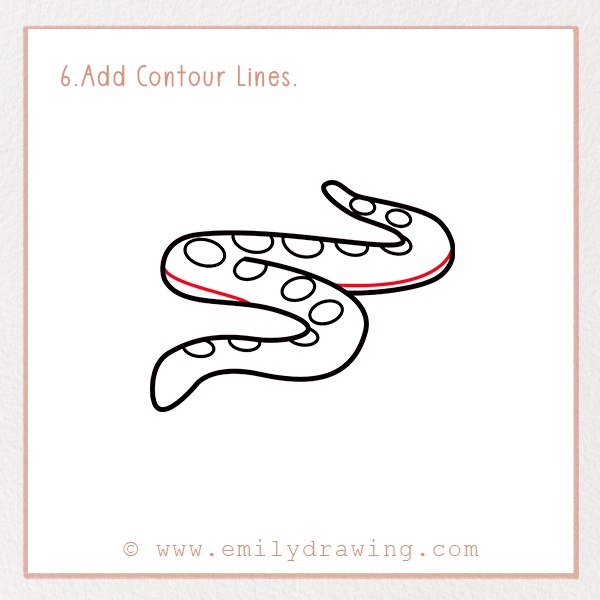
A basic drawing of a green anaconda must be on your paper till this step. But we still need to work on it to give it a three-dimensional look.
For this, you have to add thin contour lines along the curves of its body. You should add these lines where the snake’s body bends or overlaps.
Make sure that you keep your hand light while adding these contour lines as they should be thin.
Step 7 – Refine Contour Lines
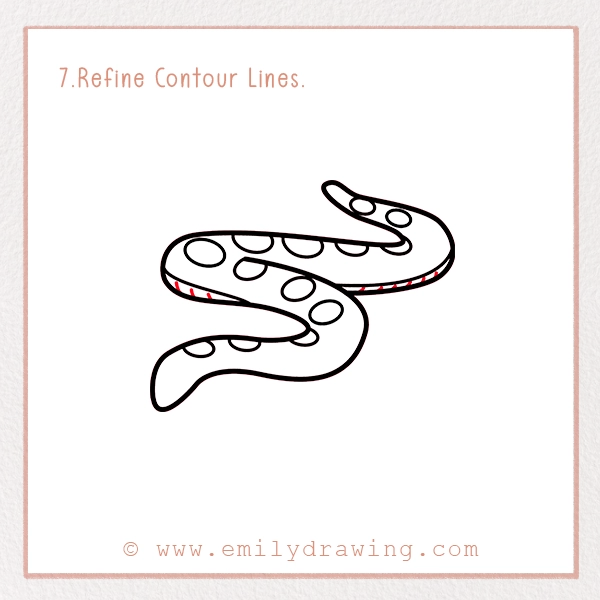
You should refine your contour lines to take maximum benefits from them. For this, you could sketch various horizontal lines at an equal distance in between your contouring lines space.
You should use dark pencils for this to give a realistic vibe to your drawing. If you want, you could go for light pencil shading, too, in place of sketching lines. It is totally up to your creativity.
Step 8 – Final Details to Anaconda’s Face
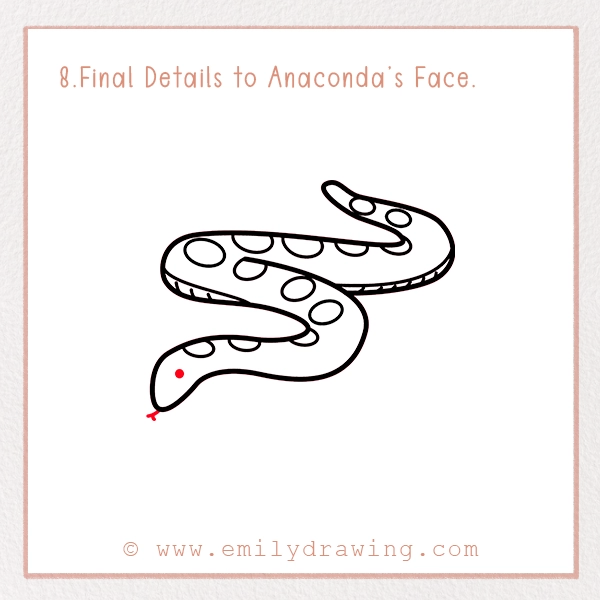
It is time to give final details to your snake’s face. For this, you need to draw the eyes and tongue.
So, add a small black rounded eye in the middle of the snake’s head. You could add a small white dot in the middle of the black eye, too, to give a light spot to it.
Now, sketch a flicking forked tongue. You could see in our reference picture how the tongue is flicking out of the mouth. You have to do the same to give the anaconda a lively appearance.
Finally, your easy anaconda drawing is here. But, there is one step left that is crucial for anaconda drawing for kids.
Step 9- Coloring (Optional)

The green anaconda drawing is incomplete without the green color. So, grab the green and any dark color and unleash your creativity.
You could color the whole body of the anaconda in green. For spots, you could use various kinds of colors. The real anaconda has black, yellow, or brown spots. So, you could use any of these colors in your drawing.
For the strips, you could go for the yellow color. Otherwise, you can use any other color of your choice too.
Pin it now, Draw later!
 />
/>Additional Anaconda Drawing for Kids Tips
Kids must be excited at the success of drawing an attractive green anaconda on paper. So, it is time to boost their art project with some additional tips.
- They could give a cartoony look to their anaconda drawing by sketching a hat or glasses on the anaconda’s head.
- If you are feeling extra patient, you could repeat this tutorial for drawing a group of anacondas. You could make a few changes in each one to distinguish them from each other.
- You could see other pictures of snakes in different poses and could sketch them.
- Add different backgrounds to your drawing. Forest, desert, or grassy fields could be good backgrounds. Otherwise, adding trees, rocks or plants can also do the magic.
- You could give a fantasy sort of background to it, too, by sketching any sort of fictional character in the picture.
- If you have a love for storytelling, you could add speech bubbles to the drawing. Anaconda having a conversation with any other animal on any serious topic could be a great activity for storytellers.
Once your ideal anaconda drawing is ready, you could share it with your family members for review. Their feedback could help you in becoming an expert.
Moreover, keep exploring our drawing tutorials to create some magical drawings in a short time.
