We all see ants crawling on the floors, on the trees, and even on our tables daily. Kids are highly fascinated by this small insect and would love to draw it with pencils on their papers.
On the other hand, adults also find ants quite intriguing because of their amazing facts. There are almost 10,000 known species of ants in the world. They are famous for their colonies and group work. Each ant has a specific responsibility in their colony that they have to fulfill at every cost.
Due to these fascinating facts, they are a great subject to draw, much like other insects such as bees — you can also check our tutorial on how to draw a bee. That’s why, in this step-by-step ant drawing tutorial, I will guide kids on how to create an ant pencil drawing. Moreover, adults could also learn to draw an ant on their fancy drawing tablets, just like they might enjoy following our bee drawing guide.
Realistic Ant Drawing Step-by-Step Tutorial
This drawing guide will focus on creating a realistic ant sketch that looks lifelike yet simple. This easy ant drawing for kids uses basic shapes so they can easily follow and create their own masterpiece.
For this, I will suggest you have some real life ant pictures for reference — or you can explore how segmented creatures are drawn in our caterpillar drawing tutorial. These pictures will give you a better idea of the natural habitat of the ant and what type of background you should have.
But, if kids want to give it a cartoony look, they could have a cartoonish ant drawing, or explore colorful options like in our how to draw a butterfly guide.
Now that you have an idea of what type of drawing you want, you should gather the art supplies. For ant pencil drawing, you should have a pencil or pen, a piece of paper, an eraser, a sharpener, and crayons.
Otherwise, you could have your drawing tablet for this tutorial and try other fun sketches, such as drawing a butterfly.
Materials:
- a piece of paper
- a pencil for the guiding lines and sketching
- an eraser
- a black sharpie or a pen for the outlines
- markers or colored pencils for coloring
- our printable drawing guide (Join my Email List below to get this Tutorial)
Here are my RECOMMENDED Art Supplies!
- Crayola Coloring Set (140 Pieces – Mega Value!)
- 24 Colored Crayon Set
- A4 Printer Paper
- Crayola Coloring Pencils
- HP Home Printer with Instant Ink!
Time needed:
15 minutes.
How to Draw an Ant — Let’s get started!
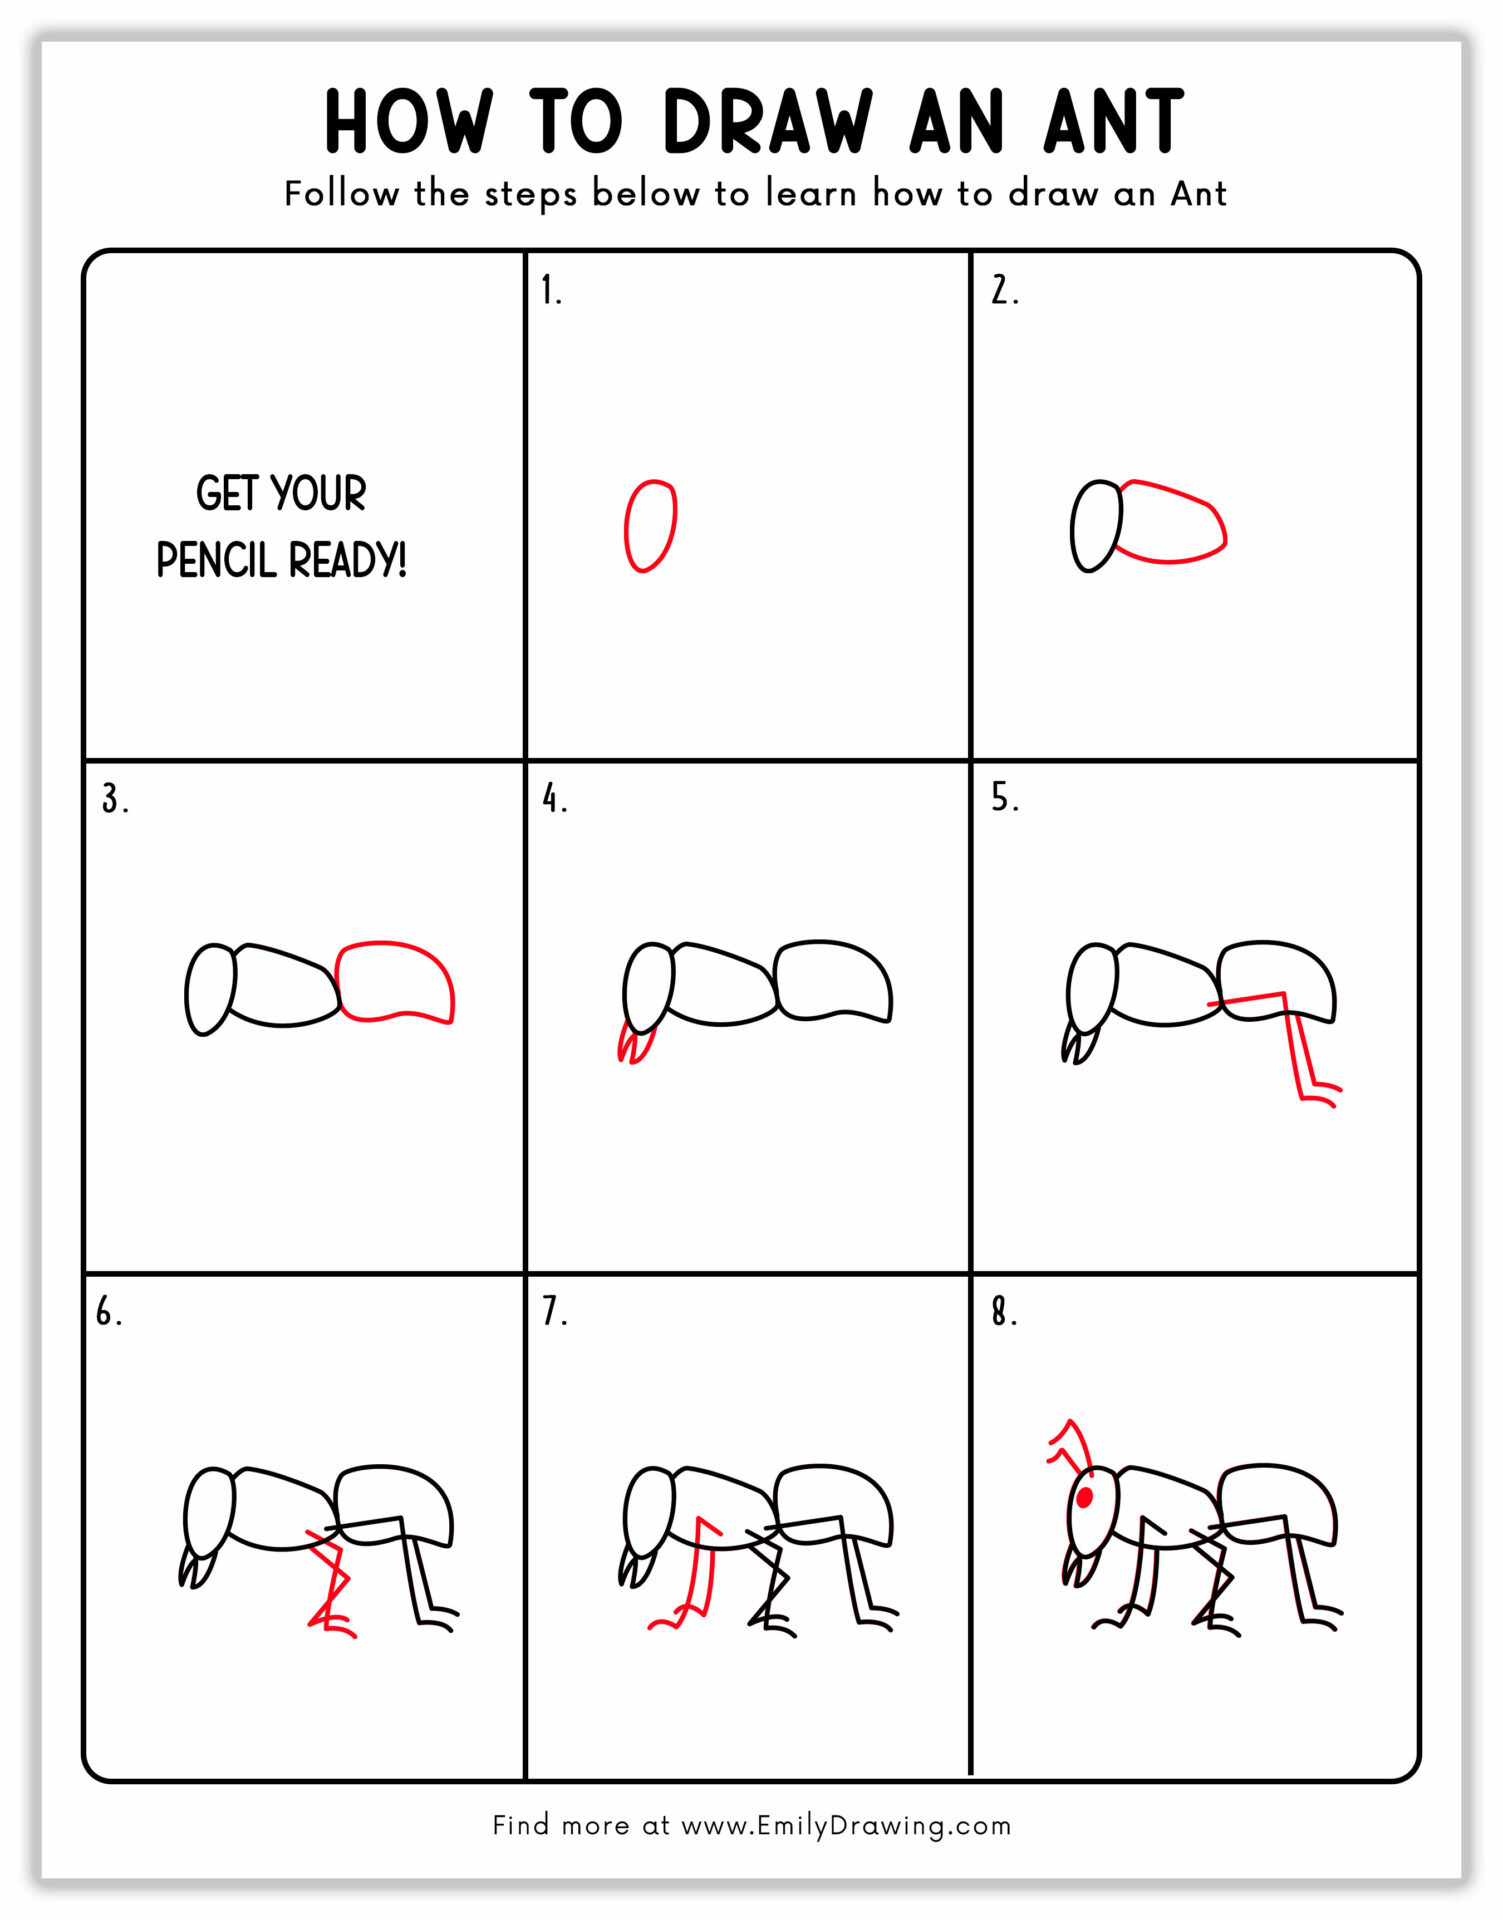
Step 1 – Head
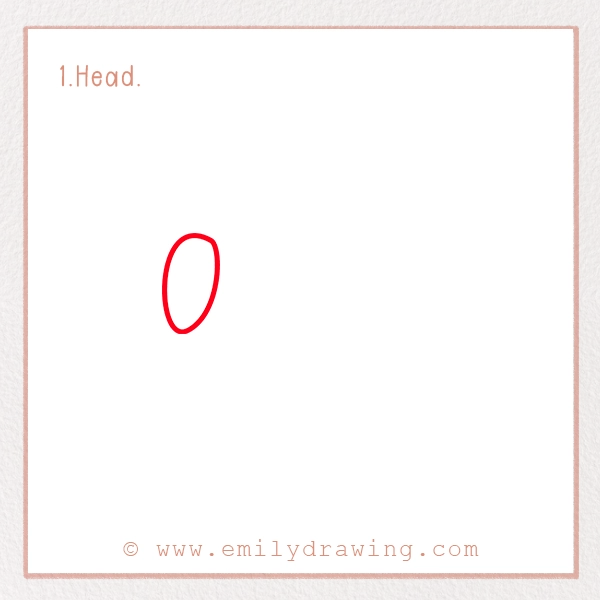
The first step is to make the head of the ant. It is the base of the body so you should always start with the head.
For this, you should sketch an oval shape that is slightly tilted. See the reference picture for a better understanding.
Remember: Ants have a more elongated head shape. So, make sure that the oval is not perfectly rounded.
Step 2 – Thorax
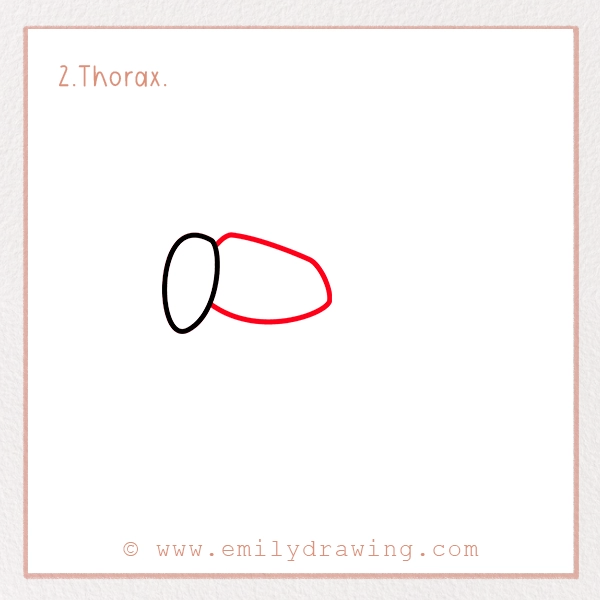
The next step is also related to completing the body of the ant. For this, you need to draw the thorax. It is also known as mesosoma.
Put your pencil or pen on the top right side of the head. Create a small tilted line in the upward direction and create an oval shape. Make sure it is slightly tilted and a larger size than the head.
Make sure that there is a small sharp corner at the end of the oval shape, as shown in the reference picture.
Step 3 – Abdomen
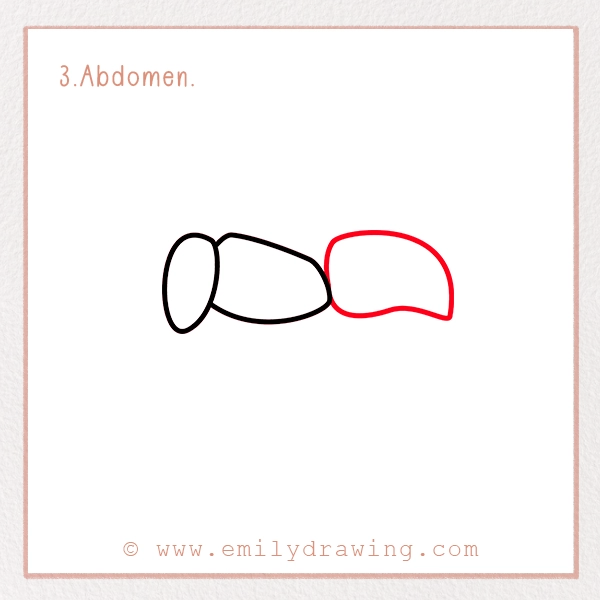
Our ant’s body is going to be complete after this step. What you have to do is to draw another oval shape that is larger than the first two.
This oval shape should overlap the thorax and be tilted slightly downward at the end. The surface at the end should be uneven, as you can see in the reference picture.
Step 4 – Mouthparts
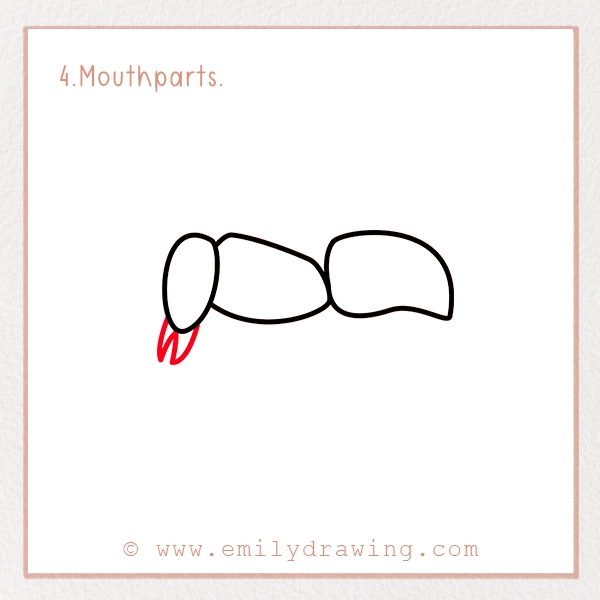
At this point, the complete ant body should be on your paper. Now, it is time to create their mouthparts. These are the parts through which ants bite and eat. They are known as mandibles.
To draw them, put your pencil on the downside of the ant’s head, as shown in the reference picture. Now, sketch two small triangular mandibles that are facing the downward direction.
Step 5 – First Two Legs
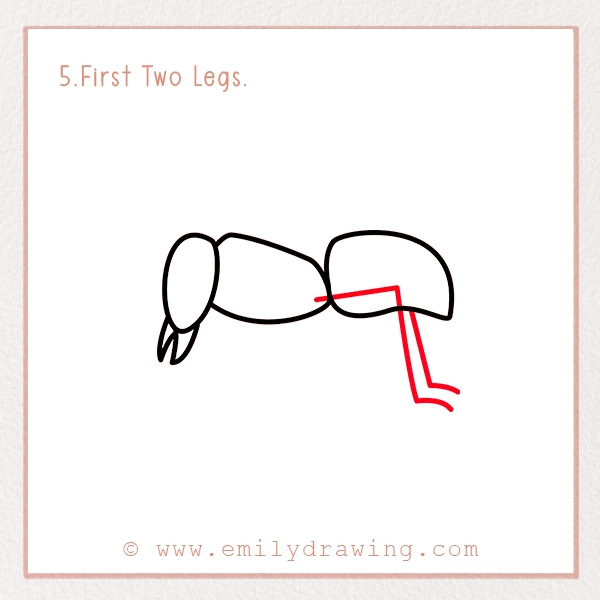
Ants have six legs that are attached to the thorax. They are in 3 pairs, one leg on each side. So, drawing it is a bit tricky. That’s why, we have divided it into three steps.
In this step, we will only draw two legs. For this, you have to start drawing the horizontal line from the end point of the thorax and extend it to the abdomen.
Now, angle the line downward and end it with a claw, as shown in the picture.
For the second leg, draw a vertical tilted line, starting from the middle of the abdomen’s outline. End it with the claw as it is in the reference picture.
Note: We are extending the legs to the abdomen to give the drawing a neat and realistic look.
Step 6 – Next Two Legs
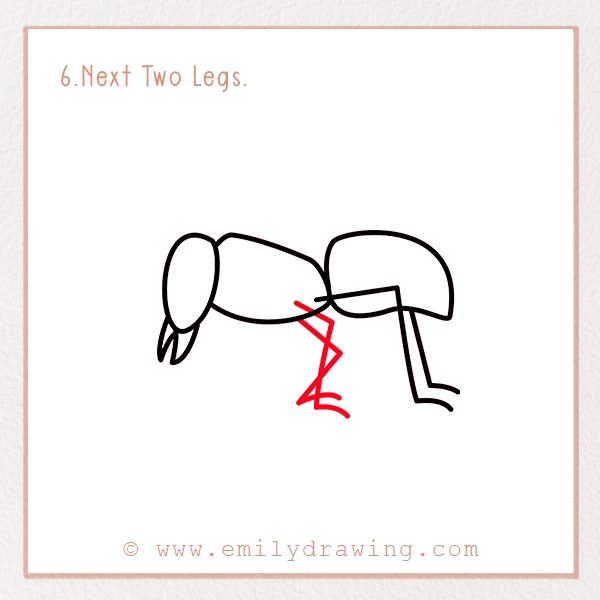
Now, it is time to draw the next pair of legs. Here, you need to remember a few facts about an ant’s legs.
It has three parts. The coxa is the base of the leg that is attached to the abdomen. The femur is the middle segment that needs to be thicker than others. The tibia tarsus is the thinner segment that ends in the claw.
You have to keep the breadth of each part of the ant’s leg in mind before drawing it.
Well, coming back to the legs, put your pencil onto the backside of the thorax, just an inch away from the previous leg. Draw an angled line in the downward direction as shown in the reference picture.
Don’t stop your pencil here and draw the vertical straight line in the downward direction. At last, create a small claw.
For the second leg, put your pencil on the outline of the lower thorax. Create a small vertical ray and end it with a small claw. In the reference picture, you could see it overlapping with the first one.
Step 7 – Last Pair of Legs
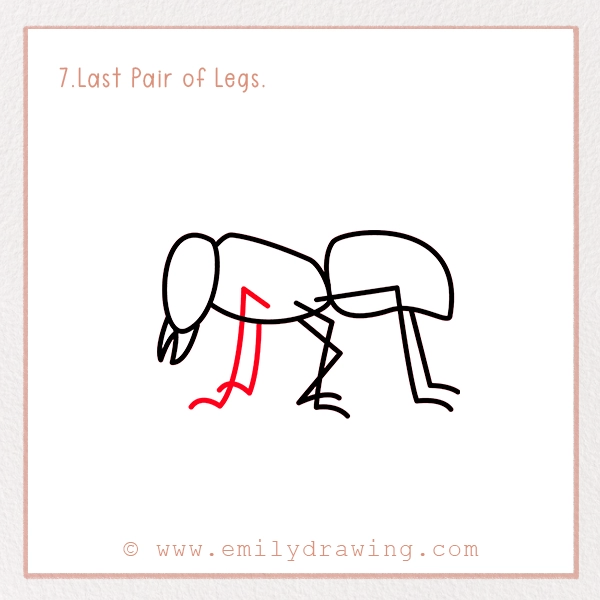
At last, we are drawing the last pair of ant legs. For this, you have to put your pencil on the front side of the thorax. Create a small angled line in the upward direction inside the body of the thorax.
Now, extend it downward in the form of a straight vertical line. End it with a small claw.
It is time to draw the last leg. For this, put your pencil on the outline of the thorax, just an inch away from its pair leg.
Draw a vertical line in the downward direction and end it with a claw.
Note: Make sure to keep checking our reference pictures for better clarity of the leg drawing. Because legs are a crucial part of making a realistic ant drawing.
Step 8 – Detailing
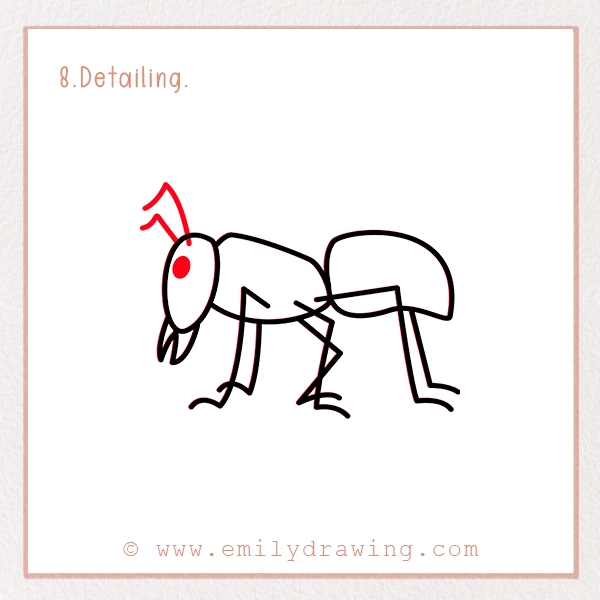
I am sure a complete ant is staring you back from your paper or tablet. But, it still needs some detailing to give it a professional drawing look.
For this, you have to draw a small dark circle near the top of the head to make the eye.
Moreover, on the top of the head, draw two long segmented antennae. These should curve slightly and taper toward the ends.
Step 9 – Coloring

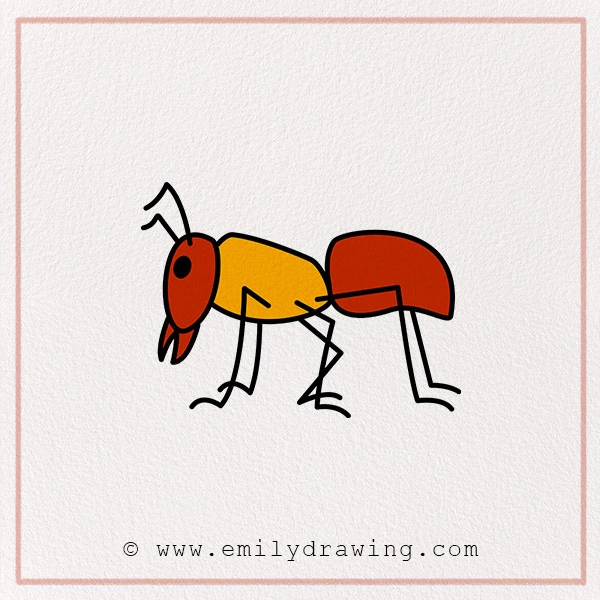
Now, this step is totally optional, but I know kids’ pencil ant drawing is incomplete without colors. So, grab crayons, watercolors, or acrylic colors and add your creativity to the drawing.
As I have told you ants have different species, so you could find ants of various colors around the world. Yellow, dark brown, black, red, green, and metallic luster are the realistic colors of ants. They are not colorful insects, so you can’t mix two colors in one ant except for black and red. A few ant species have these two colors in their bodies, otherwise they are of one color only.
Pin it now, Draw later!
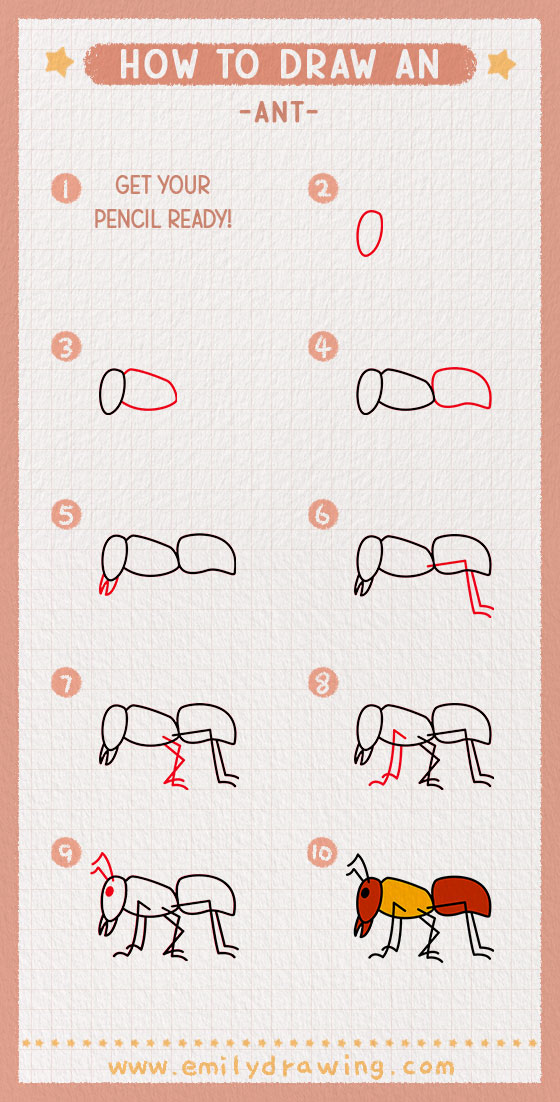
If you want to do different experiments, you could go with different colors too. Kids could have cartoony ants by mixing different colors.
Conclusion
Now, your pencil ant drawing is ready. If you want, you can add different backgrounds to your drawing. Otherwise, creating a group of colorful ants on the paper is also a good idea — you might even combine it with ideas from our how to draw a caterpillar guide!
Share your ant drawings on your social media profiles and keep checking this blog for different art tutorials.
