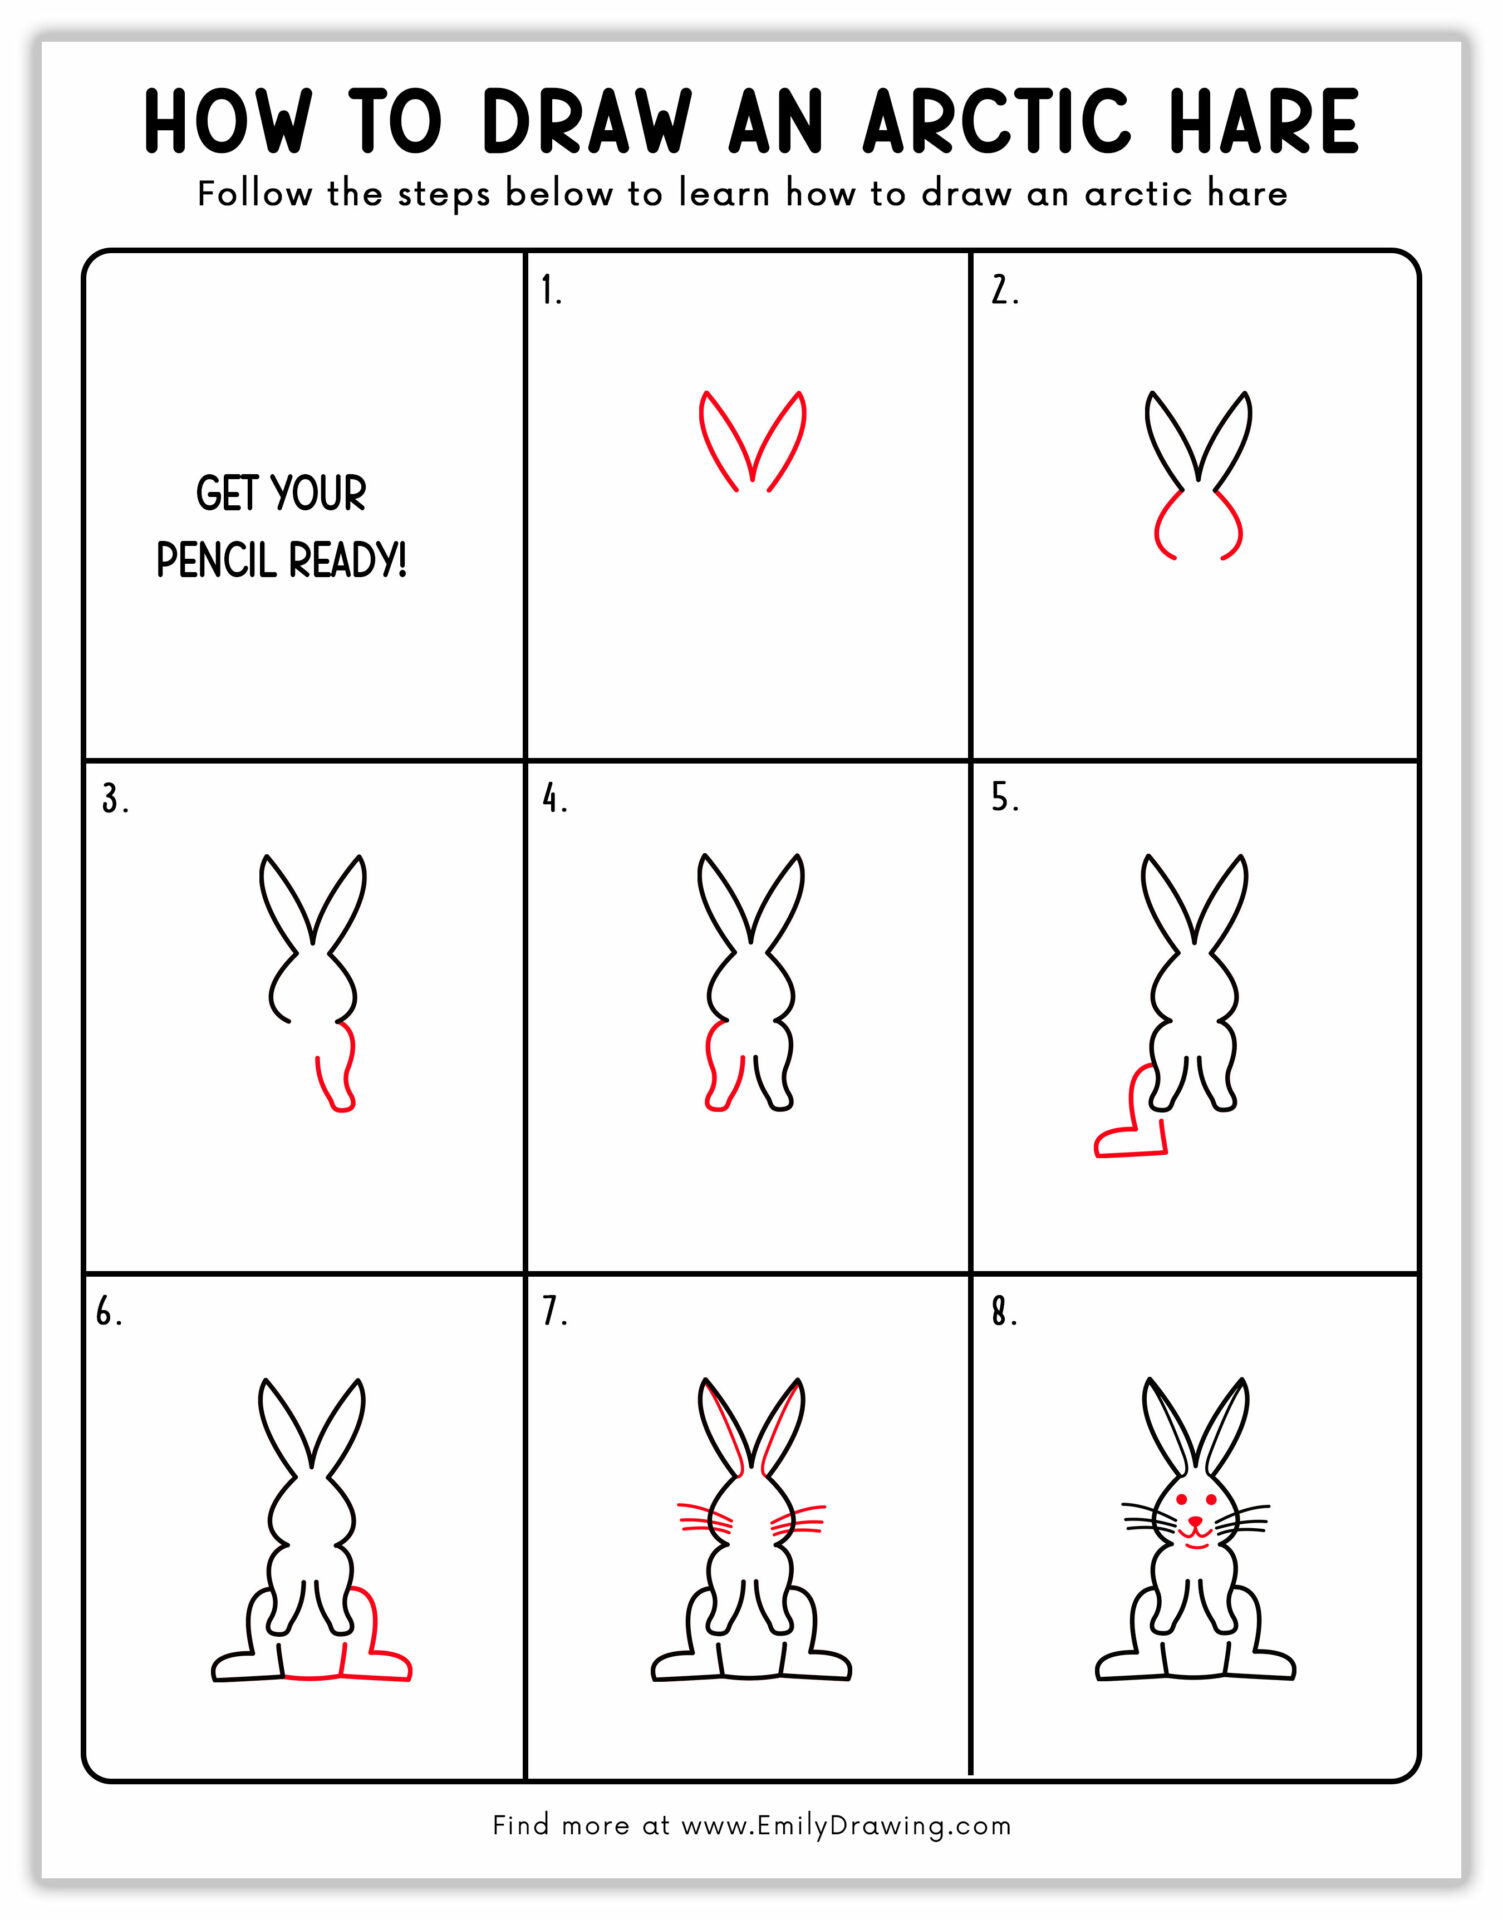
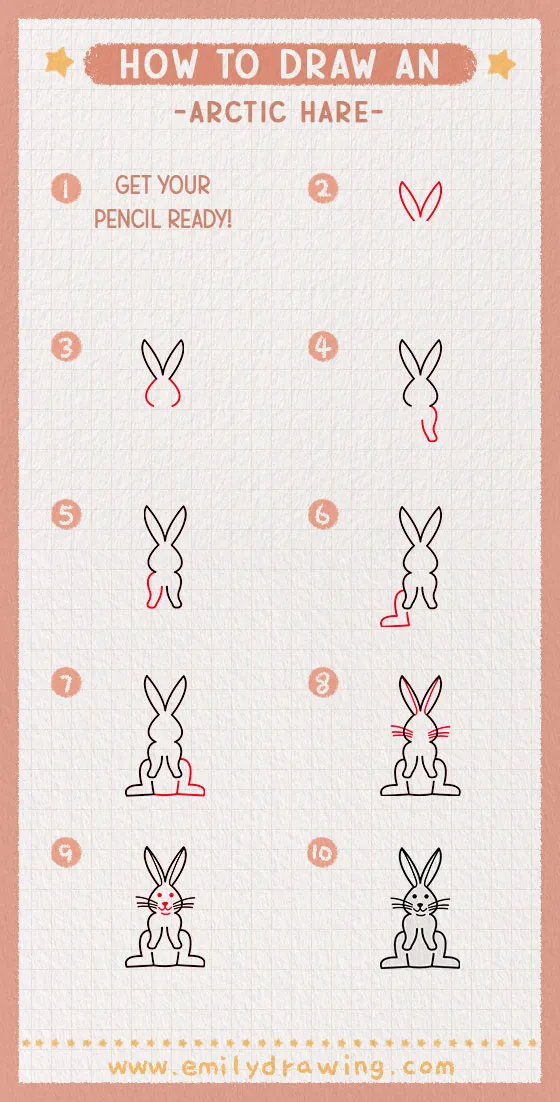
Hello, and welcome to another tutorial by Emily Drawing! Today’s tutorial is all about our Arctic hare drawing guide! We’re going to go through nine steps to draw this adorable animal!
Arctic hares are larger than other hares, weighing anywhere from 3kg to 5kg in mass and measuring anywhere from 480 to 600 mm long. Their chest and underbelly have thick fur to keep them warm in colder temperatures. This fur changes colors in different seasons, such as a long, white coat with black-tipped ears in winter. In summer, they have thin, blue-gray fur.
The arctic hare’s fur isn’t the only thing that keeps them warm in cold weather. While arctic hares are very adapted to cold, icy areas, these animals can also hide under the snow or dig holes in the ground for warmth—similar to other cold-weather creatures like the harp seal, which you can also learn to draw.
Furthermore, These hares are fast creatures, with speeds of up to 40 miles per hour. This helps get away from predators—unlike small animals like the chipmunk, which rely more on agility and hiding. Their food sources include buds, berries, leaves, and woody plants.
Overall, Arctic hares are amazing cold climate animals that are highly adaptable! Now, it’s time to grab your colored pencils or markers and learn how to draw this hare.

Materials:
- a piece of paper
- a pencil for the guiding lines and sketching
- an eraser
- a black sharpie or a pen for the outlines
- markers or colored pencils for coloring
- our printable drawing guide (Join my Email List below to get this Tutorial)
Here are my RECOMMENDED Art Supplies!
- Crayola Coloring Set (140 Pieces – Mega Value!)
- 24 Colored Crayon Set
- A4 Printer Paper
- Crayola Coloring Pencils
- HP Home Printer with Instant Ink!
Time needed:
15 minutes.
How to Draw an Arctic Hare — Let’s get started!
Step 1 – Draw the Arctic Hare’s ears.
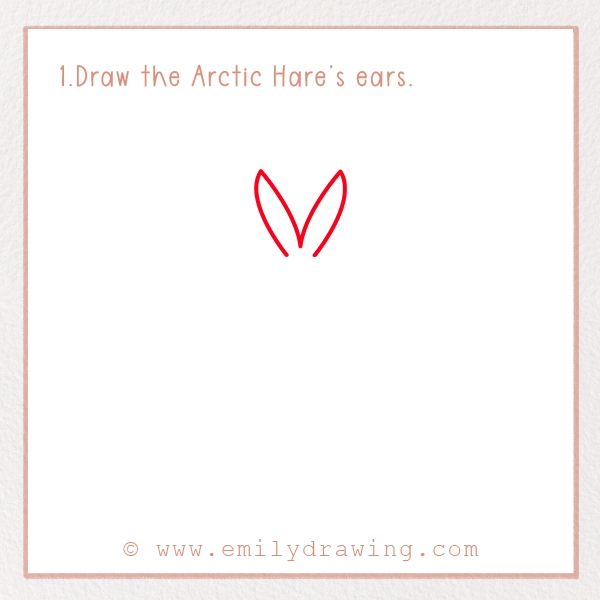
The first step is to draw the Arctic hare’s ears. Their ears are short and pointed with black tips to prevent heat loss. These hares have good hearing, and they can move each ear to pinpoint the source of a sound.
Step 2 – Draw the Arctic Hare’s head.
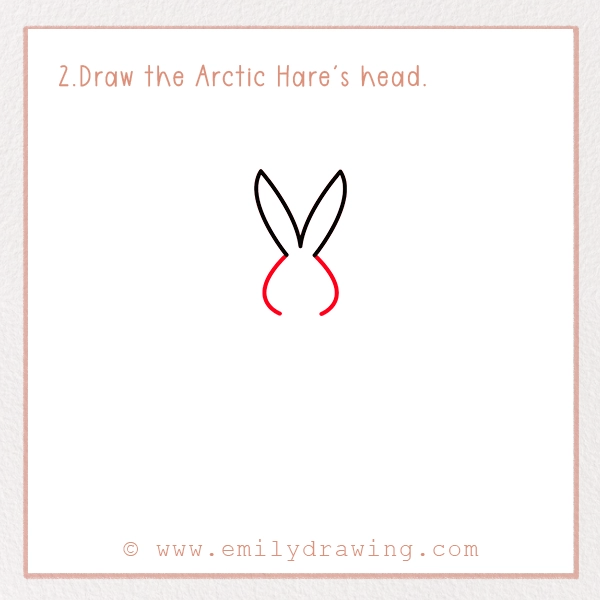
For step two, you’re going to draw both sides of the hare’s head. Each side features a line that curves outward. While this is the hare’s head shape, you can also think of it as the cheeks if it makes it easier. Leave the bottom open to connect the body.
Step 3 – Draw one side of the Arctic Hare’s upper body.
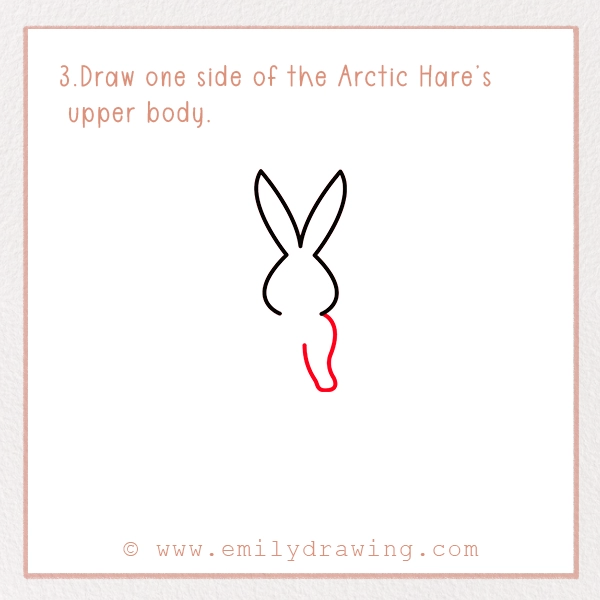
Next, you’re going to draw one side of the Arctic hare’s upper body. It’s going to start on one side of the opening from the hare’s head, as mentioned in the previous step. This is the shoulder and arm, which include several curved lines. This step should be easy, but please remember, it doesn’t have to be perfect.
Step 4 – Draw the other side of the Arctic Hare’s upper body.
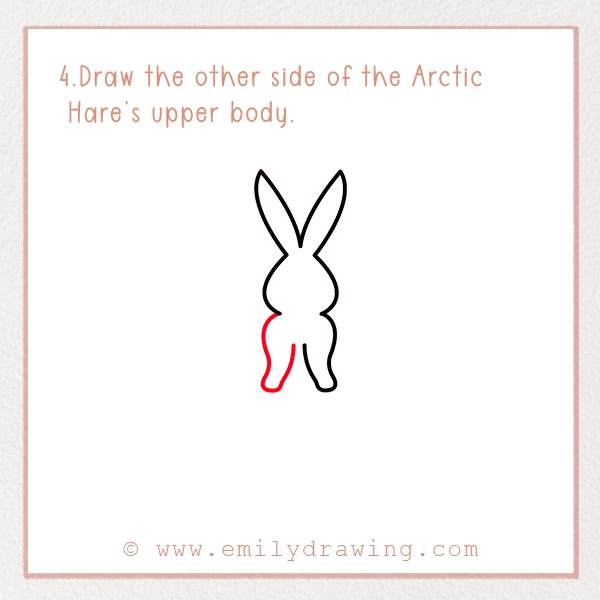
Now, you’re going to repeat the previous step for the other side of the hare’s upper body. All you need to do is mimic the first side to create the other shoulder and arm. Speaking of the arctic hare’s body, these animals use their skin to keep their babies warm in cold temperatures.
Step 5 – Draw one of the Arctic Hare’s legs.

It’s time to draw one of the arctic hare’s hind legs. For this step, we’ll start with the left leg. Start with the knee cap, which curves outward, add the foot facing to the left, and then draw a line back up as the other side of the leg. It should look like the leg is sticking out from behind the arm, with the line for the back of the leg on the left-center of the body.
Step 6 – Draw the Arctic Hare’s other leg.
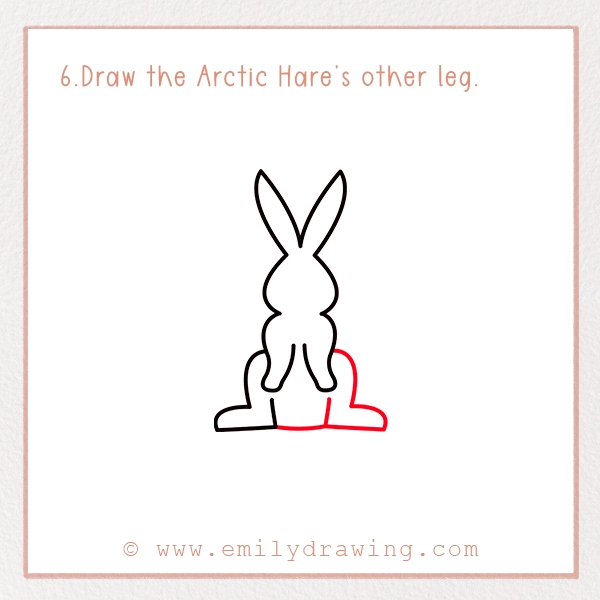
For the right leg, you’re going to repeat the previous step on the right hind leg. The kneecap and foot should be facing the right instead of the left. Close the small gap between the back of the legs with a small curve, representing the bottom of the belly. Did you know that arctic hares can hop on their hind legs like a kangaroo? They can hop as fast as 30 miles per hour.
Step 7 – Draw the Arctic Hare’s head details.
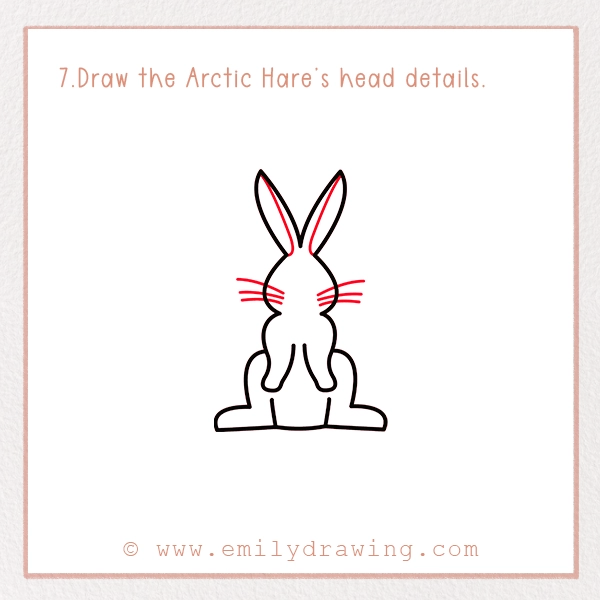
Your Arctic hare is looking great so far, but there are a few minor details to add to the face and head. The first is three lines on each side to represent the hare’s whiskers, just as you’d add when drawing a cat. Next, you’re going to draw a small line on each ear, which highlights the inside and outside of the ears.
Step 8 – Draw the Arctic Hare’s face.
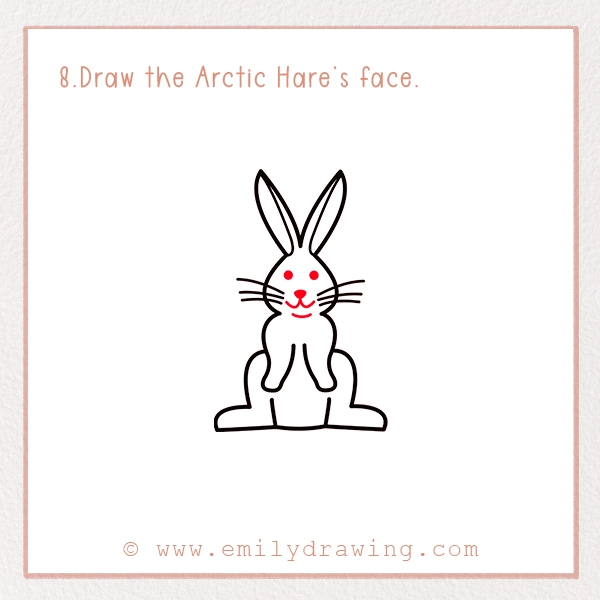
Finally, you can add the Arctic hare’s adorable face. We’ve chosen two dots as the eyes, a circle or rounded, upside-down triangle for the nose, and two connected curves as the smile. You’re also going to add a small curved line under the smile, which is the hare’s chin. We enjoy adding cute faces to the animals because we want to appeal to children and adults alike.
Step 9 – Color In Your Drawing!
The fun isn’t over just yet. Now, you need to color in your drawing of an Arctic hare! In fact, many consider coloring the drawing to be the best part. We’ve chosen to color our hare white with off-white ears. However, you can also choose blue-gray fur for an Arctic hare who is enjoying the summer season. You also have the option of coloring your winter animal sketch with a completely different palette for a personal, unique touch. Be sure to color in the background to create the scene you have in mind.
Pin it now, Draw later!
Congratulations, you’ve just completed our how-to-draw an Arctic hare tutorial. Did you have fun drawing this wonderful animal? Did you find our tutorial easy or difficult? The key is to have a good time while learning a new skill, so don’t stress if it doesn’t look exactly like the tutorial. You could also try your hand at drawing smaller woodland animals, like our chipmunk tutorial. If you’re looking to draw other animals, you can browse through our site for a variety of drawing tutorials—like our guide on how to draw a harp seal, another winter-ready animal.
Get the FREE Printable Drawing Guide