Orangutans have been featured in literature, art, and popular culture, including in JoJo’s Bizarre Adventure and various children’s songs. There are several reasons for their popularity: they share 96.4 percent of our genes, and their species are endangered.
I know all of the beginners and kids want to draw this amazing animal. That’s why I have shared this easy 8-step guide on how to draw a cute Orangutan. At the end of this guide, you will have a friendly and cartoonish Orangutan drawing in your sketchbook.
It will help every novice artist excel in their artistic skills and create a cute orangutan on a piece of paper.
Orangutan Easy Drawing Guide
Make sure you have all the important art supplies, pieces of paper, and a collection of reference pictures with you. Once you have them around you, begin with the first step.
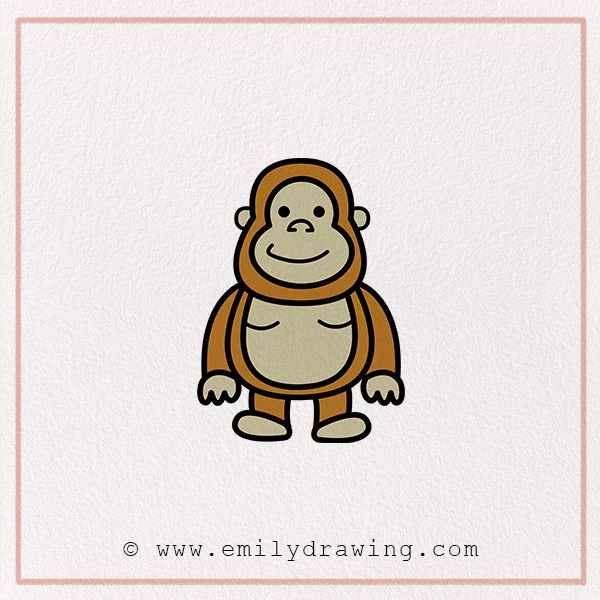
Materials:
- a piece of paper
- a pencil for the guiding lines and sketching
- an eraser
- a black sharpie or a pen for the outlines
- markers or colored pencils for coloring
- our printable drawing guide (Join my Email List below to get this Tutorial)
Here are my RECOMMENDED Art Supplies!
- Crayola Coloring Set (140 Pieces – Mega Value!)
- 24 Colored Crayon Set
- A4 Printer Paper
- Crayola Coloring Pencils
- HP Home Printer with Instant Ink!
Time needed:
15 minutes.
How to Draw an Orangutan — Let’s get started!
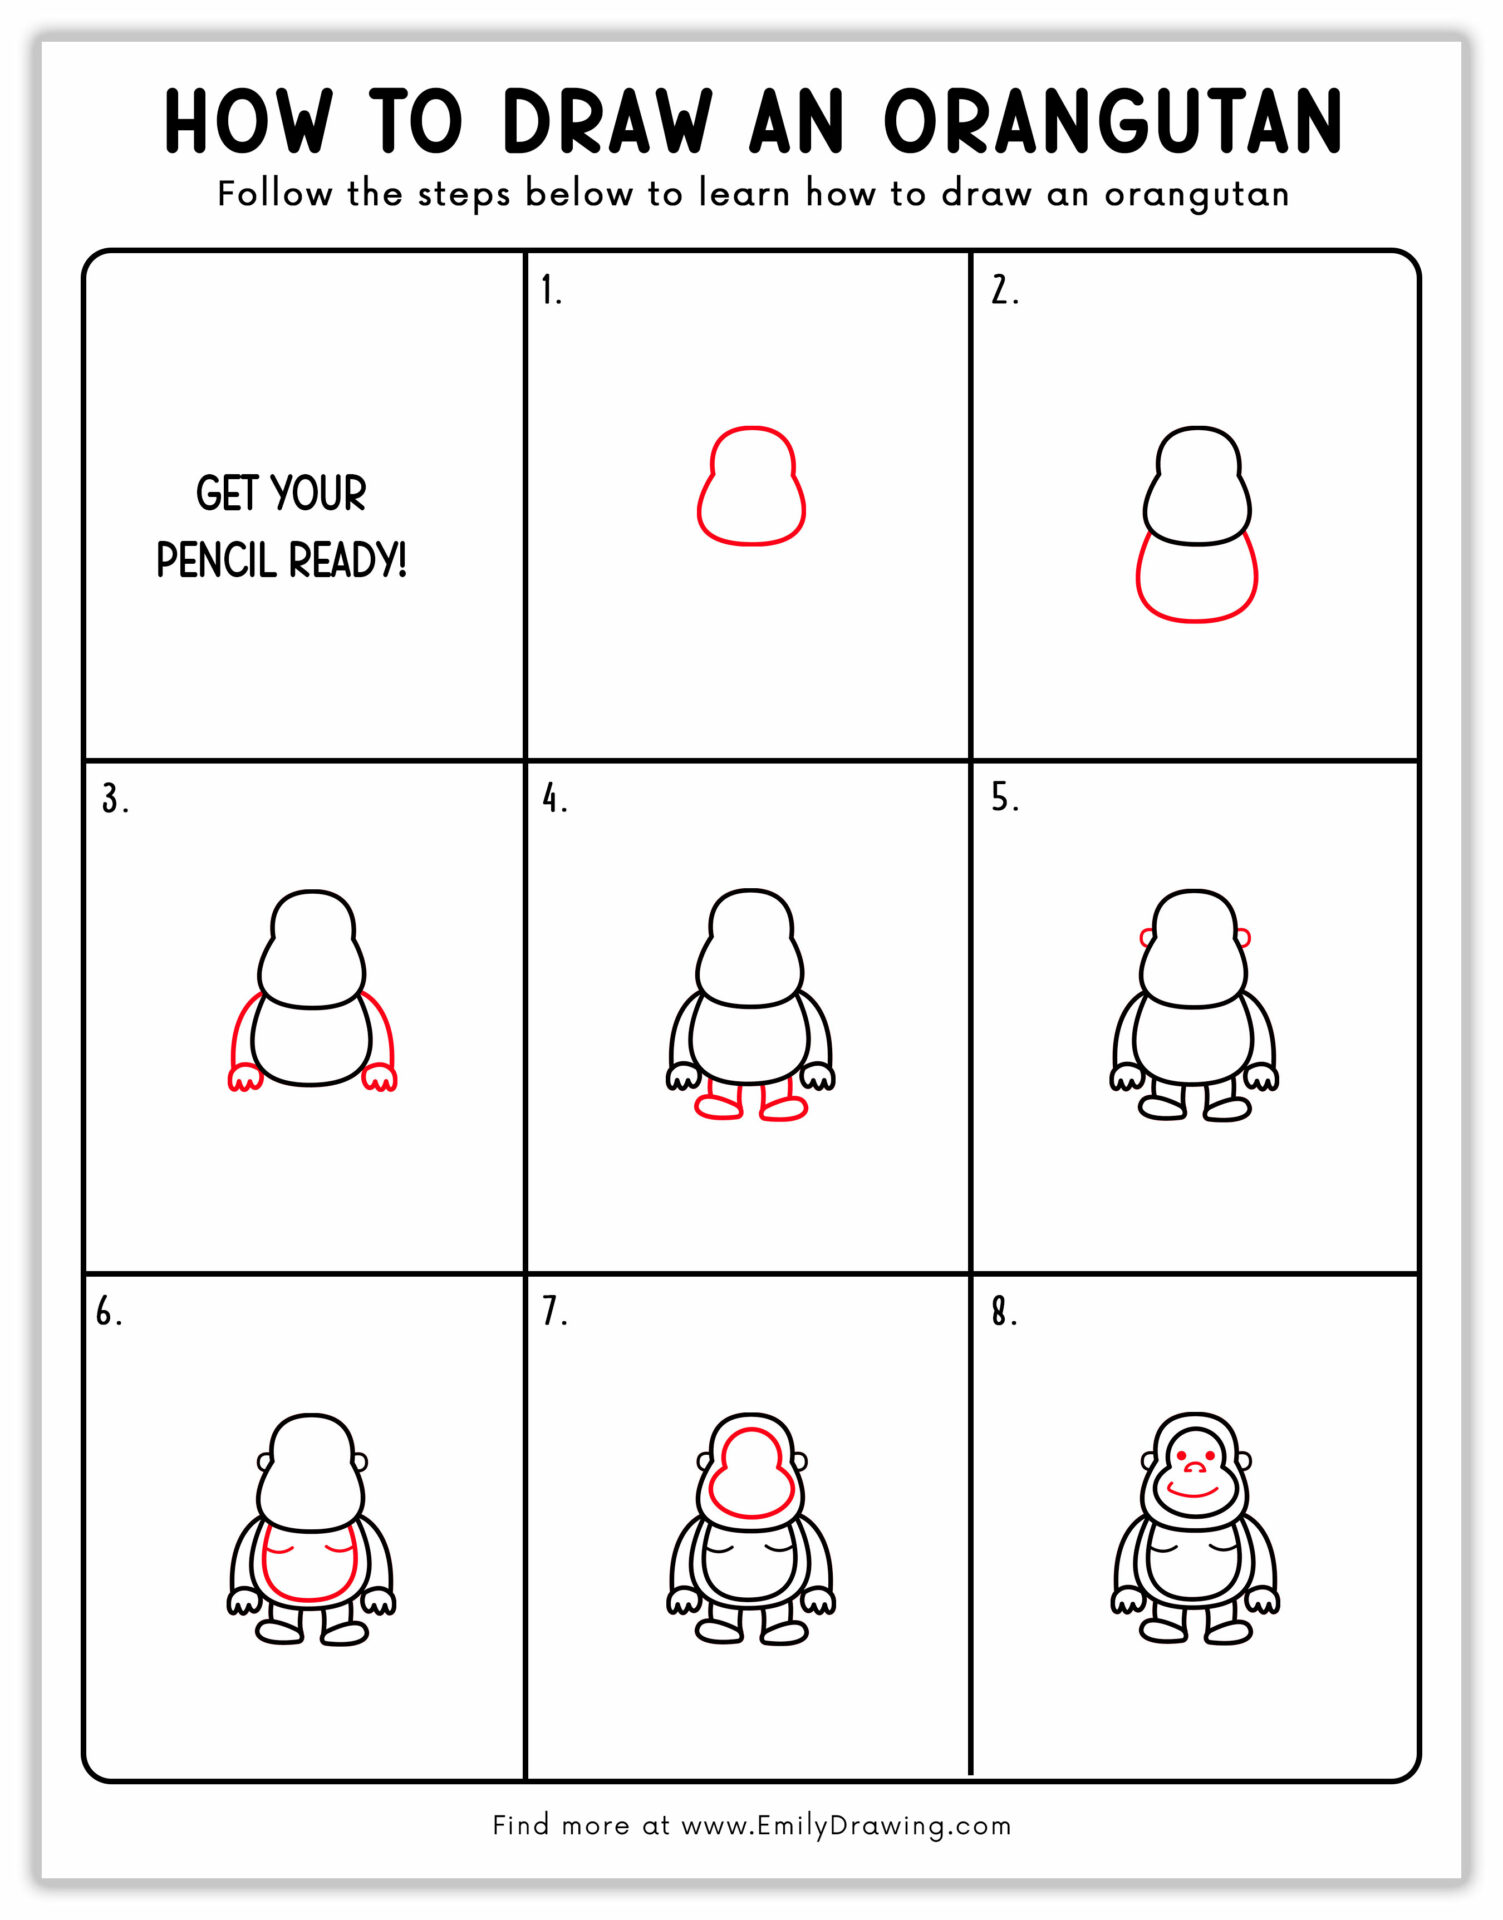
Step 1 – Sketch the Head
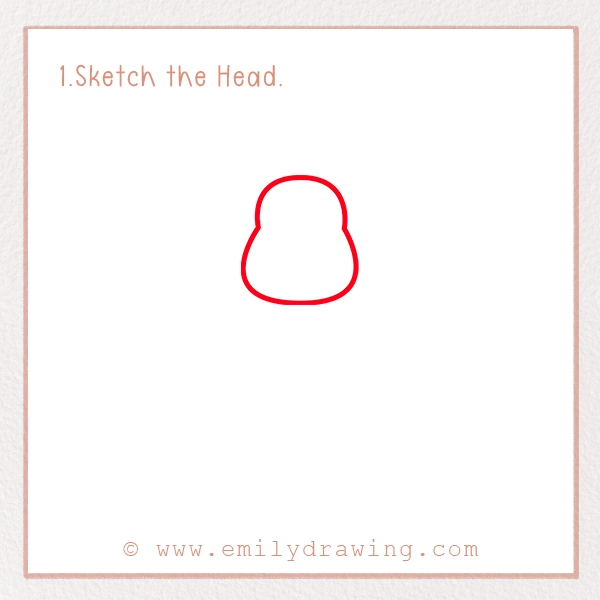
The head is the base of the drawing. That’s why, we prefer sketching it as the first thing in our drawing. To learn how to draw an Orangutan head, you need to carefully proceed with this step.
Put your pencil on the top center of the page and draw a peanut-like shape as shown in our reference picture. Make sure the top is narrow and the bottom of the head is wider to give a natural look to your animal.
Use light strokes initially so that you can erase any mistakes easily.
Step 2 – Draw the Body of an Orangutan
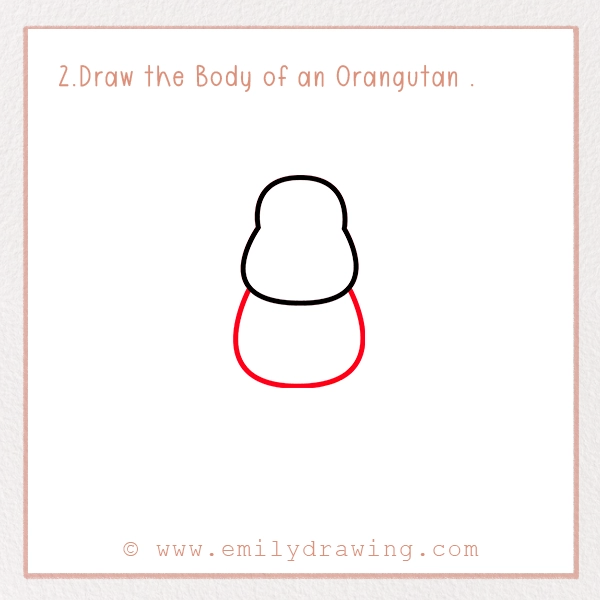
Now, it is time to draw the powerful body of an Orangutan. To do this, you have to sketch an oval shape beneath the head. Make sure it is overlapping with the head to give the feeling as if they both are naturally connected.
The body should be slightly wider than the head of an Orangutan to give a sturdy appearance to it.
Step 3 – Draw the Arms of an Orangutan
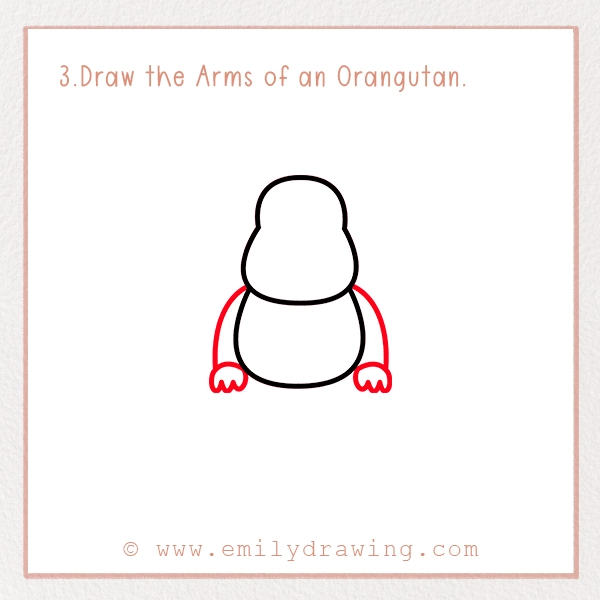
Now, draw curved shapes on either side of the Orangutan’s body. It should extend from the top of the torso and end at the hands.
To create hands, draw a small rounded rectangle shape with a wavy edge on both sides.
If you want to give a perfect cartoonish look to your Orangutan, sketch the arms slightly longer and curved.
Step 4 – Draw the Legs of Orangutan
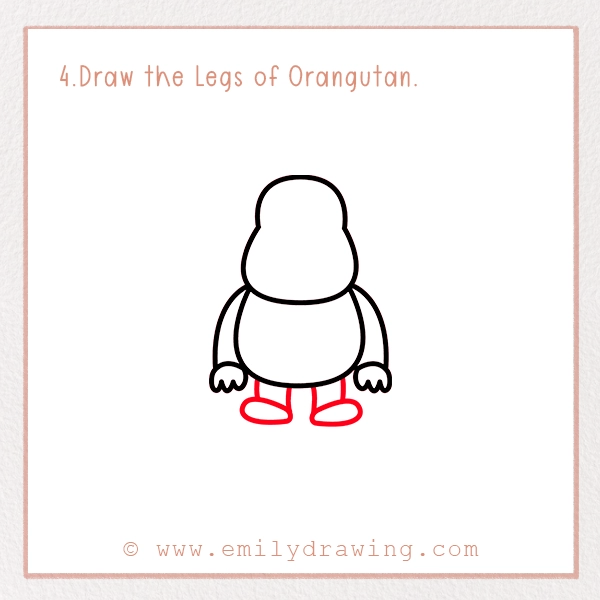
Now, it is time to sketch the legs and feet of an Orangutan. Remember, the legs should be shorter than the arms as an Orangutan uses their arms to move.
For sketching it, draw two short lines from the bottom of the torso. End it with a small oval shape for the feet. Repeat the process to draw the second leg.
Step 5 – Sketch the Ears of Orangutan
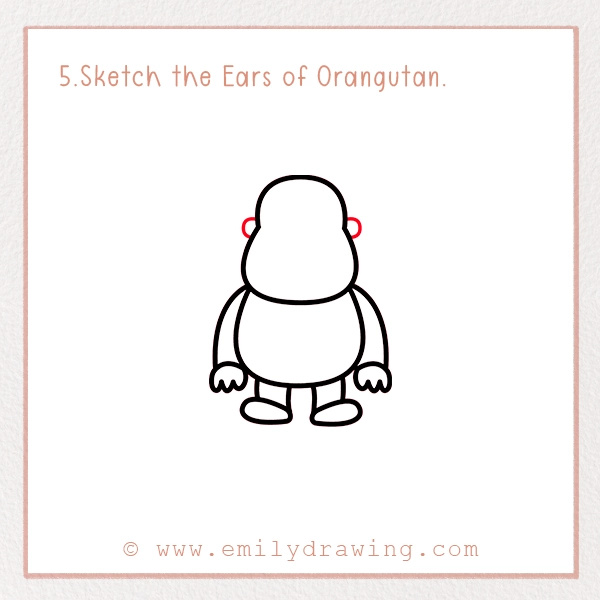
It’s time to draw the ears of an Orangutan. Begin by sketching two small circles on either side of the head, positioning them closer to the top.
Step 6 – Draw the Chest
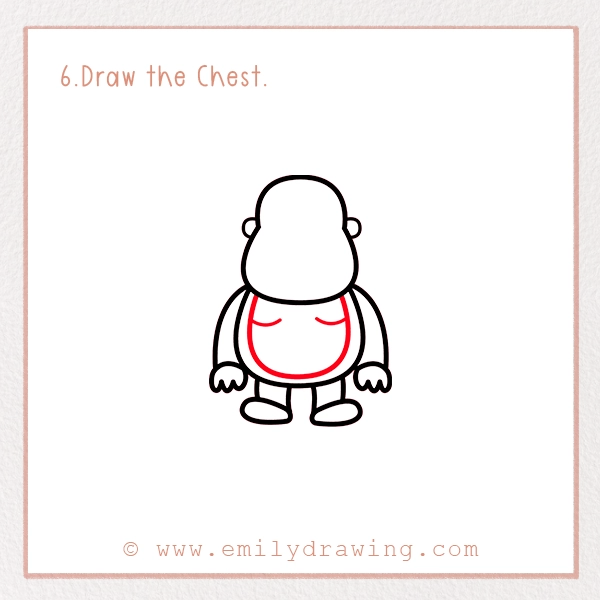
In this step, we are going to finalize the lower part of the body. For this, we have to draw the chest and add some refined lines to indicate the fur.
To do this, add an oval inside the body, similar to the torso’s shape. It should outline your torso perfectly.
Now, draw two slightly curved lines to indicate the chest area of the Orangutan.
Step 7 – Outline the Head
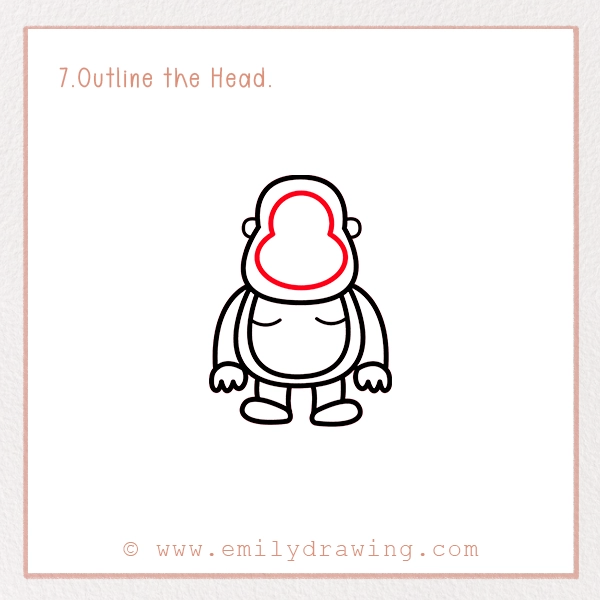
After finalizing the lower body part, we need to focus on the head now. This step will focus on outlining the face to give a refined look to this animal’s head.
For this, draw a shape similar to the head near the outline of it. You can see our reference picture for better understanding.
Step 8 – Add Facial Features
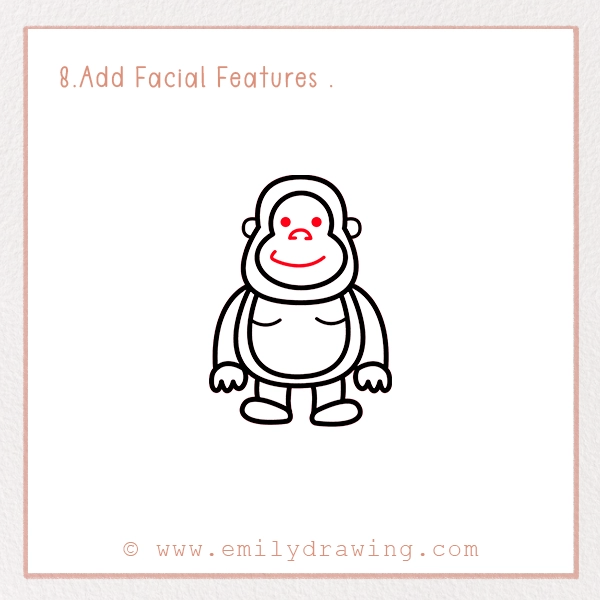
This is the last step in which we will add facial features. You have to draw eyes, nose, and lips in the outline of the head.
Let’s start with the eyes. For this, draw two dark circles positioned near the top of the head. You can add a small light spot in dark circles to give it a lively look.
Below the eyes, draw a small but wide “U-shaped” curve. “U” should be upside-down as it represents the nose.
Finally, we have to draw a smile. For this, sketch a wide curved line beneath the nose to indicate the smile. This will give a friendly vibe to your drawing.
Finally, Your Orangutan drawing is complete! But, there is one step left to enhance its professional look.
Step 9 – Coloring Your Orangutan Drawing

Our drawing contains an orangish-brown color as it is the natural color of the Orangutan. You can use a darker shade on the outline and a lighter shade for the inner body, feet, and hands. This will give a realistic look to your drawing.
If you want, you can use a darker shade of orange or brown to add shadows and textures to arms, legs, facial outline, and torso.
But, if you want to experiment with unique colors, you can go for it too. If you desire a purple Orangutan, no one can stop you. Just make sure to enjoy the process of sketching and coloring your Orangutan drawing.
Sketch Exciting Background of your Orangutan Drawing
Want to elevate your animal drawing? Sketching exciting backgrounds can be a great idea. Here are a few background ideas to inspire you.
- Sketch the greenery or forest.
- Sketch the Orangutan sitting on the branch of a tree as they spend the majority of their lives on the tree.
- You can depict a family of orangutans by drawing a baby along with a few adult Orangutans.
For more ideas, you can refer to the realistic pictures present on the internet and in books.
Pin it now, Draw later!
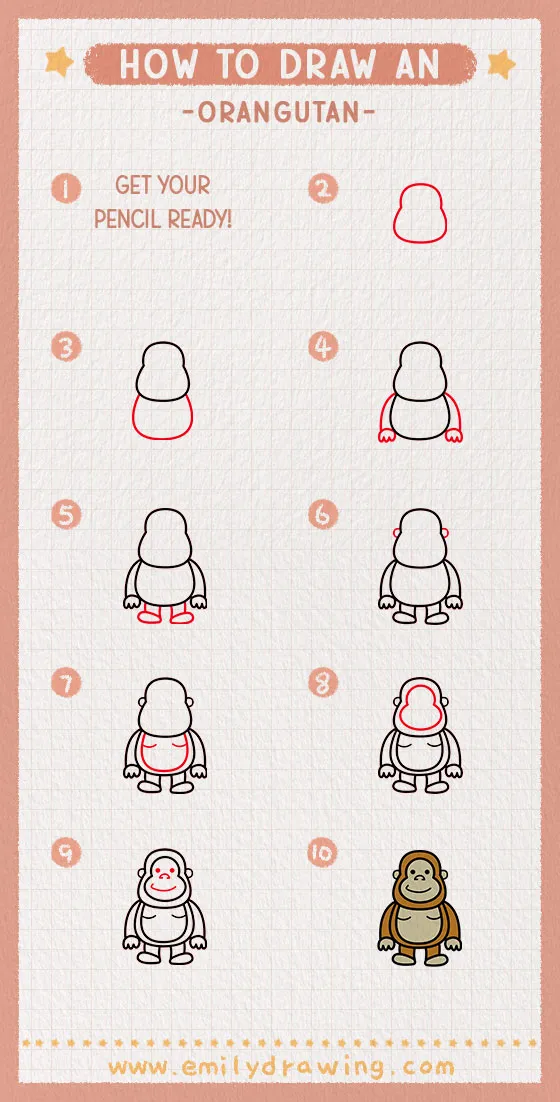
Your Orangutan Drawing is Complete!
Celebrate it by sharing it with your friends, family members, and your artistic community on social media. Don’t forget to mention us. By the way, if you want to enhance your animal drawing skills, check out our other tutorials, too. You will not be disappointed.
